Jiffy Mix Corn Pudding Recipe: Corn pudding has been a staple on American dinner tables for decades, especially during the holidays like Thanksgiving, Christmas, and Easter. This creamy, slightly sweet, and perfectly golden dish brings together the best of cornbread and custard. But what makes it even more special is how easy it is to prepare when using Jiffy Corn Muffin Mix.
Jiffy is a household name in the baking aisle, famous for its little blue boxes that make everything from cornbread to muffins. With just a few pantry staples and fresh ingredients, you can turn this humble mix into a decadent side dish that steals the spotlight at any meal.
The beauty of Jiffy Mix Corn Pudding lies in its versatility. Whether you’re cooking for a crowd, making a family dinner, or whipping up a quick comfort food recipe, this dish never fails to impress. It’s creamy, savory, and just sweet enough to balance out rich main dishes like roast turkey, baked ham, or barbecue ribs.
If you’ve never made corn pudding before, don’t worry. This guide will walk you step by step through the process, ensuring you get a perfectly baked, fluffy-yet-creamy pudding every time. By the end of this article, you’ll not only have the classic recipe down but also know how to tweak it to match your taste and occasion.
Ingredients You’ll Need
The ingredient list for Jiffy Mix Corn Pudding is short, sweet, and easy to find at any grocery store. You’ll likely have many of these items already in your pantry or fridge, which makes this recipe a go-to side dish in a pinch.
Pantry Staples You Already Have
- 1 box of Jiffy Corn Muffin Mix (8.5 oz) – the star of the recipe that provides structure and a slightly sweet cornbread flavor.
- 1 can of whole kernel corn (15 oz, drained) – adds texture with juicy corn bites throughout the pudding.
- 1 can of cream-style corn (15 oz) – gives creaminess and enhances the corn flavor.
Fresh Ingredients for Best Flavor
- 2 large eggs – help bind everything together while giving the pudding a rich, custardy texture.
- 1 cup sour cream – makes the dish extra creamy and tangy.
- ½ cup (1 stick) melted butter – adds richness and helps keep the pudding moist.
Optional Add-Ons for Customization
Want to put your own spin on it? Try adding:
- 1 cup shredded cheddar cheese for a gooey, cheesy version.
- 1 diced jalapeño or a pinch of cayenne pepper if you like a little heat.
- ½ cup diced onions or green chiles for added flavor.
- 1-2 tablespoons of sugar if you want a sweeter version.
This base recipe is so flexible that you can make it savory, spicy, or even sweet depending on your preference.
Kitchen Tools Required
Before you start mixing, let’s make sure you’ve got the right tools on hand. Luckily, you won’t need anything fancy—just the basics.
Baking Essentials
- 9×13-inch baking dish or casserole dish (glass or ceramic works best).
- Non-stick cooking spray or butter for greasing the pan.
Mixing Tools
- Large mixing bowl – for combining all ingredients.
- Whisk or wooden spoon – to ensure a smooth batter.
- Measuring cups and spoons – accuracy matters for baking.
Serving Suggestions
- A large serving spoon to scoop generous portions.
- Garnish options like chopped parsley or a sprinkle of cheese for presentation.
Once you have these ready, the process will be seamless, and you’ll be pulling a golden, bubbling dish out of the oven in no time.
Step-by-Step Guide to Making Jiffy Mix Corn Pudding
Now comes the fun part—putting it all together! Follow this simple, step-by-step process to create the perfect corn pudding.
Step 1 – Preheating the Oven and Preparing the Pan
First things first: preheat your oven to 350°F (175°C). This ensures that your pudding bakes evenly and sets perfectly. While the oven is heating, grease your baking dish with butter or non-stick spray. This step prevents sticking and makes serving much easier later.
Step 2 – Mixing the Wet Ingredients
In a large mixing bowl, whisk together the eggs until lightly beaten. Add the sour cream and melted butter, mixing until smooth. This creamy base helps give the pudding its signature custardy texture.
Step 3 – Adding Jiffy Mix and Corn
Next, pour in the Jiffy Corn Muffin Mix, the can of drained whole kernel corn, and the can of cream-style corn. Stir gently until everything is well combined. Be careful not to overmix—this recipe is forgiving, but you don’t want the batter to become too dense.
Step 4 – Combining Everything Smoothly
Fold all the ingredients together until the mixture is uniform. If you’re adding extras like cheese, jalapeños, or onions, now is the time to stir them in. The batter will look thick and slightly lumpy, but that’s exactly how it should be.
Step 5 – Baking to Golden Perfection
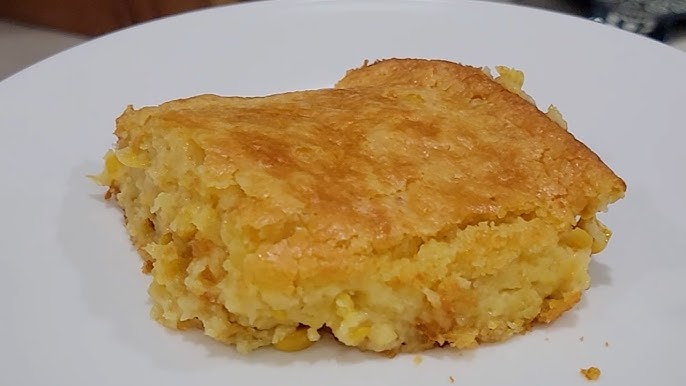
Pour the mixture into your prepared baking dish, spreading it evenly. Bake uncovered for 45–55 minutes, or until the top is golden brown and the center is set. To check for doneness, insert a toothpick into the center—it should come out mostly clean, with just a little moisture (not wet batter).
Once baked, let the pudding rest for about 5–10 minutes before serving. This allows it to firm up slightly while still staying creamy inside.
Tips for Perfect Corn Pudding Every Time
Corn pudding may sound simple, but there are a few tricks to guarantee it comes out just right.
Avoiding Common Mistakes
- Don’t skip greasing the pan—corn pudding sticks easily.
- Avoid overbaking, which can dry it out.
- Mix gently; overmixing can make it dense.
How to Keep It Moist and Creamy
The sour cream and butter already help, but if you want extra creaminess, you can add a splash of heavy cream or milk to the batter. Covering the dish with foil halfway through baking also prevents over-browning while keeping the pudding moist.
Adjusting Texture to Your Preference
If you like your corn pudding on the softer, custard-like side, bake it a little less. For a firmer, more cornbread-like texture, let it bake until the top is deeply golden and firm to the touch.
Variations of Jiffy Corn Pudding
One of the best things about Jiffy Mix Corn Pudding is how easy it is to customize. The base recipe is already delicious, but you can easily tweak it to suit different tastes, occasions, or dietary needs. Here are a few popular variations that can take your corn pudding to the next level.
Cheesy Corn Pudding Version
If you’re a cheese lover, this twist is a must-try. Simply add 1 to 1 ½ cups of shredded cheddar cheese (or a blend of cheeses like mozzarella and Monterey Jack) into the batter before baking. The cheese melts into the pudding, making it gooey and rich. For extra flair, sprinkle some cheese on top during the last 10 minutes of baking for a golden, bubbly crust. This version pairs beautifully with grilled meats and BBQ dishes.
Spicy Jalapeño Twist
For those who enjoy a little heat, try stirring in one or two finely diced jalapeños or a pinch of cayenne pepper. You could also add a dash of hot sauce to the wet ingredients for an extra kick. The spice complements the sweetness of the corn perfectly, creating a balanced and bold flavor profile. If you want even more complexity, toss in some smoked paprika for a hint of smokiness.
Sweet Dessert-Style Corn Pudding
Yes, corn pudding can double as a dessert! To make a sweeter version, add 2–3 tablespoons of sugar or honey, a splash of vanilla extract, and maybe a pinch of cinnamon. You can also top it with powdered sugar or a drizzle of maple syrup after baking. This version leans toward a custard-style pudding and makes a unique treat for potlucks or family gatherings.
Storing and Reheating Corn Pudding
One of the great things about corn pudding is that it keeps well, making it an excellent make-ahead dish. Whether you’ve got leftovers or want to prepare it in advance, here’s how to handle storage and reheating.
How to Store Leftovers Properly
Once your pudding has cooled completely, cover the baking dish tightly with foil or transfer leftovers to an airtight container. It will stay fresh in the refrigerator for 3–4 days. If storing in the baking dish, you can also wrap it in plastic wrap before covering with foil for extra protection.
Best Reheating Methods
To reheat, you can:
- Oven method (recommended): Preheat oven to 300°F (150°C), cover the pudding with foil, and heat for about 15–20 minutes until warmed through.
- Microwave method: Heat individual portions in a microwave-safe dish for 1–2 minutes. To keep it moist, cover with a damp paper towel.
Can You Freeze Corn Pudding?
Yes! Corn pudding freezes surprisingly well. To freeze, let it cool completely, then wrap tightly in plastic wrap followed by aluminum foil, or store in a freezer-safe container. It can last in the freezer for up to 2 months. To reheat, thaw overnight in the refrigerator and warm in the oven before serving.
Serving Suggestions
Corn pudding is a versatile side dish that fits into many meals, from holiday spreads to casual weeknight dinners.
Holiday Side Dish Favorite
Corn pudding is practically a holiday tradition in many households. It pairs wonderfully with Thanksgiving turkey, Christmas ham, or Easter lamb. Its creamy, slightly sweet taste balances out savory roasts and hearty gravies.
Pairing with Main Courses
Beyond holidays, corn pudding is fantastic with BBQ ribs, fried chicken, or grilled steak. It works as a comfort food side with soups, stews, and chili as well. The slightly sweet corn flavor complements both smoky and savory main dishes.
Everyday Comfort Meal
Don’t save it just for special occasions! Corn pudding makes a quick, affordable, and filling side dish for weeknight dinners. Pair it with roasted veggies and a simple protein like baked chicken for a balanced meal that feels indulgent without being complicated.
Nutritional Information of Jiffy Mix Corn Pudding
If you’re curious about the nutritional breakdown of this dish, here’s a general estimate based on a standard recipe. (Note: values may vary depending on portion size and additional ingredients like cheese or sugar.)
- Calories per serving: ~250–300
- Carbohydrates: 28–32g
- Protein: 4–6g
- Fat: 12–15g
- Fiber: 2–3g
- Sugar: 6–8g
Healthier Ingredient Swaps
Want to lighten it up without sacrificing flavor? Try these swaps:
- Use Greek yogurt instead of sour cream for added protein and less fat.
- Replace half the butter with olive oil or applesauce for a lighter texture.
- Add in extra vegetables like bell peppers, spinach, or zucchini for more nutrients and fiber.
- Choose reduced-fat cheese if making the cheesy version.
FAQs about Jiffy Mix Corn Pudding Recipe
1. Can I make Jiffy corn pudding ahead of time?
Yes! You can prepare the batter, cover it, and refrigerate it overnight. Bake it fresh the next day.
2. How do I know when my corn pudding is done?
It’s ready when the edges are golden brown, and a toothpick inserted in the center comes out mostly clean (slightly moist, not wet).
3. Can I make this recipe without sour cream?
Yes. You can substitute with plain Greek yogurt, cream cheese (softened), or even a mix of milk and butter for creaminess.
4. Is corn pudding the same as corn casserole?
They’re very similar! Corn casserole is another common name for this dish, especially when made with Jiffy Mix.
5. Can I double the recipe?
Absolutely. Just use a larger baking dish (like 9×13 or two 8×8 pans) and add about 10 extra minutes of baking time.
Conclusion
Jiffy Mix Corn Pudding is one of those timeless recipes that never goes out of style. With its creamy texture, sweet corn flavor, and simple preparation, it’s the perfect side dish for holidays, family dinners, or anytime you’re craving comfort food. Plus, with all the variations and customization options, you can make it your own—cheesy, spicy, or even dessert-like.
So grab that little blue box of Jiffy, gather your ingredients, and give this recipe a try. You’ll have a warm, golden, and irresistibly creamy dish on your table in less than an hour. Whether it’s Thanksgiving, a backyard BBQ, or just a cozy night in, Jiffy Mix Corn Pudding will always deliver comfort and flavor in every bite.


