Italian Hoagie Recipe: The Italian hoagie is more than just a sandwich—it’s a masterpiece of flavors layered between fresh bread. Known for its combination of cured Italian meats, cheeses, fresh veggies, and bold seasonings, the hoagie has become a staple in American delis and homes alike. If you’ve ever bitten into one, you know it’s not your average sandwich; it’s a balanced mix of savory, tangy, and crunchy all in one bite.
What Makes an Italian Hoagie Unique?
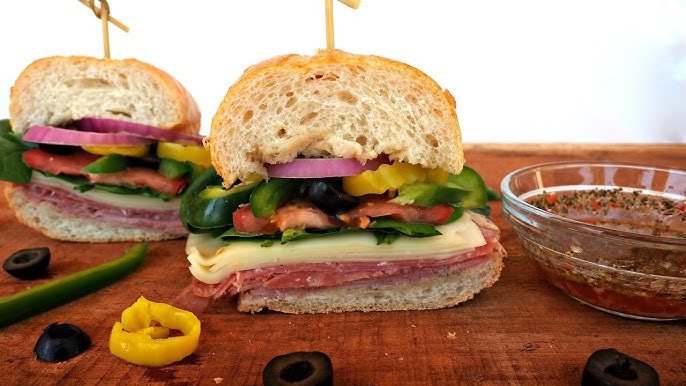
Unlike a simple ham and cheese sandwich, an Italian hoagie features a selection of cured meats such as salami, capicola, and mortadella. Add to that provolone cheese, shredded lettuce, onions, tomatoes, pickles, and a drizzle of olive oil with oregano, and you’ve got a bold, hearty flavor that can’t be replicated with just one or two ingredients. What sets it apart is the layering—each ingredient plays its role, creating a symphony of textures and tastes.
A Quick History of the Italian Hoagie
The Italian hoagie traces back to Philadelphia, where Italian immigrants brought their love of cured meats and cheeses. Over time, these sandwiches became known as “hoagies” or “subs,” depending on the region. The name “hoagie” itself is said to come from workers on Hog Island in Philadelphia, who often packed these meaty sandwiches for lunch. Today, it remains an East Coast favorite, but its popularity has spread nationwide.
Ingredients You’ll Need
An Italian hoagie is only as good as the quality of its ingredients. Using fresh bread, premium deli meats, and crisp vegetables will make the difference between a decent sandwich and an unforgettable one.
Essential Meats for Authentic Flavor
The traditional Italian hoagie uses a variety of cured meats. Here’s what you’ll need:
- Genoa salami – Rich, slightly tangy flavor.
- Capicola (coppa) – A spiced, cured pork with a bold taste.
- Mortadella – A delicate Italian cold cut with a smooth texture.
- Prosciutto (optional) – For an extra layer of sophistication.
Each meat brings its own flavor profile, and when layered together, they create the heart of the hoagie.
Cheese Selection for the Perfect Hoagie
Cheese is what ties the meats and vegetables together. The most common choice is provolone cheese. Its mild, slightly sharp taste pairs beautifully with the richness of the meats. If you prefer a creamier touch, mozzarella can also be used, but provolone is the classic choice.
Fresh Vegetables and Toppings
No hoagie is complete without crisp, refreshing vegetables. These are must-haves:
- Shredded iceberg lettuce
- Thinly sliced tomatoes
- Onions (raw or pickled)
- Banana peppers or pickles for tang
Some people also add roasted red peppers for a sweeter touch.
Bread – The Foundation of a Great Hoagie
The bread is crucial. A true Italian hoagie requires a long Italian roll with a slightly crunchy crust and a soft interior. It should be sturdy enough to hold all the fillings without getting soggy. Avoid overly soft sandwich bread—it won’t do justice to the flavors.
Condiments and Seasonings
A drizzle of condiments elevates the hoagie from good to unforgettable.
- Olive oil (extra virgin for best flavor)
- Red wine vinegar (for tanginess)
- Oregano and black pepper
- Optional: mayonnaise or mustard (not traditional but popular in some regions)
Step-by-Step Guide to Making an Italian Hoagie
Now that we’ve gathered the ingredients, let’s put them together step by step.
Preparing the Bread
Start with a fresh Italian roll. Slice it lengthwise, but don’t cut all the way through—you want it to open like a book. Scoop out a little of the soft interior to make room for the fillings. This ensures the sandwich won’t overflow while you eat it.
Layering the Meats and Cheeses
First, lay down the provolone cheese so it slightly melts into the bread. Then, layer your meats in an alternating pattern—salami, capicola, mortadella—making sure each slice covers the roll evenly. This method gives every bite a balanced mix of flavors.
Adding Vegetables and Seasonings
Next, add shredded lettuce for crunch, followed by tomatoes and onions. Sprinkle a dash of oregano and black pepper over the vegetables. If you’re adding banana peppers or pickles, now’s the time.
Dressing the Hoagie with Condiments
Drizzle olive oil and red wine vinegar evenly over the vegetables. This gives the hoagie its signature tangy, juicy bite. Some people like to spread a thin layer of mayo or mustard, but traditionally, the oil and vinegar combo is enough.
The Final Assembly and Serving Tips
Close the hoagie gently and press it together so the flavors meld. Cut it into halves or thirds, depending on the roll size. For the best experience, wrap it tightly in parchment paper and let it rest for 10 minutes before eating. This allows the oil, vinegar, and seasonings to soak into the bread slightly, giving you that deli-style flavor.
Tips for the Best Italian Hoagie Experience
Making an Italian hoagie is simple, but turning it into something unforgettable requires a little extra attention. Think of it like building a house: the structure might be solid, but the finishing touches make it stand out. Here are some tips to help you get the best results.
Choosing the Right Ingredients Locally
Not everyone has access to a specialty Italian deli, but that doesn’t mean you can’t make a great hoagie. Visit your local grocery store’s deli counter and ask for freshly sliced meats instead of pre-packaged ones. Freshly sliced Genoa salami or capicola has a stronger aroma and better flavor. For cheese, always go for sharp provolone if you can find it—it adds a distinct punch that balances the richness of the meats.
When it comes to bread, local bakeries are your best bet. A fresh, crusty Italian roll makes all the difference. If you can only find softer hoagie rolls, try toasting them lightly in the oven for a few minutes. This helps strengthen the bread while adding a subtle crunch.
Common Mistakes to Avoid
Even though hoagies are simple, it’s easy to make mistakes that can ruin the final product. Here are some pitfalls to steer clear of:
- Overloading with condiments – Too much oil, vinegar, or mayo can make the sandwich soggy. A light drizzle is enough.
- Using the wrong bread – Soft bread will fall apart under the weight of the fillings. Always choose sturdy rolls.
- Skipping the seasoning – A sprinkle of oregano, salt, and pepper is small but mighty. Without it, the flavors won’t pop.
- Uneven layering – If you pile all the meats in one spot and the veggies in another, some bites will taste bland. Spread everything evenly for balance.
Serving Suggestions and Pairings
A hoagie is already hearty, but serving it with the right sides makes the meal even better. Classic pairings include potato chips, pickles, or a simple pasta salad. If you want to keep things light, a side of mixed greens with a tangy vinaigrette is a good option.
For drinks, a cold soda or sparkling water works well, but if you’re in the mood for something stronger, try pairing your hoagie with a crisp lager or a glass of Italian red wine. Serving your hoagie wrapped in parchment paper, just like delis do, adds an authentic touch and makes it easier to handle.
Variations of the Italian Hoagie
One of the best things about the Italian hoagie is its versatility. You can stick to the traditional recipe or tweak it to fit your taste. Here are a few variations to try.
Spicy Italian Hoagie
If you love a little heat, upgrade your hoagie with spicy additions. Swap regular capicola for hot capicola, and add sliced jalapeños or spicy banana peppers. You can also drizzle a bit of hot sauce or spread some spicy mustard for an extra kick. This version is bold, fiery, and perfect for those who enjoy strong flavors.
Vegetarian Italian Hoagie
Want the Italian hoagie experience without the meat? It’s completely possible! Replace the cold cuts with grilled or roasted vegetables like zucchini, bell peppers, eggplant, and mushrooms. Keep the provolone cheese, lettuce, onions, and seasonings. Add some olives and roasted red peppers for that Italian touch. You’ll still get the same layered flavors, just in a lighter, veggie-packed form.
Mini Party Hoagies
Planning a get-together? Instead of making full-sized hoagies, you can prepare smaller versions using slider rolls or mini baguettes. Cut them into halves or thirds and arrange them on a platter. They’re great for parties, picnics, or game nights and allow guests to enjoy all the flavors without committing to a giant sandwich.
FAQs about Italian Hoagie Recipe
1. What’s the difference between a hoagie, a sub, and a grinder?
They’re essentially the same type of sandwich, but the names vary by region. In Philadelphia, it’s called a hoagie, while in other parts of the U.S., it may be known as a sub or a grinder.
2. Can I make an Italian hoagie ahead of time?
Yes, but to avoid sogginess, don’t add the oil and vinegar until right before serving. Wrap the sandwich in parchment paper and store it in the fridge for up to 24 hours.
3. What’s the best bread for an Italian hoagie?
A crusty Italian roll or hoagie roll is best. It should be sturdy enough to hold all the fillings without falling apart.
4. How do I store leftovers?
Wrap leftover hoagies tightly in plastic wrap or foil and refrigerate. Eat within one day for the best taste and texture.
5. Can I make a healthy version of the Italian hoagie?
Yes! Use whole wheat bread, lean meats like turkey, and load up on fresh vegetables. You can also go light on the cheese and dressing to cut calories.
Conclusion
The Italian hoagie is more than just a sandwich—it’s a flavorful tradition that brings together rich meats, sharp cheeses, crisp vegetables, and tangy dressings inside a perfect Italian roll. With the right ingredients and a bit of layering technique, you can recreate this deli favorite at home anytime. Whether you go classic, spice it up, or make a vegetarian version, the hoagie is versatile enough to satisfy any craving.
So, next time you’re hungry for a hearty, mouthwatering sandwich, skip the takeout and build your own Italian hoagie. You’ll taste the difference in every bite.


