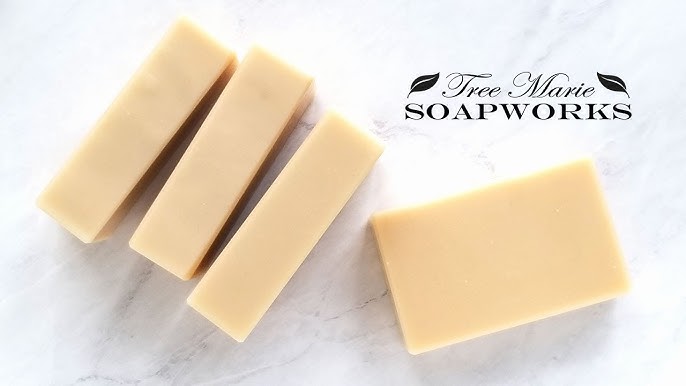
Goat Milk Soap Recipe: Making your own goat milk soap at home is more than just a crafty hobby—it’s a step toward natural living and skincare wellness. Goat milk soap has been used for centuries due to its luxurious lather, gentle nature, and nourishing properties. If you’re someone who loves DIY projects and is passionate about knowing exactly what goes into the products you use on your body, then you’re in the right place. This guide will walk you through everything from the essential ingredients to the step-by-step process of crafting your own rich, creamy bars of goat milk soap.
But why goat milk, you might ask? It’s not just a rustic novelty—it’s packed with skin-loving nutrients like vitamin A, selenium, and lactic acid that work wonders for hydration, exfoliation, and softening the skin. Let’s dive into the deeper benefits before we start mixing things up.
Why Goat Milk Soap?
Goat milk is rich in natural emollients and vitamins, making it an excellent base for gentle yet effective cleansing bars. It contains fatty acids that help repair the skin barrier, and its pH level is close to that of human skin, which means it doesn’t strip your natural oils.
Another huge plus? It’s particularly beneficial for sensitive skin. If you struggle with eczema, psoriasis, or dry patches, goat milk soap may be your saving grace. The alpha-hydroxy acids (like lactic acid) found in goat milk help exfoliate dead skin cells, giving you a natural glow without irritation.
Plus, it lathers like a dream. That creamy texture comes from the fat content in the milk, and it gives goat milk soap a luxurious, spa-like feel that many commercial soaps just can’t replicate.
Ingredients You’ll Need
Before you roll up your sleeves and get started, let’s talk ingredients. One of the most exciting things about making soap is customizing it to your liking, but there are some basics you just can’t skip. Here’s your essential ingredient checklist.
Base Oils and Butters
Oils and butters are the foundation of every soap recipe. Each one brings unique properties to your final bar:
- Olive Oil – Offers a gentle, moisturizing cleanse and is great for all skin types.
- Coconut Oil – Adds hardness and great lather.
- Palm Oil (optional) – Creates a stable, long-lasting bar.
- Shea Butter or Cocoa Butter – Adds creaminess and extra skin-conditioning properties.
- Castor Oil – Boosts lather.
These oils are combined in different ratios depending on whether you want a soft, creamy bar or a firmer, bubbly one.
Goat Milk (Fresh vs Powdered)
You can use either fresh, frozen goat milk or powdered goat milk. Both work, but fresh goat milk gives the richest feel.
- Fresh Goat Milk: Needs to be frozen into ice cubes before use to avoid scorching when mixed with lye.
- Powdered Goat Milk: Can be rehydrated with distilled water or added directly during the oil phase for a gentler approach.
Choose high-quality, organic milk for best results, especially if you’re making soap for sensitive or allergy-prone skin.
Lye (Sodium Hydroxide)
Lye is non-negotiable in soap making. It’s the ingredient that turns oils and milk into soap through a process called saponification.
- Must be 100% pure sodium hydroxide
- Always handle with extreme care
- You’ll mix this with your frozen goat milk rather than water
Never use drain cleaner or impure lye—buy food or cosmetic-grade lye from a reputable supplier.
Optional Additives
This is where you can get creative and tailor your soap to your senses:
- Essential Oils: Lavender, peppermint, tea tree, or eucalyptus for scent and skin benefits
- Herbs: Oatmeal, calendula, rosemary for texture and skin-soothing
- Clays: Bentonite or French green clay for detox properties and natural color
- Natural Colorants: Turmeric (yellow), charcoal (black), beetroot (pinkish hue)
Optional, but definitely what makes your soap feel uniquely yours.
Equipment Required for Soap Making
Let’s talk gear. Soap making isn’t like baking—you can’t just use your regular kitchen tools. Once equipment is used for soap making, it’s not food-safe anymore, so dedicate a few items for this project.
Safety Gear
Soap making involves working with lye, which can be dangerous without the right precautions:
- Safety Goggles – Protect your eyes from splashes
- Gloves – Nitrile or rubber to keep your hands safe
- Long-Sleeved Shirt – Prevents skin exposure
You might also want a mask if you’re sensitive to the fumes released when mixing lye with milk.
Soap-Making Tools and Containers
Here’s your essential tool checklist:
- Digital Scale – Accuracy matters when working with lye
- Stainless Steel or Heat-Resistant Plastic Mixing Bowls
- Silicone Spatula or Wooden Spoon
- Stick Blender (Immersion Blender) – Speeds up mixing and helps reach trace quickly
- Thermometer – For checking oil and lye solution temps
- Soap Molds – Silicone loaf molds are popular and easy to use
- Parchment Paper or Freezer Paper – If using wooden molds
Once you’ve gathered these, you’re ready to move to the next stage: staying safe.
Safety Precautions Before You Start
Soap making is a science as much as it is an art. That means precision, attention, and most of all—safety. The main concern here is working with lye. If mishandled, it can cause chemical burns or even dangerous reactions. But don’t worry—follow these safety tips, and you’ll be in control.
Lye Handling Tips
- Always add lye to liquid, not the other way around.
- Mix in a well-ventilated area, preferably outside.
- If lye comes in contact with skin, rinse with cold water immediately and seek help if needed.
- Keep kids and pets away while soap making.
Store lye in a cool, dry place, and label it clearly.
How to Work Safely with Goat Milk and Oils
- When mixing lye with frozen goat milk, go slowly to avoid overheating and scorching.
- Use a digital thermometer to monitor temperatures closely—ideally, both your lye solution and oils should be around 90–110°F before combining.
- Always work on a covered surface, and have vinegar nearby to neutralize lye spills (although some experts now suggest water is more effective).
Once you’re confident and cautious, making soap becomes a fun and satisfying activity.
Preparing the Goat Milk
The key to perfect goat milk soap? Prepping the milk correctly. Lye is incredibly hot when it dissolves and will scorch the milk unless you chill it first.
Freezing Goat Milk to Prevent Scorching
Pour your fresh goat milk into an ice cube tray and freeze it overnight. This keeps the temperature down and prevents the milk sugars from turning orange or brown during the lye mix.
- Use plastic or silicone trays
- Measure exactly how much milk your recipe calls for
- Add a few extra cubes just in case
When you add lye, do so slowly and in small amounts, stirring constantly to keep the temp down.
Tips for a Smooth Blend
- Mix in a stainless steel or heavy-duty plastic container
- Stir gently until the cubes are fully melted and the solution is opaque
- Keep an ice bath nearby in case the solution heats too quickly
You’ll know your goat milk and lye solution is ready when it’s smooth, cool, and fully dissolved—no chunks, no orange tint, just a creamy base ready for soap magic.
Step-by-Step Goat Milk Soap Making Process
Making goat milk soap isn’t just about mixing stuff in a bowl—it’s a delicate, rewarding craft that requires patience, precision, and care. Let’s break down the process step-by-step so you can follow along without feeling overwhelmed.
Step 1: Measure and Freeze the Goat Milk
Start by measuring the exact amount of goat milk your recipe calls for. Accuracy is essential, especially when dealing with lye and liquids. Pour the measured milk into an ice cube tray and freeze overnight. This helps prevent burning or discoloration when lye is added.
Why freeze it?
When lye hits a liquid, it gets hot—very hot. If you use liquid goat milk straight from the fridge, the temperature will rise too quickly and could burn the milk, leading to an unpleasant smell and a tan or orange color. Freezing keeps everything cool and calm.
- Measure milk by weight, not volume.
- Cover the tray to avoid absorbing freezer odors.
- Don’t rush the freezing—make sure it’s solid.
Once the milk is frozen solid, pop the cubes into a bowl and prepare for the next step.
Step 2: Weigh and Mix the Lye
Lye is the heart of the saponification process—the chemical reaction that turns your oils and milk into soap. You must handle it carefully.
Using a digital scale, weigh the exact amount of sodium hydroxide (lye) required by your recipe. Slowly sprinkle the lye into the bowl of frozen goat milk cubes while constantly stirring. Never add the milk to lye—it should always be lye to milk to avoid a dangerous reaction.
As the lye dissolves:
- The mixture will begin to melt the cubes.
- Stir constantly with a silicone spatula.
- Use an ice bath if needed to keep the temperature low.
- Don’t inhale the fumes—work near a window or outdoors.
The mixture should stay cool and turn a creamy pale color. Once fully dissolved and there are no visible lye grains left, set the mixture aside.
Step 3: Prepare Oils and Butters
While your lye and goat milk mixture rests, it’s time to melt the oils and butters. Combine all your chosen oils (olive, coconut, palm, etc.) and butters (shea or cocoa) in a heat-safe bowl. Warm them gently on the stove or in the microwave until fully melted and combined.
Keep your thermometer handy—your oils should cool to 90–110°F before mixing with the lye-milk solution.
- Stir well to blend the oils evenly.
- Avoid overheating—take it slow.
- Let both the oils and lye solution reach similar temperatures before combining.
This temperature harmony is crucial to achieving a smooth, creamy soap batter.
Step 4: Blend Lye with Goat Milk
Once your oils and lye-milk solution are within the same temperature range (ideally 95–105°F), it’s time to mix. Slowly pour the lye solution into the melted oils while stirring gently. This is where the magic begins!
Use a stick blender to mix until you reach “trace.” This stage is when your soap mixture thickens to the consistency of pudding.
Tips for blending:
- Pulse the stick blender—don’t run it continuously to avoid overheating.
- Alternate stirring and pulsing.
- Scrape the sides and bottom often to avoid separation.
You’ll notice the texture change gradually. Once it leaves trails on the surface when drizzled from a spoon or spatula, you’re at trace.
Step 5: Combine Lye Solution with Oils
At this stage, your mixture is ready for customization. Once trace is achieved, it’s time to add any extra ingredients:
- Essential oils for scent (e.g., lavender, rosemary, or peppermint)
- Herbs or flower petals for texture and decoration
- Natural colorants like activated charcoal or turmeric
- Oatmeal or ground almonds for exfoliation
Stir these in gently with a spatula—don’t use the stick blender anymore unless you want a thicker trace. Blend thoroughly to ensure even distribution without overmixing.
And just like that, you’re ready to pour!
Achieving Trace in Soap Making
Trace is the moment when your mixture transforms from oil and lye into something that looks and feels like soap. Understanding trace is essential to mastering soap making.
What is Trace?
Trace is the stage where the saponification process is underway. It’s the moment when the mixture thickens, and you can visibly see it leaving trails (like a ribbon) on the surface as you stir.
There are three levels of trace:
- Light Trace – Batter is thin but emulsified. Great for swirls and layered designs.
- Medium Trace – Pudding-like texture. Best for most cold-process soaps.
- Thick Trace – Very thick, similar to mashed potatoes. Ideal for embedding objects or heavy textures.
You’ll want to reach at least medium trace before pouring your soap, but depending on your design, you may stop earlier or blend longer.
How to Identify Different Stages of Trace
Here’s a quick guide to help:
- No Trace Yet: Mixture is thin, and oil/lye may separate if left alone.
- Light Trace: Thin, runny pudding. Leaves faint lines on the surface.
- Medium Trace: More opaque, thicker lines. Perfect for pouring into molds.
- Thick Trace: Holds peaks and swirls. Must move fast when pouring.
Be careful not to over-blend. If you wait too long, the soap may harden before you pour it into molds.
Pouring and Molding Your Soap
Once you’ve reached the desired trace and added your custom ingredients, it’s time to pour the soap into molds.
Choosing the Right Soap Mold
There are plenty of options when it comes to soap molds:
- Silicone loaf molds – Most popular and easiest to release
- Wooden molds – Retain heat, great for even curing
- Individual cavity molds – Ideal for shaped bars (flowers, hearts, etc.)
If you’re using wooden molds, make sure to line them with parchment or freezer paper so the soap doesn’t stick.
Tips for Clean, Bubble-Free Pouring
- Tap the mold gently on the counter to remove air bubbles.
- Pour slowly and evenly to avoid splashes or air pockets.
- Use a spatula to smooth the top or create decorative swirls.
Once poured, insulate your mold with a towel or blanket. This keeps the soap warm and encourages the gel phase (which helps with color and hardness).
Leave the soap undisturbed for 24–48 hours before unmolding.
Curing and Storing Your Goat Milk Soap
Soap making doesn’t end when you pour—it’s just the beginning. Curing is the most critical part of the process, allowing the soap to fully harden, dry, and become skin-safe.
How Long Should Soap Cure?
Goat milk soap should cure for 4 to 6 weeks. During this time:
- Water evaporates, hardening the soap.
- pH levels normalize.
- The scent settles and matures.
Place bars on a drying rack or breathable surface in a cool, dry, well-ventilated area. Rotate the bars weekly to ensure even drying.
Best Practices for Storage
- Store soaps in a single layer, not stacked.
- Keep away from direct sunlight or humidity.
- Avoid plastic containers—use cardboard boxes or paper wrapping.
Once fully cured, your goat milk soap will be long-lasting, gentle, and ready to pamper your skin.
Customizing Your Goat Milk Soap
Once you’ve mastered the basic goat milk soap recipe, it’s time to personalize your creations. This is where soap making becomes an art form. You can add scents, colors, textures, and beneficial ingredients to make each batch uniquely yours. Whether you’re crafting soap for personal use or as beautiful gifts, the options are endless.
Scent Options
Fragrance is one of the most powerful aspects of any skincare product. The right scent can turn an ordinary soap into an aromatherapy experience.
- Essential Oils: Natural and therapeutic, essential oils are the go-to for most homemade soaps. Try lavender for relaxation, eucalyptus for clarity, or orange for a cheerful vibe.
- Fragrance Oils: These are synthetic blends that mimic specific scents like vanilla, apple pie, or even fresh linen. They’re potent but can be irritating to sensitive skin, so use sparingly.
- Blending Tips: Combine complementary scents. For example, lavender + lemon or rosemary + peppermint. Start with 1 oz of essential oil per pound of soap base, and adjust based on intensity.
Remember to always use skin-safe, high-quality oils. Cheap oils can cause skin irritation or fade quickly during curing.
Natural Colorants and Exfoliants
Skip the artificial dyes and go for skin-friendly, natural colorants. They’re beautiful and beneficial:
- Colorants:
- Turmeric (golden yellow)
- Activated charcoal (jet black)
- Spirulina (green)
- Beetroot powder (pinkish tones)
- Cocoa powder (brown)
- Exfoliants:
- Finely ground oatmeal for a gentle scrub
- Coffee grounds for a bold texture and color
- Crushed lavender buds or rose petals for a floral look
Tip: Always test your additives in small batches to see how they interact with goat milk and lye.
Textures & Decorative Swirls
For more advanced soap makers, playing with texture can make each bar a work of art.
- Swirl techniques using a skewer or spoon
- Layering with different colors
- Topping the soap with botanicals like dried flowers or herbs
Soap making is like cooking—once you know the basics, you can freestyle your own gourmet recipes.
Troubleshooting Common Soap-Making Issues
Even seasoned soap makers hit a few bumps along the way. Don’t worry—most issues are easy to fix once you know what went wrong.
Soap is Too Soft or Crumbly
If your soap is too soft:
- You may have used too much water or not enough hard oils.
- Cure it longer—some soft bars harden over time.
- Add sodium lactate to your lye solution next time to help harden bars.
If it’s crumbly:
- Too much lye or not enough liquid.
- Overmixing at thick trace.
- Lye not fully dissolved before combining.
A digital soap calculator can help you rebalance your recipe.
Discoloration or Odd Smell
Burned goat milk results in orange or brown soap and an ammonia-like odor.
To prevent this:
- Always freeze your milk and add lye slowly.
- Keep temperatures low during lye-milk mixing.
If your soap smells odd after curing:
- It could be rancid oils. Use fresh, high-quality oils.
- Some essential oils change scent during curing—give it time.
Other common issues:
- White ash (soda ash): Forms on the surface. Spritz with rubbing alcohol post-pour to prevent.
- Cracking or separation: Caused by high temps or overmixing.
- Uneven color: Caused by additives not mixed thoroughly.
Most of these are cosmetic and won’t affect how your soap works, so don’t toss a batch unless absolutely necessary.
Cleaning Up After Soap Making
Soap making is fun, but cleanup can get messy if you’re not prepared. The good news? You’re technically cleaning with soap, so your tools are easier to wash than you might expect!
Safe Disposal of Soap Residue
Never pour raw soap batter or lye solution down the drain. It can clog pipes or react with metals.
- Let leftover soap batter solidify, then scrape it into the trash.
- Wipe out containers with paper towels before washing.
- Rinse lye containers under running water (wear gloves!).
If you’re unsure, neutralize tools with vinegar before rinsing.
Cleaning Tools Effectively
- Use hot water and dish soap to wash your tools.
- Soak items like the stick blender in warm water if soap hardens on them.
- Silicone molds can go in the dishwasher—win!
Label your soap tools clearly and store them together so you don’t mix them up with kitchen gear.
Cleaning up promptly makes your next soap-making session smoother and more enjoyable.
FAQs about Goat Milk Soap Recipe
Q1: Can I use store-bought goat milk for soap?
Yes! Just make sure it’s whole, unsweetened goat milk. Avoid any flavored or pasteurized versions with additives.
Q2: Is lye dangerous to use?
It can be if mishandled, but when used with proper safety gear and caution, it’s completely manageable. Always add lye to frozen milk slowly and stir continuously.
Q3: Why did my soap turn orange?
Most likely due to overheating the milk when mixing with lye. Next time, make sure your goat milk is completely frozen and add lye slowly.
Q4: How long will goat milk soap last?
If stored in a cool, dry place, your goat milk soap will last 6 months to 1 year. Keep it away from humidity to prevent softening or spoilage.
Q5: Can I sell goat milk soap?
Absolutely! Just be sure to follow local regulations, label ingredients clearly, and test your recipes for consistency and safety before going commercial.
Conclusion
Making goat milk soap at home is one of the most rewarding and creative DIY projects you can try. From choosing your oils and scents to customizing colors and textures, the possibilities are endless. It’s not just about making soap—it’s about crafting a product that’s good for your skin, your health, and your environment.
With every batch, you’ll gain more confidence and creativity. Whether you’re gifting to friends, using it for your own skincare routine, or even starting a small business, goat milk soap brings a rustic charm and luxurious quality that store-bought soaps just can’t match.
So, gather your ingredients, freeze that milk, and start blending. You’ll be amazed at what your hands can create.


