Friendship Bread Recipe: Friendship bread is more than just a sweet, delicious loaf—it’s a tradition that brings people together. At its core, friendship bread is a type of sweet bread that starts with a fermented “starter,” much like sourdough, but sweeter and easier to work with. What makes it truly unique is that you don’t just bake the bread for yourself—you also share the starter with friends so they can make their own loaves. This creates a chain of baking and sharing, connecting people through food and tradition.
The bread itself is soft, moist, and flavorful. It often carries hints of cinnamon and vanilla, making it a comforting treat that pairs beautifully with coffee or tea. While the starter requires a little patience, the final result is always worth it. It’s not just about baking bread; it’s about creating a community of sharing, love, and friendship.
The Story Behind Friendship Bread Tradition
The origin of friendship bread is closely linked to Amish communities, where it’s often called Amish Friendship Bread. The tradition was simple: a friend would give you a bag of starter along with instructions to feed it over 10 days. On the 10th day, you’d use part of the starter to bake bread, save some for yourself, and pass some on to friends. This cycle would continue, ensuring that the tradition of baking and sharing never stopped.
What made it so special wasn’t just the recipe but the thoughtfulness behind it. Sharing food has always been a way of showing care, and friendship bread captures that spirit perfectly. Over time, people added their own twists, experimenting with flavors like banana, chocolate, pumpkin, or even savory herbs.
Why It’s Called “Friendship Bread”
The name comes directly from the sharing tradition. The act of passing along a portion of the starter is symbolic of sharing friendship, love, and kindness. It’s more than just food—it’s a message: “I care about you, and I want you to enjoy this too.” In a world where life moves fast, this simple tradition reminds us of the value of slowing down, baking something with love, and sharing it with others.
Ingredients You’ll Need
Basic Ingredients for the Starter
The starter is the heart of friendship bread. It’s similar to a sourdough starter, but sweeter and simpler to maintain. To make it, you’ll need:
- 1 cup all-purpose flour
- 1 cup sugar
- 1 cup milk (preferably whole milk)
- 1 packet (2 ¼ tsp) active dry yeast dissolved in ¼ cup warm water (optional, for kickstarting fermentation)
This mixture will ferment over 10 days, bubbling and growing as the yeast feeds on the sugar and flour.
Additional Ingredients for the Bread Batter
Once your starter is ready, you’ll use part of it to make the bread. Here’s what you’ll need:
- 1 cup friendship bread starter
- 2 cups all-purpose flour
- 1 cup sugar
- 1 tsp baking soda
- 1 ½ tsp baking powder
- 1 tsp cinnamon
- ½ tsp salt
- 3 eggs
- ½ cup vegetable oil (or melted butter)
- ½ cup milk
- 2 tsp vanilla extract
These create a moist, sweet loaf with a hint of cinnamon warmth.
Optional Add-ins for Extra Flavor
Here’s where you can get creative. Add-ins make each loaf unique. Some popular options include:
- Chocolate chips
- Chopped nuts (walnuts, pecans, or almonds)
- Fresh or dried fruits (bananas, apples, cranberries, raisins)
- Shredded coconut
- Lemon zest or orange peel
- Pumpkin puree with extra spices
Think of the base recipe as a blank canvas—your creativity turns it into a masterpiece.
Preparing the Friendship Bread Starter
Day 1 – Getting Started
On the first day, you’ll combine the flour, sugar, milk, and optional yeast. Mix well until smooth, then place the starter in a large, loosely covered bowl or a resealable plastic bag. The mixture will need to breathe, so don’t seal it airtight. Leave it at room temperature.
Over the next several hours, you’ll notice tiny bubbles forming. This is the yeast coming to life, feeding on the sugar and flour. Congratulations—you’ve just created the beginning of your friendship bread tradition.
Days 2 to 9 – Feeding and Caring for the Starter
For the next nine days, you’ll care for your starter like a little pet. Each day, you’ll check on it, stir it (or squeeze the bag if using a plastic one), and feed it on specific days.
- On Days 2, 3, 4, 5, 6, and 7: Stir the starter once a day.
- On Day 5: Add 1 cup flour, 1 cup sugar, and 1 cup milk. Stir well.
- On Days 8 and 9: Keep stirring daily.
The starter should smell slightly sweet and yeasty. If it smells sour or grows mold, it means something went wrong. But if it’s bubbly and smells pleasant, you’re on track.
Day 10 – Using and Sharing the Starter
Day 10 is the big day! Here’s what you do:
- Stir the starter well.
- Divide it into four equal portions (about 1 cup each).
- Keep one portion for yourself to bake with.
- Save one portion to start the next 10-day cycle.
- Share the remaining two portions with friends, along with the instructions.
Now, you’re ready to bake your first loaf of friendship bread!
Step-by-Step Guide to Baking Friendship Bread
Mixing the Batter
Take one cup of the starter and place it in a large mixing bowl. Add the flour, sugar, baking soda, baking powder, cinnamon, salt, eggs, oil, milk, and vanilla extract. Mix until smooth but don’t overmix—you want a light, fluffy texture.
At this stage, you can fold in your favorite add-ins like chocolate chips or fruit. The batter should be thick but pourable.
Choosing the Right Baking Pan
Friendship bread works beautifully in a standard loaf pan, but you can also use:
- Muffin tins (for individual servings)
- Bundt pans (for a decorative touch)
- Mini loaf pans (great for gifting)
Grease the pans well, or line them with parchment paper for easy removal. A sprinkle of cinnamon-sugar coating on the pan before pouring in the batter adds a sweet crunch to the crust.
Baking and Cooling the Bread
Preheat your oven to 325°F (165°C). Pour the batter into the prepared pan(s) and bake:
- Loaf pan: 50–60 minutes
- Muffins: 20–25 minutes
- Bundt pan: 60–70 minutes
Check doneness by inserting a toothpick into the center—it should come out clean or with a few crumbs, but not wet. Allow the bread to cool for at least 15 minutes before removing it from the pan.
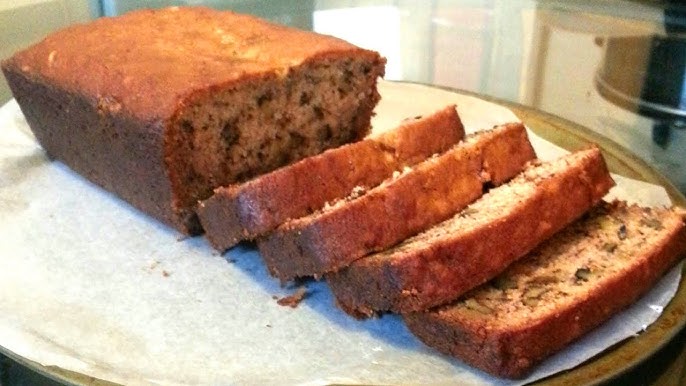
Once cooled, slice and enjoy! The bread keeps well in an airtight container for up to 5 days, or you can freeze it for longer storage.
Variations and Flavor Ideas
Chocolate Chip Friendship Bread
If you’ve got a sweet tooth, chocolate chip friendship bread is the perfect twist on the classic recipe. Simply fold 1 to 2 cups of chocolate chips into your batter before baking. Semi-sweet chips give a rich flavor without being overly sweet, while milk chocolate chips create a softer, sweeter loaf. For extra indulgence, drizzle melted chocolate over the cooled bread or sprinkle mini chips on top before baking. The result is a moist, cake-like bread with little bursts of chocolate in every bite. It’s a crowd-pleaser for kids and adults alike.
This variation also works beautifully as muffins, which are great for breakfast, lunchboxes, or quick snacks. If you want to elevate the flavor even more, add a teaspoon of instant espresso powder to the batter—it enhances the chocolate flavor without making the bread taste like coffee.
Cinnamon Sugar Twist
Cinnamon and sugar are the heart of traditional friendship bread, but you can take it up a notch by adding a crunchy topping. Mix 2 tablespoons of sugar with 1 teaspoon of cinnamon and sprinkle it over the greased loaf pan before pouring in the batter. You can also swirl extra cinnamon sugar into the batter itself for a marbled effect.
This version gives you a crisp, sweet crust with every slice. It tastes a lot like coffee cake, making it perfect for breakfast or brunch. Serve it warm with a pat of butter, and you’ve got a cozy treat that feels like home.
Savory Friendship Bread Options
While most people associate friendship bread with sweetness, you can actually turn it into a savory loaf. By reducing the sugar and skipping the cinnamon, you open up a world of possibilities. Add shredded cheese, herbs like rosemary or thyme, garlic powder, and even bits of cooked bacon or sun-dried tomatoes.
Savory friendship bread pairs wonderfully with soups, stews, and salads. Imagine serving a warm slice with a hearty bowl of chili or alongside a creamy potato soup—it’s comfort food at its best.
Tips for Success
How to Keep the Starter Healthy
Your starter is the foundation of friendship bread, so keeping it alive and healthy is key. Always store it at room temperature unless you want to slow down the process, in which case you can refrigerate it. When refrigerated, feed it at least once a week with equal parts flour, sugar, and milk.
Use a non-metallic bowl and spoon when stirring, as metal can sometimes react with the yeast. A glass bowl or a resealable plastic bag works best. If your starter ever smells unpleasant, turns gray, or grows mold, it’s time to start fresh.
Common Mistakes to Avoid
One of the biggest mistakes is forgetting to feed the starter. If you skip too many days, the yeast won’t survive, and your starter will stop bubbling. Another common issue is overbaking the bread, which can make it dry. Always check it with a toothpick and pull it out as soon as it’s done.
Also, don’t overmix the batter. Stirring too much can make the bread dense instead of light and fluffy. And remember, sharing the starter is part of the tradition—don’t keep it all to yourself!
Storage Tips for Bread and Starter
Baked friendship bread keeps best when stored in an airtight container at room temperature for up to 5 days. For longer storage, wrap it tightly in plastic wrap and freeze for up to 3 months.
The starter can also be frozen if you don’t plan to use it right away. Portion it into 1-cup servings, freeze them in resealable bags, and thaw at room temperature when ready to use. This way, you’ll always have a starter on hand without having to begin from scratch.
Serving Suggestions
Best Ways to Enjoy Friendship Bread
Friendship bread is so versatile that it works for breakfast, dessert, or even a mid-afternoon snack. Enjoy it plain, warm out of the oven, or spread with butter for extra richness. A drizzle of honey or cream cheese frosting turns it into a decadent dessert.
If you bake muffins, you can pack them for on-the-go breakfasts or snacks. Mini loaves also make great gifts for neighbors, coworkers, or friends. Wrap them in parchment paper and tie with a ribbon—it’s simple, thoughtful, and delicious.
Pairing with Drinks and Spreads
This bread pairs beautifully with drinks like coffee, tea, or hot chocolate. For something refreshing, try it with iced tea or a glass of cold milk. If you prefer spreads, cream cheese, fruit jam, or nut butter are excellent choices.
For savory versions, pair the bread with dips like hummus, spinach-artichoke spread, or even a bowl of hearty chili. The bread acts as the perfect balance between soft and chewy, soaking up flavors while still holding its structure.
The Tradition of Sharing
Passing the Starter to Friends and Family
The most beautiful part of friendship bread is the tradition of passing it on. On day 10, when you divide the starter, package portions into jars or resealable bags. Attach a simple note with the 10-day instructions and maybe even a recipe card for the bread.
When you gift the starter, you’re not just giving food—you’re sharing time, love, and tradition. Your friends can then bake their own loaves, save some starter, and pass it forward to others. This ripple effect keeps the tradition alive across families and generations.
Creative Packaging Ideas
If you want to make your gift extra special, think about presentation. Here are a few fun ideas:
- Use mason jars for the starter, decorated with ribbon or twine.
- Attach a handwritten recipe card for a personal touch.
- Bake mini loaves, wrap them in brown paper, and tie with rustic string.
- Create a “friendship bread kit” with a bag of starter, the recipe, and a few fun add-ins like chocolate chips or cinnamon.
These small touches turn a simple tradition into a heartfelt gift that people will cherish.
Healthier Friendship Bread Alternatives
Sugar-Free and Gluten-Free Options
If you love the tradition of friendship bread but want a healthier twist, there are plenty of ways to adapt the recipe. For a sugar-free version, swap white sugar with alternatives like stevia, monk fruit sweetener, or coconut sugar. These options still provide sweetness without the blood sugar spikes. If you prefer natural sweeteners, honey or maple syrup can be used, though you may need to adjust the liquid balance in the recipe.
For gluten-free friendship bread, replace the all-purpose flour with a good-quality gluten-free flour blend. Almond flour and oat flour can also be incorporated for extra flavor and nutrition. Just keep in mind that gluten-free bread tends to be denser, so adding an extra egg or a teaspoon of xanthan gum can help with structure.
The beauty of this bread is its flexibility—it can be enjoyed by people with different dietary needs without losing the spirit of the tradition.
Using Whole Grains and Natural Sweeteners
For a more wholesome version, try using whole wheat flour or spelt flour in place of white flour. This adds extra fiber and a nutty flavor. Pairing it with natural sweeteners like honey or molasses gives the bread a rich, earthy sweetness. You can also use unsweetened applesauce or mashed bananas to replace some of the oil, making the bread lighter while adding natural sweetness.
If you’re looking for a protein boost, toss in some chia seeds, flaxseeds, or even a scoop of protein powder. Not only does this make the bread healthier, but it also adds texture and heartiness, perfect for breakfast or a post-workout snack.
Healthy doesn’t mean boring. By experimenting with natural ingredients, you can make a loaf that’s just as delicious, with the added bonus of being better for your body.
FAQs about Friendship Bread Recipe
1. How long does friendship bread starter last?
If you feed it regularly, the starter can last indefinitely. Refrigerated starters should be fed once a week, while room-temperature starters should be fed every 5–7 days.
2. Can I freeze the starter?
Yes! Portion the starter into 1-cup bags, freeze them, and thaw when you’re ready to use. It’s a great way to pause the process without losing it completely.
3. Do I have to wait 10 days before baking?
Yes, the 10-day cycle is what develops the flavor and texture of the starter. However, once you have an active starter, you can bake anytime by feeding it and using a portion.
4. Why is my bread too dense?
Overmixing the batter or using an inactive starter are common reasons. Always fold the batter gently and make sure your starter is bubbly and healthy before baking.
5. Can I make friendship bread vegan?
Absolutely! Use plant-based milk (like almond or oat milk), replace eggs with flax eggs (1 tbsp flaxseed + 3 tbsp water per egg), and swap butter for coconut oil or vegan margarine.
Conclusion
Friendship bread isn’t just about baking—it’s about sharing love, building connections, and creating traditions that last for generations. From preparing the starter to experimenting with fun variations, every step of the process is a reminder that food is meant to be enjoyed together.
Whether you stick to the classic cinnamon loaf, try out chocolate chip muffins, or create a healthier version with whole grains, each slice of friendship bread tells a story. It’s a gift of time, care, and flavor that continues to spread as long as you keep sharing.
So, why not start today? Make your starter, bake your first loaf, and pass it along. Before you know it, your circle of friends and family will be filled with the warm aroma of freshly baked bread and the even warmer feeling of togetherness.


