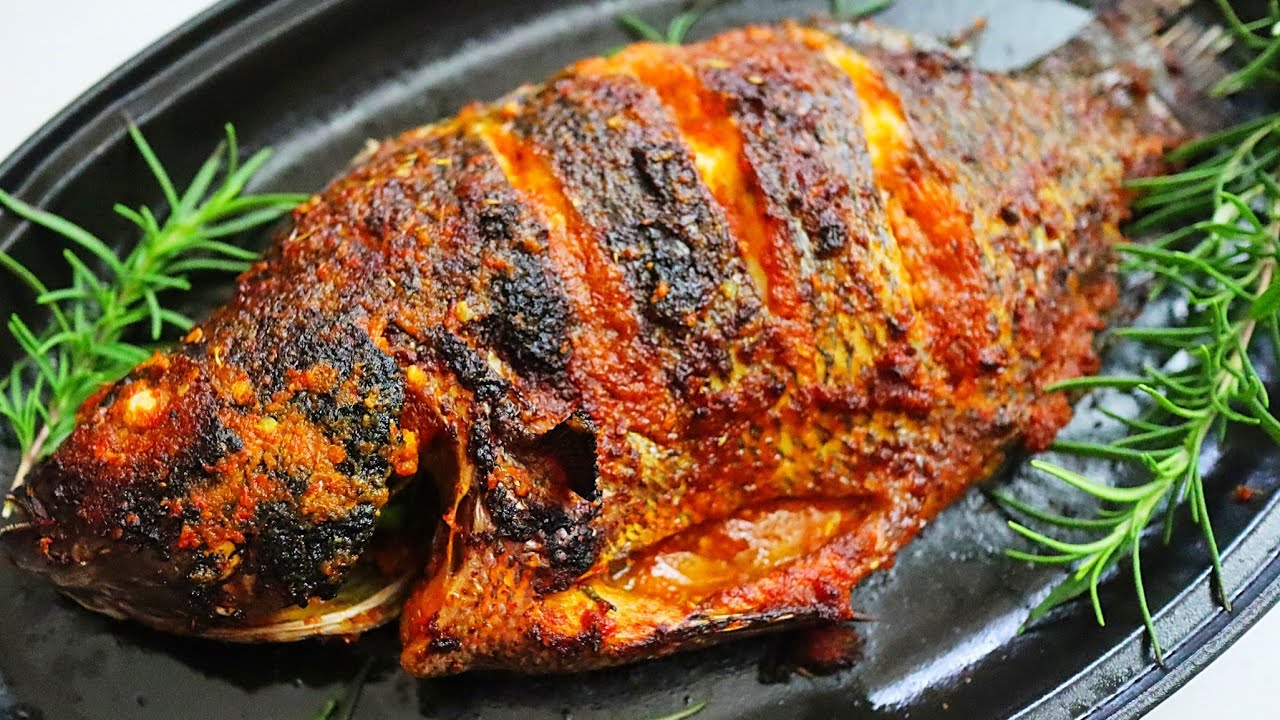
Fried Tilapia Recipe: Fried tilapia has earned its spot in kitchens around the globe—and for good reason. It’s quick, flavorful, and budget-friendly. Whether you’re whipping up a last-minute dinner or planning a Sunday family meal, this fish delivers a crispy outside and juicy, flaky inside that makes everyone ask for seconds. Plus, tilapia has a mild, adaptable taste that easily absorbs marinades and spices, making it a blank canvas for culinary creativity.
Another big plus? It’s a relatively lean fish, so you’re getting a lighter option compared to fattier types like salmon or mackerel. You don’t need fancy culinary skills or expensive ingredients—just a few pantry staples and a craving for something delicious.
And let’s not forget its versatility. Fried tilapia can be served in a taco, alongside a bed of rice, on a fresh salad, or simply with lemon wedges and tartar sauce. It’s the kind of dish that works as both comfort food and gourmet delight, depending on how you dress it up.
Why This Guide is Perfect for Beginners
So, why this guide? Because learning to fry tilapia should be fun, not frustrating. This step-by-step breakdown is created with simplicity in mind, but without cutting corners on flavor or technique. Whether you’re a college student learning to cook for yourself or a parent looking for a quick meal option, this guide has you covered.
We’ll walk you through everything from selecting the right ingredients to nailing that golden-brown crust. Plus, we’ve included tips to avoid rookie mistakes—like soggy batter or uneven cooking—that could ruin your dish.
By the time you’re done with this recipe, you’ll not only have a plate full of delicious fried tilapia, but you’ll also have the confidence to make it part of your regular meal rotation.
Ingredients You’ll Need
Creating a killer fried tilapia dish starts with assembling the right ingredients. Don’t worry—we’re not talking about hard-to-find gourmet items. Everything listed here is easily available in most supermarkets.
Tilapia Fillets: The Star of the Dish
- Quantity: 4 boneless tilapia fillets (fresh or thawed from frozen)
- Why Tilapia? It’s mild, not fishy, and easy to season.
- Fresh vs Frozen: Fresh is always ideal, but frozen works too—just be sure to thaw completely and pat dry to avoid excess water during frying.
Tilapia fillets are thin, making them perfect for a quick fry. Look for fillets that are uniform in size to ensure even cooking. They should smell like the sea—clean and not overly fishy. If buying fresh, cook within a day or two. If using frozen, thaw in the fridge overnight or under cold running water.
Essential Spices and Seasonings
- Salt – 1 tsp (to taste)
- Black Pepper – ½ tsp
- Garlic Powder – 1 tsp
- Paprika – 1 tsp for color and a hint of smokiness
- Cayenne Pepper – ¼ tsp (optional for heat)
- Lemon Juice – 1 tbsp (for marinating)
These seasonings form the backbone of flavor for your fish. You can also experiment with dried herbs like oregano or thyme if you want a Mediterranean twist.
Oils and Coating Agents
- Cooking Oil – 1 to 1.5 cups (vegetable, canola, or peanut oil)
- All-Purpose Flour – ½ cup (for light dredging)
- Cornmeal – ½ cup (for extra crunch)
- Eggs – 2 (for dredging)
- Milk – 2 tbsp (optional, to loosen the egg mixture)
The coating is where the magic happens. A mix of flour and cornmeal gives a perfectly crisp crust. Eggs help everything stick together, while oil brings the heat that seals the deal.
Optional Add-ons and Flavor Enhancers
- Hot Sauce – A few drops in the egg mix for bold flavor
- Buttermilk – Can replace milk for a tangier, richer dredge
- Fresh Herbs – Chopped parsley or cilantro for garnish
- Tartar Sauce or Garlic Aioli – For dipping
These extras aren’t necessary but can take your dish from good to unforgettable. Add them based on your taste and how fancy you’re feeling.
Kitchen Tools You’ll Need
- Non-stick skillet or cast-iron pan
- Mixing bowls
- Paper towels
- Tongs or spatula
- Meat thermometer (optional but useful)
- Wire rack or plate with paper towels (for draining)
Having the right tools makes the cooking process smoother and safer. A meat thermometer helps check doneness, while paper towels soak up excess oil after frying.
Preparing the Tilapia
Cleaning and Patting Dry
Before you start marinating or seasoning, prepping the tilapia properly is essential. Even if you’ve bought pre-cleaned fillets, it’s a good idea to give them a gentle rinse under cold water. This helps remove any residual scales, bones, or packaging liquids. But—and this is super important—you must pat them dry with paper towels afterward.
Why? Because excess water can mess up the frying process. It causes the hot oil to splatter (dangerous and messy), and it also weakens the coating’s ability to stick to the fillets. Dry fish equals crispy fish.
You can also use a clean kitchen cloth, but paper towels are more convenient for soaking up moisture. Make sure to dab both sides of each fillet and let them sit on a dry surface while you prep the seasonings and dredge.
Marinating for Maximum Flavor
Marinating adds layers of flavor and keeps the fish moist during frying. While tilapia has a mild flavor on its own, it acts like a sponge, absorbing whatever you put on it.
Here’s a simple, foolproof marinade:
- 1 tbsp lemon juice
- 1 tsp salt
- ½ tsp black pepper
- 1 tsp garlic powder
- ½ tsp paprika
- Optional: a few dashes of hot sauce or cayenne if you like heat
Place the tilapia fillets in a shallow dish or a resealable plastic bag. Pour the marinade over them, making sure each piece is coated evenly. You can use your hands or a brush to rub the spices into the fillets gently.
Cover and refrigerate. If you’re in a hurry, even 15–20 minutes can make a difference. But if you’ve got time, aim for 1–2 hours to let those flavors really sink in.
How Long Should You Marinate?
This often depends on how intense you want the flavor. Here’s a quick guide:
- 15–30 minutes: Light flavor, great for weekday dinners
- 1–2 hours: Bold, deep flavor with juicier results
- Overnight: Risk of over-marinating, which can break down the fish and make it mushy (avoid unless using a very mild marinade)
If your marinade contains a high amount of citrus (like lemon or vinegar), avoid marinating for more than 2 hours. Acids can start to “cook” the fish, similar to ceviche, and alter the texture too much for frying.
Step-by-Step Guide to Frying Tilapia
Now that your tilapia is prepped and marinated, it’s time to bring out the skillet and get frying. Follow this foolproof method to achieve a perfectly golden-brown crust and juicy interior every single time.
Step 1: Preheat the Oil
This is where a lot of people go wrong. Frying at the wrong temperature can either burn your fish or make it soggy. Preheat your oil to about 350°F to 375°F (175°C to 190°C). If you don’t have a thermometer, sprinkle a bit of flour into the oil—if it sizzles right away, you’re good to go.
Use a deep skillet, cast-iron pan, or a fryer with high sides to reduce splatter. Add about 1 to 1.5 cups of oil, enough to coat the bottom generously.
Never add the fish before the oil is hot enough. Cold oil = greasy, limp fish.
Step 2: Coat the Fish Properly
Set up a dredging station:
- Bowl 1: Flour + Cornmeal mix (½ cup each)
- Bowl 2: Eggs beaten with 2 tbsp of milk (or buttermilk)
Here’s the order:
- Dip each fillet into the flour/cornmeal mix → shake off excess.
- Then into the egg mixture → coat fully.
- Finally, back into the flour/cornmeal for a double layer of crisp.
Double dredging helps create an extra crispy crust that stays intact during frying.
Place the coated fillets on a plate or wire rack while you finish the rest. Letting them sit for a few minutes helps the coating “set” before they hit the hot oil.
Step 3: Frying the Fillets to Perfection
Carefully place one or two fillets in the pan. Don’t overcrowd—this drops the oil temperature and leads to soggy results.
Fry each fillet for 3 to 5 minutes per side, depending on thickness. You’ll know it’s time to flip when the edges turn golden brown and crispy.
Use tongs or a spatula to flip the fish gently. Don’t poke or press down—let the oil do its job. Once both sides are golden and the internal temperature reaches 145°F (63°C), your fish is done.
The crust should be firm, golden, and slightly bubbled. The inside? Moist, tender, and flaky.
Step 4: Draining and Resting the Fish
Once your tilapia is fried to perfection, remove it from the pan and place it on a wire rack over paper towels. This allows the oil to drip off without steaming the crust.
If you lay the fish directly on paper towels, the bottom can become soggy. Let it rest for about 5 minutes before serving—this allows the juices to redistribute and keeps everything crispy.
Optional: Sprinkle a pinch of salt or a squirt of lemon juice while it’s still hot to enhance the flavor.
Step 5: Garnishing and Serving Suggestions
Presentation matters, even for home-cooked meals. Here are some ways to serve fried tilapia:
- With lemon wedges and chopped parsley
- On a bed of herbed rice or mashed potatoes
- Inside tacos with shredded cabbage and lime crema
- Alongside coleslaw and cornbread for a Southern twist
Don’t forget the dipping sauces—tartar sauce, garlic aioli, or even spicy mayo add extra flavor layers.
A sprig of parsley or cilantro on top, a few lemon slices on the side, and boom—restaurant-quality vibes from your own kitchen.
Common Mistakes to Avoid
Fried tilapia is pretty straightforward, but a few common mistakes can turn your crispy dreams into a soggy nightmare. Let’s break them down so you can sidestep these culinary pitfalls.
Overcrowding the Pan
This might be the number one mistake home cooks make. When you add too many fillets at once, the oil temperature drops significantly. What happens next? Instead of frying, your fish stews in oil—and that results in limp, greasy fillets with uneven browning.
Pro Tip: Always give each fillet enough space in the pan to breathe. If you’re working with a smaller pan or cooking for a crowd, fry in batches. Yes, it takes a bit longer, but trust us, the results are worth the patience.
Plus, overcrowding also makes flipping more difficult and increases the chances of the coating falling off.
Using the Wrong Type of Oil
Not all oils are created equal—especially when it comes to frying. Olive oil, for instance, has a low smoke point and can burn easily, giving the fish a bitter flavor.
Best oils for frying tilapia:
- Vegetable oil
- Canola oil
- Peanut oil
- Sunflower oil
These oils have high smoke points (above 400°F), ensuring that your fish gets crispy without burning. They’re also neutral in flavor, so they won’t overpower the delicate taste of tilapia.
Avoid butter or margarine—they burn quickly and make the fish soggy.
Skipping the Marination Step
We get it—you’re hungry and want food now. But skipping marination is like leaving out the chorus in your favorite song. Sure, the dish will still be edible, but it won’t be memorable.
Marination not only infuses flavor but also tenderizes the fillets. Even a quick 15-minute soak in lemon juice and spices makes a noticeable difference. Without it, you risk bland fish that tastes flat, even with a great crust.
Best Sides to Serve with Fried Tilapia
Pairing your tilapia with the right side dish can turn a simple meal into a full-blown feast. Here are some delicious ideas to complete your plate and complement the crispy fish.
Classic Rice Dishes
Rice and fish are a match made in heaven. The starchy goodness of rice balances the crispiness and flavor of fried tilapia perfectly. Here are a few tried-and-true rice options:
- Garlic butter rice – Simple, fragrant, and buttery.
- Coconut rice – Adds a hint of sweetness that complements the savory fish.
- Jollof rice – A spicy West African classic that pairs beautifully with fried fish.
- Fried rice – Add some veggies and eggs for a satisfying one-bowl meal.
Rice is also perfect for soaking up any drippings or sauce from the fish, making every bite deliciously moist and flavorful.
Fresh Salads
After a hearty piece of fried tilapia, a crisp, refreshing salad is the perfect palate cleanser. Go for something light and acidic to cut through the richness of the fried crust:
- Cucumber and tomato salad with vinaigrette
- Coleslaw – Classic and crunchy with a creamy or vinegar-based dressing.
- Avocado and corn salad – Creamy, sweet, and slightly tangy.
- Arugula salad with lemon dressing – Peppery and zesty, adds a gourmet touch.
Salads not only offer great texture contrast but also make the meal feel more balanced and healthy.
Dips and Sauces That Work Best
Dipping sauces are where fried tilapia gets elevated. You’ve already put in the work—now let’s add some saucy magic:
- Tartar Sauce – Creamy and tangy with pickles, it’s a classic for a reason.
- Spicy Mayo – Mix mayonnaise with sriracha for a simple kick.
- Garlic Aioli – Adds richness and a gourmet feel.
- Chili Lime Sauce – A tangy-spicy explosion perfect for fish tacos.
You can even create a DIY sauce station if you’re serving a crowd. Let people choose their favorite flavors to personalize their plates.
How to Make it Extra Crispy
Crispy fried fish isn’t just about luck—it’s about technique and a few kitchen secrets. If you’re after that irresistible crunch that makes people think you ordered takeout from a fancy restaurant, here’s how to get it.
The Secret Ingredient for Crispiness
Want to know the not-so-secret weapon in making fried fish next-level crispy? Cornmeal. Yep, mixing cornmeal into your flour coating gives you a golden, textured crust that stays crunchy longer.
Use a 1:1 ratio of flour to cornmeal. The fine grit of the cornmeal creates air pockets when fried, which results in a light, crispy exterior that won’t get soggy fast.
You can also toss in a pinch of baking powder for extra lift—it helps the coating puff up slightly during frying.
Double Dredging Technique
This is the real game-changer. It might seem like an extra step, but it delivers restaurant-quality results.
Here’s how:
- Coat the fish in seasoned flour/cornmeal mixture.
- Dip it in the egg wash.
- Return to the flour/cornmeal mix and coat again.
Let it rest for a few minutes so the coating sets. This technique builds a thicker, crunchier crust that clings to the fish, even when sliced or dipped.
Right Temperature for Frying
We’ve mentioned it earlier, but it’s worth repeating: oil temperature matters. The sweet spot for frying tilapia is 350°F to 375°F.
Too hot? The outside burns while the inside stays raw.
Too cool? The fish absorbs oil like a sponge, becoming greasy and limp.
If you’re frying a big batch, be sure to let the oil reheat between rounds. Use a thermometer if you can, or do the flour test—sprinkle a bit of flour into the oil; if it sizzles and dances, you’re good to go.
Air Fryer vs Deep Fryer vs Pan Frying
Fried tilapia is delicious no matter how you cook it, but depending on your kitchen tools and health preferences, the cooking method can make a big difference in texture, flavor, and cleanup. Let’s break down the three most common frying methods so you can pick what’s best for your setup.
Pros and Cons of Each Method
Pan Frying (Traditional Method)
- Pros:
- Uses less oil
- Easier to manage at home
- Great flavor and crispy crust
- Cons:
- Can be messy (oil splatter)
- Requires constant monitoring
Deep Frying
- Pros:
- Delivers ultra-crispy crust
- Even cooking due to submersion
- Cons:
- Uses a lot of oil
- Messy cleanup
- Higher fat content
Air Frying
- Pros:
- Healthier (less oil)
- No messy oil splatter
- Quick and easy cleanup
- Cons:
- Slightly drier texture
- Crust may not be as crisp as deep frying
Which One Gives the Best Texture?
- Best Crisp: Deep frying wins hands-down for crunch, but pan-frying is a close second.
- Best for Health-Conscious Cooks: Air frying is your go-to. You can achieve a decent crunch with little to no oil if you pre-coat the fish and spray it lightly.
- Best Balance: Pan frying gives you a crisp crust without the guilt or hassle of deep frying, making it ideal for everyday cooking.
Storing and Reheating Leftovers
Fried tilapia is best eaten fresh, but if you’ve got leftovers, don’t worry—they can be just as tasty the next day with proper storage and reheating techniques.
How to Store Fried Tilapia
- Cool First: Let the fish cool completely before storing to prevent condensation (which causes sogginess).
- Use Airtight Containers: Place the fillets in a single layer in an airtight container. If stacking, use parchment paper between layers to keep them from sticking.
- Refrigerate: Store in the fridge for up to 3 days.
- Freeze for Later: If you want to keep it longer, freeze the fillets wrapped individually in plastic wrap, then place in a freezer-safe bag. They’ll keep for up to 2 months.
Reheating Without Losing Crispiness
Microwaving is fast but turns the crust into mush—skip it unless you have no other choice.
Here are better options:
- Oven Method:
- Preheat to 375°F (190°C).
- Place the fish on a wire rack over a baking tray.
- Bake for 10–12 minutes until hot and crispy.
- Air Fryer Method:
- Set to 350°F (175°C).
- Heat for 4–5 minutes.
- Stovetop:
- Heat a non-stick pan with a splash of oil.
- Reheat fillets on medium heat for 2–3 minutes per side.
All methods help restore some crunch while keeping the inside tender.
Nutritional Breakdown
Wondering how healthy fried tilapia really is? It depends on the ingredients and cooking method you choose. Here’s a general idea of what you’re eating.
Calories per Serving
A typical serving (one medium-sized fried tilapia fillet) has approximately:
- Calories: 200–300 (depending on size and amount of oil absorbed)
- Total Fat: 10–15g
- Protein: 22–25g
- Carbohydrates: 8–12g (from the coating)
Using an air fryer or pan-frying with minimal oil can reduce calories significantly.
Macronutrients (Protein, Fats, Carbs)
Protein
Tilapia is a lean protein, making it ideal for muscle growth and low-fat diets. Each fillet provides about 23g of protein, which helps with satiety and energy.
Fats
Fried tilapia contains moderate fat due to the frying oil. To make it leaner, use healthier oils like avocado oil or olive oil (for air frying or baking).
Carbohydrates
The carbs mostly come from the coating—flour and cornmeal. Want to go low-carb? Skip the coating or use almond flour and crushed pork rinds as a keto-friendly alternative.
Tips from Home Cooks and Chefs
We’ve all got our tricks in the kitchen, and when it comes to fried tilapia, home cooks and chefs alike have favorite hacks and flavor variations. Here are a few crowd-pleasers to try.
Flavor Variations
- Spicy Cajun Style: Add Cajun seasoning to your flour mix and serve with hot sauce.
- Lemon-Herb Crust: Mix dried parsley, thyme, and lemon zest into the breading.
- Garlic-Parmesan: Toss grated parmesan into your cornmeal mix for a cheesy, umami kick.
Want an Asian twist? Use a soy sauce marinade and pair with sweet chili dipping sauce.
Cultural Twists on Fried Tilapia
- Nigerian-Style: Marinate with ginger, garlic, and spicy pepper mix, then deep-fry whole tilapia.
- Filipino “Piniritong Tilapia”: Usually fried whole, served with rice and toyomansi (soy sauce with calamansi).
- Caribbean-Inspired: Marinate in lime juice, thyme, and allspice; serve with plantains or rice and peas.
These global takes give you a whole new appreciation for just how versatile tilapia can be.
FAQs about Fried Tilapia Recipe
Can I use frozen tilapia fillets?
Yes, you can! Just make sure they’re fully thawed and patted dry before marinating or frying. Excess moisture from frozen fillets can ruin the crispiness.
What oil is best for frying fish?
Stick to high smoke-point oils like vegetable, canola, or peanut oil. They heat well, fry evenly, and won’t overpower the fish’s flavor.
How do I know when tilapia is fully cooked?
The fillets should be golden-brown and flake easily with a fork. Internally, they should reach 145°F (63°C). The meat turns white and opaque when done.
Can I make this recipe gluten-free?
Absolutely. Use gluten-free flour and cornmeal, or replace the flour with almond flour or crushed gluten-free crackers. Also, check that your seasonings and sauces are gluten-free.
How do I keep the fish from sticking to the pan?
Use a non-stick or well-seasoned cast iron skillet. Make sure the oil is hot enough before adding the fish, and don’t move the fillets around too much while frying.
Conclusion
There you have it—a full, no-nonsense, step-by-step guide to making the perfect fried tilapia. Whether you’re new to cooking or a seasoned home chef looking for a foolproof go-to recipe, this dish never disappoints.
From choosing the right fillets to getting that golden, crispy crust and pairing it with sides that sing, every step adds up to something crave-worthy. It’s quick enough for a weeknight and satisfying enough for Sunday dinner. Plus, it’s flexible—you can switch up the flavors, the sides, even the cooking method to match your taste and lifestyle.
The next time you’re standing in your kitchen wondering what to cook with those tilapia fillets, you’ll know exactly what to do—and how to do it right.


