Dilly Beans Recipe: Crunchy, tangy, and packed with flavor—dilly beans are a pickled delight that turns your garden green beans into a snack-worthy masterpiece. Whether you’re preserving a summer harvest or just craving a zesty, crunchy snack, this guide will walk you through everything you need to know about making the best homemade dilly beans. From gathering the ingredients to sealing your final jar, we’ve got you covered.
Let’s get into the jars and turn up the flavor!
What Are Dilly Beans?
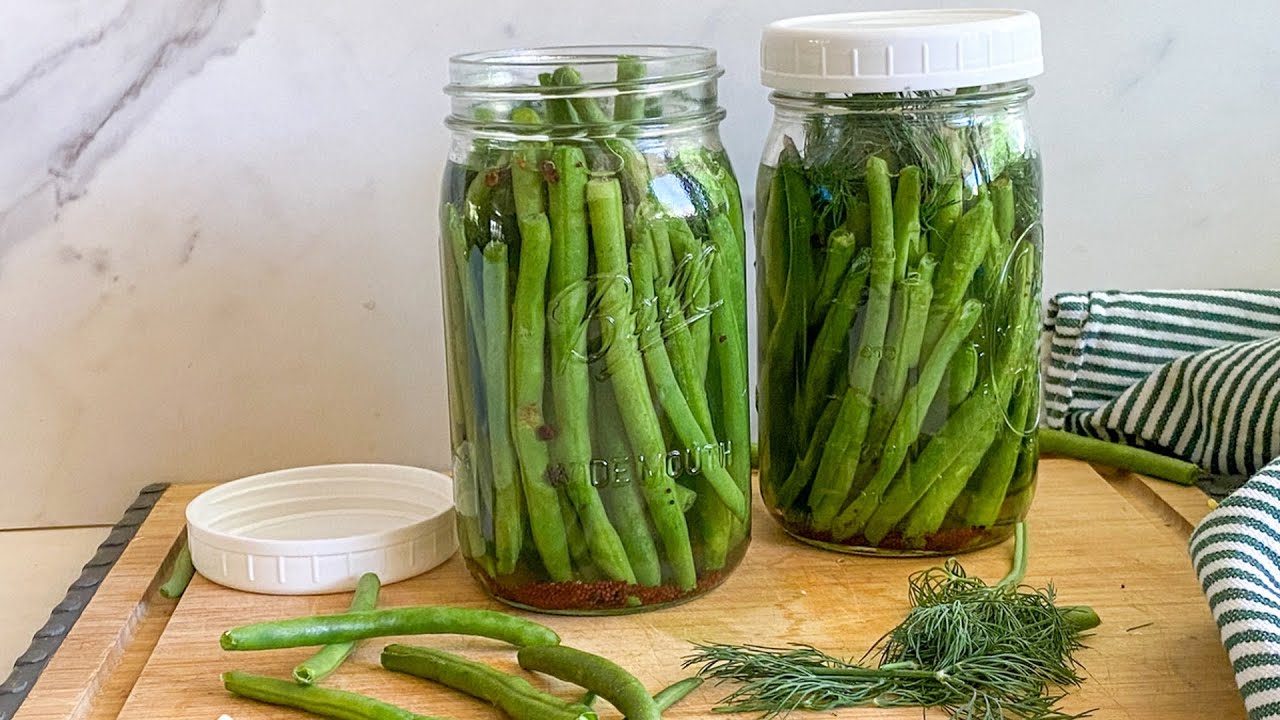
Dilly beans are essentially pickled green beans, infused with vinegar, garlic, dill, and spices. The name “dilly” comes from the generous use of dill weed and dill seed in the pickling process. These beans are crisp, sour, and delightfully garlicky—a favorite in Southern kitchens, farmers’ markets, and homes where canning is a cherished tradition.
Unlike standard pickles made from cucumbers, dilly beans offer a firmer crunch and a uniquely bold flavor that makes them stand out in any pickle platter. They’re often served as snacks, appetizers, garnishes for Bloody Marys, or even tossed into salads for a zesty twist.
What makes dilly beans even more lovable is how easy they are to make at home. Even if you’re new to canning or pickling, this recipe is beginner-friendly and foolproof with the right instructions.
Why You’ll Love This Recipe
- Crunch Factor: Forget soggy pickles. These beans stay crispy and fresh for months when done right.
- Flavor Bomb: Think garlic, dill, vinegar, and a hit of heat—your taste buds are in for a treat.
- Great for Gifting: A jar of homemade dilly beans makes for a thoughtful and unique gift.
- Beginner-Friendly: You don’t need a canning degree to make these work. Just follow the steps, and you’re good to go.
- Customizable: Want spicy? Add red pepper flakes. Like it super garlicky? Toss in an extra clove. You’re the boss of your brine.
Whether you’re preserving your garden’s bounty or just love pickled snacks, once you try this recipe, you’ll want to keep a few jars on hand year-round.
Ingredients You’ll Need
Before diving into the process, it’s essential to have all your ingredients prepped and ready. Here’s everything you’ll need to whip up a few jars of these crunchy, tangy delights.
Fresh Green Beans – The Star of the Show
Your beans are the heart and soul of this recipe. Opt for fresh, crisp green beans—the kind that snap when you bend them. Here are some quick tips:
- Choose medium-thin beans; overly thick beans may not pickle evenly.
- Avoid wilted or spotted beans.
- Aim for 6 to 7 cups of green beans for 4 pint-sized jars.
If you grow your own green beans, harvest them young. Farmers’ markets are another great source for fresh, local produce. The fresher your beans, the crisper your final product.
Essential Pickling Ingredients
Now let’s build that mouthwatering brine and flavor profile. Here’s your pickling pantry list:
- 4 cups distilled white vinegar (5% acidity): This is your main preservative and flavor booster.
- 4 cups water: Dilutes the vinegar so it’s not overpowering.
- 1/4 cup pickling or kosher salt: Essential for the right salt balance.
- 4 tsp dill seed: Adds the signature “dilly” flavor.
- 4 garlic cloves (1 per jar): Crushed for that bold garlic kick.
- 1 tsp red pepper flakes (optional): Adds a little heat.
- Black peppercorns (optional): For a deeper, spiced flavor.
- Mustard seeds (optional): Gives a nice tangy undertone.
These ingredients are typically enough for 4 pint jars. You can scale up or down depending on how many jars you’re making.
Optional Add-ins for Extra Flavor
Want to make your dilly beans unique? Feel free to toss in a few extras:
- Bay leaves: For added herbal depth.
- Fresh dill sprigs: For aesthetics and stronger dill flavor.
- Jalapeño slices: For a spicy Southern twist.
- Coriander seeds: Lends a citrusy flavor to the brine.
These optional ingredients aren’t required but definitely help in customizing the flavor. You can experiment with each batch and find your personal favorite combo.
Equipment You’ll Need
Pickling doesn’t require fancy gadgets, but there are a few key tools that will make your life easier and your jars safer.
Kitchen Tools for Success
Here’s what you’ll need:
- Large pot for boiling the brine
- Tongs or jar lifter for safe handling
- Funnel for mess-free jar filling
- Measuring cups and spoons
- Knife and cutting board for trimming beans
- Clean towel or cloth for wiping jar rims
All of these are standard kitchen tools, but they’ll make your pickling process smoother and cleaner.
Canning Jars and Lids
Use pint-size (16 oz) mason jars with two-part lids (lid and ring). Make sure:
- The jars are free of cracks or chips
- The lids are new and not rusted or dented
- You have 4 jars (or more if doubling the recipe)
You can find canning jars in most grocery stores, hardware stores, or online. Ball and Kerr are reputable brands.
Sterilization Basics
Sterilizing your jars is key to avoiding spoilage. Here’s a quick method:
- Wash jars and lids in hot, soapy water.
- Place jars in a large pot of water and bring to a boil.
- Boil for 10 minutes, then remove with tongs and place upside down on a clean towel.
- Keep them warm until ready to fill—this prevents the jars from cracking when adding hot brine.
Never skip this step. A dirty jar can ruin a whole batch.
Prepping Your Green Beans
Now that you’ve got your tools and ingredients ready, it’s time to prep the green beans for pickling.
Washing and Trimming
Start with a thorough rinse to remove any dirt or debris. Here’s the step-by-step:
- Rinse beans under cool water in a colander.
- Snap or cut off the stem ends, leaving the tail ends if you like.
- Aim for uniformity: all beans should be similar in length to fit upright in the jars.
Some people like to trim both ends for a more polished look—it’s totally up to you.
How to Keep Them Crisp
Crispness is king when it comes to pickled beans. Here’s how to preserve that snap:
- Use fresh beans: Older beans will be rubbery.
- Quick chill: Soak the beans in ice water for 15–30 minutes before pickling.
- Skip overcooking: Avoid blanching unless you’re storing for long-term shelf life (and even then, it should be brief—about 1 minute).
The crunch is what sets dilly beans apart from soggy store-bought pickles, so treat your beans right!
Blanching – Yes or No?
Blanching is optional in this recipe. Some pros say it helps with sterilization and color retention, while others skip it for a firmer crunch.
- To blanch: Boil beans for 1 minute, then immediately dunk them in ice water to stop cooking.
- To skip: Just rinse and pack raw beans into your sterilized jars.
If you plan on refrigerating your pickles and eating them within a month, skipping blanching is perfectly fine. If you’re canning for long-term storage, blanching might be worth considering.
Step-by-Step Guide to Making Dilly Beans
Now that your beans are prepped, your jars are sterilized, and your ingredients are ready, it’s time to dive into the fun part—putting everything together! This step-by-step guide will ensure your dilly beans are not only delicious but also safe for storing and enjoying for months.
Step 1 – Preparing the Brine
The brine is the magical potion that transforms plain green beans into tangy, savory, irresistible dilly beans.
Ingredients for Brine:
- 4 cups white distilled vinegar (5% acidity)
- 4 cups water
- 1/4 cup kosher or pickling salt
Instructions:
- In a large pot, combine vinegar, water, and salt.
- Bring to a boil over medium-high heat, stirring until the salt fully dissolves.
- Once it reaches a rolling boil, reduce the heat and keep the brine hot while you prepare your jars.
The brine must be hot when poured over the green beans to ensure proper pickling and sterilization. You can also taste and adjust the brine before boiling—if you like it tangier, add a little more vinegar. Like it salty? A pinch more salt won’t hurt.
Step 2 – Packing the Jars
Packing the jars might be the most satisfying part of this process—lining up your beans like little green soldiers!
Packing Instructions:
- Place one garlic clove, 1 tsp dill seed, a pinch of red pepper flakes (optional), and 3–4 peppercorns into the bottom of each sterilized pint jar.
- Add green beans upright, fitting as many as you can. Pack them tightly but don’t force or break them.
- If needed, cut some beans shorter to make sure the tops sit just below the jar rim.
Pro Tip: Use a canning funnel to keep the jar rim clean while filling.
This part is a bit like Tetris. The more efficiently you stack the beans, the more you can fit in. Make sure everything is snug, but don’t smash the beans—gentle packing is key.
Step 3 – Adding the Brine
This is where the magic really begins. Your spicy, garlicky, salty brine will bring everything together.
How to Add Brine:
- Using a ladle and a funnel, carefully pour the hot brine into each jar, covering the beans completely.
- Leave about 1/2 inch of headspace at the top to allow for expansion and sealing.
- Tap the jars gently on a towel or use a bubble remover tool to release any trapped air bubbles.
- Wipe the rims of the jars with a clean, damp cloth to remove any brine or residue.
- Place the lids on and tighten the bands to fingertip-tight (don’t overtighten).
The heat of the brine will slightly cook the beans and help infuse the flavors. The longer they sit, the more flavorful they’ll become.
Step 4 – Sealing and Processing the Jars
If you want to store your dilly beans for the long haul (up to a year), you’ll need to process them using a boiling water bath.
Boiling Water Bath Instructions:
- Fill a large canning pot or deep stockpot with enough water to cover the jars by at least 1 inch.
- Bring the water to a gentle boil.
- Carefully lower the jars into the water using a jar lifter.
- Process for 10 minutes (adjust for altitude if needed).
- Remove the jars and place them on a towel-lined surface. Let them cool undisturbed for 12–24 hours.
As the jars cool, you’ll hear the signature “pop” of the lids sealing. This sound is music to any home canner’s ears!
How to Check Seals:
- Press the center of the lid—if it doesn’t flex or pop, it’s sealed.
- If a jar doesn’t seal, refrigerate and eat it first.
Sealed jars can be stored in a cool, dark place like a pantry or basement. Unsealed jars must be refrigerated and used within a few weeks.
Step 5 – Cooling and Storing Properly
Your jars are sealed, your kitchen smells like garlic and vinegar, and now it’s time to store your little green gems.
Storage Tips:
- Let jars sit for at least 1–2 weeks before opening. This allows flavors to fully develop.
- Store sealed jars in a cool, dark place for up to 12 months.
- Refrigerate jars after opening.
Shelf Life:
- Unopened jars: Up to 12 months
- Opened jars: 1–2 months in the refrigerator
The longer you let the dilly beans sit, the stronger and more delicious the flavor. Try to resist the urge to eat them too soon—though we won’t judge if you can’t help yourself!
Troubleshooting Common Mistakes
Let’s face it—sometimes things don’t go as planned. Here are a few common mistakes and how to fix or avoid them:
| Problem | Cause | Fix/Prevention |
|---|---|---|
| Mushy beans | Overcooking or old beans | Use fresh beans and skip blanching |
| Lids didn’t seal | Improper sterilization or sealing method | Reprocess immediately or refrigerate jar |
| Cloudy brine | Impurities in salt or unfiltered water | Use pickling salt and filtered/distilled water |
| Beans float in jar | Loose packing or air bubbles | Pack beans tightly and remove bubbles |
| Lack of flavor | Not enough time to pickle | Let sit at least 1–2 weeks before eating |
Dilly beans are more than just a tasty snack—they’re a DIY treat that turns a humble green bean into a pickle jar rock star. Now that your jars are sealed and your pantry is stocked, you’ll be reaching for these crunchy bites every chance you get.
Serving Suggestions and Pairings
Once your dilly beans are ready to eat, the possibilities are endless. These flavorful, crunchy snacks can enhance just about any dish or occasion. Don’t let them just sit in your pantry—put them to work!
Perfect As a Snack
First things first—eat them straight out of the jar. Seriously, these beans are that good.
- They’re a low-calorie, crunchy snack alternative to chips.
- The vinegar tang and garlicky punch satisfy salty cravings without the guilt.
- Great for lunchboxes, picnics, or late-night munchies.
Their crunch is unmatched, and they bring a brightness to your palate that few other snacks can compete with. Once you start, you might find yourself finishing a whole jar without realizing it.
Jazz Up Your Charcuterie Board
Dilly beans are a secret weapon for charcuterie and snack boards. Here’s why:
- They add color and height to the board.
- Their zesty flavor pairs beautifully with cheeses, olives, cured meats, and spreads.
- The garlicky bite balances the richness of creamy cheeses like Brie or goat cheese.
Arrange them in a small dish or fan them out across the board for a rustic, homey look that screams gourmet without trying too hard.
Cocktail Garnish with a Twist
Move over celery—dilly beans make a killer garnish for Bloody Marys.
- They add a crunchy, vinegary element that contrasts with the tomato base.
- They double as a stir stick!
- Add them alongside a pickle spear, olives, or a shrimp for a full-on cocktail skewer.
You can even drop a few into a dirty martini or a gin and tonic for an unexpected twist.
In Salads and Sandwiches
Add chopped dilly beans to:
- Potato salads for extra crunch
- Pasta salads for a vinegar kick
- Tuna salad for some tang
- Sandwiches and burgers for a flavor bomb
Their acidity cuts through creamy or fatty ingredients, balancing your dishes in the most delicious way. Try them once in a grilled cheese or a ham sandwich—you’ll never go back.
How to Customize Your Dilly Beans
One of the best parts about making dilly beans is how versatile the recipe is. You can personalize the flavor, heat level, and even presentation to make them uniquely yours.
Make Them Spicy
Love heat? It’s easy to crank things up.
- Add more red pepper flakes to each jar.
- Slice and add jalapeños, serranos, or even habaneros for a fiery kick.
- Try whole dried chiles in each jar.
Spicy dilly beans are especially popular in Southern kitchens and pair great with cold beers or tangy cocktails.
Try Different Vinegars
White vinegar is classic, but you can switch things up with other vinegars:
- Apple cider vinegar: Adds sweetness and a fruitier flavor.
- Rice vinegar: Milder and a bit sweet, great for a softer brine.
- White wine vinegar: Elegant and slightly floral.
Mix and match or do a taste test to find your favorite combo. Just make sure any vinegar you use has at least 5% acidity for safe canning.
Add Fresh Herbs
Take the dill flavor up a notch with fresh herbs:
- Fresh dill sprigs: Boost that classic taste and make jars look prettier.
- Tarragon or thyme: Add herbal complexity.
- Basil or oregano: For a Mediterranean twist.
Herbs not only enhance the flavor but also elevate the aesthetic—making your jars gift-worthy.
Sweet Dilly Beans? Yes, Please
Want a slightly sweet version? Add 1–2 tablespoons of sugar to your brine. The sugar softens the vinegar tang and creates a more rounded flavor.
This version is great for:
- Kids or vinegar-sensitive palates
- Holiday charcuterie boards
- Balancing spicy meals
Play around with brown sugar or honey for a deeper, more unique sweetness.
Dilly Beans for Gifting and Sharing
Homemade dilly beans make incredible gifts, especially around holidays, harvest season, or housewarmings. Here’s how to present them like a pro.
Presentation Matters
Dress up your jars to make them stand out:
- Add a twine bow or ribbon around the jar lid.
- Include a handwritten label or tag with the date and flavor variation.
- Use fabric squares under the lid ring for a rustic touch.
This small bit of effort turns a humble jar into a thoughtful, personal gift.
Perfect for the Holidays
Dilly beans are ideal for:
- Thanksgiving appetizer platters
- Christmas gift baskets
- New Year’s Eve charcuterie boards
- Hostess gifts during party season
They offer a homemade touch that shows you care, plus they’re shelf-stable and don’t require refrigeration right away.
Create a Pickle Gift Set
Bundle your dilly beans with other homemade pickles:
- Pickled carrots
- Spicy okra
- Pickled onions
- Sweet bread and butter pickles
Add them all to a basket with crackers, cheeses, and wine or beer, and you’ve got a show-stopping gift for any food lover.
The Health Benefits of Dilly Beans
Not only are dilly beans delicious and fun to make—they’re also surprisingly healthy. Let’s take a look at why you can snack guilt-free.
Low in Calories, High in Crunch
One cup of dilly beans has:
- Fewer than 50 calories
- Virtually no fat
- Minimal carbs
You get that satisfying crunch without the greasy aftermath of chips or crackers. Perfect for mindful munching!
Vinegar’s Digestive Boost
The vinegar in pickles, especially unfiltered versions, is known to:
- Aid digestion
- Support healthy gut bacteria
- Help stabilize blood sugar
It also satisfies sour cravings, making it easier to avoid junk food.
Rich in Antioxidants
Green beans are naturally rich in:
- Vitamin C
- Beta-carotene
- Flavonoids
Pickling doesn’t strip all of these away. You still get some immune-boosting, cell-protecting goodness in every bite.
Fermented vs. Quick Pickles
While this recipe is for quick-pickled (vinegar-based) beans, fermented dilly beans offer even more gut-friendly probiotics.
- Fermentation uses salt and time instead of vinegar.
- It requires more care but boosts nutritional value.
Either way, you’re choosing a snack that’s far better than processed options on the shelf.
FAQs about Dilly Beans Recipe
1. How long do dilly beans need to sit before eating?
For the best flavor, let your dilly beans sit for at least 1 to 2 weeks after canning. This gives the vinegar, garlic, and dill time to infuse the beans thoroughly. If you open them too soon, they may taste more like vinegary beans than true pickles. But once that flavor develops, it’s worth the wait!
2. Can I make dilly beans without canning?
Absolutely! If you don’t want to go through the water bath canning process, you can make refrigerator dilly beans. Just follow the same steps, skip the boiling water bath, and store your filled jars in the fridge. They’ll last up to 2 months and still develop a great flavor.
3. Why are my dilly beans mushy?
Mushy beans are usually the result of overcooking or using old beans. To avoid this:
- Use fresh, firm green beans
- Avoid blanching unless necessary
- Keep jars in a cool, dark place
Also, be cautious not to process the jars for too long in the boiling water bath.
4. Can I reuse old pickle jars for dilly beans?
While reusing jars is tempting, it’s best to use proper canning jars like Ball or Kerr brand. These jars are specifically designed to withstand the heat of processing. Always use new lids to ensure a proper seal. Reusing old pickle jars or lids can increase the risk of spoilage or failed seals.
5. What’s the difference between pickled and fermented dilly beans?
Pickled dilly beans (like this recipe) use vinegar for preservation, which gives them their sharp tang and allows for quick pickling. Fermented dilly beans rely on natural bacteria and salt over time to create lactic acid, which gives a milder tang and probiotic benefits. Fermentation takes longer and requires more care, but it’s a great alternative for those looking for gut-health benefits.
Conclusion
We’ve walked you through every step of the process—from selecting the freshest beans to packing and sealing your jars with love. We’ve explored ways to customize the flavor to suit your taste buds and how to make your pickles pop as party snacks, cocktail garnishes, salad toppings, and even thoughtful gifts.
What’s most rewarding about making dilly beans isn’t just the final crunch when you bite into one—it’s the entire process. The smell of the brine, the careful packing of the jars, the excitement of hearing the “pop” as the lids seal. It’s a form of kitchen magic that connects us to tradition while giving us the freedom to create something uniquely our own.
So why not start today? Grab some green beans, clear off some counter space, and get ready to impress yourself—and everyone else—with your homemade dilly beans. Trust us, your taste buds will thank you.


