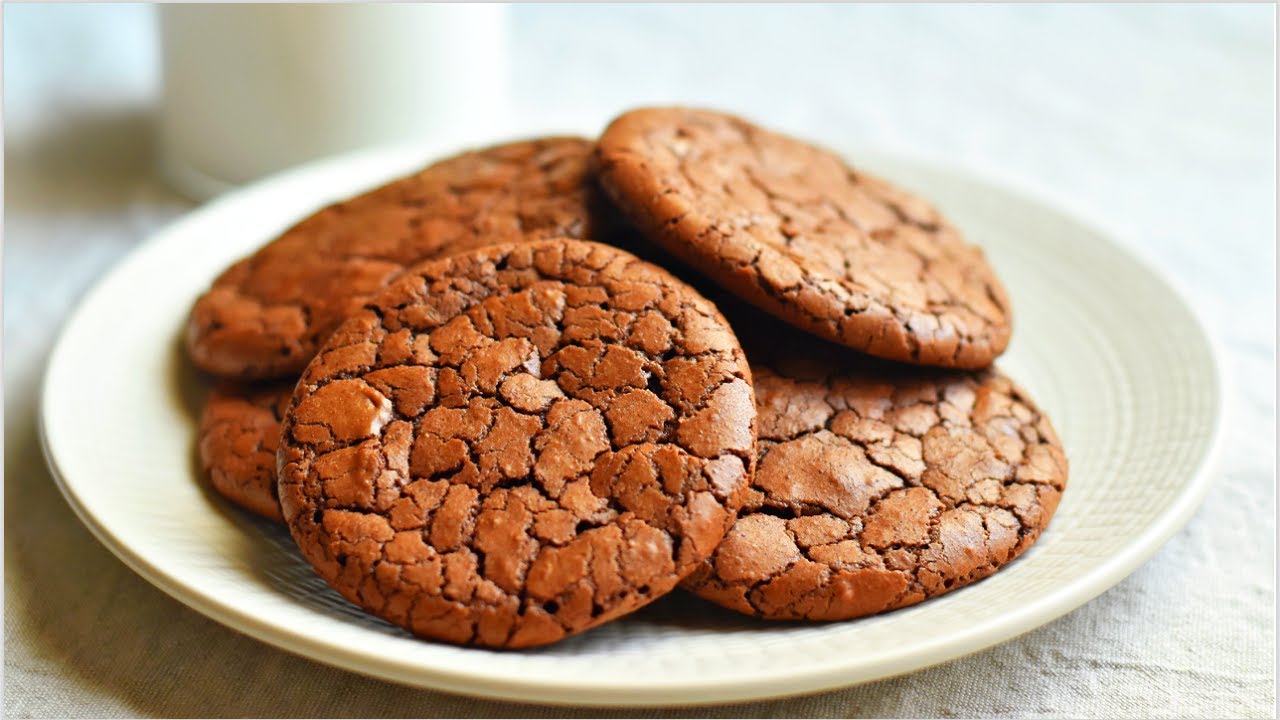
Cookie Brownie Recipe: If you’ve ever found yourself torn between a fudgy brownie and a chewy cookie, you’re not alone. The great news is—you don’t have to choose! Cookie brownies, sometimes called “brookies,” combine the richness of brownies with the classic sweetness of cookies. They’re the ultimate dessert mash-up, loved by kids, adults, and anyone who appreciates a gooey, chocolatey treat.
In this guide, we’ll walk through everything you need to know to make bakery-style cookie brownies at home. From gathering the right ingredients to following a detailed step-by-step baking process, you’ll have the confidence to whip up a batch that’s irresistible. We’ll also share tips to avoid common baking mistakes and offer fun variations to try. By the end, you’ll have the perfect recipe to wow your family, impress guests, or satisfy your own sweet cravings.
Why Cookie Brownies Are the Perfect Dessert
When it comes to desserts, some people prefer the dense, rich bite of a brownie, while others lean toward the soft, chewy goodness of a cookie. Cookie brownies bring the best of both worlds together into one pan. Imagine biting into a dessert where the bottom layer is fudgy and chocolate-packed, while the top has that golden, slightly crisp cookie finish. It’s indulgence in every bite.
Cookie brownies are also incredibly versatile. You can serve them warm with a scoop of vanilla ice cream for a decadent dessert, pack them into lunch boxes for a sweet midday pick-me-up, or bring them to potlucks where they’re guaranteed to disappear fast. Unlike some desserts that require fancy techniques, this recipe is beginner-friendly. Even if you’ve never baked before, you’ll be able to create a batch that looks and tastes like it came from a bakery.
A Sweet Blend of Two Classics
Brownies and cookies each have a rich history in baking, and combining them is like blending two timeless classics. Brownies originated in the United States in the late 19th century, quickly becoming a staple for chocolate lovers. Cookies, on the other hand, have been around for centuries, evolving from simple baked biscuits into the countless variations we know today.
When these two desserts meet, magic happens. The soft brownie layer provides a rich base, while the cookie dough adds texture and sweetness on top. Some recipes swirl the two batters together, while others layer them neatly for a striking contrast. No matter how you do it, the result is always crowd-pleasing.
Ingredients You’ll Need
Getting the ingredients right is the key to successful baking. Cookie brownies require a balance of both brownie and cookie components, and using fresh, high-quality ingredients will give you the best results.
Dry Ingredients for the Brownie Base
- 1 cup all-purpose flour
- 1 cup unsweetened cocoa powder
- 2 cups granulated sugar
- 1 teaspoon baking powder
- ½ teaspoon salt
These form the foundation of the brownie base. The cocoa powder gives it that deep chocolate flavor, while flour provides structure. Baking powder helps the brownies rise slightly, preventing them from being too dense.
Wet Ingredients for the Brownie Batter
- 1 cup melted unsalted butter
- 3 large eggs
- 2 teaspoons vanilla extract
The wet ingredients bind everything together and add richness. Butter provides that melt-in-your-mouth texture, while eggs create stability and structure. Vanilla enhances the flavor, balancing out the bitterness of cocoa.
Ingredients for the Cookie Layer
- 1 cup all-purpose flour
- ½ teaspoon baking soda
- ½ teaspoon salt
- ½ cup softened unsalted butter
- ½ cup brown sugar
- ½ cup granulated sugar
- 1 large egg
- 1 teaspoon vanilla extract
- 1 cup chocolate chips
The cookie dough layer is what sets brookies apart. Brown sugar gives cookies their chewy texture, while granulated sugar keeps them crisp. Chocolate chips are the star of this layer, melting slightly during baking for pockets of gooey goodness.
Optional Add-Ins for Extra Flavor
- Nuts (walnuts, pecans, or almonds)
- White chocolate chunks
- Peanut butter swirls
- Caramel drizzle
- Sea salt flakes
Optional add-ins let you customize your cookie brownies. For example, sprinkling sea salt on top before baking can create an irresistible salty-sweet flavor balance.
Tools and Equipment Required
Even the best ingredients won’t shine without the right tools. Thankfully, cookie brownies don’t need anything fancy, and you probably already have most of these items in your kitchen.
Baking Essentials You Can’t Skip
- Mixing bowls (large and medium)
- Measuring cups and spoons
- Whisk and spatula
- 9×13-inch baking pan
- Parchment paper
- Electric mixer (optional, but helpful for cookie dough)
The baking pan size is especially important. Using the wrong size can affect the thickness of your layers and alter baking time. Parchment paper ensures your brownies don’t stick to the pan, making it easier to remove and cut them neatly.
Optional Tools That Make Baking Easier
- Stand mixer for quicker mixing
- Digital kitchen scale for accuracy
- Cookie scoop for portioning dough evenly
- Cooling rack to speed up the cooling process
While not strictly necessary, these tools can save time and help you achieve professional-level results. For instance, using a digital scale removes the guesswork from measuring, which is especially helpful in baking since precision matters.
Step-by-Step Guide to Making Cookie Brownies
Now comes the fun part—baking! Cookie brownies may look impressive, but the process is straightforward if you follow each step carefully.
Step 1 – Preparing the Baking Pan
Before you even start mixing, prep your baking pan. Line a 9×13-inch pan with parchment paper, leaving a little overhang on the sides. This makes it easy to lift the brownies out once they’re baked. Grease the paper lightly with butter or cooking spray to prevent sticking.
Preheating your oven is another crucial step. Set it to 350°F (175°C) so it’s ready when your batter is. Baking in a properly preheated oven ensures even cooking and prevents underbaked centers.
Step 2 – Mixing the Brownie Batter
Start with the brownie base since it will form the foundation of your dessert. In a large mixing bowl, whisk together the dry ingredients—flour, cocoa powder, sugar, baking powder, and salt—until well combined. This helps to evenly distribute the baking powder and salt, ensuring a consistent texture.
Next, add the melted butter, eggs, and vanilla extract. Stir gently with a spatula or whisk until just combined. Be careful not to overmix—this is a common mistake that can make your brownies tough instead of fudgy. The batter should look thick, glossy, and rich.
If you want a fudgier texture, try adding an extra egg yolk or a tablespoon of espresso powder to deepen the chocolate flavor. For a cakier brownie, add a little extra flour. Once mixed, set the batter aside—it’s ready to be spread into your prepared pan once the cookie dough is ready.
Step 3 – Preparing the Cookie Dough
Now for the top layer—the cookie dough. In a medium-sized bowl, whisk together flour, baking soda, and salt. In a separate bowl, cream together softened butter, brown sugar, and granulated sugar until light and fluffy. An electric mixer works best here, but you can use a wooden spoon with some extra effort.
Once creamed, beat in the egg and vanilla extract until smooth. Slowly add the dry mixture into the wet ingredients, mixing just until combined. Finally, fold in the chocolate chips using a spatula. Resist the urge to overmix—cookie dough should remain soft and slightly sticky.
For an extra twist, you can swap chocolate chips with white chocolate, M&Ms, or peanut butter chips. If you like nuts, fold in a handful of chopped walnuts for added crunch.
Step 4 – Layering Brownie and Cookie Mix
This is where the magic happens. Pour the brownie batter into your prepared pan and spread it evenly with a spatula. Make sure it reaches the corners so the base is consistent.
Next, scoop the cookie dough by spoonfuls and drop it across the brownie layer. Don’t worry if it doesn’t completely cover the top—the dough will spread as it bakes, creating that marbled brookie look. If you prefer a cleaner layered effect, gently press the cookie dough across the top with your hands or the back of a spoon.
This layering step is key to achieving that perfect contrast between the dense brownie base and the golden, chewy cookie topping.
Step 5 – Baking the Perfect Cookie Brownies
Place the pan into your preheated oven and bake at 350°F (175°C) for 35–40 minutes. Baking times may vary depending on your oven, so start checking around the 30-minute mark. You want the edges to look set and the top golden, but the center should still be slightly soft.
To test doneness, insert a toothpick into the brownie layer. If it comes out with a few moist crumbs (not wet batter), your cookie brownies are ready. Avoid overbaking, as this can dry out both the brownies and cookie layers.
If you prefer your brownies extra gooey, bake them closer to 35 minutes. For a firmer, more sliceable texture, let them go up to 40 minutes.
Step 6 – Cooling and Cutting
Patience is key here. As tempting as it is to cut into your cookie brownies right away, let them cool in the pan for at least 20–30 minutes. This allows the layers to set properly, making them easier to slice without crumbling.
Once cooled slightly, lift the brownies out of the pan using the parchment overhang and place them on a cutting board. Use a sharp knife to cut them into squares or rectangles. For neat edges, wipe the knife clean between cuts.
If you want perfectly clean slices, let the brownies cool completely and even refrigerate them for about 30 minutes before cutting. Warm brownies taste amazing but can be messy to portion out—so decide based on whether presentation or gooeyness matters more to you.
Tips and Tricks for the Best Cookie Brownies
Even though cookie brownies are a fairly simple dessert, a few small tricks can make all the difference between “pretty good” and “absolutely amazing.”
How to Get a Fudgy vs. Cakey Brownie Base
The texture of your brownie layer depends on the ratio of ingredients. For fudgy brownies, use more butter and eggs with less flour. For cakey brownies, increase the flour slightly and whip the eggs more before mixing. Also, avoid overbaking if you want fudgy results.
Adding espresso powder or melted dark chocolate to the batter intensifies the chocolate flavor and gives the brownies a gourmet touch. If you love extra richness, swirl in a spoonful of Nutella before baking.
Preventing Overbaking or Undercooking
Baking both brownie and cookie layers together can be tricky since they have different textures. To avoid overbaking, start checking your brownies 5 minutes before the recommended baking time. If the top looks golden but the center still jiggles, let it bake for a few more minutes until just set.
For even baking, make sure your oven rack is in the center position. Rotating the pan halfway through baking can also help prevent uneven cooking.
Creative Twists to Try
- Peanut Butter Brookies: Swirl peanut butter into the brownie batter before layering.
- Salted Caramel Brookies: Drizzle caramel sauce between the brownie and cookie layers.
- Holiday Brookies: Add red and green M&Ms for Christmas or pastel candy for Easter.
- Gluten-Free Version: Substitute all-purpose flour with a 1:1 gluten-free baking blend.
The possibilities are endless—you can truly make cookie brownies your own with just a few simple tweaks.
Storage and Serving Suggestions
Once you’ve baked a pan of delicious cookie brownies, the next step is figuring out how to store and serve them so they stay fresh and irresistible.
How to Store Cookie Brownies Properly
Cookie brownies can last for several days if stored correctly. The best way to keep them fresh is to store them in an airtight container at room temperature. Line the container with parchment paper and place the brownies in a single layer. If stacking, separate each layer with another sheet of parchment to prevent sticking.
At room temperature, cookie brownies will stay fresh for about 3 to 4 days. If you want them to last longer, refrigerate them—they’ll keep for up to a week this way. For the longest storage, freeze them. Wrap each piece tightly in plastic wrap, then place the wrapped brownies in a freezer-safe bag or container. They can last up to 3 months in the freezer.
When ready to enjoy, thaw them at room temperature or warm them in the microwave for a few seconds to bring back that gooey, just-baked texture.
Best Ways to Serve Them
Cookie brownies are delicious straight out of the pan, but you can elevate them with a few serving ideas:
- Warm with Ice Cream – Classic and indulgent, serve a warm brookie with a scoop of vanilla or salted caramel ice cream.
- With Whipped Cream – Add a light, creamy topping to balance the richness.
- Drizzled with Sauce – Chocolate, caramel, or peanut butter drizzle takes them over the top.
- With Coffee or Milk – Pairing brookies with a drink makes them even more enjoyable.
Whether you’re serving them at a party or enjoying one as a midnight snack, cookie brownies are versatile enough to fit any occasion.
Nutritional Information
Of course, cookie brownies aren’t exactly health food—but knowing what’s inside can help you make mindful choices or adapt the recipe for your needs.
Estimated Calories and Macronutrients
On average, a standard-sized cookie brownie square (about 2×2 inches) contains approximately:
- Calories: 280–320
- Carbohydrates: 35–40g
- Fat: 14–16g
- Protein: 3–5g
- Sugar: 25–30g
These numbers vary depending on the exact ingredients and add-ins you use. Extra chocolate chips, nuts, or caramel will increase the calorie count, while using less sugar or butter can lower it.
Healthier Substitutions
If you want to enjoy cookie brownies with a slightly healthier twist, try these substitutions:
- Flour: Swap half the all-purpose flour for whole wheat or oat flour.
- Butter: Replace with coconut oil or a blend of oil and Greek yogurt for lower saturated fat.
- Sugar: Use coconut sugar, honey, or maple syrup instead of refined sugar.
- Chocolate Chips: Choose dark chocolate chips with at least 70% cocoa for a less sugary option.
- Eggs: For a vegan version, substitute flax eggs (1 tbsp ground flaxseed + 3 tbsp water per egg).
While these swaps won’t make cookie brownies diet food, they can lighten them up and add some nutritional value without sacrificing too much of the indulgence.
Common Mistakes to Avoid
Even simple recipes can go wrong if you’re not careful. Here are some pitfalls to watch out for when making cookie brownies.
Overmixing the Batter
It’s tempting to keep stirring until your batter is silky smooth, but that’s not the goal here. Overmixing introduces too much air and develops excess gluten, leading to dense, tough brownies and dry cookies. The rule of thumb: mix until ingredients are just combined.
For brownie batter, a few lumps are fine—they’ll bake out. For cookie dough, stop as soon as the flour disappears into the mixture.
Using the Wrong Pan Size
The pan size can make or break this recipe. A 9×13-inch pan is ideal. If you use a smaller pan, the layers will be too thick and underbake in the middle. If the pan is too large, the layers will spread thin and overbake, losing that gooey texture.
If you only have an 8×8-inch pan, reduce the recipe or expect to bake longer, checking often for doneness. Always line your pan with parchment for easy removal and even baking.
FAQs about Cookie Brownie Recipe
1. Can I Use Store-Bought Mix Instead of Homemade?
Yes! You can use a boxed brownie mix and store-bought cookie dough for a quicker version. Just follow the same layering and baking process.
2. How Long Do Cookie Brownies Last?
At room temperature, they last 3–4 days. In the fridge, up to a week. For longer storage, freeze them for up to 3 months.
3. Can I Freeze Them?
Absolutely. Wrap individual squares tightly in plastic wrap, then store them in a freezer-safe container or bag. Thaw at room temperature before eating.
4. How Do I Make Them Gluten-Free?
Use a gluten-free flour blend in place of all-purpose flour. Make sure your chocolate chips and other add-ins are certified gluten-free as well.
5. What’s the Best Chocolate to Use?
High-quality cocoa powder and semi-sweet or dark chocolate chips give the best flavor. If you prefer sweeter brookies, milk chocolate chips are a great choice too.
Conclusion
The recipe is simple, flexible, and perfect for beginners and experienced bakers alike. With just a few common ingredients and some patience, you can create a batch that rivals any bakery treat. Plus, they’re endlessly customizable—you can add nuts, swirl in caramel, or even make them gluten-free or vegan.
Whether you’re baking for a party, a family gathering, or just to satisfy your own sweet tooth, cookie brownies are sure to be a hit. Store them properly, serve them creatively, and don’t be afraid to experiment with flavors to make the recipe uniquely yours.


