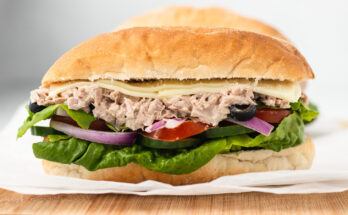
Chocolate Milk Recipe: Few drinks strike the perfect balance between comfort and indulgence like a glass of chocolate milk. It’s creamy, chocolaty, and has a nostalgic charm that takes most of us back to our childhood days.
Yet, chocolate milk isn’t just for kids—it’s a versatile beverage enjoyed by people of all ages. Whether you sip it cold on a hot day, warm it up on a chilly evening, or blend it into a fancy milkshake, it never disappoints.
In this guide, we’ll walk through everything you need to know about making the perfect chocolate milk at home, step by step. From ingredients and tools to variations and serving ideas, you’ll be equipped to craft a glass that rivals even the best store-bought versions.
Why Chocolate Milk is a Timeless Favorite
Chocolate milk has stood the test of time because it combines two universally loved ingredients: milk and chocolate. The creamy texture of milk complements the rich, slightly bitter notes of cocoa, creating a balanced drink that’s both refreshing and satisfying. It’s not just a childhood treat either—athletes use it as a post-workout recovery drink, and home cooks experiment with it in desserts and coffee blends. Its versatility is unmatched, and that’s why it remains a kitchen staple around the world.
When we think about chocolate milk, nostalgia instantly kicks in. Perhaps you remember rushing home from school and mixing cocoa powder with milk, or maybe you preferred those ready-to-drink cartons from the store. Either way, chocolate milk always sparks a little joy. Unlike soda or overly sweetened drinks, it strikes a perfect middle ground between indulgence and nutrition, making it a timeless favorite.
The Versatility of Chocolate Milk
What makes chocolate milk even more special is its adaptability. You can drink it cold with ice for a refreshing pick-me-up or warm it on the stove for a cozy winter beverage. It can be as simple as mixing cocoa powder with milk or as elaborate as blending in whipped cream, vanilla, cinnamon, or even nut butter for extra richness. Plus, with today’s variety of milk options—dairy and plant-based—it’s easier than ever to customize it to your dietary preferences.
Think of chocolate milk as a blank canvas. Want something indulgent? Add whipped cream and chocolate shavings. Looking for a healthy twist? Use unsweetened almond milk with pure cocoa powder. Need an energy boost? Blend it with protein powder and a banana. The possibilities are endless, which is why chocolate milk continues to be reinvented across generations.
Ingredients You’ll Need
Core Ingredients for Classic Chocolate Milk
The beauty of chocolate milk lies in its simplicity. At its core, you only need three ingredients:
- Milk (any type: whole, skim, or plant-based)
- Cocoa powder or chocolate syrup
- Sweetener (sugar, honey, or maple syrup)
These three make the foundation. Milk provides creaminess, cocoa brings the rich chocolate flavor, and sweetener balances the bitterness. If you’re aiming for the most authentic taste, always go for unsweetened cocoa powder instead of pre-mixed powders, as it allows you to control both sweetness and quality.
Optional Add-ins for Extra Flavor
Want to take your chocolate milk to the next level? Try these optional add-ins:
- Vanilla extract – Adds depth and warmth.
- Cinnamon or nutmeg – Gives a subtle spice kick.
- Peanut butter or almond butter – For a nutty twist and creaminess.
- Sea salt – Enhances the chocolate flavor.
- Espresso shot – Turns it into a mocha-like beverage.
These add-ins let you personalize your drink according to your mood. Whether you want cozy, indulgent, or energizing, the right mix-in can transform your glass of chocolate milk.
Best Milk Choices (Dairy and Non-Dairy Options)
Milk is the backbone of chocolate milk, and your choice significantly affects the outcome. Here are some popular options:
- Whole milk – Rich, creamy, and the classic choice.
- Skim milk – Lighter but still tasty.
- Almond milk – Slightly nutty flavor, lower in calories.
- Oat milk – Creamy and naturally sweet, a great dairy-free option.
- Coconut milk – Tropical and rich, pairs well with cocoa.
- Soy milk – High in protein and neutral in flavor.
Experimenting with different milk types allows you to create endless variations of chocolate milk, catering to both health-conscious drinkers and indulgence seekers.
Tools and Equipment Required
Kitchen Tools for Easy Preparation
You don’t need fancy equipment to make chocolate milk, but a few basic tools can make the process smoother:
- Mixing spoon or whisk – To combine ingredients evenly.
- Measuring spoons and cups – For accuracy.
- Small saucepan – If making warm chocolate milk.
- Blender – Ideal for frothy or creamy versions.
- Shaker bottle – Great for quick, on-the-go mixing.
Each tool serves a purpose, but even if all you have is a spoon and a glass, you can still make a delicious version at home.
Storing and Serving Essentials
Once your chocolate milk is ready, presentation matters too. A chilled glass, a mason jar with a straw, or even a tall milkshake glass can elevate the experience. If you’re making a batch, store it in a glass jug in the fridge to keep it fresh. Pro tip: shake or stir before serving since cocoa tends to settle at the bottom.
Step-by-Step Guide to Making Chocolate Milk
Step 1 – Gather All Ingredients
The first step may seem obvious, but it’s crucial: have everything ready before you start. Place your milk, cocoa, sweetener, and any add-ins on the counter. This not only makes the process faster but also ensures you won’t forget a key ingredient.
Think of this as setting the stage for your recipe. Just like chefs in professional kitchens do their mise en place (a French term for “everything in its place”), preparing your ingredients ahead of time makes the entire process smoother.
Step 2 – Mixing the Chocolate Base
This step is where the magic begins. Start by combining your cocoa powder (or chocolate syrup) with the sweetener in a small bowl or cup. If you’re using cocoa powder, it’s best to mix it with a little warm water or warm milk first. This helps dissolve the cocoa completely, preventing those annoying clumps that often float around when stirred directly into cold milk.
For a smoother and more indulgent flavor, whisk the cocoa and sweetener until it forms a silky, syrup-like mixture. Think of it as making your own homemade chocolate syrup. This method allows the chocolate flavor to be more concentrated and evenly distributed once you add it to the milk.
If you’re in a hurry, store-bought chocolate syrup works fine, but homemade mixtures give you better control over sweetness and quality. Plus, once you taste the difference, you’ll rarely go back to pre-made options.
Step 3 – Combining Chocolate and Milk
Now that your chocolate base is ready, it’s time to bring it all together. Pour your milk into a glass, cup, or blender, depending on how you plan to serve it. Slowly add the chocolate mixture while stirring continuously.
- For cold chocolate milk: Stir well with a spoon or whisk until fully combined. If you want extra creaminess, blend the mixture for 20–30 seconds.
- For hot chocolate milk: Heat your milk in a saucepan on low-medium heat, then whisk in the chocolate mixture until smooth. Avoid boiling the milk, as it can alter the taste and texture.
This is the step where your drink transforms into that velvety, chocolaty goodness you’ve been craving. Take a quick sip and adjust if needed—sometimes you’ll want a bit more cocoa or an extra drizzle of sweetness.
Step 4 – Adjusting Sweetness and Texture
Here’s where personal preference takes center stage. Some like their chocolate milk rich and decadent, while others prefer a lighter version. If the drink tastes too bitter, add more sweetener. If it feels too thick, dilute it with a splash of milk. On the other hand, if you want a creamier texture, try adding a bit of heavy cream or even a scoop of ice cream for a milkshake-like consistency.
Another trick is adding a pinch of sea salt. It might sound odd, but salt enhances the chocolate flavor and balances sweetness beautifully. Think of it like salted caramel—the same principle applies here.
If you’re preparing chocolate milk for kids, you might want to keep it sweeter. For adults, a slightly darker, cocoa-forward version can feel more sophisticated and less sugary.
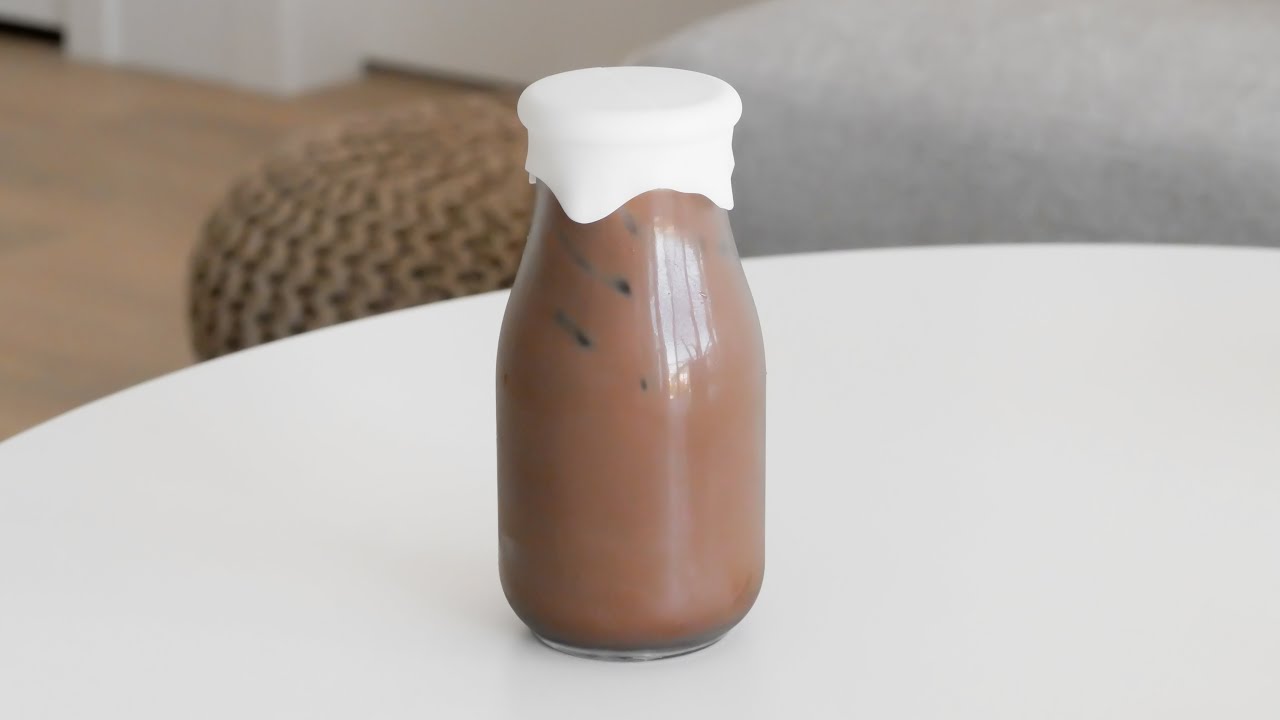
Step 5 – Chilling or Serving Warm
At this point, your chocolate milk is ready, but how you serve it makes all the difference.
- Chilled version: Pour your chocolate milk over ice cubes for a refreshing, cool drink. You can even blend it with ice for a slushy texture.
- Warm version: Perfect for cozy evenings. Heat it gently on the stove, pour into a mug, and top with whipped cream or marshmallows for that hot chocolate vibe.
Presentation also matters. Use a tall glass for cold chocolate milk and garnish with chocolate shavings, cocoa dust, or a drizzle of syrup around the rim. For the warm version, a sprinkle of cinnamon or a dash of nutmeg on top adds both aroma and flavor.
This flexibility is why chocolate milk is loved worldwide—it can be whatever you need it to be, whether a refreshing drink or a comforting treat.
Variations of Chocolate Milk
Hot Chocolate Style
Turn your simple chocolate milk into a cozy hot chocolate. Warm the milk on the stove, whisk in the cocoa base, and finish with whipped cream, marshmallows, or even a drizzle of caramel sauce. This version is especially popular during winter months and pairs beautifully with cookies or pastries.
Iced Chocolate Milk Shake
Blend your prepared chocolate milk with ice and a scoop of vanilla ice cream. The result? A frothy, milkshake-style drink that’s perfect for summer. If you want to make it fancier, add a swirl of whipped cream on top with chocolate sprinkles.
Vegan-Friendly Chocolate Milk
Dairy-free doesn’t mean flavor-free. Use almond, oat, or coconut milk as your base, and pair it with unsweetened cocoa powder and a natural sweetener like agave syrup. Oat milk, in particular, gives a creamy, rich texture that’s very close to dairy.
Protein-Packed Chocolate Milk
If you’re looking for a post-workout recovery drink, blend chocolate milk with a scoop of protein powder. Athletes love this version because it’s both delicious and effective for muscle recovery. You can even add a banana for extra nutrients and thickness.
Health Benefits of Chocolate Milk
Nutritional Value of Cocoa
Cocoa isn’t just about flavor; it’s loaded with antioxidants, flavonoids, and minerals that can actually benefit your health. A moderate amount of cocoa in your diet may support heart health, improve blood circulation, and even enhance mood. Pairing it with milk (dairy or plant-based) creates a nutrient-rich drink that provides calcium, vitamin D, and protein.
Cocoa powder is also naturally low in fat and contains magnesium, which supports muscle function and energy production. When combined with milk, the overall nutritional profile becomes quite balanced—especially if you don’t overdo the sugar.
Benefits for Athletes and Active People
Chocolate milk has earned a reputation as one of the best post-workout recovery drinks. Why? Because it contains the perfect ratio of carbohydrates and protein to help muscles recover and refuel glycogen stores. The carbs from the sugar restore energy, while the protein from milk supports muscle repair.
In fact, many athletes prefer chocolate milk over expensive recovery shakes because it’s effective, affordable, and tastes amazing. Whether you’ve finished a long run, a cycling session, or a weightlifting workout, a glass of chocolate milk can help you bounce back faster.
Myths vs. Facts About Chocolate Milk
- Myth: Chocolate milk is only for kids.
Fact: It’s suitable for all ages and can even benefit adults after workouts. - Myth: It’s too sugary to be healthy.
Fact: When made at home, you control the sweetness and can use natural alternatives. - Myth: Only dairy milk works for chocolate milk.
Fact: Plant-based options can be just as creamy and satisfying.
The key takeaway is moderation—enjoying chocolate milk a few times a week can fit into a balanced lifestyle.
Common Mistakes to Avoid
Using Too Much Sugar
It’s tempting to add a generous scoop of sugar to your drink, but too much can overwhelm the natural richness of cocoa. Instead, start with a small amount, taste, and adjust. Remember, your taste buds can adapt—over time, you may even prefer a less sweet version.
Choosing Low-Quality Cocoa
Not all cocoa powders are created equal. Some are heavily processed, stripped of nutrients, or packed with unnecessary additives. Always go for high-quality, unsweetened cocoa powder. The better the cocoa, the richer and more authentic the flavor.
Overheating the Milk
When making warm chocolate milk, overheating or boiling the milk can ruin its texture and taste. Milk can develop a burnt flavor if left on high heat. Always heat it slowly on low-medium heat and stir constantly for the best results.
Avoiding these mistakes will ensure that your chocolate milk is consistently smooth, delicious, and satisfying.
Expert Tips for the Perfect Chocolate Milk
Balancing Flavors Like a Pro
The secret to great chocolate milk lies in balancing bitterness, sweetness, and creaminess. If your cocoa is too bitter, balance it with just the right amount of sweetener. If your drink feels thin, add a splash of cream or froth it with a blender.
Professional baristas often use a “chocolate paste” method: mixing cocoa with a bit of warm water and sweetener before adding milk. This ensures maximum flavor and smoothness.
Enhancing with Spices and Flavors
Don’t be afraid to experiment! Add a sprinkle of cinnamon for warmth, a pinch of cayenne for a spicy kick, or a drop of peppermint extract for a holiday-inspired version. Even a dash of instant espresso can give your chocolate milk a mocha twist.
These small tweaks can transform a basic drink into something gourmet, perfect for impressing guests or just treating yourself.
Serving Ideas
Pairing with Snacks
Chocolate milk pairs beautifully with snacks, making it a great choice for breakfast, dessert, or a quick pick-me-up. Try it with:
- Cookies (especially chocolate chip or shortbread)
- Pastries like croissants or muffins
- Fresh fruits such as strawberries and bananas
- Peanut butter sandwiches for a classic combo
Creative Glass and Garnish Ideas
Presentation makes a difference. Pour your chocolate milk into a mason jar with a colorful straw for a fun, casual vibe. For special occasions, serve it in a tall milkshake glass topped with whipped cream, chocolate syrup drizzle, or even a cookie on the rim.
If you’re making it for kids, decorate the glass with sprinkles or candy on the rim using a thin layer of chocolate syrup as glue. For adults, keep it classy with a dusting of cocoa powder or cinnamon on top.
Storing Chocolate Milk
How Long Does Chocolate Milk Last?
Homemade chocolate milk is best enjoyed fresh, but you can store it in the fridge for up to 2–3 days. Always keep it in a sealed glass container to preserve freshness and prevent it from absorbing odors from other foods.
Best Practices for Freshness
Before drinking stored chocolate milk, give it a good stir or shake since cocoa tends to settle at the bottom. Avoid leaving it out at room temperature for long periods, as milk spoils quickly. If you want to prepare a larger batch, consider using pasteurized milk for better shelf life.
Chocolate Milk for Kids vs. Adults
Fun Ways to Serve for Kids
Kids love chocolate milk, and with a little creativity, you can make it even more exciting for them. Try serving it with fun straws, colorful cups, or in bottles shaped like animals. You can also turn it into a game by letting kids choose their favorite add-ins, like sprinkles, marshmallows, or a drop of vanilla.
Another fun idea is to make “frozen chocolate milk pops.” Simply pour the drink into popsicle molds and freeze—it becomes a healthy, refreshing summer treat. Kids enjoy the hands-on experience of making and eating these, and parents love that it’s a healthier alternative to store-bought ice cream.
By involving kids in the preparation process, you also encourage them to learn simple kitchen skills. Let them whisk the cocoa mixture or add the toppings—they’ll feel proud of their creation and enjoy drinking it even more.
Gourmet Touch for Adults
For adults, chocolate milk can easily transform from a simple childhood drink into a sophisticated treat. Think of it as a dessert in a glass. Add a splash of espresso for a mocha vibe, or infuse it with spices like cardamom or nutmeg for a café-style experience.
You can also make “grown-up” versions by blending in liqueurs like Baileys, Kahlua, or Amaretto for a rich after-dinner drink. Serve it in elegant glassware, garnished with chocolate curls or dusted cocoa, and it instantly becomes a gourmet indulgence.
The key difference is presentation and flavor depth—where kids love sweetness and fun, adults often appreciate balance, richness, and a touch of sophistication.
FAQs about Chocolate Milk Recipe
Can I make chocolate milk in advance for meal prep?
Yes, you can store homemade chocolate milk in the fridge for up to 3 days. Just shake or stir before drinking.
Which plant-based milk makes the best chocolate milk?
Oat milk is the creamiest option, while almond milk adds a subtle nutty flavor. Coconut milk creates a rich, tropical twist.
How do I keep cocoa powder from clumping in cold milk?
Mix the cocoa with a little warm water or milk first to create a smooth paste before adding it to cold milk.
Can chocolate milk be used in recipes?
Absolutely! You can use it in smoothies, baked goods, pancakes, or even as a base for ice cream.
Is chocolate milk healthier than soda?
Generally, yes. Homemade chocolate milk provides protein, calcium, and vitamins, while soda offers mostly empty calories from sugar.
Conclusion
From athletes using it as a recovery drink to kids enjoying it as a fun snack, chocolate milk continues to prove its place as a timeless beverage. Whether you’re indulging in nostalgia or experimenting with new flavors, the joy of chocolate milk is that it always feels like a treat.
So next time you’re craving something sweet, skip the store-bought carton and make your own. It’s quick, easy, and endlessly customizable. One sip, and you’ll see why chocolate milk never goes out of style.