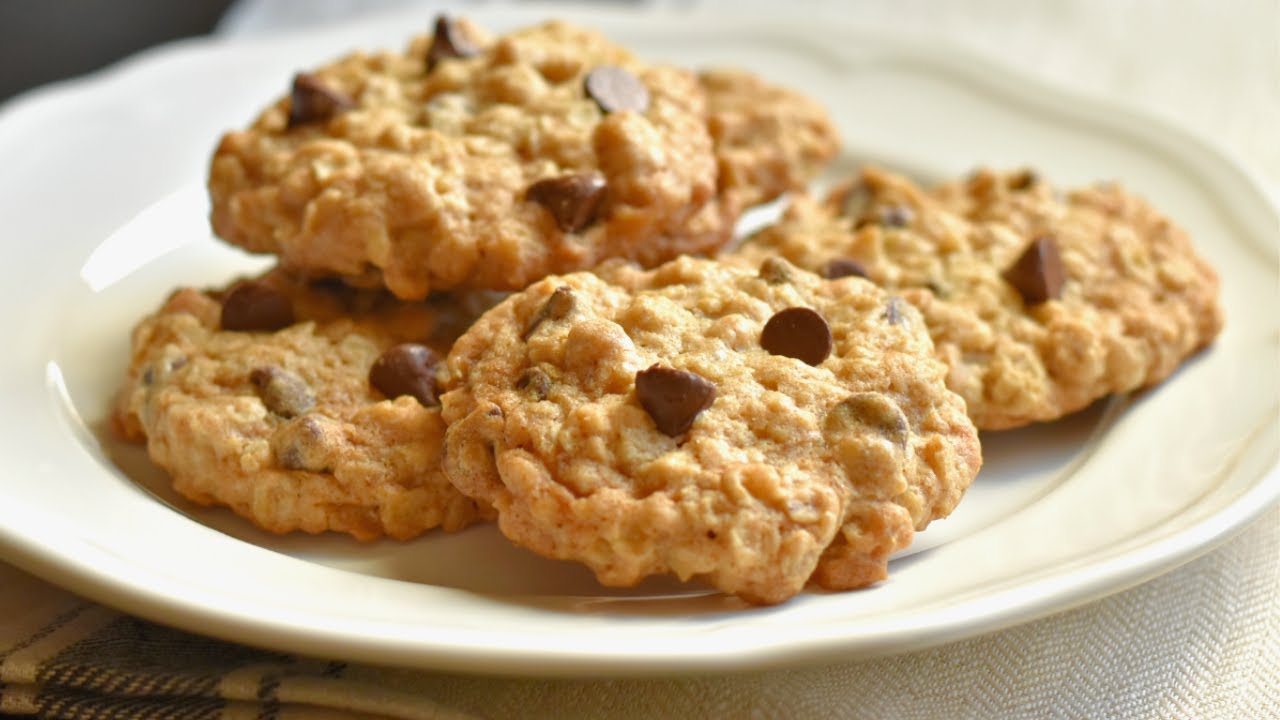
Chocolate Chip Oatmeal Cookie Recipe: Who doesn’t love the warm, gooey goodness of freshly baked cookies straight out of the oven? If you’ve been craving a cookie that strikes the perfect balance between chewy, hearty oats and rich, melty chocolate chips, you’re in for a treat. This chocolate chip oatmeal cookie recipe is everything you need for your next baking day—simple ingredients, straightforward steps, and the kind of results that make you say, “Wow, did I really make these?” Let’s walk you through the full guide so your cookies turn out bakery-level delicious every single time.
Why This Recipe Stands Out
Not all cookies are created equal. This particular recipe marries the hearty texture of old-fashioned rolled oats with the sweet decadence of semi-sweet chocolate chips. Unlike your average cookie, oatmeal cookies offer a chewy bite and a rustic charm that never goes out of style. Plus, the oats not only improve texture—they also add a touch of wholesomeness. What really makes this recipe special, though, is how simple and foolproof it is. You don’t need any fancy equipment or rare ingredients—just a few pantry staples and some love for baking.
We’ve tested and tweaked this recipe countless times to ensure it delivers consistent results. It’s soft in the center, lightly crisp on the edges, and has the perfect amount of sweetness. Whether you’re a seasoned baker or just getting started, this step-by-step guide ensures your cookies will come out perfect, every single time.
Perfect for Every Occasion
These cookies are incredibly versatile. You can bake them for family movie nights, pack them in school lunches, or make a big batch for your next potluck. And let’s not forget the holidays—these cookies are always a crowd-pleaser on dessert trays during Thanksgiving, Christmas, and beyond. Want to level up your cookie game? Sandwich some vanilla ice cream between two of them for an unforgettable homemade treat.
Ingredients You’ll Need
Before you dive into baking, you’ll want to gather all your ingredients. Being prepared will help the process go smoothly, and measuring everything beforehand ensures consistency in taste and texture. Let’s break it down into three parts: dry ingredients, wet ingredients, and optional add-ins.
Dry Ingredients
- 1 ½ cups all-purpose flour – This provides the structure and base of your cookie dough.
- 1 teaspoon baking soda – Helps the cookies rise and creates a soft texture.
- ½ teaspoon salt – Enhances the flavor of the cookies.
- 1 ½ teaspoons ground cinnamon (optional) – Adds a warm depth that pairs beautifully with oats and chocolate.
- 3 cups old-fashioned rolled oats – The heart of the cookie. Don’t substitute with instant oats—they won’t provide the same texture.
Wet Ingredients
- 1 cup (2 sticks) unsalted butter, softened – Butter brings flavor and richness. Make sure it’s soft but not melted.
- 1 cup packed brown sugar – Brown sugar is key to getting that chewy texture.
- ½ cup granulated sugar – Adds sweetness and structure.
- 2 large eggs – They bind everything together.
- 2 teaspoons pure vanilla extract – Vanilla rounds out the flavor profile.
Optional Add-Ins
- 1 ½ cups semi-sweet chocolate chips – You can’t go wrong with the classics.
- ½ cup chopped walnuts or pecans (optional) – For those who love a nutty crunch.
- ½ cup shredded coconut or raisins – For added texture and flavor variation.
Having your ingredients at room temperature will make everything mix better and bake more evenly. If your butter is straight from the fridge, give it about 30 minutes to soften on the counter.
Kitchen Tools You’ll Need
While the ingredients are obviously the star of the show, the right tools can make your baking experience smooth and enjoyable. Here’s everything you’ll need to get started:
Essential Baking Tools
- Mixing bowls (1 large, 1 medium) – One for wet ingredients, one for dry.
- Measuring cups and spoons – Precision matters in baking, so use these to measure accurately.
- Electric mixer or hand whisk – An electric mixer makes creaming butter and sugar a breeze, but a strong whisk will work in a pinch.
- Wooden spoon or spatula – Perfect for folding in oats and chocolate chips without overmixing the dough.
- Cookie scoop or tablespoon – For consistent cookie sizes.
- Baking sheet – A heavy-duty, rimless sheet works best for even baking.
- Parchment paper or silicone baking mat – Prevents sticking and makes clean-up easy.
Optional Tools to Make Life Easier
- Cooling rack – Helps cookies cool evenly without becoming soggy on the bottom.
- Stand mixer – Ideal for large batches or hands-free mixing.
- Digital kitchen scale – Great if you prefer weighing your ingredients for more precision.
If you’re baking cookies regularly, investing in quality tools can save you time and effort down the line. And let’s be honest, who doesn’t want an excuse to expand their kitchen collection?
Prepping Before You Bake
Measuring Tips
Accurate measuring is the cornerstone of baking. If you scoop your flour directly from the bag using your measuring cup, chances are you’re adding too much. Instead, use the spoon-and-level method: spoon the flour into your measuring cup and level it off with the back of a knife. This little habit can be the difference between a dry cookie and a perfectly chewy one.
The same goes for sugar, oats, and other dry ingredients. For brown sugar, make sure to pack it tightly into the measuring cup. If you’re using a scale, here are some quick conversions:
- 1 cup flour = approx. 120g
- 1 cup rolled oats = approx. 90g
- 1 cup brown sugar = approx. 200g
Preheating and Parchment Paper Prep
Start by preheating your oven to 350°F (175°C). While it’s warming up, line your baking sheets with parchment paper or a silicone mat. This step ensures that your cookies won’t stick and that they’ll brown evenly on the bottom.
Want extra flavor and texture? Lightly toast your oats in a dry skillet for 3–5 minutes over medium heat. It’s optional, but it adds a nutty depth that elevates the cookie to new heights.
Step-by-Step Instructions
Let’s break this down so you can easily follow along. From mixing to baking, every step matters in crafting the perfect chocolate chip oatmeal cookie.
Step 1: Cream the Butter and Sugars
This step sets the foundation for the texture and flavor of your cookies. In a large mixing bowl, combine the softened unsalted butter, brown sugar, and granulated sugar.
Use an electric mixer on medium speed and beat the mixture for about 2–3 minutes until it becomes light, fluffy, and pale in color. This process incorporates air into the dough, which helps create that soft and chewy bite we all crave.
Pro tip: Don’t rush this step. Under-creaming will result in denser cookies. Over-creaming, on the other hand, can cause them to spread too much during baking.
Once your mixture is whipped and creamy, scrape down the sides of the bowl to ensure everything’s well-blended.
Step 2: Add Eggs and Vanilla
Now it’s time to add the eggs—one at a time. Crack the first egg into the bowl and beat until fully incorporated. Repeat with the second egg. This gradual process helps the eggs emulsify into the butter and sugar mixture evenly.
Then, stir in the vanilla extract. This gives the cookies that warm, cozy aroma and enhances the flavor of the oats and chocolate.
Note: Make sure your eggs are at room temperature for better integration with the creamed butter.
At this stage, your wet mixture should be silky smooth and fragrant.
Step 3: Mix Dry Ingredients Separately
In a separate medium bowl, whisk together all the dry ingredients:
- Flour
- Baking soda
- Salt
- Optional: cinnamon
Whisking helps distribute the leavening agent evenly throughout the flour, ensuring your cookies bake up with a consistent rise and flavor. It also breaks up any lumps so your dough blends smoothly later.
If you want to take it up a notch, sift the flour and baking soda for an even lighter texture. This extra step makes a big difference, especially if you’re aiming for bakery-quality cookies.
Step 4: Combine Wet and Dry Mixtures
Now comes the part where everything starts to come together.
Gradually add the dry mixture into the bowl of wet ingredients. You can do this in two to three additions to avoid flour flying everywhere and to help ensure an even mix.
Use a wooden spoon or spatula for this step, gently folding the flour into the wet base. You want to mix just until combined—don’t overdo it. Overmixing can develop the gluten in the flour, making your cookies tough rather than tender.
Once all the flour is just mixed in, you should have a thick, slightly sticky dough.
Step 5: Fold in Chocolate Chips and Optional Ingredients
This is where the magic really happens.
Fold in your chocolate chips until evenly distributed throughout the dough. If you’re adding any extras—like chopped nuts, raisins, or shredded coconut—this is the time to do it.
Use a spatula or wooden spoon to mix them in gently. You want the add-ins to be well spread out, so every bite delivers that rich, chocolatey satisfaction or the crunch of a toasted pecan.
Pro tip: Chill the dough for 30 minutes to 1 hour before baking. This helps control the spread and intensifies the flavors. Chilling also gives the oats time to hydrate, making the cookies even chewier.
Step 6: Scoop and Space on Baking Sheet
Using a cookie scoop or tablespoon, portion out your cookie dough into even-sized balls. Place them on the prepared baking sheet, spacing each about 2 inches apart.
This gives the cookies room to spread without touching and helps them bake evenly. If you like a bakery-style look, press a few extra chocolate chips onto the tops of each dough ball before baking.
Want smaller, crispier cookies? Use a teaspoon. Prefer big, chewy ones? Go for a heaping tablespoon or even an ice cream scoop.
Step 7: Bake to Perfection
Pop the baking sheet into your preheated oven (350°F / 175°C) and bake for 10–12 minutes, or until the edges are golden brown and the centers look just set.
Don’t wait until the whole cookie looks browned—they will continue to cook slightly as they cool on the pan. Taking them out when the center is still a little soft is key to that ideal chewy texture.
Rotate the pan halfway through baking to ensure even cooking, especially if your oven has hot spots.
Step 8: Cooling and Setting Time
Once your cookies come out of the oven, let them cool on the baking sheet for about 5 minutes. This allows them to firm up enough to move without breaking.
Then, transfer them to a wire cooling rack to cool completely. This prevents them from becoming soggy on the bottom and helps them set perfectly.
Resist the temptation to eat one right away—they’re molten hot inside. Give them a few minutes, and then you’ll get that perfect balance of a crisp edge and chewy, chocolatey center.
Tips and Tricks for the Perfect Cookie
Getting your cookies just right can sometimes feel like a science—and in a way, it is! Here are some must-know baking tips:
Getting the Texture Right
- Chill the dough: At least 30 minutes in the fridge improves texture and flavor.
- Use brown sugar: The molasses in brown sugar helps keep cookies moist and chewy.
- Don’t overbake: Take them out when the center is still slightly soft.
How to Avoid Flat Cookies
- Make sure your butter isn’t too warm or melted.
- Add a bit more flour if your dough seems greasy or loose.
- Chill your dough before baking to minimize spread.
Variations You Can Try
One of the best things about this chocolate chip oatmeal cookie recipe is how flexible it is. Whether you’re catering to dietary needs or just want to get creative in the kitchen, these variations will keep things exciting and tasty.
Raisin and Nut Combo
If you love classic oatmeal raisin cookies, this twist is for you. Simply swap out the chocolate chips for 1 cup of raisins and add ½ cup chopped walnuts or pecans. The result? A hearty, chewy cookie with a perfect balance of sweetness and crunch.
To make the raisins even more tender and flavorful, soak them in warm water or rum for 10–15 minutes before folding them into the dough. It’s a small step with a big flavor payoff.
White Chocolate and Cranberries
Looking for something a little more festive or fruity? Swap semi-sweet chocolate chips for white chocolate chips and mix in ½ cup dried cranberries. This combo is perfect for the holidays—or anytime you want a more elegant twist.
The sweetness of the white chocolate plays beautifully with the tart cranberries, and the oats provide that familiar chewy base. Sprinkle a pinch of sea salt on top before baking for an extra layer of flavor.
Vegan and Gluten-Free Options
No eggs? No dairy? No problem.
For Vegan Cookies:
- Replace butter with vegan butter or solid coconut oil.
- Swap eggs with flax eggs (1 tbsp ground flaxseed + 2.5 tbsp water per egg, let sit 5 minutes).
- Use dairy-free chocolate chips.
For Gluten-Free Cookies:
- Use a gluten-free 1:1 baking flour blend (like Bob’s Red Mill or King Arthur’s).
- Double-check that your oats are labeled gluten-free, as cross-contamination is common.
These swaps still produce chewy, delicious cookies, with the bonus of being suitable for more diets. Always test a small batch first to ensure the texture is just how you like it.
Storage Tips for Freshness
You just made the most incredible batch of chocolate chip oatmeal cookies—now let’s make sure they stay that way.
Short-Term Storage
If you plan to eat the cookies within a few days (and let’s be real, they probably won’t last that long!), store them in an airtight container at room temperature. Add a slice of bread to the container—it’ll help keep the cookies soft and chewy by absorbing excess moisture.
Cookies stored this way will stay fresh for about 4–5 days.
Freezing Cookie Dough or Baked Cookies
Want fresh-baked cookies on demand? Freeze the dough!
- Scoop the dough into balls.
- Place on a baking sheet and freeze until solid (about 1–2 hours).
- Transfer to a freezer-safe bag or container and store for up to 3 months.
To bake from frozen, just add 2–3 extra minutes to the baking time. No need to thaw.
Already baked cookies can also be frozen. Let them cool completely, then store in a sealed container with parchment between layers. Reheat in the oven for a few minutes to bring them back to life.
Common Mistakes to Avoid
Even a great recipe can flop if certain baking basics are overlooked. Avoid these common cookie-making missteps:
Overmixing the Dough
It’s tempting to keep stirring, especially when everything smells so good—but don’t do it! Overmixing the dough can make your cookies tough and dense.
Once the dry ingredients are added, mix just until combined. The dough should still be soft and slightly sticky, not rubbery.
Incorrect Oven Temperature
Always preheat your oven and use an oven thermometer if possible. Even small temperature variances can make a big difference. Too hot, and your cookies will brown too quickly outside while staying raw inside. Too cool, and they’ll spread too much and lose shape.
Stick with 350°F (175°C) and monitor baking closely.
Nutritional Information (Per Cookie)
Here’s a rough estimate for each standard-sized cookie (based on a batch making about 24 cookies):
| Nutrient | Amount |
|---|---|
| Calories | 180–210 |
| Total Fat | 9g |
| Saturated Fat | 5g |
| Carbohydrates | 25g |
| Sugar | 14g |
| Protein | 2g |
| Fiber | 1.5g |
| Sodium | 120mg |
Keep in mind, values will vary depending on exact ingredient brands, portion sizes, and add-ins.
FAQs about Chocolate Chip Oatmeal Cookie Recipe
1. Can I use quick oats instead of old-fashioned?
Yes, but the texture will be softer and less chewy. Old-fashioned oats hold their shape better in baking and give a heartier bite.
2. How do I make them chewier?
Use more brown sugar than white sugar and don’t overbake. Also, chilling the dough helps develop a chewier texture.
3. Can I freeze the dough?
Absolutely! Portion it, freeze it, and bake directly from frozen. Just add a few extra minutes to the bake time.
4. How long do they stay fresh?
About 4–5 days at room temperature in an airtight container. You can also freeze for longer storage.
5. Can I substitute the chocolate chips?
Of course! Use white chocolate, dark chocolate chunks, or even butterscotch chips. Go wild with your flavor combos!
Conclusion
So there you have it—the ultimate, foolproof, and completely crave-worthy Chocolate Chip Oatmeal Cookie Recipe. From prepping your dough like a pro to mixing in creative add-ins, you’ve now got all the steps, tips, and tricks to whip up a batch of cookies that could rival any bakery.
Whether you’re baking for a special occasion or just want a cozy night in with fresh cookies and cold milk, this guide has got you covered. The best part? You can make it truly yours. Try new flavors, tweak the texture, or just stick with the classic—either way, you’re going to end up with something delicious.


