Cheesecake Brownie Recipe: Whoever thought of combining the rich, fudgy goodness of a brownie with the creamy, tangy delight of cheesecake deserves a dessert hall of fame. Cheesecake brownies are an indulgent dessert that brings together two beloved classics in one perfectly decadent bite. Whether you’re baking for a special occasion, a party, or simply because your sweet tooth is acting up, these treats will leave everyone begging for seconds.
The magic of this recipe lies in its perfect balance. You get that deep, chocolatey brownie base topped with (or swirled into) a luscious cheesecake layer. It’s soft yet chewy, creamy yet rich—basically, everything a dessert lover dreams about. Plus, it looks just as good as it tastes. Those marbled swirls on top? Pure eye candy.
Even better, this guide makes baking them foolproof. We’re going beyond just listing steps—we’ll walk you through the entire process, show you what ingredients you need, what tools to use, how to nail that swirl, and even how to customize your brownies to make them uniquely yours.
So let’s preheat those ovens, tie on the apron, and dive right into the sweetest guide you’ll ever read.
Ingredients You’ll Need
Before diving into the baking process, let’s gather all the essentials. Splitting the ingredients into two parts—brownie and cheesecake layers—makes it easy to follow.
For the Brownie Layer
This layer forms the chocolatey base of your dessert. Go for high-quality cocoa and chocolate for the best taste.
- 1/2 cup (1 stick) unsalted butter – Melted and slightly cooled.
- 1 cup granulated sugar
- 2 large eggs
- 1 teaspoon vanilla extract
- 1/3 cup unsweetened cocoa powder – Dutch-processed for deeper color and taste.
- 1/2 cup all-purpose flour
- 1/4 teaspoon salt
- 1/4 teaspoon baking powder
- Optional: 1/2 cup semi-sweet chocolate chips – For extra gooeyness.
For the Cheesecake Layer
This luscious layer adds the creamy, tangy contrast that makes these brownies stand out.
- 8 oz cream cheese – Softened to room temperature.
- 1/4 cup granulated sugar
- 1 large egg
- 1/2 teaspoon vanilla extract
- Optional: 1 tablespoon sour cream for added tang and smoothness.
Optional Add-Ins & Toppings
Want to elevate your brownies? Try these:
- Crushed Oreos – Adds crunch and a cookies-and-cream vibe.
- Fresh berries – Raspberries or strawberries work well with both chocolate and cheesecake.
- Nutella or peanut butter swirl – Drizzle before baking.
- Caramel drizzle – After baking, for added decadence.
- Chopped nuts – Walnuts or pecans for crunch.
Pro Tip: Stick to the base recipe the first time, then explore variations once you’re confident with the method.
Tools & Equipment Required
To create these cheesecake brownies with ease, having the right tools is half the battle. The good news? You don’t need anything fancy—just a few basics and maybe a few “nice-to-have” extras.
Basic Kitchen Tools
These are the must-haves:
- Mixing bowls (2-3 sizes) – Separate bowls for brownie and cheesecake layers.
- Whisk or hand mixer – To beat the cream cheese smoothly and combine ingredients.
- Measuring cups and spoons – Accuracy matters in baking!
- Rubber spatula – Helps with scraping down sides and folding ingredients gently.
- 8×8 inch baking pan – Perfect size for thick, chewy brownies.
- Parchment paper – Makes removing the brownies from the pan so much easier.
- Toothpick or knife – For swirl design and doneness testing.
Recommended Extras for Perfect Results
These tools can elevate your baking game:
- Electric mixer or stand mixer – Makes creaming the cheesecake mixture effortless.
- Offset spatula – Great for spreading batter evenly.
- Cooling rack – Helps your brownies cool uniformly and quickly.
- Digital kitchen scale – If you prefer weighing your ingredients for precision.
Having the right gear helps ensure that your brownies turn out picture-perfect every time—moist, fudgy, and beautifully swirled.
Step-by-Step Guide to Make Cheesecake Brownies
Time to put all those ingredients and tools to work. Follow these steps closely, and you’ll be biting into pure bliss in no time.
Step 1: Preheat and Prepare Your Baking Pan
Start by preheating your oven to 350°F (175°C). This ensures the brownies bake evenly from the get-go.
Next, line your 8×8-inch pan with parchment paper, letting some overhang on the sides. This “sling” makes removing the brownies a breeze later. Lightly grease the paper and sides of the pan with butter or nonstick spray to prevent sticking.
This might seem like a small step, but trust me—it makes a huge difference. Nobody wants half their brownie stuck to the bottom of the pan, right?
Pro Tip: If you’re using a glass or ceramic pan, reduce the oven temperature by 25°F. These materials retain heat more than metal and can cause overbaking.
Step 2: Make the Brownie Batter
Let’s get chocolatey!
- In a medium mixing bowl, whisk together the melted butter and sugar until the mixture looks smooth and shiny.
- Add the eggs and vanilla extract, beating well after each addition. This step gives your brownies that crinkly, shiny top.
- Sift in the cocoa powder, flour, salt, and baking powder. Mix just until combined—overmixing can lead to tough brownies.
- Optional: Fold in chocolate chips for added richness.
Once mixed, set the brownie batter aside. Don’t overthink the thickness—it should be dense and fudgy, not runny.
And just like that, you’re halfway to dessert heaven.
Step 3: Prepare the Cheesecake Mixture
Now it’s time to whip up that creamy cheesecake layer that sets these brownies apart.
- In a separate mixing bowl, add the softened cream cheese. Beat it until smooth and creamy. This is crucial—if the cream cheese is too cold, you’ll end up with a lumpy batter.
- Add the granulated sugar and mix until fully incorporated. The sugar not only sweetens but also softens the cream cheese even more.
- Next, beat in the egg and vanilla extract. Continue mixing until smooth and velvety. You can also add a spoonful of sour cream if you want a slight tang and an extra creamy texture.
The cheesecake batter should be pourable but not runny. A smooth, lump-free consistency is key here—think rich, pourable custard.
Pro Tip: Scrape down the sides of your bowl often to make sure everything is evenly mixed. A handheld mixer makes this easier, but a whisk and some arm power can do the job too.
Step 4: Layer and Swirl
Now for the fun part—layering and swirling the brownie and cheesecake mixtures.
- Pour about 3/4 of the brownie batter into your prepared baking pan. Spread it evenly using a spatula or the back of a spoon.
- Gently spoon the cheesecake mixture over the brownie base. Don’t pour it all in one spot—space it out across the surface.
- Drop the remaining brownie batter in small dollops over the cheesecake layer.
- Using a butter knife or skewer, create swirls by dragging the tip through both batters in a gentle circular or figure-eight motion. Don’t over-swirl—you want distinct, artistic patterns, not a muddy mess.
This is your moment to get creative! Swirling might seem like a small aesthetic detail, but it adds a professional touch that makes the brownies look bakery-worthy.
Pro Tip: If you’re adding peanut butter or Nutella, drop tiny spoonfuls on top before swirling it all together.
Step 5: Bake to Perfection
Slide your masterpiece into the oven and bake at 350°F (175°C) for 35 to 40 minutes. Here’s how to know when it’s done:
- The edges should look set, with a light golden brown color.
- The center might jiggle slightly—that’s normal. It will firm up as it cools.
- Insert a toothpick into the center. It should come out with a few moist crumbs (not raw batter).
Avoid overbaking, or you’ll lose the soft, fudgy texture. Remember, the cheesecake layer will continue to set after the brownies are out of the oven.
Let the brownies cool in the pan for 15-20 minutes, then transfer to a wire rack (using the parchment sling) and cool completely before cutting.
Pro Tip: For clean, bakery-style cuts, refrigerate the brownies for at least 1 hour before slicing with a sharp, clean knife.
Cooling and Serving Tips
The cooling process is just as important as baking. Rushing it can ruin the texture, and you definitely want those clean layers and smooth finish to shine through.
How Long to Cool Before Cutting
Here’s how to do it right:
- Let the brownies cool completely at room temperature in the pan.
- After that, transfer the pan to the refrigerator for at least 1 to 2 hours before cutting. This helps firm up the cheesecake layer and makes slicing much easier.
Trying to cut them while warm can lead to a gooey mess—and not the good kind. The knife will drag through the soft cheesecake, smearing everything instead of giving you those neat squares.
Pro Tip: Use a long, sharp knife and wipe it clean between each cut to get perfect edges every time.
Best Ways to Serve
Cheesecake brownies are delicious straight out of the fridge or slightly warmed in the microwave for about 10 seconds. Here are a few serving suggestions to impress your guests (or yourself):
- With a scoop of vanilla ice cream – Melts beautifully into the warm chocolatey goodness.
- Drizzled with caramel or chocolate syrup
- Topped with fresh berries and a sprig of mint
- Alongside a hot cup of coffee or an espresso
Want to go extra fancy? Add a dollop of whipped cream and a light dusting of cocoa powder or powdered sugar. It’s simple, elegant, and super Insta-worthy.
Storage and Shelf Life
These brownies are rich, indulgent, and you’ll want to savor them over several days—if they last that long!
Storing in the Refrigerator
Since they contain a cheesecake layer, refrigeration is a must.
- Store them in an airtight container in the fridge.
- They’ll stay fresh for up to 5 days without losing texture or flavor.
- Place parchment paper between layers if stacking them to avoid sticking.
Let them sit at room temperature for 10-15 minutes before serving for a softer bite.
Freezing Instructions
Yes, you can freeze these!
- Wrap individual brownies tightly in plastic wrap, then place them in a zip-top freezer bag or airtight container.
- They’ll keep well for up to 2 months.
- To thaw, transfer to the refrigerator overnight or let them sit at room temp for 30–45 minutes.
Avoid microwaving frozen cheesecake brownies directly—it can mess with the texture, especially of the cheesecake layer.
Customizations and Variations
The best part about this cheesecake brownie recipe? It’s incredibly versatile. Once you’ve nailed the basic version, you can start getting creative with flavors, textures, and mix-ins that turn this classic dessert into your signature treat.
Using Different Chocolate
Want to experiment with chocolate? There are plenty of delicious options.
- Dark Chocolate: Swap out semi-sweet chips with chopped dark chocolate or use Dutch-processed cocoa for an intense, bitter-sweet flavor.
- White Chocolate Chips: Add some white chocolate chips into the cheesecake layer for little bursts of creamy sweetness.
- Chocolate Chunks: Instead of chips, use chunks or chopped chocolate bars for that ooey-gooey melt-in-your-mouth experience.
Pro Tip: Avoid milk chocolate for the brownie base—it’s too sweet and lacks the deep flavor needed to balance the tangy cheesecake.
Adding Fruit or Nuts
Want more texture and flavor? Add-ins are your best friend.
- Berries: Fresh or frozen raspberries, blueberries, or cherries give a fruity kick that pairs beautifully with the rich chocolate.
- Nuts: Walnuts, pecans, or almonds add a satisfying crunch.
- Dried Fruit: Try dried cranberries or chopped dates for a chewy contrast.
When using fruits, lightly dust them with flour before adding to prevent them from sinking to the bottom.
Gluten-Free or Vegan Options
Dietary restrictions? No problem.
For Gluten-Free Brownies:
- Substitute all-purpose flour with 1:1 gluten-free flour blend.
- Ensure your cocoa powder and chocolate chips are labeled gluten-free.
For Vegan Cheesecake Brownies:
- Replace butter with plant-based butter or coconut oil.
- Use a flax egg (1 tbsp flaxseed + 2.5 tbsp water) instead of regular eggs.
- Choose a vegan cream cheese brand.
- Use almond milk or coconut cream to adjust the cheesecake mixture if needed.
These alternatives work well with a little testing and deliver surprisingly delicious results.
Common Mistakes to Avoid
Even with a simple recipe, it’s easy to make missteps that affect the final outcome. Here’s what to watch out for:
Overbaking or Undermixing
Overbaking can dry out your brownies and make the cheesecake rubbery. Keep a close eye during the last 5–10 minutes of baking.
- If the top is browning too fast but the center is underdone, loosely tent foil over the pan.
Undermixing, especially for the cheesecake layer, can lead to lumps and an uneven texture.
- Make sure the cream cheese is softened and fully combined with the sugar and egg before layering.
Cheesecake Layer Cracking
This usually happens when the oven temperature is too high or the cheesecake batter was overbeaten (introducing too much air).
Tips to prevent cracks:
- Bake at a consistent temperature—don’t keep opening the oven door.
- Avoid overmixing the cheesecake layer.
- Cool slowly—don’t expose hot brownies to a cold surface immediately.
Even if cracks appear, don’t panic—they still taste amazing and can be easily covered with toppings like ganache or whipped cream.
Nutrition Facts (Approximate)
Want to know what you’re indulging in? Here’s a general breakdown per square (based on a 9-square cut).
Per Serving Calories
- Calories: 320–350 kcal
- Total Fat: 20g
- Saturated Fat: 10g
- Carbohydrates: 35g
- Sugars: 24g
- Protein: 4–5g
Macronutrients Breakdown
| Nutrient | Amount per Serving |
|---|---|
| Carbs | 35g |
| Protein | 5g |
| Fat | 20g |
| Fiber | 2g |
| Sugar | 24g |
Keep in mind, these numbers can vary depending on the specific ingredients used, especially with add-ins or substitutions.
Why This Cheesecake Brownie Recipe Works
There are a million dessert recipes out there, but this one truly hits all the right notes—and here’s why.
Texture & Taste Balance
This recipe strikes a perfect harmony between rich and light, sweet and tangy, dense and creamy.
- The brownie layer is fudgy, not cakey.
- The cheesecake layer is smooth, slightly tangy, and not overly sweet.
- The swirls ensure every bite gets a bit of both, making it incredibly satisfying.
This balance is what keeps you reaching for “just one more piece.”
Tried-and-Tested Method
This isn’t some internet one-hit wonder. This method has been tested and tweaked for consistent results:
- Simple ingredients
- Straightforward steps
- Easy-to-follow layering and swirling process
Even beginner bakers can confidently make these and expect rave reviews every time.
Pairing Suggestions
Want to elevate your dessert game? Here are some perfect pairings to enjoy with your cheesecake brownies.
Drinks to Enjoy With Cheesecake Brownies
- Coffee – A strong espresso or cappuccino balances the richness.
- Red Wine – A bold cabernet or sweet port works surprisingly well.
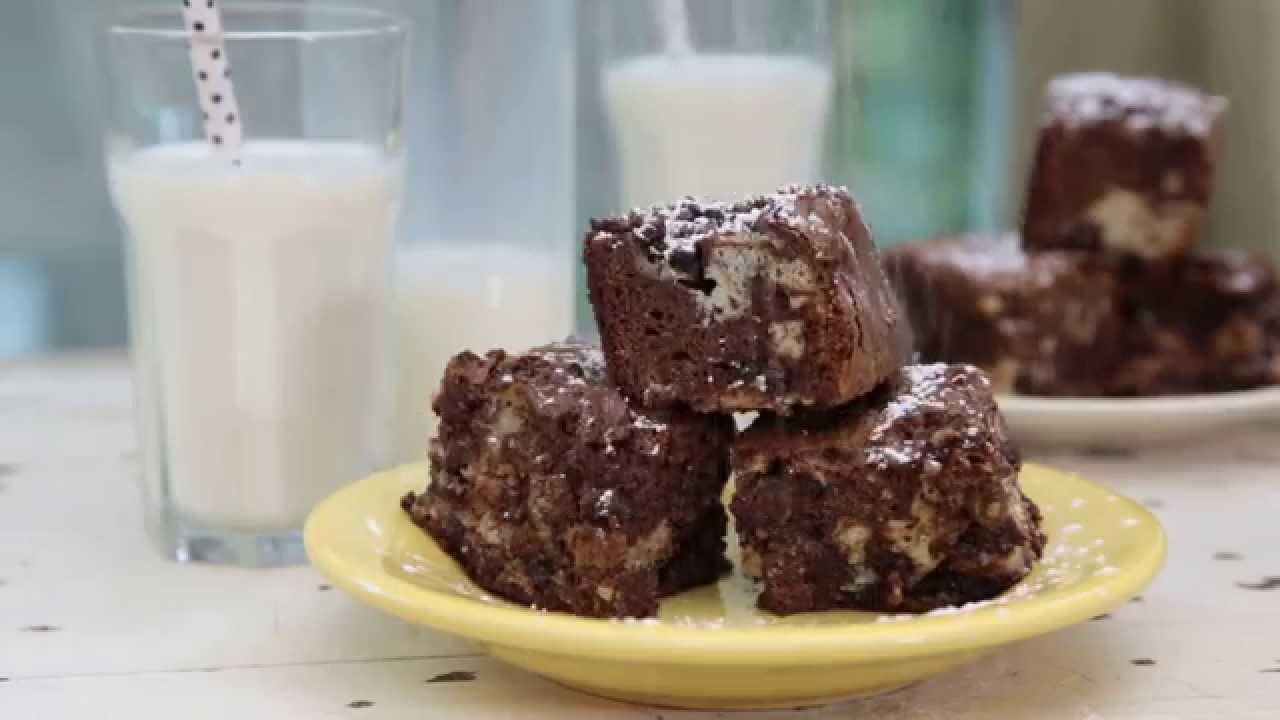
- Milk – Classic and always satisfying.
- Hot Chocolate – For the chocolate lover’s dream combo.
Other Desserts to Serve Alongside
Hosting a party? Create a dessert platter with:
- Mini cheesecakes
- Chocolate truffles
- Fresh fruit skewers
- Vanilla bean ice cream
The cheesecake brownies will still be the star of the show—but variety never hurts.
FAQs about Cheesecake Brownie Recipe
1. Can I use boxed brownie mix for this recipe?
Yes! If you’re short on time, a boxed brownie mix can work. Just prepare it as directed, pour ¾ into the pan, add the cheesecake layer, and swirl with the remaining brownie batter.
2. What kind of cream cheese is best?
Full-fat brick-style cream cheese is best for structure and creaminess. Avoid spreadable or whipped versions—they can make the cheesecake too runny.
3. Can I use this recipe to make brownie cheesecake bars?
Definitely! Just bake in a 9×13 inch pan for thinner bars. Adjust the bake time to around 30–35 minutes and keep an eye on the center.
4. What’s the best way to reheat cheesecake brownies?
Microwave for 10–15 seconds to soften and warm up the brownie slightly without melting the cheesecake layer too much. Or enjoy them straight from the fridge!
5. Can I add flavors to the cheesecake layer?
Yes! Try adding lemon zest, espresso powder, or a swirl of peanut butter, caramel, or jam into the cheesecake layer for a flavor twist.
Conclusion
Cheesecake brownies are the ultimate dessert mash-up—a fudgy, rich chocolate base layered with silky, tangy cheesecake and swirled into an irresistible treat. Whether you’re baking for a celebration, impressing guests, or just indulging your sweet cravings, this recipe delivers every time.
From choosing quality ingredients to mastering the swirl and nailing the bake, this guide walks you through every step so you can confidently create a dessert that looks and tastes amazing. Plus, with customization options, storage tips, and pairing ideas, you’re ready to take your dessert game to the next level.
So the next time you’re torn between baking brownies or cheesecake… don’t choose. Make both. In one. You won’t regret it.


