Cheesecake Bars Recipe: There’s something universally irresistible about cheesecake. Now imagine it in bar form—portable, perfectly portioned, and just as creamy and delicious as the classic version.
That’s exactly what you get with cheesecake bars! These delightful treats blend the richness of cheesecake with the simplicity of a square dessert, perfect for picnics, potlucks, or your midnight cravings.
In this comprehensive, step-by-step guide, we’ll walk you through everything you need to make the best cheesecake bars ever—from scratch!
Why Cheesecake Bars Are Everyone’s Favorite
Cheesecake bars have become a dessert staple in many households, and for good reason. Unlike a traditional cheesecake that requires a springform pan, a water bath, and a prayer to the baking gods, cheesecake bars are way easier. You don’t need fancy equipment, and the results are just as impressive.
One of the main reasons people love them is portion control. Each bar is a perfectly sized bite of creamy bliss—rich, tangy, and slightly sweet with that buttery, crunchy crust. They’re also ideal for sharing, making them perfect for gatherings and celebrations. Plus, you can customize the flavors endlessly. Want to add a swirl of raspberry or a drizzle of caramel? Go for it. Prefer something chocolatey? Easy.
And unlike pies or layered cakes, cheesecake bars are sturdy. They hold their shape, stack beautifully, and can be stored easily. If you’re a fan of quick desserts that don’t skimp on flavor, these bars will become your go-to.
Perfect Occasions to Serve Cheesecake Bars
Cheesecake bars fit into every event like the MVP dessert they are. Whether you’re hosting a birthday party, baby shower, or holiday dinner, they deliver elegance with minimal effort.
Here are a few perfect occasions to serve them:
- Holiday Gatherings: Add crushed peppermint or pumpkin spice for seasonal flair.
- Picnics and Potlucks: Easy to transport, mess-free, and always a hit.
- Brunch Buffets: Pair with fruit and coffee for a classy touch.
- Birthday Parties: Drizzle chocolate or caramel for an extra treat.
- Bake Sales: Slice them neatly, wrap individually—perfection!
Ingredients You’ll Need
Let’s talk ingredients. The key to any great recipe is quality ingredients, and that’s especially true when it comes to cheesecake. Each component plays a major role in flavor and texture. Here’s what you’ll need:
For the Crust
The crust is the foundation of your cheesecake bars, so it has to be solid (literally and figuratively). Graham cracker crust is the most common choice, offering a slightly sweet, nutty flavor that balances the richness of the filling.
Ingredients for the crust:
- 1 ½ cups graham cracker crumbs
- ¼ cup granulated sugar
- ½ cup unsalted butter, melted
- Pinch of salt (optional)
Best Type of Graham Crackers to Use
Not all graham crackers are created equal. Look for ones labeled “honey graham” for the best flavor. If you prefer a slightly spicier kick, cinnamon grahams work too. Crushed digestive biscuits or vanilla wafers are excellent alternatives if graham crackers aren’t available.
You can buy pre-crushed crumbs or crush your own in a food processor. Just make sure the texture is fine and even—chunky pieces can ruin the crust’s structure.
For the Cheesecake Filling
Here’s where the magic happens. The filling is the creamy, dreamy heart of the bars. You’ll want it smooth, tangy, and rich—no lumps allowed.
Ingredients for the filling:
- 16 oz (2 blocks) cream cheese, softened
- ½ cup granulated sugar
- 2 large eggs
- 1 tsp pure vanilla extract
- ½ cup sour cream (for extra creaminess)
Cream Cheese Tips for Creamy Texture
Room-temperature cream cheese is non-negotiable. Cold cream cheese will leave you with lumps that no amount of mixing can fix. Leave it out for at least 30–45 minutes before starting. Use full-fat cream cheese for the richest texture and flavor.
The sour cream is a secret weapon—it lightens up the texture and adds that signature tang. If you don’t have it, plain Greek yogurt can be a decent substitute.
Optional Toppings and Add-ins
Want to take your bars to the next level? These optional ingredients will add flair and flavor:
- Fruit Swirls: Raspberry, blueberry, or strawberry preserves swirled into the filling
- Chocolate Chips: Fold them into the filling or sprinkle on top before baking
- Caramel or Chocolate Drizzle: Add after baking and cooling
- Nuts: Chopped pecans or walnuts for crunch
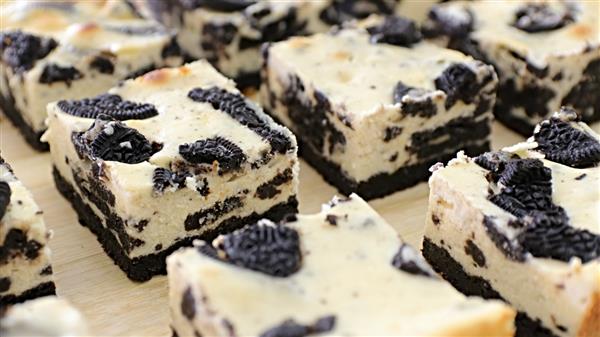
- Cookie Crust Variation: Try crushed Oreos or Biscoff cookies instead of grahams
Equipment You’ll Need
Kitchen Tools to Prepare Perfect Cheesecake Bars
While cheesecake bars don’t require high-end tools, having the right equipment makes the process smoother and more enjoyable.
Must-have tools:
- 9×13-inch baking pan
- Parchment paper (for easy removal)
- Mixing bowls (at least two)
- Hand mixer or stand mixer
- Measuring cups and spoons
- Rubber spatula
- Knife or offset spatula (for spreading filling)
- Cooling rack
Alternatives for Missing Equipment
No mixer? No problem! A strong whisk and some elbow grease will do the trick. If you don’t have parchment paper, grease the pan well with butter and lightly dust with flour. For crushing graham crackers, a zip-top bag and rolling pin work just fine.
Step-by-Step Guide to Making Cheesecake Bars
Step 1 – Prepping Your Pan and Oven
Before you start mixing and pouring, setting yourself up with the right prep makes the rest of the recipe a breeze. Start by preheating your oven to 325°F (160°C). This temperature ensures a gentle bake, helping your cheesecake layer stay smooth and crack-free.
Now, line a 9×13-inch baking pan with parchment paper, leaving some overhang on the sides. Why the parchment paper? It makes lifting out the cheesecake bars super easy and keeps them from sticking. If you don’t have parchment, use aluminum foil or just grease the pan well with butter or non-stick spray.
Once the pan is lined, place it on a baking sheet. This offers extra support, especially if your pan is thin or older. It also makes it easier to move in and out of the oven without shaking the filling.
Pro Tip: If your kitchen is hot or humid, pop your crust ingredients in the fridge for 10–15 minutes before assembling. Cold butter helps the crust hold its shape better.
Step 2 – Making the Crust
The crust is the first layer to build, and it’s surprisingly simple. Combine the graham cracker crumbs, melted butter, sugar, and a pinch of salt in a medium bowl. Mix until the texture resembles wet sand—when you press it between your fingers, it should clump together.
Next, press the mixture firmly and evenly into the bottom of your prepared pan. Use the bottom of a flat glass or measuring cup to smooth and pack the crust down tightly. This is important—if it’s too loose, it’ll crumble when you slice the bars later.
Bake the crust for 10 minutes at 325°F, then remove it and let it cool while you prepare the filling. A quick bake helps firm it up and prevents sogginess when you add the cheesecake layer.
Let’s not forget: the crust carries all the texture. It contrasts the creamy filling and gives that satisfying snap with each bite. Don’t rush this part.
Step 3 – Mixing the Creamy Cheesecake Filling
Here comes the most satisfying step—mixing up that luscious cheesecake filling.
In a large mixing bowl, add your room-temperature cream cheese. Beat it with a hand mixer or stand mixer on medium speed until it’s completely smooth and fluffy—this should take about 2–3 minutes. Scrape down the sides of the bowl to ensure every bit gets mixed evenly.
Now add the sugar and continue beating until it’s fully incorporated and silky. Then add the eggs, one at a time, mixing just until each one is blended in. Overmixing at this point can cause your cheesecake to crack during baking.
Finally, stir in the vanilla extract and sour cream. Give everything a good final mix, making sure there are no lumps. The mixture should be smooth, creamy, and pourable.
If you’re adding any flavorings or swirls—like lemon zest, raspberry jam, or chocolate chips—fold them in gently now.
Pro tip: Tap the bowl on the counter a few times to release any trapped air bubbles. This helps the cheesecake bake more evenly.
Step 4 – Assembling the Layers
Now that your crust is ready and your filling is smooth as silk, it’s time to assemble.
Pour the cheesecake filling over the cooled crust. Use a spatula to spread it out evenly, making sure it reaches all corners. Gently tap the pan on the counter to level out the top and remove any bubbles.
If you’re doing a fruit swirl, dollop spoonfuls of jam or compote across the top and drag a skewer or toothpick through it in a swirl pattern. Want a chocolate version? Sprinkle mini chocolate chips or swirl in some Nutella or peanut butter.
At this stage, the bars already look impressive—and you haven’t even baked them yet!
Take your time here. A smooth top and even layer not only look great but also ensure every bar has that perfect cheesecake-to-crust ratio.
Step 5 – Baking to Perfection
Transfer the pan to your preheated oven (still at 325°F) and bake for 35–40 minutes. Keep an eye on it during the last 10 minutes. You’re looking for a center that’s just set—it should jiggle slightly when you gently shake the pan.
Don’t overbake! That’s how you end up with dry or cracked cheesecake. Once done, turn the oven off, crack the door open, and let the cheesecake sit inside for about 10 minutes. This slow cooling helps prevent cracks from forming.
Remove the pan from the oven and place it on a wire rack to cool completely at room temperature. Then transfer it to the fridge for the final chill.
Pro tip: Avoid temptation and don’t slice them yet. They need to set properly in the fridge to hold their shape and develop that dense, creamy texture we all love.
Cooling and Chilling the Bars
Why Proper Cooling is Crucial
Cheesecake isn’t like your typical cake. It relies on residual heat and cooling time to set. Rushing this step can result in a runny center or bars that fall apart when cut.
Let the bars cool at room temperature for about 1 hour, then refrigerate for at least 4 hours—though overnight is even better. This long chill allows the filling to firm up and flavors to meld beautifully.
Avoid placing hot cheesecake directly in the fridge; it creates condensation, which can make the top soggy or lead to a weepy texture.
Use this time to prep any toppings or sides you plan to serve with it. And hey, maybe clean up the kitchen—you’ve earned a reward later!
How Long to Chill for Best Results
Minimum chill time: 4 hours
Recommended: Overnight (8–12 hours)
Once fully chilled, the cheesecake bars will be firm, easy to slice, and have that ultra-creamy bite that melts in your mouth. They’re totally worth the wait.
Cutting and Serving the Cheesecake Bars
Tips for Clean Cuts
You’ve waited patiently, the bars are perfectly chilled, and now it’s time for the final reward—slicing and serving! But don’t rush this part; a clean slice makes all the difference between pro-level presentation and messy edges.
Here’s how to get perfect, bakery-style slices every time:
- Use a sharp knife: Serrated knives or chef’s knives both work well. The sharper, the better.
- Wipe between cuts: After each slice, wipe the blade clean with a damp paper towel. This keeps the edges from smearing.
- Warm the knife: Run it under hot water, then dry before slicing. It’ll glide through the cheesecake like butter.
- Use a ruler (optional): Want even squares for a party tray? Lightly score the top of the bars with a ruler and a knife before cutting.
Depending on how large you want them, you can cut the 9×13 pan into:
- 12 large squares
- 24 medium squares
- 30–36 bite-sized bars
Best Ways to Serve
Now for the fun part—presentation! Cheesecake bars don’t need much dressing up, but you can still impress with a little extra flair:
- Dust with powdered sugar for a classy touch.
- Top with fresh berries like strawberries, blueberries, or raspberries.
- Drizzle with chocolate or caramel sauce before serving.
- Add whipped cream and a mint leaf for elegance.
Serve them chilled, straight from the fridge. They’ll hold their shape best that way and taste wonderfully refreshing. If you’re hosting a party, arrange them neatly on a platter or in mini cupcake liners for grab-and-go ease.
Storage Tips and Shelf Life
How to Store in the Fridge
To keep your cheesecake bars fresh and delicious, store them in an airtight container in the fridge. If you’re stacking them, place parchment paper between layers to prevent sticking. Stored properly, they’ll last for up to 5 days.
Want to make them ahead for a party or gathering? They actually taste better after a day in the fridge because the flavors deepen and the texture becomes more cohesive.
Pro tip: Avoid storing them uncovered—they’ll dry out or absorb other fridge smells (nobody wants onion-flavored cheesecake).
Can You Freeze Cheesecake Bars?
Absolutely! Cheesecake bars freeze beautifully and make for an amazing make-ahead dessert.
Here’s how to do it:
- Chill the bars completely in the fridge.
- Slice into individual servings.
- Wrap each bar tightly in plastic wrap, then aluminum foil.
- Place wrapped bars in a freezer-safe bag or container.
They’ll keep well for up to 3 months. To serve, thaw in the fridge overnight or at room temperature for 30–60 minutes. The texture and flavor remain nearly identical to fresh.
Freezing is perfect for holiday prep or late-night cravings. Just unwrap one bar and enjoy whenever the mood strikes!
Flavor Variations and Add-ons
One of the best things about cheesecake bars is how customizable they are. Once you master the base recipe, the sky’s the limit when it comes to flavors and add-ons. Here are some exciting twists to try:
Fruit Swirls and Compotes
Swirling in fruit preserves not only adds flavor but creates a beautiful marbled effect on top.
Popular combos:
- Raspberry + lemon zest
- Blueberry + vanilla bean
- Strawberry + balsamic drizzle
You can also top finished bars with a spoonful of homemade compote or fresh fruit for an elegant finish.
Chocolate and Nutty Versions
Want something rich and indulgent? Add chocolate in any form!
- Chocolate Chips: Fold into the batter or sprinkle on top before baking.
- Chocolate Ganache: Pour over the top once cooled.
- Nutella Swirl: Swirl into the filling for a hazelnut-chocolate dream.
- Crushed Oreos or Biscoff cookies: Use in the crust or as a topping.
- Toasted Nuts: Walnuts, pecans, or almonds for crunch.
Seasonal Flavors (Pumpkin, Peppermint, etc.)
Perfect for holidays or themed events, these seasonal variations are a crowd-pleaser:
- Pumpkin Cheesecake Bars: Add pumpkin puree and pumpkin pie spice.
- Peppermint Swirl: Mix in crushed candy canes and a drop of peppermint extract.
- Apple Cinnamon: Top with cinnamon-spiced apples before baking.
- Gingerbread Crust: Swap graham crackers for crushed gingersnaps.
No matter the flavor, keep the texture creamy and the crust firm—that’s the golden formula for success.
Common Mistakes to Avoid
Even the simplest recipes can go wrong without the right tips. Here are some common cheesecake bar mistakes—and how to dodge them:
Overbaking or Underbaking
Cheesecake should be creamy—not dry or runny. Bake just until the center jiggles slightly, not until it’s fully set. Overbaking leads to cracks and a rubbery texture, while underbaking causes a soupy mess.
Solution: Use the jiggle test and let the residual heat finish the job during cooling.
Lumpy Filling or Cracked Top
Nobody wants grainy cheesecake. Lumps come from using cold cream cheese or not mixing thoroughly.
Solution:
- Always use room-temperature cream cheese.
- Mix slowly and scrape the bowl often.
- Don’t overbeat the eggs—they trap air, which causes cracks.
Soggy Crust
This often happens when the crust isn’t baked before adding the filling.
Solution: Pre-bake the crust for 10 minutes, and let it cool before pouring in the cheesecake layer.
Avoiding these pitfalls ensures a flawless, melt-in-your-mouth cheesecake bar every time.
Nutritional Information
Let’s talk numbers. While cheesecake bars aren’t diet food, they’re definitely worth the indulgence. Here’s a rough breakdown per serving (based on 24 bars):
| Nutrient | Amount |
|---|---|
| Calories | 210–250 kcal |
| Fat | 15–18g |
| Saturated Fat | 9g |
| Carbohydrates | 18–22g |
| Sugar | 14–18g |
| Protein | 3–5g |
Healthier Substitution Ideas
Want to lighten things up? Try these tweaks:
- Low-fat cream cheese: Reduces overall fat and calories.
- Greek yogurt: Use in place of sour cream.
- Stevia or coconut sugar: For reduced sugar.
- Almond flour crust: A low-carb, gluten-free alternative.
You can make cheesecake bars fit most lifestyles with a few smart swaps—just be sure to test your version for texture and flavor.
Pairing Suggestions
Drinks That Complement Cheesecake Bars
Pairing the right drink with your cheesecake bars elevates the entire dessert experience. Since cheesecake is rich and creamy, it’s best paired with something that can either complement or cut through the richness.
Top drink pairings:
- Coffee or Espresso: The bitterness balances the sweet and creamy cheesecake.
- Black Tea: A subtle pairing that doesn’t overpower the dessert.
- Sparkling Wine or Champagne: Great for parties and adds a refreshing contrast.
- Dessert Wines: Think Moscato, Riesling, or a fruity rosé.
- Milk: A classic combo, especially if the bars are extra sweet or chocolaty.
Desserts to Pair in a Platter
If you’re putting together a dessert spread, cheesecake bars play well with others. Serve them alongside:
- Mini brownies or blondies
- Lemon bars or fruit tarts
- Chocolate-covered strawberries
- Cupcakes with light buttercream
- Cookies (shortbread, snickerdoodles, or sugar cookies)
This adds variety and makes your dessert table look stunning!
Making Cheesecake Bars Ahead of Time
Meal Prep Tips
Cheesecake bars are one of the best make-ahead desserts. In fact, they taste better the next day. If you’re preparing for a party or event, bake and chill them up to 48 hours in advance.
Once chilled and sliced:
- Place parchment paper between layers.
- Store in an airtight container.
- Keep refrigerated until ready to serve.
If you’re using toppings like whipped cream or fruit, add those right before serving to keep everything fresh.
How to Keep Them Fresh for Events
If transporting to an event:
- Keep them cool using a cooler bag or ice pack.
- Pre-cut and pack in layers using wax or parchment paper between each.
- Avoid stacking too many layers or they may squish.
Want them to look extra polished? Decorate them with a swirl of ganache, a fresh berry, or a gold-dusted chocolate chip just before serving.
Kid-Friendly Cheesecake Bars
Fun Designs and Shapes
Kids love anything fun, colorful, and sweet. Turn your cheesecake bars into kid-friendly bites with these creative ideas:
- Use cookie cutters to make heart, star, or animal shapes.
- Add rainbow sprinkles on top before baking.
- Swirl in fruit-flavored jams to create colorful patterns.
- Let them decorate their own with candy, chocolate drizzle, or whipped cream.
You can also make mini cheesecake bites using a muffin tin and cupcake liners—perfect for tiny hands and little appetites.
Safe Ingredients for All Ages
Make sure to avoid ingredients that can be allergenic or too complex for kids:
- Use natural food colorings or fruit for color.
- Skip nuts if there’s a risk of allergies.
- Reduce the sugar slightly for younger children without sacrificing flavor.
With a few tweaks, these bars are guaranteed to be a hit with kids at birthdays, school events, or family dinners.
Gluten-Free or Vegan Alternatives
Swaps for a Gluten-Free Crust
It’s surprisingly easy to make gluten-free cheesecake bars. Just swap out the graham crackers for one of these:
- Gluten-free graham crackers
- Crushed almond flour cookies
- Oat-based gluten-free cookies
Also, double-check that your vanilla extract and other ingredients are labeled gluten-free, especially if you’re baking for someone with celiac disease.
Vegan Cream Cheese Options
Craving that creamy cheesecake vibe without the dairy? No problem.
Vegan swaps to try:
- Vegan cream cheese (brands like Kite Hill or Tofutti)
- Coconut cream or vegan sour cream for tang
- Ground flax eggs instead of real eggs (1 tbsp flaxseed meal + 2.5 tbsp water = 1 egg)
For the crust, use coconut oil or vegan butter, and pick cookies that are dairy- and egg-free.
Vegan cheesecake bars might require a little trial and error, but they can be just as creamy and delicious as the traditional version!
FAQs about Cheesecake Bars Recipe
1. Can I double the recipe for a larger crowd?
Yes! Simply use a larger pan (like a 12×18-inch pan) or bake two separate batches. Just keep an eye on the baking time—it may need a few extra minutes depending on thickness.
2. Can I use low-fat cream cheese?
You can, but the texture will be less rich and creamy. For best results, use full-fat cream cheese. If you’re looking for a lighter version, balance it with Greek yogurt or light sour cream.
3. Why is my cheesecake layer runny?
That could be from underbaking or not chilling long enough. Make sure the bars are fully set in the fridge for at least 4 hours (preferably overnight) before slicing.
4. How do I know when it’s baked properly?
Look for a slight jiggle in the center when you gently shake the pan. The edges will be slightly puffed, but the center should still wobble a bit—it’ll firm up as it cools.
5. Can I use flavored cream cheese?
Absolutely! Flavored cream cheeses like strawberry or honey work well. Just reduce the added sugar slightly, as flavored versions tend to be sweeter.
Conclusion
With the step-by-step guide above, you now have everything you need to master this classic treat. From picking the perfect crust to slicing them like a pro, every detail matters. And the best part? You can customize them for any flavor, occasion, or dietary need.
So grab your ingredients, preheat that oven, and get ready to bake the best cheesecake bars of your life. Trust me—once you try them, you’ll never go back to store-bought again.


