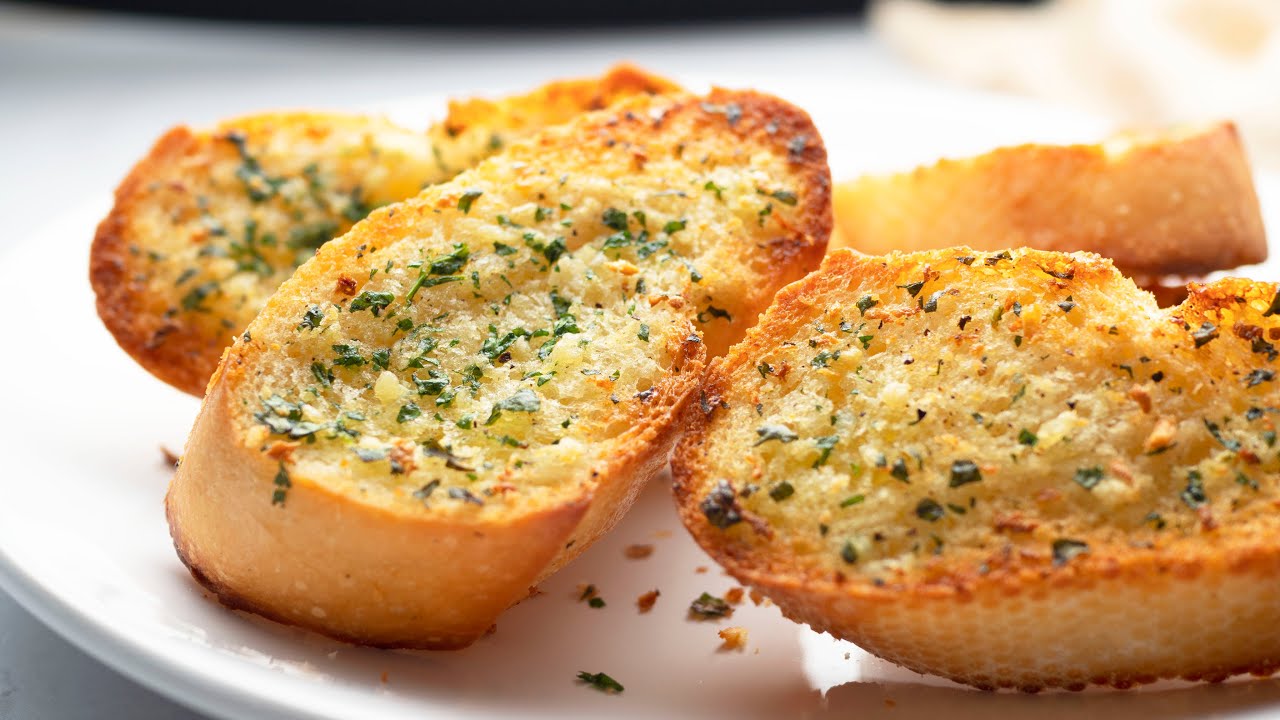
Cheese Garlic Bread Recipe: There’s something magical about cheese garlic bread. It’s the kind of food that instantly puts a smile on your face—crunchy on the outside, gooey on the inside, and packed with bold, savory flavor. Whether you’re pairing it with a hearty pasta dish or just enjoying it as a snack, cheese garlic bread is one of those universally loved comfort foods that never disappoints.
What makes it so irresistible? It’s the perfect blend of textures and flavors. The buttery richness, the kick of garlic, the stretchy cheese, and the golden crisp bread all come together in a symphony of deliciousness. And the best part? You don’t need to be a professional chef to make it. In fact, this easy-to-follow, step-by-step guide is crafted specifically for home cooks like you—no fancy tools or complicated steps required.
If you’ve ever felt disappointed by bland, store-bought versions or struggled with soggy homemade ones, this guide is about to change your garlic bread game forever. By the end of this article, you’ll know how to create the ultimate cheese garlic bread that’s restaurant-quality yet incredibly simple to make.
So, tie your apron, grab a loaf of bread, and let’s dive into the wonderful world of cheesy, garlicky goodness!
Ingredients You’ll Need
To make truly memorable cheese garlic bread, the ingredients you choose matter—a lot. Using high-quality and fresh ingredients will elevate your bread from ordinary to extraordinary. Here’s a breakdown of what you’ll need:
Essential Ingredients
1. Bread: Choosing the right bread is crucial. A good loaf of French bread, baguette, or Italian bread works best. These breads have a crusty exterior and a soft interior that holds up well to the buttery spread and melted cheese. Avoid using sandwich bread or anything too thin, as it may become soggy or fall apart.
2. Cheese: For that melty, stretchy, golden cheese pull, a combination works best:
- Mozzarella: For its meltability and mild flavor.
- Cheddar: Adds sharpness and depth.
- Parmesan: For that salty, nutty kick and a golden crust on top.
You can mix and match depending on your taste, but using at least two types is recommended.
3. Garlic: Fresh garlic is non-negotiable. Don’t settle for garlic powder unless it’s your last option. Minced or finely grated garlic delivers a punch of flavor that powdered alternatives just can’t match.
4. Butter: Use unsalted, high-quality butter. Melted and mixed with garlic, it forms the rich base of your spread. If you’re dairy-free, olive oil is a solid alternative, but you’ll miss out on some richness.
Optional Add-ons
Want to kick things up a notch? Here are some extras to consider:
- Fresh Parsley or Basil: Adds a fresh, herby finish.
- Oregano or Italian Seasoning: For a more traditional, pizza-style flavor.
- Chili Flakes or Black Pepper: Adds a subtle heat.
- Jalapeños or Olives: For extra zest and bite.
These optional ingredients aren’t required, but they help you customize the garlic bread to your own flavor preferences. For instance, if you love spicy food, a sprinkle of chili flakes will give the bread a nice little kick.
Kitchen Tools You’ll Need
You don’t need a gourmet kitchen to pull off amazing cheese garlic bread, but having the right tools on hand will make the process easier and more efficient.
Basic Kitchen Equipment
1. Oven: A standard oven is ideal for baking garlic bread. If you have a toaster oven or even an air fryer, those can work in smaller batches.
2. Baking Tray: You’ll need a sturdy baking sheet or tray to lay out your bread slices or loaf halves. Lining it with parchment paper is a good idea for easy cleanup.
3. Sharp Knife: A serrated bread knife makes slicing the loaf easier without squishing it. Precision matters, especially when you’re cutting even slices for even toasting.
4. Spoon or Spatula: To spread the garlic butter evenly across the bread, a spoon or small spatula will do the job just right.
Nice-to-Have Tools
1. Garlic Press: For perfectly crushed garlic without a mess, a garlic press is your best friend. It extracts maximum flavor and is super easy to use.
2. Cheese Grater: If you’re using block cheese (which you should for better melting), a good grater helps you get the right texture—fine for Parmesan, coarser for mozzarella and cheddar.
3. Pastry Brush: Want a perfectly even layer of garlic butter? Use a pastry brush. It gives you control and helps you coat every inch of the bread.
4. Broiler Option: Some ovens have a broiler function, which is great for getting that bubbly, golden cheese top. It’s optional but can elevate the final product visually and texturally.
With these tools in place, you’re set up for success. Now, let’s roll up our sleeves and start cooking.
Step-by-Step Guide to Making Cheese Garlic Bread
This is the fun part! Follow these steps, and you’ll be pulling out a tray of steaming, golden-brown, cheesy garlic bread that looks and tastes like it came straight out of a top-tier Italian restaurant.
Step 1: Preparing the Garlic Butter Mixture
Start with the garlic. Peel and mince 4–5 garlic cloves finely. You want a texture that’s almost paste-like. If you have a garlic press, use that instead—it releases more flavor oils and gives a smoother consistency.
Melt the butter. Use about half a cup (1 stick) of unsalted butter. Melt it gently over low heat in a small saucepan. You don’t want it boiling, just liquefied.
Infuse the garlic. Once the butter is melted, toss in your minced garlic. Let it cook for a minute or two—just until it becomes fragrant. Be careful not to burn it! Burnt garlic is bitter and will ruin the taste.
Add herbs and seasoning. Turn off the heat and stir in:
- 1 tablespoon chopped parsley
- ½ teaspoon of dried oregano or Italian seasoning
- Salt to taste
- Optional: A pinch of chili flakes for some heat
Let the mixture sit for a few minutes to cool slightly and allow the flavors to blend. This butter is going to soak into the bread, infusing every bite with garlicky, buttery goodness.
Consistency check: The mixture should be slightly thick but pourable. If it’s too thick, add a teaspoon of olive oil or a bit more melted butter. If too runny, let it cool a bit longer.
Pro tip: Make a double batch and refrigerate the extra garlic butter. It lasts for a week and can be used on veggies, pasta, or even steak.
Step 2: Preparing the Bread
The foundation of any good cheese garlic bread is the bread itself. You want a sturdy, crusty loaf that can handle all that butter and cheese without getting soggy or falling apart.
Start with the right loaf. A day-old French baguette or Italian loaf works wonders because it holds its shape and crisps up nicely. If it’s freshly baked and still soft, consider toasting it slightly before assembling to help firm it up.
Slicing technique matters. For classic garlic bread, slice the loaf in half lengthwise so you have two long, flat halves. If you’re serving a group or want individual portions, you can also cut the bread into thick slices about 1.5 inches wide. Make sure not to cut all the way through the base if you’re doing a pull-apart or stuffed version.
Optional toasting step. If your bread is extra soft or you like an ultra-crunchy base, pre-toast it for 3–4 minutes at 350°F (175°C) before adding the toppings. This step helps avoid sogginess and ensures a perfect bite every time.
Check the texture. The bread should feel slightly crispy on the outside but soft on the inside—ready to soak up that glorious garlic butter and gooey cheese in the next steps.
Step 3: Assembling the Garlic Bread
Now comes the satisfying part—assembling everything together to build the flavor bomb we all know and love.
Spread the garlic butter. Using a spoon or a pastry brush, generously coat each slice or loaf half with your garlic butter mixture. Don’t just brush the surface—let the butter soak into the nooks and crannies of the bread. Make sure the minced garlic and herbs are distributed evenly.
Go heavy or light. If you’re all about bold flavor, go heavy on the butter. If you’re watching calories (but still want to indulge), use a light hand. Either way, aim for even coverage so every bite is equally delicious.
Add the cheese. Sprinkle a generous layer of shredded mozzarella over the garlic-buttered bread. Then add a bit of cheddar for sharpness and finish with a dusting of parmesan. For a golden, crispy cheese top, make sure the cheese isn’t too thick—just enough to cover without clumping.
Customize it. This is the perfect stage to throw in extra toppings. Love spice? Add jalapeños or chili flakes. Want it herby? Sprinkle more parsley or oregano. Craving crunch? Add some finely chopped onions or bell peppers.
Pro tip: Add a small pinch of salt over the cheese if your butter was unsalted. It brings out the full flavor of the cheese and garlic.
Once you’ve layered everything, it’s time for the oven to work its magic.
Step 4: Baking It to Perfection
Baking is what transforms your assembled bread into the cheesy, golden masterpiece you’re dreaming of. The key is to get that perfect balance between crispy edges, a gooey cheesy top, and a soft interior.
Preheat your oven. Set it to 375°F (190°C) and allow it to fully preheat. This ensures the bread bakes evenly from the get-go.
Baking time. Place your prepared bread on a lined baking tray and bake for 10–12 minutes. Keep an eye on it around the 8-minute mark. You’re looking for:
- Melting cheese with some bubbling
- Slight golden edges on the bread
- Light browning on the cheese top
Optional broil step. If you want that Instagram-worthy golden top with slightly crisped cheese edges, turn your oven to broil for the last 2–3 minutes. But watch it closely—cheese can burn fast under broil mode!
Check doneness. The bread should feel crisp when tapped, and the cheese should be melted all the way through. If the center still looks soft or raw, give it another 2–3 minutes.
Pro tip: Let it rest for a minute after baking. This helps the cheese set slightly so it doesn’t slide off when you slice it.
Now comes the best part—getting it ready to serve.
Step 5: Garnishing and Serving Suggestions
You’ve nailed the baking. Your kitchen smells like a garlic-lover’s heaven. But don’t stop here. A little garnish and presentation go a long way.
Herbs are your friend. Sprinkle freshly chopped parsley or basil over the hot bread right out of the oven. The heat releases the oils in the herbs, making them even more aromatic.
Want a citrusy twist? A few drops of lemon juice or lemon zest can add a surprising brightness that cuts through the richness.
Dipping sauces to elevate it:
- Marinara sauce for a pizza-style flavor
- Ranch or garlic aioli for a creamy twist
- Hot sauce or sriracha for spice lovers
How to serve:
- Cut loaf halves into slices if not already pre-cut.
- Stack them on a rustic wooden board or a lined basket for a cozy, homemade vibe.
- Pair with soups, salads, or pasta for a full meal.
Occasion ideas:
- Game nights and movie marathons
- Family dinners
- Holiday gatherings or potlucks
Pro tip: Always serve hot. Cheese garlic bread loses its magic when it cools too much, so keep it warm until it hits the plate.
Variations of Cheese Garlic Bread
The classic version is hard to beat, but sometimes, a little experimentation can make things even more exciting. If you’re looking to switch things up, try one of these delicious variations:
Cheesy Garlic Pull-Apart Bread
This version is a crowd-pleaser and perfect for parties. Instead of slicing the bread into halves or pieces, take a whole round or oval loaf (like sourdough) and cut it in a crisscross pattern—both horizontally and vertically—without slicing all the way through.
How to make it:
- Stuff the garlic butter into the crevices using a spoon or your fingers.
- Then, sprinkle a generous amount of shredded mozzarella and cheddar into each cut.
- Wrap the loaf in foil and bake at 375°F (190°C) for about 15 minutes. Unwrap and broil for 2–3 minutes to crisp up the top.
When it comes out of the oven, each pull reveals strings of melted cheese and buttery garlic—like a savory blooming flower. Perfect for sharing!
Spicy Jalapeño Garlic Bread
Want some heat? This version kicks it up a notch and is ideal for spice lovers.
To make it spicy:
- Mix finely chopped jalapeños (fresh or pickled) into your garlic butter mixture.
- Add a sprinkle of chili flakes or cayenne pepper on top.
- Use pepper jack cheese along with mozzarella for extra fire.
The spice beautifully balances the richness of the cheese and butter, making it irresistibly bold.
Vegan Cheese Garlic Bread
For those who are dairy-free or vegan, don’t worry—this version is just as indulgent.
Vegan swaps:
- Use vegan butter or olive oil instead of regular butter.
- Choose plant-based cheese that melts well—brands like Violife or Daiya work great.
- Opt for a crusty vegan-friendly loaf (double-check ingredients if buying packaged).
The garlic and herbs remain the stars here, so even without dairy, this version packs a punch in flavor.
Pro tip: Adding nutritional yeast to your vegan garlic butter mix gives it a cheesy, umami-rich edge without the actual cheese.
Storage Tips and Reheating Instructions
So you made a big batch (because why not?) and now you’ve got leftovers. Don’t toss them—cheese garlic bread can be stored and reheated easily while keeping most of its deliciousness intact.
How to Store Leftovers:
Refrigeration:
- Place cooled bread slices in an airtight container or wrap them tightly in foil.
- Store in the fridge for up to 3 days.
Freezing:
- If you want to keep it longer, wrap each piece in foil and then place them in a zip-lock bag.
- Store in the freezer for up to 1 month.
Before freezing, you can also assemble the bread (with garlic butter and cheese) and freeze it unbaked. When ready, just bake directly from frozen—just add a few extra minutes to the cooking time.
How to Reheat Garlic Bread:
Oven method (recommended):
- Preheat your oven to 350°F (175°C).
- Wrap the bread in foil and bake for 10–15 minutes.
- For extra crispiness, unwrap for the last 3–4 minutes.
Microwave method:
- Not ideal, but it works in a pinch.
- Wrap in a paper towel and microwave for 20–30 seconds.
- Bread will be softer but less crispy.
Toaster oven/air fryer:
- Reheat for 5–7 minutes at 350°F (175°C) for a great texture.
Pro tip: Avoid reheating more than once. Garlic bread tends to dry out if it’s reheated multiple times.
Nutritional Information
Let’s be honest—cheese garlic bread isn’t a health food, but knowing what’s in each serving can help you make informed choices, especially if you’re tracking your intake.
Estimated Nutritional Breakdown (per slice):
| Nutrient | Amount |
|---|---|
| Calories | 250–300 kcal |
| Total Fat | 15–18g |
| Saturated Fat | 9g |
| Carbohydrates | 20–25g |
| Protein | 7–10g |
| Sodium | 350–450mg |
These numbers vary depending on your bread type, cheese quantity, and butter portion.
Want to lighten it up?
- Use whole wheat or sourdough bread.
- Cut down on butter and cheese or use low-fat alternatives.
- Add more herbs for flavor without the extra calories.
Still craving it on a diet? Try making mini cheese garlic bread bites using whole grain baguette slices. Portion control for the win!
Common Mistakes to Avoid
Even simple recipes like this one can go wrong without the right tips. Here are a few common pitfalls and how to steer clear of them:
1. Using Too Much Butter
Yes, butter is delicious, but going overboard can make the bread greasy and soggy. Stick to a balanced amount that coats the bread without pooling.
2. Skimping on Garlic
This is garlic bread. Don’t be shy! Using too little garlic leads to bland results. And always use fresh garlic if possible—it’s worlds apart from powdered versions.
3. Overbaking or Undercooking
It’s easy to go too far and end up with hard, dry bread—or worse, pull it out too early and get a raw middle. Always preheat your oven and check doneness visually and by touch.
4. Uneven Cheese Distribution
Clumps of cheese in one spot and none in another? Nope. Spread it out evenly so every bite has that perfect cheesy goodness.
5. Serving It Cold
Timing matters. Cheese garlic bread is best served piping hot when the cheese is gooey and the aroma fills the room. If you’re hosting, time it so it comes out of the oven just before serving.
Tips and Tricks from Home Chefs
The difference between good and great cheese garlic bread often lies in the little secrets passed down from kitchen to kitchen. Here are some tried-and-true hacks from passionate home cooks that will take your garlic bread game to the next level:
1. Let the Butter Sit
Instead of applying garlic butter right after melting, let it sit for 5–10 minutes. This gives the garlic and herbs time to infuse, creating a deeper flavor profile. The cooled mixture also spreads more easily without soaking the bread too much.
2. Mix Cheeses for Maximum Flavor
Don’t just stick to one kind of cheese. Mozzarella gives you stretch, but mixing it with cheddar or gouda adds depth and sharpness. Add a dusting of parmesan on top for that irresistible golden crust.
3. Use Compound Garlic Butter in Advance
Make a batch of garlic herb butter, roll it into a log, wrap it in plastic, and keep it in the fridge. Whenever you’re in the mood, just slice a round and melt it on bread—instant garlic bread magic!
4. Add a Drizzle of Olive Oil
Right before baking, a small drizzle of extra virgin olive oil across the cheese can boost both flavor and texture. It also helps in browning the cheese beautifully.
5. Experiment with Flavored Butters
Want something gourmet? Try mixing in sun-dried tomatoes, roasted red peppers, or even caramelized onions into your garlic butter. The result? A completely unique twist on a classic favorite.
6. Try Different Bread Types
Yes, baguettes and Italian loaves are standard, but sourdough adds a tangy punch. Ciabatta offers an airy texture, and even naan or pita bread can serve as a creative base.
7. Use the Freezer for Meal Prep
Assemble garlic bread ahead of time and freeze it unbaked. When guests drop by or hunger hits, you’re just minutes away from freshly baked, cheesy goodness. Total lifesaver.
FAQs about Cheese Garlic Bread Recipe
1. Can I make cheese garlic bread vegan?
Yes! Simply swap the butter for vegan margarine or olive oil and use plant-based cheeses that melt well. Add nutritional yeast for an extra cheesy flavor boost.
2. Can I cook garlic bread in a microwave instead of an oven?
Technically yes, but it won’t have the crispy texture that oven baking provides. Use a microwave for reheating only. For the best taste and texture, stick to the oven or air fryer.
3. How do I store cheese garlic bread overnight?
Wrap it tightly in foil or store in an airtight container in the fridge. Reheat in the oven or air fryer for 5–10 minutes at 350°F to bring it back to life.
4. What cheese is best for garlic bread?
Mozzarella is the classic choice for stretchiness, but mixing it with cheddar, Parmesan, or Monterey Jack adds depth of flavor. Use freshly grated cheese for the best melt.
5. Can I freeze garlic bread after baking it?
Absolutely! Let it cool completely, wrap it in foil or cling wrap, and freeze. To reheat, pop it in the oven at 350°F for 10–15 minutes. It’s perfect for quick snacks or surprise guests.
Conclusion
Cheese garlic bread isn’t just a side dish—it’s an experience. It’s the perfect combination of crispy, chewy, cheesy, and garlicky that satisfies comfort food cravings every single time. With the right ingredients, some clever hacks, and this detailed step-by-step guide, you can now whip up bakery-style garlic bread right in your own kitchen.
Whether you’re making it for a cozy family dinner, a weekend movie night, or a special gathering, one thing’s for sure—there won’t be any leftovers. And once you master the basics, the flavor possibilities are endless. From spicy jalapeño twists to vegan alternatives, garlic bread is your canvas, and you’re the artist.
So, roll up your sleeves, preheat that oven, and prepare to make some magic. Trust us—your taste buds will thank you.


