Canned Black Beans Recipe: Canned black beans are one of the most versatile and budget-friendly pantry staples you can have in your kitchen. Unlike dry beans, which require soaking overnight and long cooking times, canned black beans are pre-cooked, which makes them a quick and convenient ingredient. Whether you’re making tacos, burrito bowls, soups, or simply looking for a hearty side dish, canned black beans can be transformed into a flavorful dish in just minutes.
Why Choose Canned Over Dry Beans?
Let’s be honest—life gets busy. While dry beans may be cheaper, the soaking and cooking process can take hours. Canned beans, on the other hand, are ready to go. You just open the can, rinse, and start cooking. They’re perfect for quick weeknight meals, last-minute gatherings, or when you just don’t have the energy to babysit a pot of beans on the stove. The best part? You don’t sacrifice nutrition or taste—canned beans are packed with the same nutrients as dried ones.
Nutritional Benefits of Black Beans
Black beans are a powerhouse of nutrition. They’re loaded with protein, making them a great meat substitute for vegetarians and vegans. They also contain high amounts of dietary fiber, which supports digestion and helps you feel full longer. On top of that, black beans are rich in iron, magnesium, and antioxidants that support heart health and help stabilize blood sugar levels. If you’re looking to boost your diet with nutrient-dense, plant-based foods, black beans are an easy win.
Ingredients You’ll Need
The beauty of cooking with canned black beans is that you don’t need a long list of complicated ingredients. A few pantry staples and fresh add-ins can take these beans from plain to delicious in no time.
Main Ingredients
- 1–2 cans of black beans (15 oz each, drained and rinsed)
- 1 tablespoon olive oil (or any cooking oil of choice)
- 1 medium onion (finely chopped)
- 2–3 garlic cloves (minced)
- 1 teaspoon ground cumin
- 1 teaspoon chili powder
- Salt and pepper to taste
- ½ cup vegetable broth or water (to help simmer the beans)
These core ingredients will give you a flavorful base that works for almost any dish.
Optional Add-Ins for Extra Flavor
- Bay leaf for earthy notes
- Fresh cilantro for brightness
- Lime juice for a tangy kick
- Diced tomatoes or salsa for extra depth
- Jalapeños or red pepper flakes for heat
The beauty of this recipe is flexibility—you can keep it simple or dress it up depending on what you’re craving or what you already have in your kitchen.
Kitchen Tools and Equipment
Before diving into cooking, let’s make sure your kitchen is set up for success. You don’t need fancy gadgets, but the right tools can make cooking smoother and more enjoyable.
Must-Have Cooking Tools
- Medium saucepan or skillet (for cooking the beans)
- Wooden spoon or spatula (for stirring)
- Colander (for draining and rinsing the beans)
- Cutting board and knife (for prepping vegetables)
Useful Extras for Convenience
- Garlic press (if you want to save time mincing garlic)
- Measuring spoons and cups (to get seasonings just right)
- Storage containers (if you plan on saving leftovers)
Having these tools on hand ensures the recipe comes together quickly and without stress.
Step-by-Step Guide to Cooking Canned Black Beans
Now comes the fun part—turning plain canned black beans into something flavorful and delicious. Follow these steps, and you’ll have a dish that tastes like it’s been simmering for hours, even if it only takes 20 minutes.
Step 1: Draining and Rinsing the Beans
Start by opening your can of black beans and pouring them into a colander. Rinse them under cold water until the liquid is gone and the beans look clean. Why rinse? The liquid in canned beans often contains excess sodium and starch, which can make your dish taste overly salty or starchy. Giving them a good rinse not only improves flavor but also reduces sodium content, making your dish healthier.
Step 2: Preparing Aromatics
Every great bean dish starts with aromatics. Heat a tablespoon of olive oil in a medium saucepan or skillet over medium heat. Once the oil is warm, add your finely chopped onion and cook until it turns soft and golden, about 5–7 minutes. This step builds a sweet, savory foundation that enhances the beans later. Next, add minced garlic and stir for another minute until fragrant. Be careful not to burn the garlic—it can turn bitter quickly.
This onion-and-garlic combo is the backbone of flavor. If you want to take it up a notch, you can also toss in diced bell peppers, jalapeños, or even celery. These vegetables not only add depth to the dish but also sneak in extra nutrients. Think of this stage as laying down the first brushstrokes on a canvas—the rest of the flavors will layer beautifully on top.
Step 3: Cooking the Beans with Seasonings
Once your aromatics are softened and fragrant, it’s time to bring in the star—your black beans. Add the rinsed beans straight into the pan with the onion and garlic. Stir well to coat them in the oil and aromatics.
Now comes the seasoning. Sprinkle in cumin and chili powder for a smoky, earthy kick. A pinch of salt and pepper balances the flavors, but don’t go heavy-handed yet—you’ll adjust at the end. If you enjoy a little extra warmth, add paprika or cayenne pepper. Pour in about half a cup of vegetable broth (or water if you don’t have broth on hand). This liquid helps the beans simmer and absorb the spices, transforming them into something rich and savory.
As the beans simmer, stir occasionally to prevent sticking. The mixture should thicken slightly, creating a flavorful sauce that clings to each bean. Already, your kitchen will start smelling irresistible!
Step 4: Simmering to Enhance Flavor
Here’s where patience pays off. Allow the beans to simmer gently for 10–15 minutes. Keep the heat low so the beans don’t dry out or burn. During this time, the seasonings marry with the beans, and the broth reduces to create a deliciously thick consistency.
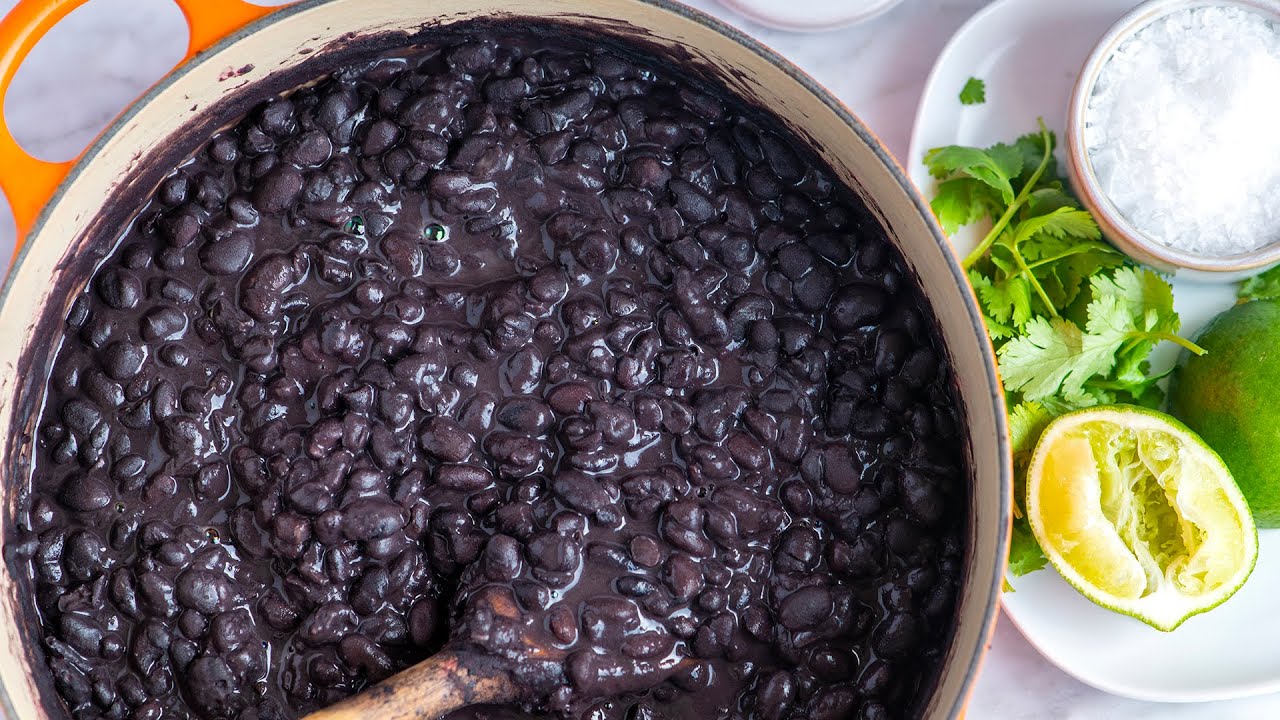
If you want creamier beans, use the back of a spoon to gently mash some of them against the side of the pan while simmering. This trick gives your dish a richer texture, perfect for serving over rice or as a hearty dip with tortilla chips.
For a burst of freshness, consider squeezing in lime juice or sprinkling in chopped cilantro at the very end of cooking. These bright notes cut through the earthiness of the beans and make the dish feel lighter.
Step 5: Serving Suggestions
Now that your black beans are perfectly cooked and seasoned, it’s time to enjoy them. These beans are incredibly versatile, so you can serve them in many ways:
- As a side dish: Pair them with grilled chicken, steak, or fish.
- In tacos or burritos: Use them as a filling with cheese, salsa, and avocado.
- Over rice: A classic combo that never fails. Add a fried egg on top for extra protein.
- In grain bowls: Mix them with quinoa, roasted veggies, and a drizzle of tahini or chipotle sauce.
- As a dip: Mash them slightly and serve with tortilla chips or pita bread.
This recipe is so flexible that you can adjust it based on your meal plans or what’s already in your fridge. Once you start making beans this way, you’ll never want to eat them straight out of the can again.
Variations of the Recipe
One of the best things about canned black beans is their adaptability. You can take the same base recipe and give it a completely new flavor profile just by switching up seasonings and add-ins. Here are three delicious variations:
Spicy Mexican-Style Black Beans
If you love heat and bold flavors, add diced jalapeños, extra chili powder, and a pinch of cayenne pepper while cooking. Top with fresh cilantro and a squeeze of lime juice before serving. These spicy beans are perfect for tacos, nachos, or burrito bowls.
Cuban-Style Black Beans
For a classic Cuban twist, add bay leaves, oregano, and a splash of vinegar during the simmering process. Serve with white rice and plantains for a traditional Cuban meal that’s comforting and full of flavor.
Quick Garlic and Herb Black Beans
Keep it simple with lots of garlic, olive oil, and fresh herbs like parsley or cilantro. This version pairs beautifully with grilled meats or can be eaten on its own with crusty bread.
How to Store and Reheat Leftover Black Beans
Cooking a big batch of black beans means you’ll likely have leftovers—and that’s a good thing! These beans store beautifully and taste even better the next day as the flavors deepen. Here’s how to handle them properly.
Refrigerating
If you plan to enjoy the beans within 3–4 days, the fridge is your best option. Let the beans cool completely before transferring them to an airtight container. Store them in the refrigerator, and when you’re ready to eat, simply reheat them on the stovetop over medium heat or in the microwave. Add a splash of water or broth if they’ve thickened too much.
Freezing for Long-Term Use
Want to keep your beans for longer? Freezing is the way to go. Place cooled beans into freezer-safe containers or resealable bags, making sure to leave a little space at the top for expansion. Label the containers with the date so you can keep track. Frozen black beans last up to 3 months. To reheat, thaw overnight in the fridge or warm directly on the stove with a splash of water.
Best Ways to Reheat
- Stovetop: Place beans in a saucepan, add a little liquid, and heat gently until warmed through.
- Microwave: Heat in short bursts, stirring in between to ensure even heating.
- In recipes: Toss frozen or refrigerated beans directly into soups, stews, or casseroles—they’ll warm up as the dish cooks.
Storing beans properly saves you both time and money while ensuring you always have a quick, healthy option on hand.
Tips and Tricks for the Best Flavor
Cooking canned beans may seem straightforward, but a few smart tricks can take your dish from good to unforgettable.
Balancing Seasonings
Black beans have a mild, earthy flavor, so they benefit from bold seasonings. Start with a base of cumin, garlic, and onion, then build up layers with chili powder, smoked paprika, or even a splash of vinegar for brightness. Remember: always taste as you go! Adjust salt and spices at the end so everything balances perfectly.
Common Mistakes to Avoid
- Skipping the rinse: That canned liquid can leave beans overly salty and starchy. Always rinse!
- Overcooking: Simmer gently—high heat can make beans mushy.
- Forgetting acidity: A squeeze of lime or lemon at the end brightens the dish dramatically.
- Using too little seasoning: Plain beans can be bland. Don’t be shy with your spices and herbs.
With these tips, even the simplest can of black beans will taste like a restaurant-quality dish.
Health Benefits of Black Beans
Black beans are more than just delicious—they’re a nutrient-packed powerhouse that supports overall health.
Protein and Fiber
One cup of black beans provides around 15 grams of protein and 15 grams of fiber, making them one of the best plant-based protein sources available. This combo keeps you feeling full longer, which can help reduce unnecessary snacking.
Heart Health
Black beans are rich in antioxidants, magnesium, and potassium—all of which support cardiovascular health. Regularly eating black beans may help lower blood pressure and improve cholesterol levels.
Weight Management
Because of their high fiber and protein content, black beans promote satiety, making it easier to manage weight. They also have a low glycemic index, which means they help stabilize blood sugar levels instead of causing spikes.
In short, black beans are an inexpensive, tasty, and powerful addition to any healthy diet.
Serving Ideas for Canned Black Beans
Wondering how to enjoy your black beans beyond the basic recipe? Here are some creative ways to put them to use.
As a Side Dish
Serve them alongside grilled chicken, steak, or fish. Add rice and veggies, and you’ve got a complete, balanced meal.
In Tacos and Burritos
Mash them slightly and use as a taco or burrito filling. Pair with salsa, cheese, and avocado for a satisfying bite.
In Salads and Grain Bowls
Mix beans with corn, bell peppers, and avocado for a colorful salad. Or toss them into a quinoa or brown rice bowl with roasted veggies for a protein boost.
As a Base for Soups and Stews
Black beans add body and richness to soups. Blend some beans for a creamy texture while leaving others whole for bite.
With so many possibilities, canned black beans can easily become a staple in your weekly meal plan.
FAQs about Canned Black Beans Recipe
1. Do I need to rinse canned black beans before cooking?
Yes! Rinsing reduces sodium and removes the starchy liquid, improving flavor and texture.
2. Can I use canned black beans straight from the can?
Technically yes, since they’re pre-cooked, but rinsing and seasoning them makes them taste much better.
3. Are canned black beans healthy?
Absolutely. They’re rich in protein, fiber, and nutrients. Just choose low-sodium cans if possible.
4. How can I make canned black beans taste better?
Cook them with aromatics like onion and garlic, add spices, and finish with lime juice or fresh herbs.
5. Can I freeze leftover black beans?
Yes, they freeze well for up to 3 months. Store in freezer-safe containers and reheat as needed.
Conclusion
Canned black beans may start as a humble pantry item, but with the right steps, they can transform into a flavorful, nutrient-packed dish. By rinsing, seasoning, and simmering with aromatics, you elevate them from plain beans to a versatile side or main dish that works for tacos, salads, soups, and more. Plus, they’re affordable, healthy, and quick to prepare—making them a true kitchen staple.
So, next time you reach for a can of black beans, remember that a few simple tricks can unlock their full potential and turn them into a dish you’ll crave again and again.


