Cane’s Chicken Recipe: When it comes to crispy, juicy chicken tenders, Raising Cane’s has earned a legendary reputation. Their chicken is perfectly golden on the outside, tender on the inside, and paired with their addictive dipping sauce. If you’ve ever craved Cane’s chicken but didn’t want to leave home—or maybe you don’t have a location near you—you’re in luck. This step-by-step guide will teach you exactly how to make a homemade version of Cane’s chicken tenders that tastes just as delicious, if not better.
This recipe covers everything you need—from the marinade and breading to frying tips and even how to make their famous Cane’s Sauce. Ready to impress your family and friends with restaurant-style chicken tenders at home? Let’s dive in!
What Makes Cane’s Chicken Special
Cane’s chicken isn’t your average fried chicken. Unlike many other fast-food chains that over-season or use overly complex spice blends, Cane’s keeps things simple but powerful. Their chicken tenders are known for being incredibly juicy, tender, and seasoned just enough to enhance the natural flavor of the chicken rather than overpowering it. The breading is light, golden, and crispy, which creates the perfect balance of crunch and tenderness.
The real secret lies in the marinating process. By soaking the chicken in a flavorful but simple mixture, the meat absorbs moisture and subtle seasoning, ensuring every bite is packed with flavor. Add in the iconic Cane’s Sauce, and you’ve got a combination that keeps people coming back for more.
Why This Copycat Recipe Works
This recipe is designed to mimic the exact taste and texture of Cane’s chicken tenders. We use buttermilk marinade to tenderize the meat, a seasoned flour mixture to give that signature crispiness, and just the right frying technique to lock in flavor. The result? Homemade tenders that are crispy, juicy, and irresistible, with a dipping sauce that tastes just like the real deal.
Ingredients You’ll Need
Making Cane’s chicken at home doesn’t require fancy or hard-to-find ingredients. Most of these items are already in your kitchen, and the few you’ll need to pick up at the store are inexpensive and easy to find. Let’s break it down step by step.
For the Chicken Marinade
- 2 pounds of chicken tenderloins (or boneless, skinless chicken breasts cut into strips)
- 2 cups buttermilk
- 1 teaspoon garlic powder
- 1 teaspoon onion powder
- 1 teaspoon paprika
- 1 teaspoon salt
- ½ teaspoon black pepper
The buttermilk works wonders here—it tenderizes the chicken and infuses it with flavor, ensuring each bite is juicy and flavorful.
For the Breading
- 2 cups all-purpose flour
- ½ cup cornstarch (adds extra crunch)
- 1 teaspoon garlic powder
- 1 teaspoon onion powder
- 1 teaspoon paprika
- 1 teaspoon salt
- ½ teaspoon cayenne pepper (optional, for a slight kick)
This flour mixture is the key to getting that perfect light yet crispy crust on the chicken tenders.
For Frying
- 4 cups vegetable oil (canola or peanut oil also works well)
A neutral oil with a high smoke point is best—it allows the chicken to fry evenly without burning.
Optional Add-Ons for Serving
- Texas toast
- Crinkle-cut fries
- Coleslaw
- Extra Cane’s sauce
If you want the full Cane’s experience at home, serve your chicken tenders with these classic sides.
Essential Kitchen Tools for the Recipe
Before you start cooking, make sure you have the right tools on hand. Having the right equipment ensures your chicken turns out just like the original.
Cooking Equipment
- Large mixing bowls (for marinating and breading)
- Tongs (for dipping and frying)
- Deep skillet or Dutch oven (for frying)
- Wire rack (for draining fried chicken)
- Meat thermometer (to check doneness)
Recommended Oils and Utensils
For the most authentic result, use vegetable or canola oil since they don’t add unnecessary flavor to the chicken. A wire rack is especially important—it prevents the tenders from becoming soggy after frying, which is one of the biggest mistakes people make when frying chicken at home.
Step-by-Step Guide to Making Cane’s Chicken at Home
Now that you’ve got your ingredients and tools ready, let’s go through the cooking process. Follow these steps carefully, and you’ll have a basket of golden, crispy chicken tenders in no time.
Step 1 – Preparing the Marinade
Start by combining the buttermilk, garlic powder, onion powder, paprika, salt, and pepper in a large mixing bowl. Stir until the mixture is smooth and well blended. Place the chicken tenderloins into the bowl, making sure each piece is fully submerged in the marinade.
Cover the bowl with plastic wrap and refrigerate for at least 2 hours, but preferably overnight. The longer the chicken marinates, the more tender and flavorful it becomes. This step is crucial because it’s what gives Cane’s chicken its signature juiciness.
Pro tip: If you’re short on time, a minimum of 30 minutes will work, but overnight marination is what really makes the difference.
Step 2 – Coating and Breading the Chicken
After marinating, remove the chicken from the refrigerator and let it sit at room temperature for about 15 minutes. This helps the chicken cook more evenly once it hits the hot oil.
In a large bowl, mix together the flour, cornstarch, garlic powder, onion powder, paprika, salt, and cayenne pepper. This is your breading mixture. For the best texture, you’ll want to use a double-dip method:
- Remove one chicken tender from the marinade, letting the excess buttermilk drip off.
- Coat it thoroughly in the flour mixture, pressing the flour into the chicken so it sticks well.
- Dip the coated chicken back into the marinade quickly, then dredge it in the flour mixture again for a second coating.
- Place the breaded chicken on a wire rack and repeat the process with the remaining tenders.
This double-dip method ensures the tenders get that thick, crispy crust that Cane’s chicken is famous for. Don’t rush this step—taking your time with the breading makes a huge difference in the final result.
Pro tip: After breading, let the chicken sit for 5–10 minutes before frying. This helps the coating stick better and prevents it from falling off in the oil.
Step 3 – Frying to Crispy Perfection
Frying is the moment of truth. Heat about 3–4 inches of oil in a deep skillet or Dutch oven to 350°F (175°C). Use a kitchen thermometer to monitor the temperature—if the oil is too hot, the chicken will burn on the outside before cooking inside; if too cool, the breading will soak up oil and turn greasy.
Carefully place 3–4 chicken tenders into the hot oil at a time. Avoid overcrowding the pan, as this lowers the oil temperature and leads to soggy chicken. Fry each batch for 5–6 minutes, flipping halfway through, until golden brown and crispy.
Check the internal temperature with a meat thermometer—it should reach 165°F (74°C) for safe eating. Once cooked, transfer the chicken to a wire rack set over a baking sheet. This keeps the tenders crispy by allowing excess oil to drain off.
Pro tip: If making a large batch, keep the finished tenders warm in a 200°F (93°C) oven while frying the rest.
Step 4 – Resting and Serving the Chicken
One of the biggest mistakes people make is serving fried chicken immediately. Freshly fried chicken needs a few minutes to rest, which allows the juices to redistribute inside the meat. Resting also helps the breading set properly, so it doesn’t slide off when dipped in sauce.
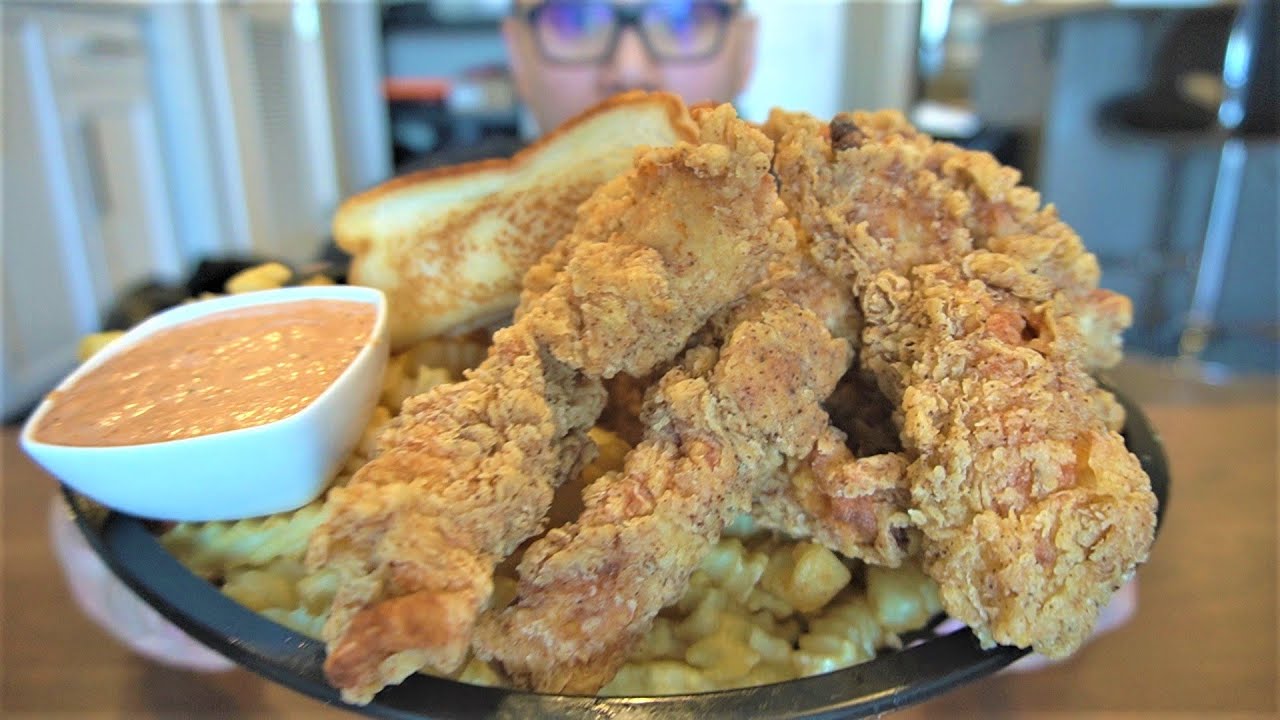
Once rested, serve the chicken tenders hot alongside Texas toast, crinkle-cut fries, coleslaw, and plenty of Cane’s Sauce. If you want the full Cane’s experience, make a “Caniac-style” basket at home with all the classic sides.
The result? Crispy, golden tenders that are tender on the inside and crunchy on the outside—just like you’d get at the restaurant.
Making the Famous Cane’s Sauce
No Cane’s chicken meal is complete without their legendary dipping sauce. This creamy, tangy, slightly spicy sauce is what elevates the meal from good to unforgettable. Thankfully, you can recreate it easily at home with a handful of pantry staples.
Ingredients for Cane’s Sauce
- ½ cup mayonnaise
- ¼ cup ketchup
- ½ teaspoon garlic powder
- ½ teaspoon Worcestershire sauce
- 1 teaspoon black pepper (freshly ground is best)
Mixing and Perfecting the Flavor
Combine all ingredients in a small mixing bowl. Stir until smooth and creamy. Cover the bowl and refrigerate for at least 2 hours before serving. This resting time allows the flavors to meld together, creating that authentic Cane’s taste.
The key to nailing the sauce is the black pepper—it adds a bold kick that balances the creamy and tangy flavors perfectly. Some people even prefer to let it rest overnight for maximum flavor.
Pro tip: Make a big batch of this sauce because it’s incredibly versatile. It pairs well not only with chicken but also with fries, burgers, and sandwiches.
Tips and Tricks for Perfect Crispy Chicken
Even though this recipe is straightforward, a few expert tips can make the difference between good fried chicken and restaurant-quality chicken tenders.
Common Mistakes to Avoid
- Skipping the marinade: Without it, the chicken won’t be as juicy.
- Using cold oil: Always heat the oil properly before frying.
- Overcrowding the pan: This lowers oil temperature and prevents crispiness.
- Draining on paper towels: This makes the bottom soggy—always use a wire rack.
Secret Techniques for Extra Crispiness
- Add cornstarch to the flour mixture—it creates a lighter, crunchier coating.
- Let the breaded chicken sit for a few minutes before frying.
- Fry in small batches for even cooking.
- Use buttermilk instead of regular milk for better tenderization.
Following these tips ensures your chicken turns out as close to Cane’s as possible—crispy, golden, and mouthwatering.
Pairing Suggestions with Cane’s Chicken
Cane’s chicken tenders are delicious on their own, but the right pairings can turn them into a complete, unforgettable meal. At the restaurant, you’ll usually find them served with crinkle-cut fries, coleslaw, and thick Texas toast. When making them at home, you have the freedom to get creative while still keeping things simple.
Classic Sides
- Crinkle-Cut Fries: These fries are a Cane’s signature. Their ridged texture makes them extra crispy and perfect for dipping in Cane’s sauce. If you don’t have crinkle fries, regular fries or even waffle fries work well.
- Coleslaw: A cool, tangy coleslaw balances the richness of the fried chicken. You can make a quick version with shredded cabbage, carrots, mayonnaise, vinegar, and a touch of sugar.
- Texas Toast: Thick, buttery slices of toasted bread complete the Cane’s experience. Simply butter both sides of thick bread, sprinkle with garlic powder, and toast until golden brown.
Creative Serving Ideas
- Chicken Sandwich: Place two tenders inside a toasted bun with lettuce and Cane’s sauce for a quick homemade sandwich.
- Loaded Fries: Top fries with chopped chicken tenders, shredded cheese, and extra sauce for a fun twist.
- Chicken Salad Bowl: For a lighter option, serve tenders over a fresh salad with ranch dressing or extra Cane’s sauce as the dressing.
- Party Platter: Serve the chicken tenders with a variety of dips—Cane’s sauce, ranch, honey mustard, or barbecue sauce—for a crowd-pleasing snack.
No matter how you serve them, Cane’s chicken tenders always shine. The sides and extras just make the meal feel complete.
Storing and Reheating Leftovers
Fried chicken is best eaten fresh, but if you’ve made a big batch, you’ll want to store it properly to enjoy later.
Best Way to Store Cooked Chicken
- Allow the chicken tenders to cool completely before storing.
- Place them in an airtight container lined with paper towels to absorb excess oil.
- Store in the refrigerator for up to 3 days.
- For longer storage, freeze them in a freezer-safe bag for up to 2 months.
How to Reheat Without Losing Crunch
The biggest challenge with reheating fried chicken is keeping the crispiness intact. Avoid the microwave—it makes the breading soggy. Instead, try one of these methods:
- Oven Method: Preheat your oven to 375°F (190°C). Place the tenders on a wire rack over a baking sheet and heat for 10–15 minutes until crispy.
- Air Fryer Method: Reheat at 350°F (175°C) for 5–7 minutes. This is the best option for keeping the breading crunchy.
- Skillet Method: Heat a small amount of oil in a pan and re-crisp the tenders for a few minutes on each side.
Pro tip: If reheating from frozen, let the chicken thaw in the fridge overnight before reheating for best results.
Nutritional Information
It’s no secret that fried chicken isn’t exactly diet food, but knowing the nutritional breakdown can help you enjoy it in moderation—or find ways to make it a little lighter.
Calories and Macros (per 2 tenders with sauce)
- Calories: ~450–500
- Protein: 30g
- Carbs: 25g
- Fat: 25g
These numbers will vary depending on portion size, breading thickness, and the amount of sauce used.
Healthier Alternatives
- Air-Fried Version: Use an air fryer instead of deep frying to reduce oil and calories.
- Whole Wheat Flour: Swap regular flour with whole wheat flour for added fiber.
- Baked Option: Bake the chicken at 400°F (204°C) for 20–25 minutes instead of frying. Spray lightly with oil to help crisp up.
- Lighter Sauce: Replace mayonnaise in Cane’s sauce with Greek yogurt for fewer calories and more protein.
This way, you can still enjoy the signature flavors of Cane’s chicken while making it fit your dietary needs.
FAQs about Cane’s Chicken Recipe
1. Can I bake instead of frying Cane’s chicken?
Yes! Bake at 400°F (204°C) for 20–25 minutes. Spray the breaded chicken lightly with oil to help achieve crispiness.
2. How long does the marinade take?
For best results, marinate overnight. If you’re short on time, aim for at least 2 hours.
3. What oil is best for frying Cane’s chicken?
Vegetable, canola, or peanut oil works best due to their high smoke points and neutral flavors.
4. Can I make Cane’s sauce ahead of time?
Absolutely. In fact, it tastes even better if made a day in advance and stored in the fridge.
5. How do I make it gluten-free?
Substitute all-purpose flour with a gluten-free flour blend and ensure your sauces and seasonings are certified gluten-free.
Conclusion
Cane’s chicken tenders are iconic for a reason—they’re crispy, juicy, and packed with flavor. With this step-by-step guide, you can now recreate the magic at home. From the buttermilk marinade that keeps the chicken tender to the double-dip breading method that makes it extra crispy, every detail matters. And of course, no Cane’s experience is complete without their famous sauce, which is easy to whip up with just a few ingredients.
Whether you stick to the classic sides like crinkle-cut fries and Texas toast, or get creative with sandwiches and loaded fries, this recipe is guaranteed to impress. Plus, with tips on storing, reheating, and even making healthier versions, you can enjoy Cane’s chicken anytime you want.
So next time you’re craving Cane’s but don’t want to drive to the restaurant, pull out this recipe and bring the flavor of Cane’s right into your kitchen.


