Blueberry Bagel Recipe: There’s something deeply satisfying about baking your own bagels. The smell of freshly baked dough wafting through your kitchen, the first warm bite into a chewy crust—it’s a culinary experience that store-bought bagels simply can’t match. Sure, you could buy blueberry bagels at the grocery store, but they often come loaded with preservatives, artificial flavors, and lack that freshly-baked magic. Making bagels at home gives you full control over the ingredients, texture, and flavor. Plus, it’s way easier than most people think! Once you’ve tried it, you might never go back to store-bought again.
Homemade blueberry bagels also allow for customization—like using organic blueberries, choosing your flour, adjusting the sweetness, or even adding fun toppings like streusel, cinnamon sugar, or lemon zest. And let’s not forget the price advantage—homemade bagels cost a fraction of what you’d pay at a bakery or café.
Baking bagels might sound intimidating, especially with the boiling step, but don’t worry—we’ll walk you through the process step-by-step. It’s fun, rewarding, and a great way to impress family or friends at brunch.
The Magic of Blueberries in Bagels
Blueberries aren’t just delicious; they bring so much to a bagel recipe. They add natural sweetness, a beautiful pop of color, and a burst of flavor in every bite. When baked, blueberries soften into juicy gems that make your bagels irresistible. You can use fresh or frozen blueberries, and each type has its perks. Fresh blueberries hold their shape better and are slightly less messy, while frozen ones are more accessible and cost-effective year-round.
The balance between tart and sweet in blueberries complements the chewy, slightly dense texture of bagels beautifully. And when paired with creamy or sweet spreads? Heaven.
Some folks even like to add a touch of lemon zest to bring out the brightness of the blueberries, or a bit of cinnamon to warm things up. The flavor possibilities are endless, but no matter how you tweak it, blueberry bagels are always a crowd-pleaser.
Ingredients You’ll Need
Essential Dry Ingredients
- Bread Flour (3 ½ cups): Bread flour is key to getting that perfect chewy texture. All-purpose flour works in a pinch, but you’ll miss out on the classic bagel chew.
- Instant Yeast (2 ¼ tsp): Also known as rapid rise yeast, it helps the dough rise faster and more consistently.
- Sugar (2 tbsp): Adds a touch of sweetness and also feeds the yeast.
- Salt (1 ½ tsp): Crucial for flavor—don’t skip it.
- Cinnamon (optional – ½ tsp): Adds a warm depth of flavor that complements blueberries beautifully.
Using the right balance of these dry ingredients ensures a dough that’s sturdy, elastic, and full of flavor. If you want to go healthier, you can substitute half the bread flour with whole wheat flour, but it will result in a denser texture.
Wet Ingredients for Perfect Dough
- Warm Water (1 ¼ cups): Not too hot! Around 105°F is perfect to activate the yeast.
- Honey or Maple Syrup (1 tbsp): A subtle sweetener that adds complexity and enhances browning.
- Oil (1 tbsp – optional): Helps keep the dough soft and moist during kneading.
Always add your wet ingredients slowly into the dry while mixing to prevent clumping. Using a stand mixer with a dough hook makes the job easier, but you can definitely knead by hand too—it’s a good workout!
Fresh or Frozen Blueberries?
Both work great, but here are some things to consider:
- Fresh Blueberries: Hold shape better, less messy, and ideal if they’re in season.
- Frozen Blueberries: Available year-round and cheaper, but they can bleed into the dough if not handled properly. To prevent that, toss them in a bit of flour before mixing into the dough.
Avoid using canned or overly juicy blueberries, as they can make the dough too wet and difficult to work with.
Optional Toppings and Add-ins
- Coarse Sugar or Cinnamon Sugar: For a sweet crunchy top.
- Lemon Zest: Pairs beautifully with blueberry flavor.
- Streusel Crumbs: For a bakery-style touch.
- Cream Cheese Fillings: Add a surprise creamy core.
These extras can take your blueberry bagels from great to unforgettable. Just be mindful not to overload the dough—balance is everything.
Kitchen Tools You’ll Need
Must-Have Equipment
Before you dive into the bagel-making process, it’s important to get your tools ready. Having the right equipment on hand not only makes the process smoother but also ensures better results. Here’s a list of the must-haves:
- Mixing Bowls: You’ll need a couple—one for mixing the dough and one for proofing.
- Stand Mixer with Dough Hook (Optional): Makes kneading the dough much easier, especially with a thicker, stiffer dough like bagel dough.
- Measuring Cups and Spoons: Accuracy matters here, so be precise with your flour, water, and yeast.
- Kitchen Scale (Highly Recommended): Bagels are all about consistency. Weighing your ingredients leads to better texture and uniform size.
- Baking Sheet: Lined with parchment paper or a silicone mat to prevent sticking.
- Large Pot for Boiling: A wide, deep pot is essential for the boiling stage.
- Slotted Spoon or Spider Strainer: Makes it easier to lift bagels out of boiling water without damaging their shape.
- Oven: Preheated to the right temperature ensures even baking and a golden crust.
If you’re just starting, don’t worry if you don’t have a stand mixer or kitchen scale. While helpful, they’re not mandatory. Just be prepared to use a little more elbow grease when kneading by hand!
Helpful Extras That Make the Process Easier
- Bench Scraper: Useful for dividing dough evenly.
- Pastry Brush: Great for brushing on egg wash if you want a shiny, golden crust.
- Cooling Rack: Allows your bagels to cool evenly without getting soggy bottoms.
- Dough Rising Bucket or Container: Helps you monitor dough rise easily with visible markers.
- Flour Sifter: If you’re using whole wheat flour or want a lighter texture.
These tools may not be essential, but they can make your baking experience more efficient and enjoyable—especially if you’re planning to make bagels regularly.
Step-by-Step Guide to Making Blueberry Bagels
Step 1: Preparing the Dough
Start by activating your yeast. In a large mixing bowl, combine the warm water and sugar. Sprinkle the yeast on top and let it sit for about 5–10 minutes until it becomes frothy. This shows that your yeast is alive and ready to work its magic.
Next, add in your flour and salt gradually. Mix using a wooden spoon or dough hook on a stand mixer until it starts to come together. Knead the dough for about 8–10 minutes by hand, or 6 minutes with a mixer, until it becomes smooth and elastic. If it’s too sticky, add a little more flour, one tablespoon at a time.
Once your dough is kneaded and springy, gently fold in the blueberries. Be cautious—this part can get messy if you’re using frozen berries. Tossing them in flour before adding helps prevent bleeding. Mix just enough to distribute the blueberries evenly throughout the dough without crushing them.
Form the dough into a ball and place it in a lightly oiled bowl. Cover with plastic wrap or a damp towel and let it rest in a warm place for about 1 to 1.5 hours, or until it has doubled in size.
Step 2: First Rise – Letting the Dough Rest
This step is crucial. During this rest period, the yeast ferments the dough, producing carbon dioxide which causes the dough to rise and develop flavor. Don’t rush this—let the dough do its thing.
Once the dough has doubled, punch it down gently to release any trapped air bubbles. This helps create a dense and chewy texture characteristic of bagels. Transfer it onto a lightly floured surface, then divide it into 8 equal pieces using a bench scraper or sharp knife.
Roll each piece into a ball, cover them with a clean towel, and let them rest for another 10 minutes. This second rest helps the gluten relax, making it easier to shape your bagels in the next step.
Step 3: Shaping the Bagels
Shaping bagels is actually fun once you get the hang of it! Take one dough ball and poke a hole through the center with your thumb. Gently stretch the dough outward into a ring shape, rotating as you go to keep the circle even. Aim for a 1.5–2 inch hole in the center—the dough will expand during boiling and baking, so don’t make it too small.
Place the shaped bagels onto a parchment-lined baking sheet. Cover loosely with a towel and let them rise again for about 20–30 minutes. This short second proofing gives them a bit of puff before boiling.
Some bakers like to refrigerate the bagels at this point for a slow, cold ferment overnight—this deepens the flavor and improves texture. If you have time, give it a try.
Step 4: Boiling – The Key to That Classic Bagel Texture
This is where the bagel magic happens. Boiling gives bagels their shiny crust and chewy bite. Fill a large pot with water and bring it to a gentle boil. Add 1 tablespoon of honey or baking soda to the water—this helps create that glossy finish.
Using a slotted spoon or spider strainer, gently lower each bagel into the boiling water. Don’t overcrowd the pot—work in batches if needed. Boil each bagel for 1–2 minutes per side. The longer you boil, the chewier the crust will be.
Once boiled, place the bagels back on the baking sheet. At this point, you can add toppings if you like—sprinkle with coarse sugar, cinnamon, or even a dash of lemon zest for a citrusy twist.
Step 5: Baking to Golden Perfection
Preheat your oven to 425°F (218°C). Bake the bagels for 20–25 minutes, or until they’re golden brown and the tops sound hollow when tapped. Rotate the baking sheet halfway through to ensure even baking.
Once done, remove the bagels and place them on a cooling rack. Resist the temptation to dig in immediately—let them cool for at least 15 minutes to finish setting the texture and flavor.
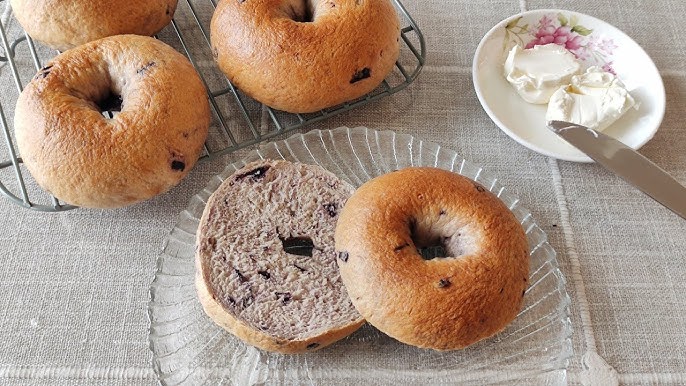
What you’re left with is a tray of stunning, golden-blueberry-speckled bagels that are soft on the inside, chewy on the outside, and absolutely bursting with flavor. Fresh out of the oven, they’re perfect with a smear of cream cheese or a touch of honey.
Tips for the Best Blueberry Bagels
Preventing Soggy Bagels
Soggy bagels are the stuff of breakfast nightmares. No one wants a mushy, limp bagel after all that effort. So how do you keep them light and chewy instead of wet and heavy? First, don’t overdo the boiling time—two minutes per side is plenty. Boiling for too long can lead to bagels that absorb too much water and turn soggy in the middle.
Second, make sure your oven is fully preheated before baking. A hot oven (425°F/218°C) helps lock in moisture quickly and gives your bagels that golden crust. And finally, always cool your bagels on a wire rack. Leaving them on a pan or countertop traps steam underneath, making the bottoms soggy.
Another pro tip: if you’re using frozen blueberries, be sure to thaw and drain them well before adding them to the dough. Excess moisture from frozen fruit is a sneaky culprit behind soggy dough.
How to Keep Blueberries from Bursting
Ever had your dough turn purple because of mashed blueberries? It’s a common issue—but totally preventable. Here’s how:
- Use Fresh Blueberries whenever possible. They’re firmer and less likely to break during mixing.
- If using frozen berries, do not thaw them fully. Add them while still semi-frozen and dusted with flour. This reduces bleeding and keeps the dough clean.
- Fold gently. Don’t aggressively knead the berries into the dough. Light, minimal folding is enough to distribute them evenly.
If some berries do burst, don’t worry—it’s not the end of the world. You might end up with a beautifully marbled dough that’s still delicious. But if presentation is important, these small adjustments can make a big difference.
Adjusting for Altitude and Humidity
Baking is a science, and environmental factors can seriously impact your results. If you live in a high-altitude area, for example, your dough may rise faster, leading to overproofed bagels. To prevent this, slightly reduce the amount of yeast and cut down the rise time.
In humid climates, the dough may become too sticky. Combat this by reducing the water slightly in your recipe or adding a bit more flour during kneading. Always go by feel—your dough should be tacky but not wet.
And during dry winter months, be sure to cover your dough well during proofing so it doesn’t dry out and form a crust. Adjustments like these come with experience, but paying attention to your environment makes a big difference in consistency.
Storing and Freezing Your Bagels
Best Practices for Storage
Fresh blueberry bagels are best enjoyed within the first two days. Store them at room temperature in an airtight container or a paper bag sealed inside a plastic bag. Avoid refrigeration—it actually dries bagels out and makes them stale faster.
If you plan to eat them within a day or two, just slice them in half and store them at room temp. For longer storage, freezing is your best bet.
How to Reheat Without Losing Texture
Freezing bagels is super convenient, and when done right, they taste just as good as fresh. Here’s how:
- Cool bagels completely before freezing to avoid condensation.
- Slice them in half before freezing—this makes it easier to toast directly from the freezer.
- Wrap individually in plastic wrap or foil, then store in a freezer bag to prevent freezer burn.
To reheat, simply pop the frozen halves into a toaster or toaster oven. No need to thaw first. They come out crispy on the outside and soft in the middle—just like they should.
Want to reheat a whole, unsliced bagel? Wrap it in foil and warm in a 350°F oven for 10–12 minutes.
Delicious Ways to Enjoy Your Blueberry Bagels
Cream Cheese Combinations
Plain cream cheese is a classic choice, but why stop there? Try some of these delicious twists:
- Honey Walnut Cream Cheese: Sweet, nutty, and perfect with blueberries.
- Lemon Zest + Vanilla Cream Cheese: Bright and aromatic.
- Maple Cinnamon Spread: Brings out the warmth of the blueberries.
- Strawberry or Raspberry Cream Cheese: More berry, more joy.
You can also make your own flavored cream cheeses by mixing softened cream cheese with fruit preserves, zest, or spices. Store in the fridge for up to a week.
Turning Them into Breakfast Sandwiches
Want to turn your blueberry bagel into a breakfast masterpiece? Here are some fun ideas:
- Sweet and Savory Combo: Blueberry bagel + whipped cream cheese + crispy bacon + arugula. Sounds weird, tastes amazing.
- Egg & Cheese: Scrambled eggs and sharp cheddar cheese make for a satisfying, protein-packed meal.
- Almond Butter + Banana: A great option for a quick, healthy breakfast with a touch of sweetness.
The sweet-tart flavor of blueberry pairs well with salty or nutty spreads, so don’t be afraid to get creative. Bagels are incredibly versatile, and a blueberry one adds just the right amount of flavor to elevate your sandwich game.
Sweet Toppings and Spreads
Here are some more mouthwatering toppings you can try:
- Butter + Cinnamon Sugar
- Greek Yogurt + Fresh Berries
- Nutella or Chocolate Spread
- Peanut Butter + Honey Drizzle
- Mascarpone + Mixed Fruit
Turn your blueberry bagels into a dessert-like treat or keep it wholesome with fresh fruit and protein-rich spreads. Either way, you’ve got a winner.
Nutritional Info and Caloric Breakdown
Estimated Nutritional Content Per Bagel
Blueberry bagels, while delicious, do come with a calorie count you might want to keep an eye on—especially if you’re indulging daily. Here’s an approximate breakdown per medium-sized homemade blueberry bagel:
| Nutrient | Amount |
|---|---|
| Calories | 280–320 kcal |
| Carbohydrates | 55–60g |
| Sugars | 6–10g |
| Protein | 8–10g |
| Fat | 1.5–3g |
| Fiber | 2–4g |
| Sodium | 300–400mg |
The exact values will vary depending on portion size, ingredients, and toppings. Adding cream cheese or spreads can increase the calorie count, so it’s always good to balance your toppings based on your goals.
Healthier Ingredient Swaps
Trying to make your blueberry bagels a bit more health-conscious? Here are a few substitutions that don’t sacrifice taste:
- Use Whole Wheat Flour: Swap out up to 50% of the bread flour for whole wheat flour. Adds fiber and nutrients.
- Use Coconut Sugar or Maple Syrup: These natural sweeteners have a lower glycemic index than refined sugar.
- Add Flaxseed or Chia Seeds: Boosts fiber, protein, and omega-3s.
- Low-Fat Cream Cheese or Greek Yogurt Spread: A healthier topping option.
These small tweaks can help make your blueberry bagels part of a balanced diet without losing the chewy deliciousness that makes them special.
Common Mistakes to Avoid
Overkneading or Underkneading
Kneading is one of those “Goldilocks” steps—it has to be just right. Overkneading leads to tough bagels, while underkneading can leave them dense and underdeveloped.
Aim for 8–10 minutes of kneading by hand, or 6–7 minutes using a stand mixer with a dough hook. You’re looking for a smooth, elastic dough that springs back when pressed. If you’re unsure, use the “windowpane test”—stretch a small piece of dough thin. If it doesn’t tear and light passes through it, you’re good.
Overproofing the Dough
Proofing, or allowing your dough to rise, is essential—but timing is everything. Letting it go too long causes your dough to collapse or deflate during baking. Your dough should double in size during the first rise and puff up slightly during the second.
If your dough looks puffy and delicate, it’s time to move on to shaping or baking. You can do a simple poke test—lightly press your finger into the dough. If the indentation springs back slowly, it’s ready.
Not Boiling Properly
The boiling step is crucial in creating that chewy crust. Skip it, and you’ll end up with something more like bread rolls than bagels. Don’t forget to add a tablespoon of honey or baking soda to the water—it helps with crust development and adds a slight sheen.
Boil your bagels for 1–2 minutes on each side. Any longer and they’ll soak up too much water. Any shorter, and the crust won’t develop properly. Also, ensure the water is at a gentle rolling boil—not too aggressive, or you might damage the shape.
FAQs about Blueberry Bagel Recipe
1. Can I make the dough in advance?
Yes! You can refrigerate the shaped dough overnight and boil/bake the next morning. This also helps develop flavor.
2. What’s the best flour to use?
Bread flour is ideal for its high protein content, which gives bagels their signature chew.
3. Can I add other fruits with blueberries?
Sure! Raspberries, cranberries, or even lemon zest pair wonderfully with blueberries—just be mindful of moisture content.
4. How do I make mini bagels?
Divide the dough into 12–14 smaller pieces instead of 8. Reduce boiling and baking time slightly to avoid overcooking.
5. Can I use a bread machine for kneading?
Yes, you can mix and knead the dough in a bread machine using the dough cycle, then shape and boil/bake as directed.
Conclusion
There’s nothing quite like biting into a freshly baked blueberry bagel—crisp on the outside, soft and chewy inside, and studded with sweet-tart blueberries in every bite. And now that you’ve got this step-by-step guide, you’re fully equipped to bake them like a pro right in your own kitchen.
Whether you’re a seasoned baker or just dipping your toes into the world of homemade bread, blueberry bagels are a satisfying project with sweet, delicious results. From choosing the right flour to mastering the boil and bake, each step brings you closer to a bakery-quality treat.
So grab your apron, stock up on blueberries, and get ready to impress your friends, family—or just treat yourself. These bagels are sure to become a staple in your breakfast rotation.


