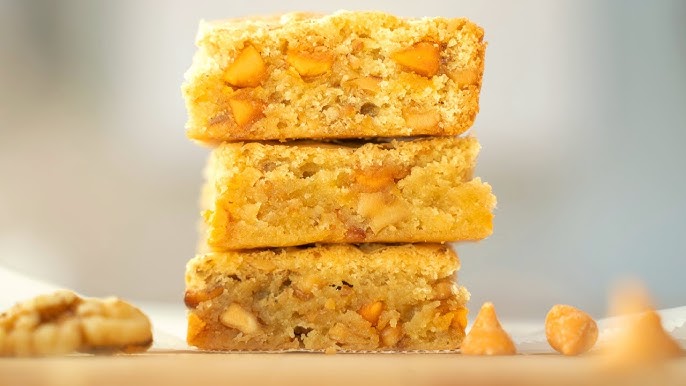
Blonde Brownie Recipe: Blonde brownies—also called “blondies”—are the caramel-colored cousins of the traditional chocolate brownie. Instead of cocoa or melted chocolate, they use brown sugar and vanilla as the primary flavor base, resulting in a rich, butterscotch-like flavor that’s incredibly satisfying. They are chewy, dense, and slightly gooey in the center—like a cross between a cookie and a brownie. The golden color and smooth, soft texture make them perfect for nearly any occasion, from lunchbox treats to fancy dessert tables.
Think of blondies as the ultimate comfort food—sweet, simple, and soul-warming. Whether you’re a seasoned baker or a total newbie in the kitchen, blondies are forgiving, quick to prepare, and endlessly customizable. Want to throw in white chocolate chips, pecans, or even a swirl of Nutella? Go ahead. The blondie batter welcomes all sorts of delicious add-ins with open arms.
These bars don’t just taste amazing—they also fill your kitchen with a heavenly aroma of caramelized sugar and vanilla as they bake. If that isn’t enough to convince you to try this recipe, keep reading. You’ll soon have a foolproof, crowd-pleasing dessert in your baking arsenal.
Why You’ll Love This Recipe
There are tons of dessert recipes out there, but this blonde brownie recipe stands out for a few key reasons:
- Simple Ingredients: Everything you need is probably already in your pantry. No fancy baking techniques, no obscure ingredients—just good old-fashioned baking.
- Fast and Easy: This recipe comes together in under 15 minutes of prep time. From start to finish, you can have a warm batch of blondies ready in about 30-35 minutes.
- Incredibly Versatile: Whether you’re craving classic butterscotch flavor or want to get adventurous with peanut butter chips or dried cranberries, this recipe is a great starting point.
- Perfect Texture: These blondies are soft and chewy with a slightly crisp edge, delivering that satisfying bite every time.
- Crowd-Pleaser: Seriously, who doesn’t love a golden, buttery bar with gooey chunks of chocolate or nuts?
Ingredients You’ll Need
Basic Pantry Staples
Here’s the beauty of blondies—you probably already have most of what you need. Let’s break down the must-have ingredients:
- Unsalted Butter (1 cup or 2 sticks): This is the backbone of flavor and moisture in blondies. Melted butter adds richness and helps develop that beautiful crackly top.
- Brown Sugar (2 cups): Brown sugar gives blondies their signature molasses-like depth. Use light brown sugar for a milder flavor, or dark brown sugar for a richer, more intense taste.
- Eggs (2 large): Eggs provide structure and help bind everything together while keeping the blondies soft.
- Vanilla Extract (2 teaspoons): The secret weapon. Vanilla enhances the brown sugar and butter flavors, bringing everything together.
- All-Purpose Flour (2 cups): The base of the batter. Keep it simple—no need for cake or bread flour here.
- Baking Powder (1 teaspoon): This helps lift the batter slightly, giving a subtle fluffiness without losing that chewy texture.
- Salt (½ teaspoon): Balances the sweetness and intensifies flavor.
That’s it for the base. If you stop right here, you’ll still end up with a delicious tray of classic blondies. But why stop at basic?
Optional Add-ins for Extra Flavor
You can jazz up your blondies by folding in any of the following add-ins:
- Chocolate Chips (semi-sweet, white, or dark)
- Chopped Nuts (walnuts, pecans, almonds)
- Butterscotch Chips
- Shredded Coconut
- Dried Cranberries or Raisins
- Peanut Butter or Nutella Swirl
Just keep add-ins around 1 to 1½ cups total, so you don’t overload the batter.
Tools You’ll Need for the Best Results
No need to bring out your entire kitchen arsenal. For this recipe, you’ll just need:
- Mixing bowls (medium and large)
- Whisk or electric mixer
- Measuring cups and spoons
- Rubber spatula or wooden spoon
- 9×13 inch baking pan
- Parchment paper (for easy removal)
- Cooling rack
- Oven mitts (safety first!)
Now that your pantry and tools are prepped, let’s get down to the fun part: baking!
Preparing for Baking
Preheating Your Oven
Don’t overlook this step. A properly preheated oven ensures your blondies bake evenly and set properly. Set your oven to 350°F (175°C). While it’s heating up, go ahead and prepare your pan.
Pro Tip: If your oven runs hot or cool, use an oven thermometer. Blondies can go from gooey-perfect to overbaked in minutes.
Lining and Greasing the Pan
Lining your pan is more than just a convenience—it ensures your blondies come out clean, without sticking or breaking apart. Here’s how to do it:
- Grease a 9×13 inch baking pan with butter or non-stick spray.
- Line it with parchment paper, leaving enough overhang on the sides to lift the blondies out once cooled.
- Lightly spray the parchment as well for extra assurance.
This simple prep step can save you a lot of frustration later, especially if you’re aiming for photo-worthy dessert bars.
Step-by-Step Guide to Making Blonde Brownies
Step 1 – Melt the Butter
Start by melting your 1 cup of unsalted butter in a small saucepan over low heat or in the microwave using 30-second bursts. You want the butter fully melted, but not bubbling hot. Melted butter is essential for creating that rich, fudgy texture and shiny top blondies are known for.
Let the butter cool for a few minutes before adding it to your mixing bowl. If it’s too hot, it might scramble the eggs when added later. Once it’s slightly cooled, pour the melted butter into a large mixing bowl—this is where your base comes together.
Pro Tip: Browning the butter slightly adds a deep, nutty flavor. Just cook it a bit longer until it smells toasty and has amber flecks. It’s optional, but wow—it elevates the whole thing.
Step 2 – Mix in the Sugars
To that melted butter, add 2 cups of packed brown sugar. Whisk the two together until fully combined. You’re looking for a smooth, thick caramel-like mixture. This step is crucial for achieving that rich, butterscotch flavor that makes blondies stand out from chocolate brownies.
Why brown sugar instead of white? Brown sugar is the secret sauce here. Its higher moisture content and molasses content give blondies that chewy, gooey, mouthwatering bite that white sugar just can’t replicate.
Make sure there are no lumps—take your time with this step. A well-mixed sugar-butter base sets the tone for a flawless batter.
Step 3 – Add Eggs and Vanilla
Once your butter and sugar are mixed and slightly cooled, crack in 2 large eggs, one at a time. Mix well after each egg to make sure everything gets fully incorporated.
Then, add 2 teaspoons of vanilla extract. This is more than just a flavor enhancer—it’s the glue that holds all the rich, buttery, sugary goodness together. Don’t skimp on the vanilla, and use pure extract if you can. Imitation vanilla just won’t hit the same notes.
The mixture should now look thick, glossy, and smooth. You’re halfway to blondie bliss.
Step 4 – Combine Dry Ingredients Separately
In a separate medium bowl, whisk together the dry ingredients:
- 2 cups of all-purpose flour
- 1 teaspoon of baking powder
- ½ teaspoon of salt
Why mix them separately? Because it ensures the leavening agents (like baking powder) get evenly distributed, preventing clumps and ensuring an even rise. It also helps prevent overmixing once combined with the wet ingredients.
Step 5 – Mix Wet and Dry Ingredients
Now it’s time to bring everything together.
Gradually add the dry ingredients to the wet mixture, about one-third at a time. Use a rubber spatula or wooden spoon to gently fold it all together. Don’t overmix—once the flour disappears into the batter, stop.
Overmixing creates tougher blondies with more of a cake-like texture. You want to keep the batter thick and scoopable, not overly runny.
At this point, your batter should be rich, golden, and thick—almost like cookie dough but slightly smoother. If you want to taste-test the raw dough… well, we won’t judge (just remember, there are raw eggs!).
Step 6 – Fold in Optional Add-ins
Here’s where you can get creative. If you’re adding chocolate chips, nuts, butterscotch chips, or anything else fun, now’s the time.
Fold in about 1 to 1½ cups of your desired mix-ins. Popular combos include:
- White chocolate chips + macadamia nuts
- Semi-sweet chocolate + pecans
- Peanut butter chips + mini marshmallows
- Dried cherries + dark chocolate chunks
Make sure your add-ins are evenly distributed throughout the batter so every bite is loaded with flavor.
Step 7 – Pour Batter into the Pan
Now, pour or scoop the thick batter into your prepared 9×13 pan. Use a spatula to spread it evenly into all corners. Don’t worry if it feels sticky—that’s normal for blondie batter.
Tap the pan gently on the counter a couple of times to eliminate air bubbles and help the batter settle.
Pro Tip: If you want a slightly crunchy top, sprinkle a tablespoon of granulated sugar over the top before baking. It’ll create a gorgeous, crackly crust.
Step 8 – Bake to Perfection
Slide your pan into the preheated oven at 350°F (175°C) and bake for 25 to 30 minutes, depending on your oven. Start checking at the 25-minute mark.
You’re looking for edges that are golden and pulling away slightly from the pan, and a center that’s just set—not jiggly, but not too firm. A toothpick inserted into the center should come out with a few moist crumbs—NOT completely clean.
If the toothpick is dry, you’ve gone too far. Remember: blondies continue to bake slightly from residual heat after you pull them out. Slightly underbaking is better than overbaking here.
Step 9 – Cool and Cut into Squares
This part requires a little patience. Once your blondies are out of the oven, let them cool in the pan for at least 20–30 minutes. Then, lift them out using the parchment paper overhang and transfer to a wire rack to cool completely.
Cut them into squares or bars of your preferred size. You can go for classic 2-inch squares, or bigger pieces for a bakery-style look.
The result? A tray of golden, chewy, buttery, rich blondies with just the right amount of sweetness. Slice, serve, and prepare for compliments.
Pro Tips for Perfect Blonde Brownies
Texture Tips – Chewy or Cakey?
The magic of blondies lies in their texture. Most people love that chewy, soft, and slightly gooey center, but if you’re aiming for something different, here’s how you can adjust your ingredients and baking time:
- For Chewy Blondies: Stick to the classic ratio of butter to flour. Use melted butter, do not overmix, and bake only until the center is just set. Chewiness also comes from brown sugar, so using dark brown sugar gives a more moist, chewy crumb.
- For Cakey Blondies: Add an extra egg (3 instead of 2), reduce the butter slightly, and bake for a bit longer. You can also add ¼ teaspoon baking soda along with baking powder to encourage a fluffier rise.
- Moisture Check: Don’t overbake! Even 2 minutes too long can turn them dry. The edges should be golden, and the center should look just set—not jiggly but not fully firm either.
- Chill Time: If you can wait (we know, it’s hard), chilling your baked blondies for an hour or two before cutting helps them firm up for cleaner, more structured bars.
So, chewy or cakey? It’s all in the technique—and now you’ve got both versions up your sleeve.
Flavor Boosting Secrets
Want to take your blondies from basic to bakery-level? Here are some flavor bombs you can sneak into the batter:
- Brown the Butter: This is a game-changer. Browning the butter adds nutty, toffee-like depth and takes your blondies to a whole new level.
- Espresso Powder (½ tsp): It won’t taste like coffee, but it deepens the overall flavor—especially if you’re using chocolate chips.
- Sea Salt Topping: A light sprinkle of flaky sea salt after baking adds the perfect contrast to the sweetness. Sweet + salty = irresistible.
- Toasted Nuts: Instead of raw, toast your nuts in the oven for 5–8 minutes before folding them in. This enhances the flavor and adds a subtle crunch.
- Extract Swap: Try almond or maple extract for a fun twist instead of vanilla, or combine them for a layered flavor profile.
Little changes make a huge difference, and with these tricks, your blondies will taste like they came straight out of a gourmet bake shop.
Variations of Blonde Brownies
White Chocolate Chip Blonde Brownies
A true classic. Fold in 1 to 1½ cups of white chocolate chips into your blondie batter just before baking. The creamy sweetness of the white chocolate complements the brown sugar beautifully.
You can also add chopped macadamia nuts to mimic that irresistible bakery-style cookie bar. For extra flair, drizzle some melted white chocolate over the top after cooling.
Nutty Blondies
Nuts add texture, flavor, and a bit of crunch that breaks up the softness of the blondies. Try:
- Pecans – buttery and slightly sweet
- Walnuts – earthy and robust
- Almonds – nutty and crunchy
Chop your nuts coarsely and toast them for best results. Fold in about 1 cup of nuts, or mix half with chocolate chips for a dreamy combo.
You can also press a few whole nut halves on top before baking for a decorative touch.
Peanut Butter Swirl Version
Peanut butter and blondies? Yes, please.
Drop spoonfuls of peanut butter (about ½ cup) on top of your blondie batter after spreading it into the pan. Use a knife to gently swirl it into the batter before baking.
Want more peanut flavor? Mix peanut butter chips right into the batter or replace ¼ cup of butter with creamy peanut butter for a double hit.
Peanut butter adds saltiness, richness, and a nostalgic twist that turns blondies into a next-level treat.
Serving Suggestions
How to Serve for Maximum Enjoyment
Sure, blondies are amazing on their own—but how about going the extra mile? Serve them:
- Warm with Vanilla Ice Cream: The heat melts the ice cream into a gooey river of sweetness. Absolute perfection.
- Drizzled with Caramel or Chocolate Sauce: A little extra sauce never hurt anyone.
- With Fresh Berries: Strawberries or raspberries cut the sweetness and add a tart contrast.
- Next to a Cup of Coffee: Perfect for an afternoon pick-me-up or cozy weekend treat.
- Topped with Whipped Cream or a Dusting of Powdered Sugar: Elegant and effortless.
Cut them into small squares for bite-sized party treats, or make big bakery-style bars for serious indulgence.
Toppings That Take It Up a Notch
Want to dress your blondies up even more? Try these topping ideas:
- Chopped Toffee Bits
- Crushed Pretzels
- Mini M&Ms
- Drizzle of Nutella or Chocolate Ganache
- Crumbled Oreos or Biscoff Cookies
Toppings not only make them look stunning but also add flavor, crunch, or creaminess for that wow factor.
Storage and Freezing Tips
How to Store for Freshness
If you manage not to eat them all in one sitting, blondies are easy to store:
- Room Temp: Store in an airtight container for up to 4–5 days. Keep a slice of bread in the container to maintain softness (the bread will absorb moisture loss).
- Refrigerator: If your kitchen is hot, refrigerate them—but let them come to room temp before eating, or microwave for 10–15 seconds to bring back the gooey goodness.
- Keep Air Out: Air is the enemy. Wrap tightly in plastic wrap or foil to maintain texture.
Can You Freeze Blonde Brownies?
Absolutely! Blondies freeze beautifully and still taste amazing when thawed.
Here’s how:
- Let blondies cool completely.
- Slice into squares and wrap each piece in plastic wrap.
- Place wrapped squares in a freezer-safe zip-top bag or airtight container.
- Label with the date—they’ll keep for up to 3 months.
To serve, thaw at room temperature or microwave for 15–20 seconds for a soft, just-baked texture.
Great for make-ahead party prep or late-night cravings—because who doesn’t want a stash of gooey blondies on standby?
Common Mistakes to Avoid
Overbaking
Overbaking is the #1 blondie-killer. It’s an easy trap to fall into because blondies don’t always look done when they’re actually perfect. Here’s how to avoid it:
- Know the signs: The edges should be golden brown and slightly pulling away from the sides of the pan, but the center should still look soft and a little shiny.
- Use the toothpick trick: Insert a toothpick into the center—it should come out with a few moist crumbs. If it’s bone dry, it’s already overbaked.
- Remember carry-over heat: Blondies continue to cook as they cool, so take them out just before they look fully done.
Overbaked blondies turn cakey and dry—no thanks. Set a timer and keep your eyes on the prize.
Incorrect Measurements
Baking is more science than art, and even a small measurement mistake can throw off your texture or taste.
- Too much flour? You’ll get dense, dry blondies. Always spoon flour into your measuring cup and level it off with a knife.
- Too little butter? Say goodbye to that rich, fudgy chew.
- Forgot the salt? Blondies will taste flat, even with all that sugar and vanilla.
Use measuring cups and spoons, not guesstimates. Better yet, use a kitchen scale for the most accuracy, especially if you’re baking often.
Nutritional Information
Calories and Serving Size
Here’s a rough nutritional breakdown for a classic blondie (based on a batch of 24 squares):
| Nutrient | Per Blondie |
|---|---|
| Calories | 220–260 |
| Total Fat | 12g |
| Saturated Fat | 7g |
| Carbohydrates | 30g |
| Sugar | 20g |
| Protein | 2g |
| Fiber | 1g |
| Sodium | 120mg |
These are estimates and will vary depending on your specific ingredients and add-ins (e.g., chocolate chips, nuts, etc.).
Ingredient Swaps for Healthier Options
Want to lighten things up a bit? Try these swaps:
- Butter → Coconut Oil: Use unrefined coconut oil for a subtle tropical flavor.
- All-purpose flour → Whole Wheat Flour: Swap up to half for extra fiber.
- Sugar → Coconut Sugar or Maple Syrup: These natural sweeteners lower the glycemic index and add flavor.
- Eggs → Flax Eggs (for vegan version): Mix 1 tbsp ground flaxseed with 3 tbsp water per egg. Let it sit for 5 minutes before adding.
Keep in mind that these swaps will slightly change the texture and taste—but they’re still delicious!
FAQs about Blonde Brownie Recipe
Can I make blonde brownies gluten-free?
Yes! Just substitute the all-purpose flour with a 1:1 gluten-free baking flour (like Bob’s Red Mill or King Arthur). Make sure your baking powder and mix-ins are gluten-free, too. The texture may be slightly softer, but still delicious.
What’s the difference between blondies and brownies?
Brownies are made with cocoa powder or melted chocolate, giving them that rich, chocolatey flavor. Blondies skip the chocolate and focus on brown sugar and vanilla, resulting in a butterscotch-caramel flavor. The texture is similar—dense and chewy—but the taste is totally different.
Can I double this recipe?
Absolutely. Just double the ingredients and use a larger baking pan (like 11×15 inches), or make two 9×13 pans. The baking time might increase slightly—check around 35–40 minutes.
What’s the best way to reheat them?
Pop a blondie in the microwave for 10–15 seconds for that fresh-from-the-oven texture. You can also warm them in a low oven (300°F) for 5–8 minutes. Serve with a scoop of ice cream for extra indulgence.
Why did my blondies turn out cakey?
Cakey blondies usually result from too much flour, overbaking, or using extra eggs. To get that chewy texture, measure your flour carefully, don’t overmix, and stick to the recommended egg count.
Conclusion
Blonde brownies, or blondies, are the kind of dessert that wins hearts with every bite. Buttery, chewy, rich, and full of caramelized brown sugar goodness, they’re the unsung hero of the dessert world. What makes them so loveable is their versatility—you can keep them classic or customize them with chips, nuts, swirls, and more.
Whether you’re baking for a party, a cozy night in, or just want to surprise your tastebuds with something golden and gooey, this foolproof blondie recipe has your back. With clear instructions, easy-to-find ingredients, and flavor-packed variations, there’s no reason not to whip up a batch (or three).
So preheat that oven, melt some butter, and get ready to impress. Once you’ve tasted these blondies, you’ll never go back.


