Blackstone Hibachi Recipe: There’s something undeniably fun and satisfying about sizzling up a full hibachi dinner right in your backyard, and with a Blackstone griddle, it’s easier than ever. This step-by-step guide is designed for everyone—from seasoned home cooks to first-timers—who want to recreate that famous restaurant-style hibachi experience. We’ll walk you through everything: from picking the best ingredients to cooking on a Blackstone griddle like a pro. By the end of this guide, you’ll be ready to put on your own backyard hibachi show. Let’s fire it up!
Introduction to Blackstone Hibachi Cooking
Why the Blackstone Griddle is Perfect for Hibachi
The Blackstone griddle is a backyard chef’s dream, especially when it comes to hibachi. Its flat, open cooking surface provides ample space to cook everything at once—rice, veggies, and proteins—just like the pros do it at your favorite Japanese steakhouse. What makes it stand out is the even heat distribution, which means no hot spots or undercooked bites. The large surface allows for multi-zone cooking, so you can sear shrimp on one side while gently sautéing mushrooms and onions on the other. Plus, the Blackstone’s ability to reach high temps makes it perfect for stir-frying, a crucial technique in hibachi-style cooking.
Cleanup is another win. Since it’s a flat surface, you just scrape everything down and wipe it off—no grills, grates, or hard-to-reach crevices. The Blackstone also gives you the freedom to cook large quantities, making it ideal for family dinners or entertaining guests. Whether you’re flipping chicken with a spatula or stirring up rice with a flat-top scraper, the Blackstone griddle turns your backyard into a lively teppanyaki table.
What Makes Hibachi Style Unique
Hibachi isn’t just about grilled food—it’s a whole vibe. Originally a Japanese cooking method involving a small, open-topped container with charcoal, hibachi in the Western world refers more broadly to a theatrical style of cooking on a flat-top grill. The secret sauce? High heat, quick cooking, and bold flavors.
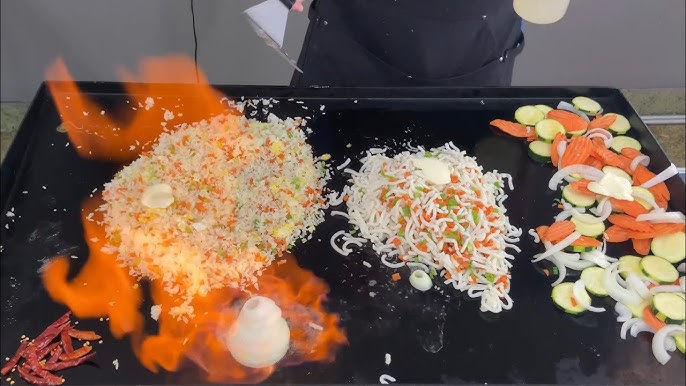
What sets hibachi apart is the combination of textures and layers of flavor. You’ve got crispy fried rice, juicy meat, tender vegetables, and signature sauces like creamy Yum Yum or tangy ginger—all hitting your taste buds in one bite. Unlike other grilled dishes, hibachi meals are interactive and exciting to watch, with sizzling, tossing, and the occasional onion volcano (if you’re feeling theatrical).
The use of garlic butter, sesame oil, and soy sauce creates an umami explosion, while the balance of meat, veggies, and carbs makes it a well-rounded meal. Whether you’re trying to impress guests or just want a fun Friday night dinner, hibachi on a Blackstone is the perfect pick.
Ingredients You’ll Need
Protein Choices (Chicken, Steak, Shrimp, or Tofu)
A great hibachi starts with your protein of choice. Whether you’re into juicy steak, tender chicken, or plump shrimp, it’s all about how you season and cook it. Here’s a breakdown of the best options:
- Chicken: Go with boneless, skinless chicken thighs or breasts. Thighs are juicier and more forgiving, especially on high heat.
- Steak: Choose tender cuts like New York strip, ribeye, or filet mignon. Cut them into bite-sized pieces to allow a fast sear and juicy interior.
- Shrimp: Peeled and deveined shrimp cook quickly and soak up flavor like a sponge. Perfect for a surf-and-turf combo.
- Tofu: For vegetarians or anyone looking for a plant-based option, extra-firm tofu works great. Press it beforehand to remove moisture and give it a nice crust when grilled.
Marinade Tip: Mix soy sauce, sesame oil, garlic, ginger, and a touch of sugar for a quick and flavorful marinade. Let your protein sit for at least 30 minutes to soak up those bold umami flavors.
Vegetables for Hibachi
A colorful mix of fresh vegetables is a must-have for authentic hibachi. These veggies not only add nutrition and crunch but also soak up the savory seasonings beautifully. Here are the hibachi staples:
- Onions: Sweet or yellow onions, sliced into half moons.
- Zucchini: Sliced into thick half-moons so they don’t get mushy.
- Mushrooms: Button or baby bella mushrooms add an earthy flavor.
- Carrots: Julienne or thinly sliced for quick cooking.
- Broccoli: Blanched slightly before hitting the grill for the perfect tender crunch.
- Bean Sprouts (Optional): Added at the end for a nice, fresh snap.
Toss these in a bit of sesame oil, soy sauce, and garlic butter for that signature hibachi flair.
Rice and Noodles
Both are staples in hibachi, and choosing the right type makes all the difference.
- Fried Rice: Use day-old jasmine or medium-grain rice—fresh rice will clump and turn mushy. Cold, dry rice fries better and absorbs sauce beautifully.
- Noodles: Yakisoba or lo mein noodles work best. Cook them al dente before throwing them on the griddle.
Toss in some scrambled egg, green onions, and soy sauce to take your rice or noodles to the next level.
Essential Sauces and Seasonings
Flavor is king in hibachi cooking, and it all comes down to the sauces and seasonings:
- Soy Sauce – For saltiness and umami.
- Garlic Butter – A mix of melted butter, minced garlic, and a splash of soy sauce.
- Sesame Oil – Adds a nutty aroma and authentic hibachi taste.
- Salt & Pepper – Keep it simple and season as you go.
- Yum Yum Sauce – Creamy and tangy, perfect for dipping.
- Ginger Sauce – Great for steak or shrimp.
Have these on hand and pre-mixed before cooking for a smooth, restaurant-style flow.
Preparing for the Cookout
Prepping Your Ingredients Like a Hibachi Chef
The secret to an unforgettable hibachi experience isn’t just in the cooking—it’s in the prep. Ever noticed how hibachi chefs at restaurants make it all look effortless? That’s because everything is prepped before they touch the grill. You’ll need to adopt that same mindset.
Start by chopping all vegetables into uniform sizes. Zucchini and carrots can be cut into half-moons, onions into thick slices, and mushrooms halved or quartered. Make sure everything is pre-washed and patted dry—excess moisture will cause unwanted steaming instead of searing.
Next, prep your protein. Cut chicken, steak, or tofu into bite-sized pieces, ideally around 1 to 1.5 inches thick. For shrimp, remove the tails unless you want to leave them on for presentation. Marinate your proteins in soy sauce, garlic, sesame oil, and a touch of brown sugar for at least 30 minutes—or overnight for maximum flavor.
Don’t forget your rice! The key to restaurant-style fried rice is using cold, day-old rice. Make a batch the night before, let it cool completely, and refrigerate it in an open container to let it dry out.
Want to level up? Create a mise en place station. Set out bowls of every ingredient and sauce, and line them up in the order they’ll be cooked. When the griddle gets hot, you won’t have time to measure or dig through the fridge—everything should be within arm’s reach.
Getting the Blackstone Griddle Ready
Prepping the Blackstone griddle is just as crucial as prepping your ingredients. First, give the griddle a good cleaning and oiling. Wipe off any dust or residue with a paper towel and a bit of water or vinegar. Then turn on the burners and let it heat up for about 10–15 minutes.
Once hot, squirt a light coating of vegetable or avocado oil across the surface and spread it evenly with a spatula. This not only seasons the griddle but ensures nothing sticks. Use medium to high heat for most of the cook; hibachi is all about that searing action.
Divide the griddle into zones:
- Hot Zone for searing proteins and stir-frying rice.
- Medium Zone for vegetables.
- Warm Zone (usually the far side) to keep cooked food warm without overcooking.
Having these heat zones allows you to multitask efficiently, just like the pros.
Tools You’ll Need
To really cook hibachi-style, you’ll need the right tools. Luckily, most of them are simple and easy to find:
- Two metal spatulas: One to flip and one to scrape or toss.
- Squirt bottles: Fill one with oil and another with water (to create steam when needed).
- Tongs: Great for grabbing meats or vegetables quickly.
- Bench scraper: Helps gather rice and keep your station clean.
- Meat thermometer: Optional but helpful for checking doneness on thicker proteins.
- Mixing bowls and prep containers: Use for organizing your chopped and marinated ingredients.
- Paper towels: For wiping down excess grease during and after cooking.
Trust us—once your tools are laid out and organized, you’ll feel like a real hibachi chef in no time.
Step-by-Step Cooking Guide
Step 1 – Cooking the Fried Rice
Fried rice is the backbone of any good hibachi meal, and it’s usually the first thing to hit the griddle. Start by heating a bit of oil and adding scrambled eggs to the hot zone. Let them cook quickly and chop them up with your spatula.
Next, add cold rice to the griddle. Use your spatulas to break up clumps and spread the rice thin for an even fry. Add a drizzle of soy sauce, a splash of sesame oil, and a touch of butter for that golden-brown flavor bomb. Toss in chopped green onions, cooked egg, and frozen peas if desired.
Cook for about 5–7 minutes, flipping and spreading it every couple of minutes to avoid burning. The rice should get a little crispy but remain fluffy inside.
Want to spice it up? Add garlic, a dash of chili sauce, or even a splash of teriyaki for a personalized kick.
Step 2 – Sautéing the Vegetables
Once your rice is done and moved to the warm zone, it’s time for the veggies. Start by squirting some oil onto the medium zone of your griddle. Add onions and carrots first since they take longer to cook. After about 2 minutes, toss in zucchini, mushrooms, and broccoli.
Season with soy sauce, a tiny bit of sugar, and garlic butter. Stir-fry everything until the onions are translucent and the zucchini has a slight char.
Pro tip: Use water from your squirt bottle to create a steam effect, especially for broccoli. It’ll help soften it without losing that delicious crunch.
Cook time is about 7–10 minutes, but don’t walk away. Stir frequently to ensure everything gets cooked evenly without burning.
Step 3 – Grilling the Proteins
Now comes the star of the show—your protein. Start by drizzling a little oil in the hot zone. If you’re cooking multiple proteins (like shrimp and steak), keep them in separate sections to avoid overcooking.
- Chicken: Cook until golden brown and cooked through (internal temp of 165°F).
- Steak: Sear each side for 2–3 minutes depending on doneness. Don’t crowd the pieces; you want a crust!
- Shrimp: These cook fast—about 2–3 minutes per side until pink and opaque.
- Tofu: Pressed tofu sears beautifully. Cook until golden and crispy on all sides.
As each protein finishes, move it to the warm zone to rest and keep warm.
Season throughout cooking with garlic butter, soy sauce, and a little salt and pepper. Don’t forget to give it a little showy flip if you’re feeling theatrical!
Step 4 – Making the Hibachi Noodles
If you’re adding noodles (which you absolutely should), now’s the time. Start with pre-cooked yakisoba or lo mein noodles. Toss them onto a freshly oiled medium-hot zone.
Add a bit of garlic butter, soy sauce, and a splash of teriyaki or oyster sauce. Stir constantly with your spatulas to coat everything evenly.
Cook for 4–5 minutes until the noodles are slightly crispy on the edges but soft and chewy in the center.
Top with sesame seeds or chopped scallions for a finishing touch.
Step 5 – Putting It All Together
It’s showtime! Assemble your hibachi plate with a scoop of fried rice, a mound of sizzling veggies, and your protein of choice layered on top. If you’re going for the full restaurant vibe, serve with a side of Yum Yum sauce or ginger dipping sauce.
Optionally, sprinkle with sesame seeds, fresh green onions, or even a squeeze of lemon for brightness.
And just like that, your Blackstone hibachi masterpiece is ready to serve. Time to dig in.
Tips for Mastering Hibachi on Blackstone
Temperature Management
One of the most important aspects of mastering hibachi cooking on a Blackstone griddle is understanding how to control your heat zones. Unlike a traditional stove with preset burners, the griddle’s large surface area allows you to create multiple temperature zones—a must when you’re juggling different ingredients.
- Hot Zone: This is where you’ll sear meats and stir-fry rice. It should be preheated for at least 10 minutes to reach optimal searing temperature.
- Medium Zone: Great for cooking vegetables and noodles that need a bit more finesse without burning.
- Warm Zone: Use this area to keep food hot once it’s cooked—just shift ingredients over to this side to prevent overcooking.
Monitoring your surface temperature is key. You can use an infrared thermometer for precise readings, but a simple test (sprinkling a few drops of water and watching how quickly they sizzle) also works. Ideally, you want a surface temperature of 375°F to 425°F for most hibachi cooking.
Also, be mindful of windy or cold weather if you’re cooking outdoors—it can affect how evenly your griddle heats. Investing in a wind guard or using your griddle in a sheltered area can make a big difference.
Timing is Everything
Just like in a professional kitchen, timing makes or breaks your hibachi cookout. You want everything to hit the plate hot, fresh, and full of flavor. That means you need to understand the cooking times for each ingredient and how to sequence your actions.
Here’s a pro tip: Cook in this order for the best results—
- Rice – Needs the most time to get golden and crispy.
- Vegetables – Medium heat, slightly slower cook.
- Proteins – Cook fast and taste best fresh.
- Noodles – Quick stir-fry and perfect for absorbing leftover flavors.
- Assemble and serve – No time wasted.
Make use of the warm zone and don’t walk away from your station. Keep ingredients moving, flip often, and don’t crowd the grill—this helps you avoid steaming and ensures that everything gets a nice sear.
If you’re serving a crowd, consider prepping multiple small batches rather than one giant pile of food. This keeps everything fresh and flavorful.
Flavor Layering
Hibachi is all about building flavor in layers. That means every step of the cooking process adds something new to the dish. Here’s how to nail it:
- Start with oil: Use sesame oil or a neutral oil with a high smoke point like avocado or vegetable oil.
- Add garlic and onions early: They release incredible aroma and flavor that will infuse into the rest of the food.
- Butter and soy sauce near the end: Adds richness and umami without burning.
- Fresh herbs and toppings last: Green onions, sesame seeds, or even a squeeze of lemon can elevate your entire plate.
Don’t just throw everything together and hope for the best. Think of your cooking as a storyline—every step builds on the last to create a full, flavorful narrative.
Popular Hibachi Sauces You Can Make at Home
Yum Yum Sauce
This creamy, tangy, slightly sweet sauce is a hibachi essential. It’s perfect for dipping shrimp, steak, or even spooning over rice.
Ingredients:
- 1 cup mayonnaise
- 2 tbsp ketchup
- 1 tbsp rice vinegar
- 1 tsp sugar
- 1 tsp garlic powder
- 1 tsp paprika
- 2–3 tbsp water (to thin it out)
Instructions:
- Mix everything in a bowl.
- Adjust consistency with water.
- Let it chill in the fridge for 1–2 hours before serving.
It gets better the longer it sits, so make it ahead of time if possible.
Ginger Sauce
This zesty sauce pairs wonderfully with steak, chicken, or grilled veggies. It’s thinner than Yum Yum but packs a flavorful punch.
Ingredients:
- 1/2 cup soy sauce
- 1/4 cup rice vinegar
- 1 small onion, chopped
- 1 tbsp ginger, minced
- 1 tbsp garlic, minced
- 1 tbsp sugar
Instructions:
- Blend all ingredients until smooth.
- Store in a mason jar or squeeze bottle.
- Serve chilled or at room temp.
The fresh ginger really makes this sauce sing—it’s bold, savory, and addictive.
Spicy Mayo Sauce
For those who like a little kick, spicy mayo is a must. It’s perfect on hibachi noodles, shrimp, or even tofu.
Ingredients:
- 1/2 cup mayonnaise
- 1–2 tbsp Sriracha (adjust to taste)
- 1 tsp sesame oil
- 1 tsp lime juice or rice vinegar
Instructions:
- Stir all ingredients until smooth.
- Taste and adjust heat level.
- Keep refrigerated until ready to use.
This one is super simple but elevates any dish with its creamy heat.
Side Dishes That Pair Perfectly with Hibachi
Clear Soup
This light, flavorful broth is usually served at the beginning of a hibachi meal and helps cleanse your palate.
Ingredients:
- Chicken or vegetable broth
- Mushrooms (button or shiitake)
- Green onions
- Fried onions or garlic for topping
Instructions:
- Simmer broth with mushrooms and scallions.
- Strain and serve hot.
- Garnish with fried onions for texture.
It’s quick, clean, and sets the tone for a great meal.
Japanese Salad with Ginger Dressing
A fresh salad adds a crisp, cooling balance to the rich flavors of hibachi.
Salad:
- Iceberg or romaine lettuce
- Shredded carrots
- Cucumber slices
- Cherry tomatoes
Dressing:
- 2 tbsp soy sauce
- 2 tbsp rice vinegar
- 1 tbsp ginger (grated)
- 1 tbsp sesame oil
- 1 tbsp honey
- 1 tbsp onion (grated)
Shake it all together and drizzle over the salad just before serving.
Edamame and Seaweed Salad
If you want to take it up a notch, add a small dish of lightly salted edamame or a tangy seaweed salad. Both offer texture, color, and traditional Japanese flair.
- Steam edamame and sprinkle with sea salt.
- Serve chilled seaweed salad in small bowls.
These sides are not only delicious—they also make your hibachi plate look like it came straight from a restaurant.
Common Mistakes to Avoid When Cooking Hibachi
Overcrowding the Griddle
One of the biggest rookie mistakes when cooking hibachi on a Blackstone griddle is overcrowding the surface. You might be tempted to throw everything on at once, especially if you’re cooking for a group, but this leads to steaming instead of searing. When the griddle is overloaded, moisture from the ingredients has nowhere to go, and instead of that nice crispy char, you end up with soggy, bland food.
Here’s how to avoid it:
- Cook in batches. It may take a little longer, but your food will thank you for it.
- Use the warm zone. Shift cooked items to the side to free up space without letting them go cold.
- Separate proteins and veggies. They have different cooking times and need different heat levels.
Remember, hibachi is all about that satisfying sizzle. Give your ingredients room to breathe.
Using Cold Ingredients
This mistake is a killer for flavor and texture. Tossing cold proteins or vegetables straight from the fridge onto the hot griddle causes the temperature to drop, and you won’t get the proper sear.
Always:
- Let your meats and veggies come to room temperature for about 20–30 minutes before cooking.
- Use pre-cooked, cold rice, but let it sit out for 10 minutes before it hits the grill to avoid uneven cooking.
Cold ingredients = cold results. Let them warm up before you bring the heat.
Skipping the Oil or Butter
This might sound obvious, but plenty of first-time hibachi cooks forget to oil the griddle. The oil (and butter!) doesn’t just prevent sticking—it adds that signature flavor and helps ingredients caramelize properly.
- Use high-heat oils like avocado, vegetable, or canola.
- Add garlic butter toward the end of cooking to layer in richness.
- Keep squirt bottles handy to re-oil dry spots quickly.
Dry griddle = dry food. Oil generously, and butter liberally for that rich, restaurant-style taste.
Nutritional Value of Hibachi Meals
Calories and Macronutrients
Hibachi meals can be surprisingly well-balanced, depending on how you portion your ingredients. A standard plate includes a source of protein (like chicken, steak, or shrimp), vegetables, and either rice or noodles—giving you a solid mix of carbs, protein, and fats.
Here’s a general breakdown per serving:
- Chicken Hibachi Plate: ~500–600 calories
- Steak Hibachi Plate: ~600–700 calories
- Shrimp Hibachi Plate: ~450–550 calories
- Fried Rice (1 cup): ~250–300 calories
- Hibachi Noodles (1 cup): ~200–250 calories
These numbers can vary depending on how much oil and sauce you use. Keep that in mind if you’re tracking calories.
Healthier Substitutions for Classic Recipes
If you’re aiming to enjoy hibachi on a regular basis without guilt, consider making a few smart swaps:
- Use brown rice or cauliflower rice for a lower-carb option.
- Substitute coconut aminos for soy sauce if you’re reducing sodium.
- Use lean proteins like chicken breast, shrimp, or tofu.
- Replace butter with olive oil (or use less butter overall).
- Add extra veggies to bulk up the meal without extra calories.
Hibachi can absolutely be part of a healthy lifestyle—you just need to take control of the ingredients.
Storing and Reheating Leftovers
Best Containers and Storage Tips
If you have leftovers (which you likely will), you’ll want to store them properly to preserve the flavor and texture.
- Use airtight glass containers to prevent sogginess and preserve freshness.
- Separate components: Store rice, protein, and veggies in separate containers if possible. This helps prevent them from getting mushy when reheated.
- Let everything cool completely before refrigerating to avoid condensation inside the container.
Stored properly, hibachi leftovers will last 3 to 4 days in the fridge.
How to Reheat Without Losing Flavor or Texture
Reheating hibachi isn’t tricky, but doing it the right way ensures it tastes almost as good as when it was fresh.
Best Reheating Methods:
- On the stovetop or griddle: Add a small amount of oil or butter and reheat each item separately. This keeps them crispy and flavorful.
- In the microwave: Use a damp paper towel to cover the dish. This creates a bit of steam and prevents drying out. Stir halfway through for even reheating.
- In an air fryer: Great for reviving crispy textures in proteins and veggies.
Avoid reheating everything together at once—you’ll get better results if you treat each part of the meal with care.
FAQs about Blackstone Hibachi Recipe
1. What’s the best oil to use on the Blackstone for hibachi?
Use high-smoke-point oils like avocado oil, vegetable oil, or canola oil. Sesame oil is great for flavor but burns quickly, so use it as a finishing touch rather than a cooking base.
2. Can I make hibachi without a Blackstone griddle?
Yes! You can use a cast-iron skillet or flat-top grill on your stovetop. While the surface area will be smaller, the cooking method remains the same—high heat, quick cooking, and layering flavor.
3. Is hibachi healthy to eat regularly?
It can be! If you use lean proteins, go light on oil and sauces, and bulk up with vegetables, hibachi can be a balanced and nutritious meal. Opt for brown rice or cauliflower rice for an even healthier version.
4. What type of rice is best for hibachi fried rice?
Use day-old jasmine or medium-grain white rice. Fresh rice will be too soft and sticky, while day-old rice fries up crispy and absorbs flavor better.
5. How can I make it more kid-friendly?
Go easy on the spice and sauces, use bite-sized pieces of mild chicken or shrimp, and serve with simple noodles or plain rice. Kids also love the showy cooking process—invite them to watch or even help out with safe tasks.
Conclusion
Whether you’re hosting a fun weekend dinner or just looking to shake up your weekday routine, hibachi on a Blackstone is a fantastic way to eat well, cook with flair, and entertain your friends or family. All you need is a little prep, the right tools, and this step-by-step guide to get started.
Now that you know everything from ingredients to execution, there’s only one thing left to do—fire up that griddle and get cookin’!


