Sourdough Tortilla Recipe: Homemade tortillas have a charm of their own—soft, chewy, and perfectly warm. Now, when you add sourdough into the mix, you unlock a whole new level of flavor, nutrition, and satisfaction. Unlike regular tortillas that rely on baking powder or commercial yeast, sourdough tortillas use a natural starter. This not only gives them a slightly tangy flavor but also makes them easier to digest.
If you’ve been searching for a foolproof sourdough tortilla recipe, you’ve come to the right place. This step-by-step guide will walk you through everything—from choosing the right ingredients to rolling and cooking perfect tortillas. Whether you’re new to sourdough baking or already have an active starter at home, this recipe is a must-try.
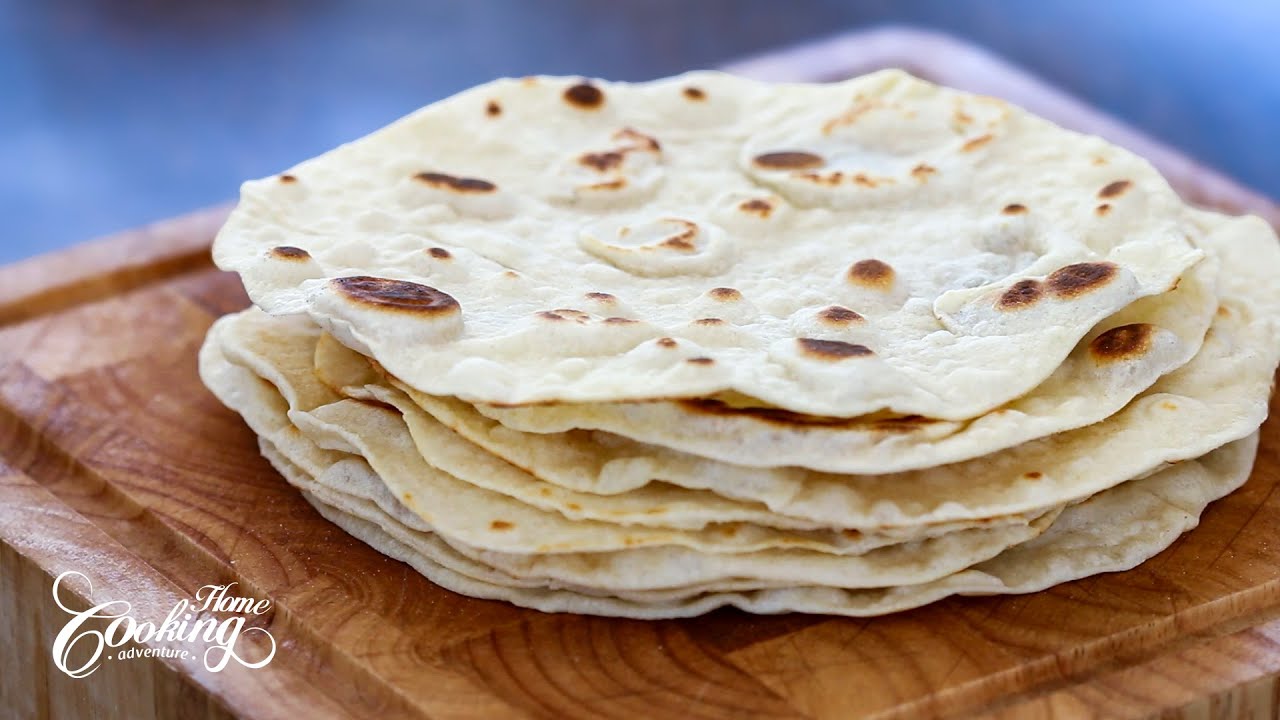
Introduction to Sourdough Tortillas
Tortillas have been a staple in many cultures for centuries. Traditionally, they are made with just flour, water, fat, and salt. The difference with sourdough tortillas lies in the fermentation process. By using a natural starter, you enhance both taste and texture, creating tortillas that are not just food but an experience.
Why Choose Sourdough Over Regular Tortillas?
Regular tortillas are quick to make, but they lack depth of flavor. Sourdough tortillas, on the other hand, benefit from natural fermentation. This gives them:
- A subtle tangy taste that pairs beautifully with savory fillings.
- A softer texture that stays pliable longer.
- A more nutritious profile due to the breakdown of gluten and phytic acid during fermentation.
The Health Benefits of Using Sourdough Starter
Sourdough isn’t just about flavor—it’s about health too. The natural fermentation process:
- Makes nutrients in the flour more bioavailable.
- Helps improve gut health with beneficial bacteria.
- Reduces gluten levels, making tortillas easier to digest for many people.
By choosing sourdough tortillas over store-bought versions, you’re not only eating better but also connecting with a centuries-old tradition of natural baking.
Ingredients You’ll Need
The beauty of sourdough tortillas lies in their simplicity. You don’t need a long list of fancy ingredients. With just a handful of pantry staples, you can create warm, fresh tortillas that rival anything you’d buy from a store.
Basic Ingredients for Sourdough Tortillas
Here’s what you’ll need for about 10–12 tortillas:
- 2 cups all-purpose flour (or substitute part with whole wheat)
- ½ cup active sourdough starter (fed and bubbly)
- 3 tbsp olive oil, lard, or butter (for richness and softness)
- ½ tsp salt
- ¾ cup warm water (adjust as needed for consistency)
These basic ingredients create a soft, flavorful dough that’s easy to work with.
Optional Add-ins for Flavor and Texture
Want to get creative? You can enhance your tortillas by adding:
- Fresh herbs like cilantro or parsley
- Spices such as garlic powder, cumin, or paprika
- Seeds like flax or sesame for extra crunch
- A splash of milk for a creamier taste
Choosing the Right Flour for the Best Tortillas
The flour you use makes a huge difference. All-purpose flour creates soft and pliable tortillas, while whole wheat flour gives a nuttier, heartier texture. If you want a balance, try mixing both. For a lighter result, stick to all-purpose flour.
Tools and Equipment for Making Sourdough Tortillas
Making sourdough tortillas doesn’t require any special gadgets, but having the right tools will make your job much easier.
Essential Kitchen Tools You’ll Need
- Mixing bowl
- Wooden spoon or dough whisk
- Rolling pin
- Cast-iron skillet or heavy-bottomed pan
- Kitchen towel (to keep tortillas warm and soft)
Helpful Extras for Easier Cooking
While not essential, these items can make the process smoother:
- A tortilla press (great for even, round tortillas)
- Bench scraper (to handle sticky dough)
- Digital kitchen scale (for precise measurements)
A well-seasoned cast-iron skillet is ideal because it heats evenly and gives tortillas a beautiful char.
Preparing Your Sourdough Starter
The heart of this recipe is your sourdough starter. If you already bake sourdough bread, you likely have one bubbling away on your countertop. If not, you can make a starter at home with just flour and water, though it takes about a week to develop.
How to Feed and Maintain Your Starter
Before using your starter, it needs to be active and bubbly. To feed it:
- Remove half of the starter from the jar.
- Add equal parts flour and water (by weight).
- Stir well and let it sit at room temperature for 4–8 hours.
When it doubles in size and passes the “float test” (a spoonful floats in water), it’s ready to use.
Signs Your Starter Is Ready for Baking
A healthy starter should:
- Have a pleasant, slightly tangy aroma
- Be full of bubbles
- Show visible rise and fall after feeding
Using an underfed or sluggish starter will result in dense, flat tortillas, so always make sure it’s active before starting the recipe.
Step-by-Step Guide to Making Sourdough Tortillas
Now for the fun part—rolling up your sleeves and making the tortillas! The process is straightforward, but each step matters.
Step 1 – Mixing the Dough
In a large bowl, combine flour, salt, sourdough starter, and fat of choice. Slowly add warm water while mixing until a soft dough forms. Knead briefly until smooth. The dough should not be sticky but should remain pliable.
Step 2 – Resting the Dough for Fermentation
Cover the bowl with a damp towel and let the dough rest for 2–4 hours at room temperature. This allows the sourdough to ferment, developing flavor and softening the gluten.
Step 3 – Dividing and Shaping the Dough Balls
Once fermented, divide the dough into equal pieces (about golf-ball size). Roll each piece into a ball, cover them, and let them rest for 15 minutes. This makes rolling easier.
Step 4 – Rolling Out the Tortillas
Lightly flour your work surface. Roll each ball into a thin circle, about 6–8 inches in diameter. Don’t worry if they’re not perfectly round—rustic tortillas taste just as good!
Step 5 – Cooking the Tortillas on a Skillet
Heat a cast-iron skillet over medium-high. Place a tortilla on the hot skillet and cook for 30–40 seconds until bubbles form. Flip and cook another 30 seconds. Cover with a towel to keep them soft while cooking the rest.
Tips for Perfect Sourdough Tortillas
Cooking with sourdough may feel intimidating at first, but tortillas are actually one of the easiest recipes to start with. To ensure your tortillas come out soft, flexible, and delicious every time, here are some helpful tips.
Preventing Tough or Dry Tortillas
One of the biggest mistakes people make is overcooking their tortillas. While it’s tempting to wait for them to develop dark spots all over, you really only need to cook each side for about 30–40 seconds. Any longer, and they’ll lose moisture and turn tough.
Another factor is the fat. Whether you use olive oil, butter, or lard, don’t skimp on it—it helps keep the tortillas tender. If your tortillas are still coming out dry, you might need to add a little extra water to the dough. Remember, hydration makes a huge difference in sourdough recipes.
Finally, keep the cooked tortillas wrapped in a clean kitchen towel. This traps steam, keeping them soft and pliable until you’re ready to serve.
How to Store and Reheat Them Properly
Fresh sourdough tortillas are best eaten warm, but they store surprisingly well too. To keep them fresh:
- Place cooled tortillas in an airtight bag or container.
- Store at room temperature for up to 2 days or refrigerate for 5–6 days.
- For longer storage, freeze with parchment paper between each tortilla.
To reheat, use a hot skillet for 10–15 seconds per side, or wrap them in a damp paper towel and microwave for about 20 seconds. Avoid reheating them directly over an open flame unless you want crispy tostada-style tortillas.
Serving Ideas for Sourdough Tortillas
So, you’ve made a batch of soft, tangy sourdough tortillas—now what? The beauty of tortillas is their versatility. They’re like a blank canvas that can hold almost any flavor combination.
Classic Mexican-Inspired Meals
Naturally, the first thing that comes to mind is tacos. Sourdough tortillas pair beautifully with grilled meats, roasted vegetables, or spicy beans. But don’t stop there:
- Quesadillas: Stuff with cheese, peppers, and onions, then toast until melty.
- Enchiladas: Roll them with fillings, cover in sauce, and bake.
- Burritos: Load with rice, beans, and your favorite protein.
Creative Ways to Use Tortillas Beyond Tacos
These tortillas are also perfect for non-traditional uses:
- Wraps and Sandwiches: Use them instead of bread for a lighter meal.
- Homemade Pizza Base: Top a tortilla with sauce, cheese, and toppings, then bake until crispy.
- Breakfast Roll-Ups: Fill with scrambled eggs, avocado, and salsa for a quick start to your day.
- Dessert Tortillas: Brush with butter, sprinkle with cinnamon sugar, and toast for a sweet treat.
Once you realize how versatile sourdough tortillas are, you’ll find yourself making them for breakfast, lunch, and dinner.
Common Mistakes to Avoid
Even though sourdough tortillas are relatively simple, a few mistakes can stand between you and perfection. Learning what not to do is just as important as following the recipe.
Overproofing the Dough
Because sourdough involves fermentation, it’s easy to let the dough rest too long. Overproofing can lead to a sour taste that’s overwhelming and dough that’s hard to roll out. Aim for 2–4 hours of resting at room temperature—just enough to build flavor without going too far.
If you’re not ready to cook them right away, you can refrigerate the dough overnight. Just let it warm up for 30 minutes before rolling.
Using Too Much Flour When Rolling
It’s tempting to dust your surface with lots of flour to prevent sticking, but too much flour can dry out the tortillas. Instead, lightly flour the surface and rolling pin. If the dough is well-rested, it should be soft and easy to roll without needing extra flour.
Another common mistake is rolling the dough too thick. Thick tortillas won’t cook properly, leaving them raw in the middle. Aim for about 1/8 inch thickness for the best results.
Variations of Sourdough Tortillas
One of the best things about making tortillas at home is the ability to customize them. Depending on your preferences or dietary needs, you can tweak the recipe without losing that classic sourdough goodness.
Whole Wheat Sourdough Tortillas
For a nuttier, more wholesome tortilla, swap half of the all-purpose flour with whole wheat. Whole wheat flour makes tortillas slightly denser, but also more filling and nutritious. If you’re new to whole wheat baking, try a 50/50 mix to start.
Gluten-Free Sourdough Tortillas
Yes, you can make gluten-free sourdough tortillas! Simply use a gluten-free flour blend that contains xanthan gum. You’ll also need a gluten-free sourdough starter, which can be made using brown rice flour or buckwheat flour. These tortillas won’t be quite as stretchy as traditional ones, but they’ll still taste amazing and work well for wraps.
Other fun variations include adding spinach puree for green tortillas, turmeric for a golden hue, or even activated charcoal for dramatic black tortillas.
Nutritional Value of Sourdough Tortillas
Homemade tortillas always win when it comes to nutrition, especially when sourdough fermentation is involved. Store-bought tortillas often contain preservatives, stabilizers, and unnecessary sugars. By making your own, you control every ingredient.
Comparison to Store-Bought Tortillas
- Calories: Homemade tortillas usually have fewer calories since you’re not adding hidden fats or sugars.
- Sodium: Store-bought tortillas are often loaded with salt. Making them at home lets you control how much you use.
- Additives: No preservatives or artificial flavors—just pure, wholesome ingredients.
Why Homemade is Always Healthier
Thanks to fermentation, sourdough tortillas offer:
- Better digestion (reduced gluten and phytic acid)
- Stable blood sugar levels (lower glycemic index compared to refined flour tortillas)
- Nutrient absorption (fermentation unlocks minerals like iron and zinc)
In short, sourdough tortillas don’t just taste better—they are better for you.
Troubleshooting Sourdough Tortillas
Even experienced bakers run into small issues when making sourdough tortillas. The good news? Most of these problems have simple fixes. Let’s go through the most common challenges and how to solve them.
Why Your Tortillas Crack
If your tortillas crack when folded, chances are the dough was too dry. This usually means:
- Not enough water was added when mixing.
- Too much flour was used during rolling.
- The tortillas were overcooked and lost their moisture.
Solution: Next time, increase the hydration of the dough by adding an extra tablespoon of water at a time until it’s soft and pliable. Also, keep cooked tortillas stacked under a towel to lock in steam and keep them flexible.
What to Do if They Don’t Puff
A good tortilla often puffs up when cooking, creating air pockets that make it light and tender. If yours stay flat:
- The dough may not have rested long enough.
- They could be rolled too thick.
- The skillet might not be hot enough.
Solution: Make sure the dough balls rest for at least 15 minutes before rolling. Roll them thinly and heat your skillet until it’s almost smoking before cooking. Even if they don’t puff, don’t worry—your tortillas will still taste delicious.
Storing and Freezing Sourdough Tortillas
One of the best things about sourdough tortillas is how well they store. With a little preparation, you can make a big batch and enjoy fresh tortillas all week—or even longer if frozen.
Best Containers for Storage
To keep tortillas soft at room temperature, store them in an airtight container or a resealable plastic bag. A tortilla warmer also works great if you plan on using them within 24 hours.
If refrigerating, wrap them tightly in foil or plastic wrap before sealing in a container. This prevents them from drying out and absorbing fridge odors.
How to Freeze and Thaw Them Without Losing Texture
Freezing is a great option for meal prepping. Here’s how:
- Let tortillas cool completely.
- Place parchment paper between each tortilla to prevent sticking.
- Stack them and place in a freezer-safe bag.
They’ll last up to 3 months in the freezer. To thaw, move them to the fridge overnight or leave at room temperature for a few hours. Reheat on a skillet for best results.
FAQs about Sourdough Tortilla Recipe
1. Can I make sourdough tortillas without fat?
Yes, but they’ll be less soft and flavorful. Fat adds tenderness, so if you omit it, expect a chewier result.
2. How long should I ferment the dough for tortillas?
Anywhere from 2–4 hours is perfect. For a stronger tang, you can refrigerate the dough overnight and use it the next day.
3. Can I use discard instead of active starter?
Yes! This is a great way to use sourdough discard. Just keep in mind that tortillas made with discard won’t rise or puff as much, but they’ll still taste amazing.
4. Why are my tortillas too chewy?
This usually happens if they’re overcooked. Reduce cooking time slightly and make sure your skillet is properly preheated.
5. Do I need a tortilla press to make them?
Not at all! A rolling pin works just fine. A tortilla press simply makes the process faster and helps keep tortillas uniform in shape.
Conclusion
From learning how to prepare your sourdough starter, to mixing, rolling, and cooking the dough, this guide has walked you through every step in detail. Along the way, we’ve covered tips, variations, storage methods, and even troubleshooting so you’re ready for success on your very first try.
Whether you’re making tacos for dinner, wraps for lunch, or even a sweet tortilla dessert, sourdough tortillas bring a unique tang and softness that can’t be matched. Once you’ve tried them, you may never go back to store-bought again.
So, grab your starter, roll up your sleeves, and start cooking. Your homemade sourdough tortillas are waiting!


