Oven Fries Recipe: Who doesn’t love fries? They’re crispy, golden, and simply irresistible. But here’s the problem—traditional deep-fried fries often come loaded with unhealthy fats and excess calories. If you’re craving that crunchy, flavorful experience without the guilt, oven fries are your best bet. With the right technique, you can make fries that are not just healthier, but equally delicious—crispy on the outside and soft on the inside.
In this detailed guide, we’ll walk through everything you need to know about making the perfect oven fries. From the ingredients you’ll need to a foolproof step-by-step process, plus tips, tricks, and variations, you’ll soon be making fries that taste like they came from your favorite restaurant.
Why Choose Oven Fries Over Deep-Fried?
Let’s be honest—deep-fried fries taste amazing. But the price you pay isn’t just at the restaurant; it’s also in your health. Deep frying involves immersing potatoes in oil at high heat, which significantly increases their calorie and fat content. For someone watching their diet or simply aiming for healthier meals, this isn’t the best option.
That’s where oven fries step in. By baking instead of frying, you reduce the oil used while still achieving that much-loved crispiness. Baking fries at high temperatures allows them to crisp up naturally, especially when paired with techniques like soaking and proper seasoning. The result? A plate of fries that’s crunchy, flavorful, and way lighter than the greasy alternatives.
Another advantage is convenience. With oven fries, you can prepare a large batch at once without standing over a hot pan of oil. Plus, there’s minimal mess—no oil splatters or strong frying smell lingering in your kitchen. It’s a win-win situation for both your taste buds and your health.
The Secret to Crispy, Golden Oven Fries
So, what makes oven fries truly crispy? It all comes down to three essential factors: soaking, seasoning, and temperature. When potatoes are soaked in water before baking, excess starch is removed, preventing them from becoming soggy. Seasoning them with just the right mix of oil, salt, and spices enhances both flavor and texture. Finally, baking at a high temperature (around 425°F/220°C) ensures that perfect golden crunch.
Think of it like roasting vegetables—when you roast at high heat, the outside caramelizes beautifully while the inside stays tender. Fries work the same way. If you follow the right steps, you won’t even miss the deep fryer.
Ingredients You’ll Need
Main Ingredients for Perfect Fries
To make oven fries, you only need a handful of simple, everyday ingredients:
- 4 large potatoes (preferably Russet or Yukon Gold)
- 2–3 tablespoons of olive oil (or any neutral oil like canola or sunflower oil)
- 1 teaspoon of salt (adjust to taste)
- ½ teaspoon of black pepper
These four basics are all you need for classic oven fries. Olive oil helps crisp the fries without overpowering their flavor, while salt and pepper keep things simple yet tasty.
Optional Add-ons for Extra Flavor
If you want to take your fries to the next level, you can experiment with additional seasonings:
- Garlic powder or minced garlic – for a rich, savory punch
- Paprika or smoked paprika – for a smoky depth
- Chili powder or cayenne pepper – if you love spice
- Parmesan cheese – for a cheesy, umami-rich finish
- Fresh herbs like parsley or rosemary – for a refreshing aroma
The beauty of oven fries is their versatility—you can keep them classic or load them up with bold flavors depending on your mood.
Choosing the Best Potatoes
Not all potatoes are created equal when it comes to fries. The best ones have the right balance of starch and moisture. Russet potatoes are the top choice—they’re starchy, which means they crisp up beautifully when baked. Yukon Gold is another good option, offering a slightly creamier interior while still getting crispy on the outside.
Avoid waxy potatoes like red or fingerling varieties, as they hold too much moisture and won’t deliver the crunch you’re after. If you want restaurant-quality oven fries, stick with Russet potatoes for the ultimate texture.
Step-by-Step Guide to Making Oven Fries
Step 1 – Wash and Cut the Potatoes
Start by thoroughly washing your potatoes. Since fries are usually cooked with the skin on for added texture and nutrition, scrubbing them clean is essential. Next, cut them into evenly sized strips—about ¼ to ½ inch thick. The key is consistency; if your fries are uneven, some will cook faster than others, leaving you with a mix of burnt and undercooked pieces.
Cutting the potatoes into sticks isn’t the only option. You can slice them into wedges for a chunkier style or go thin for shoestring fries. It’s all about preference, but whatever style you choose, aim for uniformity.
Step 2 – Soak the Potatoes for Extra Crispiness
Here’s the golden rule for oven fries: soak before you bake. This step might feel unnecessary at first, but trust me—it makes all the difference. After cutting your potatoes into sticks, place them in a large bowl of cold water. Let them soak for at least 30 minutes, or if you have more time, up to 2 hours.
Why does soaking matter? Potatoes naturally contain starch, and too much starch can make fries gummy and prevent them from crisping up in the oven. By soaking, you remove excess starch, which helps your fries bake into golden, crispy perfection instead of staying soft and soggy.
If you’re short on time, even a quick 15-minute soak will improve the texture, though longer is better. After soaking, drain the potatoes and spread them out on a clean kitchen towel. Pat them completely dry—this is critical. If your potatoes are still wet when you toss them in oil, they’ll steam in the oven rather than crisp up. Think of it this way: moisture is the enemy of crunch.
Step 3 – Seasoning the Fries
Now comes the fun part—flavoring your fries. Once your potatoes are dry, transfer them to a large mixing bowl. Drizzle with olive oil (about 2–3 tablespoons for every 4 potatoes). You don’t need a lot—just enough to lightly coat each piece. Too much oil can weigh down the fries, while too little can leave them dry.
Next, sprinkle in your salt and pepper. Toss the fries with your hands or a pair of tongs to ensure every piece is coated evenly. This step is key: even coating ensures that your fries crisp up evenly and taste consistently delicious.
If you’re feeling creative, this is the moment to add extra seasonings. For a smoky flavor, add a teaspoon of paprika. For garlic lovers, a dash of garlic powder works wonders. Want some heat? Sprinkle in chili powder or cayenne pepper. Don’t be afraid to experiment—seasonings are what transform basic fries into gourmet bites.
A pro tip: if you’re adding grated Parmesan cheese or fresh herbs like parsley, do it after baking, not before. This prevents the cheese from burning and keeps the herbs fresh and aromatic.
Step 4 – Baking the Fries to Perfection
Preheat your oven to 425°F (220°C). A hot oven is the secret to crispy fries. While it heats, line a baking sheet with parchment paper or lightly grease it to prevent sticking.
Spread your seasoned fries out on the tray in a single layer. This part is crucial—if the fries overlap or pile up, they’ll steam instead of crisp. Think of it like roasting vegetables: they need space to caramelize.
Bake the fries for 20 minutes, then take the tray out and flip them over using a spatula or tongs. Flipping ensures that both sides crisp up evenly. Return them to the oven for another 15–20 minutes, or until they reach your desired level of crispiness.
Keep an eye on them toward the end of baking—different ovens vary, and fries can go from golden to overcooked pretty quickly. When done, they should be crispy on the outside, fluffy on the inside, and irresistibly golden brown.
If you’re cooking a large batch, consider using two trays and rotating them halfway through baking. This helps maintain consistent heat and prevents overcrowding.
Step 5 – Serving and Garnishing
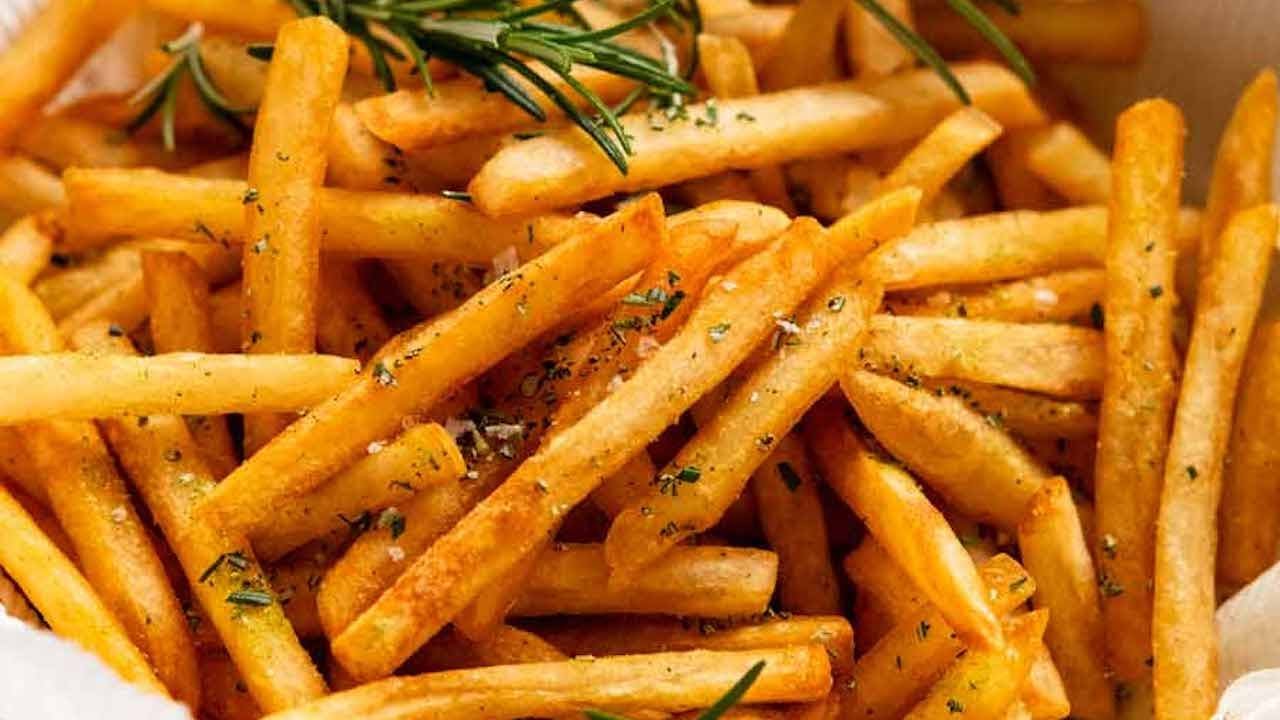
Once your fries are out of the oven, it’s time to serve them hot and fresh. But before digging in, consider adding a finishing touch. A light sprinkle of sea salt right out of the oven enhances the flavor. If you love extra flair, toss the fries with freshly chopped parsley, rosemary, or even a little Parmesan cheese for a gourmet upgrade.
When it comes to serving, oven fries are incredibly versatile. They pair perfectly with classic ketchup, but you can also serve them with garlic aioli, ranch dressing, barbecue sauce, or even cheese sauce. For a healthier twist, try dipping them in Greek yogurt mixed with herbs and lemon juice.
Presentation matters too! Pile your fries into a serving basket lined with parchment paper, or serve them in small bowls alongside your favorite dipping sauces. This little detail makes your homemade fries feel like a restaurant experience.
And here’s a tip: serve them immediately. Fries are best enjoyed fresh out of the oven when they’re still crispy. If they sit too long, they’ll lose their crunch and turn soft. So gather your family, friends, or even just yourself, and enjoy every bite of these golden, crispy delights.
Tips and Tricks for Crispy Oven Fries
No one wants soggy fries. The whole point of oven fries is to get that golden crunch without deep frying, and there are a few insider tricks to guarantee success.
First, don’t skip the soaking step. It might feel like an extra chore, but soaking the potatoes in cold water draws out excess starch, which is the main culprit behind limp fries. After soaking, drying them thoroughly is equally important. Even a little leftover water can cause the fries to steam instead of crisp up. Think of it this way: water is the enemy of crunch.
Second, the oil ratio matters. Too little oil and the fries will dry out, too much oil and they’ll feel heavy. A light coating is all you need—just enough to cover each fry evenly. Using olive oil gives a rich flavor, but if you prefer a neutral taste, canola or avocado oil work well too.
Third, spacing is everything. Overcrowding the pan leads to steaming instead of roasting. Give your fries room to breathe, spreading them out in a single layer. If you’re making a large batch, use two baking sheets instead of piling everything on one.
Another great tip is to use high heat. Baking at around 425°F (220°C) creates the perfect environment for crisping. If your oven has a convection setting, use it—the circulating hot air helps fries crisp up faster and more evenly.
For an extra crunch, some cooks like to toss the cut fries with a spoonful of cornstarch before baking. This creates a light coating that helps lock in crispiness, almost like a thin batter. It’s optional, but definitely worth trying if you want restaurant-quality texture.
Finally, don’t forget the finishing touch. A sprinkle of flaky sea salt or freshly chopped herbs right after baking not only adds flavor but also enhances the fries’ presentation. The secret isn’t just in the cooking—it’s also in the little details that make the fries irresistible.
Common Mistakes to Avoid
Even the best cooks can mess up fries if they miss a few key steps. Here are the most common mistakes and how to avoid them.
- Overcrowding the Tray – This is the number one mistake. Fries need space to bake properly. When packed too closely, they steam and turn soggy instead of crispy. Spread them out in a single layer, and use multiple trays if needed.
- Skipping the Soak – You might be tempted to skip soaking to save time, but this step is crucial. Without soaking, fries often turn out gummy and soft because of the excess starch.
- Not Drying Enough – After soaking, many people only give the potatoes a quick towel pat. But if the fries aren’t bone dry, the leftover moisture will ruin their texture. Take the time to dry them well with a clean towel or paper towels.
- Using Too Much Oil – More oil doesn’t equal more crisp. In fact, it can weigh down the fries, making them greasy instead of crunchy. A light drizzle is more than enough.
- Wrong Temperature – Baking at a low temperature won’t give you crispy fries, while too high of a temperature risks burning the outside before the inside cooks. Stick to 425°F (220°C) for the best results.
- Not Flipping the Fries – If you leave the fries untouched, one side will brown while the other stays pale and limp. Flipping them halfway ensures even crisping.
- Adding Cheese Too Early – If you plan to add Parmesan or another topping, don’t sprinkle it on before baking. It’ll burn. Instead, add it right after you take the fries out of the oven.
By avoiding these mistakes, you set yourself up for perfect oven fries every time. Remember, fries may seem simple, but little details make all the difference between average and outstanding.
Variations of Oven Fries
One of the best things about oven fries is their versatility. You can stick with the classic salted version or get creative with different flavors. Here are a few delicious variations to try:
Garlic Parmesan Oven Fries
For a gourmet twist, toss your baked fries with freshly minced garlic, grated Parmesan cheese, and a sprinkle of parsley. The garlic adds a savory punch while the Parmesan gives a rich, cheesy finish. Serve these with marinara sauce for an Italian-inspired snack.
Spicy Cajun Oven Fries
If you like a little heat, season your fries with a Cajun spice mix before baking. Paprika, cayenne pepper, garlic powder, and onion powder create a smoky, spicy flavor that pairs perfectly with ranch or chipotle mayo. These fries are bold, flavorful, and downright addictive.
Sweet Potato Oven Fries
For a healthier alternative, try making oven fries with sweet potatoes. They’re naturally sweet, rich in fiber, and full of vitamins. Season with salt and cinnamon for a sweet twist, or go savory with paprika and garlic powder. Keep in mind, sweet potato fries tend to be softer, so don’t expect the exact same crunch as regular fries—but they’re delicious in their own right.
Loaded Oven Fries
Take your fries to the next level by turning them into a full meal. After baking, top them with melted cheese, crispy bacon bits, sour cream, and green onions. These loaded fries are perfect for game nights or parties.
The beauty of oven fries is that they’re a blank canvas. With just a few seasoning swaps or toppings, you can create endless variations to match your mood and cravings.
Serving Suggestions
Oven fries are tasty on their own, but the right pairings can make them even better. Here are a few ideas to elevate your fry experience:
Best Dipping Sauces for Fries
- Ketchup – The classic and timeless choice
- Garlic Aioli – Creamy and flavorful, perfect for gourmet fries
- Cheese Sauce – Rich and indulgent, ideal for loaded fries
- Barbecue Sauce – Smoky and tangy, adds depth of flavor
- Spicy Sriracha Mayo – A kick of heat balanced with creaminess
Meals That Go Perfectly with Oven Fries
- Burgers – Fries and burgers are a match made in heaven
- Grilled Chicken Sandwiches – A lighter pairing with crispy fries
- Steak – Classic steak and fries, a true comfort meal
- Salads – Add fries on the side for a balance of fresh and indulgent
- Fish Fillets – For a healthier take on fish and chips
Oven fries aren’t just a side dish—they can be the star of the meal. Whether you’re enjoying them with a simple sandwich or building them into loaded fries, they always find a way to shine.
Nutritional Value of Oven Fries
Oven fries aren’t just delicious—they can also be a healthier choice compared to deep-fried alternatives. When you bake fries instead of submerging them in oil, you automatically cut down on calories and unhealthy fats. This makes oven fries a smarter option for anyone who loves fries but wants to maintain a balanced diet.
A medium serving of oven fries made with just a light drizzle of olive oil typically contains about 150–200 calories per cup, compared to 350–400 calories per cup for deep-fried fries. That’s almost half the calorie count! Not only that, but oven fries have far less saturated fat, making them friendlier for heart health.
Potatoes themselves are actually quite nutritious. They’re an excellent source of vitamin C, vitamin B6, potassium, and fiber—all essential nutrients your body needs. When you bake them with the skin on, you also get the added benefit of extra fiber, which aids digestion and keeps you fuller for longer.
Of course, the health factor depends on how you prepare them. Keep the oil to a light coating, avoid drowning them in salt, and balance your meal with a source of protein and vegetables. If you choose olive oil instead of processed oils, you’re also adding healthy fats that support heart and brain health.
So yes, fries can be part of a balanced diet—as long as you prepare them smartly. Oven fries prove that you don’t need to sacrifice flavor to eat healthier.
Storage and Reheating Guide
Sometimes, you’ll have leftovers (though with fries this good, that’s rare). Knowing how to store and reheat oven fries properly makes a big difference in maintaining their texture.
How to Store Leftover Oven Fries
Once the fries have cooled, transfer them into an airtight container or a resealable plastic bag. Store them in the refrigerator for up to 3–4 days. Avoid leaving them uncovered, as they’ll dry out and lose their flavor.
If you want to freeze them, place the cooled fries in a single layer on a baking sheet and freeze until solid. Then, transfer them to a freezer bag or container. This way, they won’t stick together. Frozen oven fries can last up to 2 months.
Best Methods to Reheat Without Losing Crispiness
The biggest challenge with reheating fries is keeping them crispy. Microwaves tend to make them soft and soggy, so it’s best to avoid that method unless you’re in a rush.
Instead, reheat fries in the oven at 400°F (200°C) for about 5–10 minutes. Spread them out on a baking sheet to ensure even heating. For an even faster option, use an air fryer if you have one—just heat them at 375°F for about 3–5 minutes until they’re crispy again.
If you’re reheating frozen fries, don’t thaw them first. Bake straight from the freezer at 425°F (220°C) for about 15–20 minutes. They’ll come out hot and crispy, almost as good as freshly baked.
With the right reheating technique, you’ll never have to suffer through soggy leftovers again.
FAQs about Oven Fries Recipe
1. Can I make oven fries without oil?
Yes, you can make oil-free oven fries by seasoning your potatoes with spices alone and baking them on parchment paper. However, keep in mind that they won’t be quite as crispy without a light oil coating.
2. How do I prevent my fries from sticking to the pan?
Using parchment paper or lightly greasing your baking sheet prevents sticking. Fries can also stick if they’re too wet, so make sure they’re fully dried after soaking.
3. What’s the best potato variety for oven fries?
Russet potatoes are the top choice thanks to their high starch content and low moisture, which makes them crisp up beautifully. Yukon Gold is another good option for a creamier texture.
4. Can I make oven fries in an air fryer instead?
Absolutely! Air fryers are great for making fries. Cook them at 375°F for about 15–20 minutes, shaking the basket halfway through for even crispiness.
5. How long should I bake oven fries?
At 425°F (220°C), fries typically take 35–40 minutes. Flip them halfway through for the best results. Cooking time may vary depending on the thickness of your fries and your oven’s performance.
Conclusion
The secret lies in the process: soaking to remove excess starch, drying thoroughly, seasoning evenly, and baking at high heat. Add to that a few clever tricks like spacing fries properly and flipping them halfway, and you’ll end up with crispy, golden perfection every time.
Best of all, oven fries are incredibly versatile. From classic salted fries to garlic parmesan, spicy Cajun, or even sweet potato versions, the possibilities are endless. Pair them with your favorite meals, serve them with creative dipping sauces, or even load them up with toppings for a crowd-pleasing snack.
So the next time you’re craving fries, skip the drive-thru and try this oven fries recipe instead. It’s simple, healthier, and just as satisfying. Once you taste how good homemade oven fries can be, you may never go back to deep-fried again.


