Red Velvet Cake Recipe: Red Velvet Cake is more than just a dessert—it’s a classic showstopper that brings elegance and indulgence to any occasion. Known for its vibrant red hue and subtle cocoa flavor, this cake strikes a perfect balance between chocolatey richness and buttery sweetness. Unlike traditional chocolate cakes, Red Velvet has a light, fluffy texture that pairs beautifully with tangy cream cheese frosting.
So, what makes Red Velvet Cake so special? It’s the combination of flavor, texture, and color. The slight hint of cocoa, combined with buttermilk and vinegar, creates a tender crumb that feels moist without being overly heavy. The cream cheese frosting adds a luscious tang, cutting through the sweetness and complementing the cocoa undertones. Whether it’s for birthdays, weddings, or holidays, Red Velvet Cake always turns heads with its striking appearance and delicious taste.
What Makes Red Velvet Cake Unique?
The uniqueness of Red Velvet Cake lies in its balance of flavors. It’s not as rich as a chocolate cake, yet it’s far from being a plain vanilla cake. The addition of buttermilk and vinegar provides acidity, which reacts with baking soda to give the cake a softer, velvety crumb—hence the name. The red color, often achieved with food coloring, adds to its signature look, making it one of the most visually appealing cakes ever created.
The History of Red Velvet Cake
Red Velvet Cake has an interesting history that dates back to the early 1900s. It gained popularity in the United States during the Great Depression when the Adams Extract Company promoted it with red food coloring as a way to market their products. It soon became a staple in Southern kitchens and was even served at the Waldorf-Astoria Hotel in New York City, giving it a reputation as a luxurious dessert. Today, Red Velvet Cake is enjoyed worldwide, with countless variations that keep the tradition alive.
Ingredients You’ll Need
The success of a Red Velvet Cake depends heavily on using the right ingredients in the right proportions. Each component contributes to the cake’s flavor, texture, and appearance. Below, we’ll break down the essentials.
Essential Dry Ingredients
- All-purpose flour – Provides structure and stability.
- Granulated sugar – Sweetens the cake and helps with tenderness.
- Unsweetened cocoa powder – A small amount for subtle chocolate flavor.
- Baking soda – Works with vinegar and buttermilk for leavening.
- Salt – Balances flavors and enhances sweetness.
Essential Wet Ingredients
- Buttermilk – Adds tang and moisture, creating a soft crumb.
- Vegetable oil or butter – Keeps the cake moist.
- Eggs – Bind the batter and add richness.
- White vinegar – Reacts with baking soda for leavening.
- Vanilla extract – Enhances flavor.
- Red food coloring – For the iconic deep red color.
Optional Add-ons for Extra Flavor
- Espresso powder – Intensifies the cocoa flavor.
- Orange zest – Adds a citrusy brightness.
- Almond extract – A subtle nutty twist.
These ingredients come together to form the base of the Red Velvet Cake. Now that we’ve got our pantry list ready, let’s look at the tools and equipment you’ll need before baking.
Tools and Equipment Required
Before you dive into mixing and baking, it’s important to have the right tools. Using proper equipment ensures your cake bakes evenly and looks as professional as it tastes.
Baking Essentials
- Two 9-inch round cake pans – For even layers.
- Parchment paper – Prevents sticking and ensures smooth release.
- Cooling racks – Helps cool the cake evenly.
Mixing Tools
- Electric mixer (hand or stand mixer) – For efficient mixing.
- Mixing bowls (large and medium) – For wet and dry ingredients.
- Measuring cups and spoons – Accuracy is crucial.
- Spatula and whisk – For folding and mixing.
Decorating Tools
- Offset spatula – Smooths frosting perfectly.
- Cake turntable (optional) – Makes decorating easier.
- Piping bags and tips – For creative designs.
Having these tools on hand will make the entire baking process smoother and more enjoyable.
Preparing Your Ingredients
Even before turning on the oven, preparation is key. Taking time to prep your ingredients ensures a flawless cake-baking experience.
Measuring Accurately for Best Results
One of the most common baking mistakes is inaccurate measuring. Scooping flour directly from the bag can pack it too tightly, leading to a dense cake. Instead, spoon flour into your measuring cup and level it off with a knife. The same goes for cocoa powder and sugar. Liquids should be measured in clear measuring cups for precision. Accuracy is the foundation of baking success.
Tips for Room Temperature Ingredients
Room temperature ingredients mix more easily and create a smoother batter. Eggs blend seamlessly, butter softens to the right consistency, and buttermilk incorporates without curdling. If you forget to take your ingredients out ahead of time, a quick tip is to place eggs in a bowl of warm water for a few minutes or microwave butter in short bursts until soft but not melted.
Step-by-Step Guide to Making Red Velvet Cake
Now comes the fun part—baking the cake itself. Follow these steps carefully, and you’ll end up with a stunning, bakery-worthy Red Velvet Cake.
Step 1 – Preheating and Preparing the Pans
Preheat your oven to 350°F (175°C). Grease and flour your cake pans, or line them with parchment paper for easy removal. This step ensures your cakes don’t stick and helps achieve an even bake.
Step 2 – Mixing Dry Ingredients
In a medium-sized mixing bowl, sift together the flour, cocoa powder, baking soda, and salt. Sifting helps remove lumps, aerates the mixture, and ensures that the ingredients are evenly combined. This step might seem small, but it makes a huge difference in the final cake texture. A properly sifted dry mix prevents clumps of cocoa or baking soda from creating bitter spots in the cake.
As you combine your dry ingredients, take note of the cocoa powder. Red Velvet Cake only uses a small amount—just enough to give a subtle chocolate flavor without overpowering the cake’s signature tangy-sweet taste. If you add too much, the cake starts to taste like a traditional chocolate cake, which is not what we’re aiming for. Once your dry ingredients are well-mixed, set them aside.
Step 3 – Preparing Wet Ingredients
In a large mixing bowl, whisk together the sugar and vegetable oil until smooth. Next, add the eggs one at a time, beating well after each addition. This process ensures the eggs are fully incorporated, giving the batter stability and richness. After that, add the vanilla extract for flavor depth.
Now comes the star ingredient: buttermilk. Its acidity not only tenderizes the cake but also enhances the red color when combined with cocoa. If you don’t have buttermilk on hand, you can make a quick substitute by mixing 1 cup of milk with 1 tablespoon of vinegar or lemon juice. Let it sit for about 5 minutes before using.
Finally, mix in the vinegar. It may sound odd to add vinegar to a cake, but it reacts with baking soda to create air bubbles, resulting in a lighter, fluffier cake. By the end of this step, your wet mixture should be smooth, creamy, and fragrant.
Step 4 – Combining Wet and Dry Ingredients
Now it’s time to bring everything together. Gradually add the dry ingredients to the wet mixture in small batches, alternating with the buttermilk. Start and end with the dry mixture. For example, add one-third of the flour mixture, then half the buttermilk, another third of the flour, the remaining buttermilk, and finally, the last portion of flour.
This alternating method helps prevent overmixing and ensures that the batter stays light and airy. Overmixing is one of the most common mistakes in cake baking—it develops too much gluten, which leads to a tough cake. Instead, mix just until the flour disappears into the batter.
Once combined, scrape down the sides of the bowl with a spatula to make sure all ingredients are evenly mixed. At this point, your batter should be smooth, thick, and ready for its signature color.
Step 5 – Adding the Signature Red Color
Here’s the fun part—turning your batter into that iconic deep red. Add liquid red food coloring (gel works best for vibrant color with less liquid) and gently fold it into the batter until evenly distributed. Start with 1–2 tablespoons of liquid coloring or about a teaspoon of gel coloring, then adjust depending on how bold you want the color to be.
Traditionally, the red color also came from a natural reaction between cocoa powder, buttermilk, and vinegar. However, because modern cocoa powders are more processed, the natural red hue is much less noticeable. That’s why most bakers rely on food coloring today.
If you prefer a natural option, you can use beetroot powder or juice, though this may slightly alter the taste. Just keep in mind that natural colors aren’t as vibrant as artificial ones. Either way, mix carefully until the batter has a uniform, velvety red color without streaks.
Step 6 – Baking the Cake Layers
Pour the batter evenly into your prepared pans. Use a spatula to spread the batter and smooth the tops for an even rise. Place the pans in the preheated oven and bake for 25–30 minutes, or until a toothpick inserted into the center comes out clean.
Avoid opening the oven door too early, as sudden temperature changes can cause the cake to sink. Instead, check for doneness only toward the end of the baking time. When finished, the cakes should be springy to the touch and slightly pulling away from the edges of the pans.
If you’re making cupcakes instead of a full cake, reduce the baking time to around 18–20 minutes. Always keep a close eye on them, since smaller portions bake faster.
Step 7 – Cooling the Cake Properly
Once baked, remove the pans from the oven and let the cakes cool for about 10 minutes inside the pans. After that, carefully run a knife around the edges and transfer the cakes onto a wire rack to cool completely.
Cooling is just as important as baking—if you frost a warm cake, the frosting will melt and slide off, creating a mess. For best results, let your cakes cool to room temperature and then wrap them in plastic wrap. You can even refrigerate them for 30–60 minutes before frosting, which makes handling and decorating much easier.
Some bakers go a step further and freeze the cooled layers for 20 minutes. This trick locks in moisture and makes slicing and stacking the layers much smoother. Once cooled and prepped, your cake is ready for the next delicious stage: frosting.
Making the Cream Cheese Frosting
The frosting is just as important as the cake itself. Red Velvet Cake is traditionally paired with cream cheese frosting because of its tangy flavor and creamy texture, which balance out the cake’s sweetness.
Ingredients for Frosting
- 8 oz cream cheese (softened)
- ½ cup unsalted butter (softened)
- 4 cups powdered sugar (sifted)
- 2 teaspoons vanilla extract
- Pinch of salt
Step-by-Step Frosting Method
- In a large bowl, beat the softened cream cheese and butter together until smooth and fluffy. This should take about 2–3 minutes with an electric mixer.
- Gradually add the sifted powdered sugar, one cup at a time, mixing on low speed to avoid sugar clouds.
- Add the vanilla extract and a pinch of salt, then beat on high for another 2–3 minutes until the frosting is creamy, light, and spreadable.
- Taste test and adjust sweetness if needed by adding more sugar or a dash of lemon juice for extra tang.
This frosting should be silky, luscious, and perfect for spreading over your cake layers.
Assembling the Cake
The real magic happens when you bring everything together. Assembling a Red Velvet Cake requires patience and a bit of creativity.
Layering the Cake
Place one cake layer on a serving plate or cake board. Spread a generous amount of cream cheese frosting evenly on top. Place the second layer over it, pressing gently to secure. Repeat if you have more layers.
Applying the Frosting Evenly
Start with a “crumb coat”—a thin layer of frosting that seals in crumbs and creates a smooth base. Refrigerate the cake for about 20 minutes to set the crumb coat. Then, apply the final thick layer of frosting, smoothing it out with an offset spatula for a clean finish.
Decorating Ideas for Red Velvet Cake
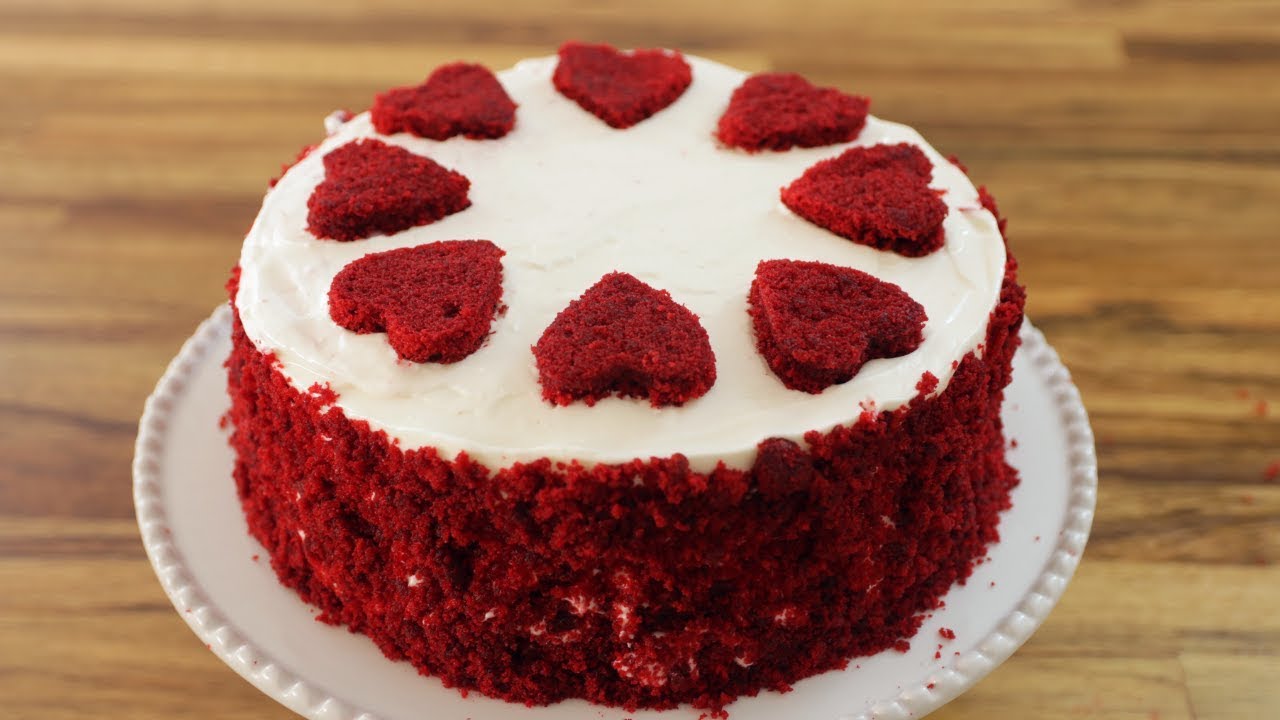
- Sprinkle cake crumbs over the top for a traditional look.
- Add fresh berries for a pop of color and freshness.
- Pipe decorative swirls or rosettes for a bakery-style finish.
- Drizzle with white chocolate for an elegant touch.
Your cake is now ready to impress!
Common Mistakes to Avoid
Even the best bakers can stumble when making Red Velvet Cake. The good news? Most common mistakes are easy to avoid with a little awareness. Let’s look at what you should be careful about so your cake comes out perfect every single time.
Overmixing the Batter
One of the most frequent errors is overmixing. When you stir the batter too much, gluten develops in the flour, which makes the cake dense and chewy rather than soft and velvety. To prevent this, mix just until the dry ingredients disappear into the wet mixture. If you’re using a stand mixer, keep it on low speed and resist the urge to keep going. The goal is a smooth batter, not an overworked one.
Using Too Much Food Coloring
The red color is iconic, but adding too much food coloring can backfire. Overdoing it can give the cake a chemical aftertaste, stain your tongue, or even affect the texture. Always start with less food coloring and gradually add more until you reach your desired shade. Gel coloring is highly concentrated, so you’ll need much less compared to liquid food coloring.
Incorrect Oven Temperature
Baking at the wrong temperature is another big mistake. Too hot, and the cake rises quickly and then collapses in the center. Too low, and the cake becomes dry and heavy. Always preheat your oven to 350°F (175°C) and use an oven thermometer if your oven tends to run hot or cool. Consistent, steady heat is the key to an evenly baked Red Velvet Cake.
Tips and Variations
One of the best things about Red Velvet Cake is its versatility. You can experiment with different variations to suit your taste or dietary needs. Here are some ideas.
Cupcake Version of Red Velvet
Want something bite-sized? Turn your cake into cupcakes. The batter remains the same, but instead of pouring it into cake pans, divide it into cupcake liners and bake for about 18–20 minutes. These mini Red Velvet treats are perfect for parties, and you can pipe cream cheese frosting into beautiful swirls for a fun presentation.
Gluten-Free or Vegan Alternatives
- Gluten-free version: Swap all-purpose flour with a gluten-free baking blend that includes xanthan gum for structure.
- Vegan version: Replace eggs with flax eggs (1 tablespoon ground flaxseed + 3 tablespoons water per egg) and use dairy-free buttermilk (almond milk + vinegar). Vegan cream cheese and plant-based butter also work great for the frosting.
These substitutions keep the flavor intact while making the cake suitable for everyone.
Serving Suggestions
Red Velvet Cake is amazing on its own, but you can take it up a notch by pairing it with:
- Fresh strawberries or raspberries for a fruity contrast.
- A drizzle of chocolate sauce for extra indulgence.
- A scoop of vanilla ice cream for a classic dessert combo.
- Dusting of powdered sugar for a simple yet elegant finish.
These little extras can transform your Red Velvet Cake from delicious to unforgettable.
Storing and Preserving Red Velvet Cake
You worked hard on your cake, so naturally, you want it to last. Proper storage keeps your Red Velvet Cake fresh and moist for days.
Short-Term Storage
If you plan to eat the cake within a couple of days, simply cover it tightly with plastic wrap or store it in an airtight container. Keep it in the refrigerator because of the cream cheese frosting. When ready to serve, let the cake sit at room temperature for 20–30 minutes for the best flavor and texture.
Freezing and Long-Term Storage
For longer storage, Red Velvet Cake freezes beautifully. Wrap each cake layer separately in plastic wrap and then in aluminum foil. Store them in the freezer for up to 2 months. When you’re ready to assemble, thaw the layers in the refrigerator overnight before frosting. You can also freeze fully frosted cakes—just make sure it’s well-wrapped and protected from freezer burn.
These methods ensure you can enjoy your homemade Red Velvet Cake anytime without losing its flavor or texture.
FAQs about Red Velvet Cake Recipe
Q1: Can I use natural food coloring instead of artificial?
Yes! Beetroot juice or powder can be used, though the color will be more muted and slightly earthy in flavor compared to artificial food coloring.
Q2: What is the difference between Red Velvet Cake and Chocolate Cake?
Red Velvet has less cocoa, a tangy flavor from buttermilk and vinegar, and a softer crumb compared to rich and dense chocolate cake.
Q3: Can I make Red Velvet Cake without buttermilk?
Yes. You can substitute with regular milk mixed with vinegar or lemon juice to mimic the acidity of buttermilk.
Q4: How do I keep my cake moist?
Avoid overbaking, measure ingredients correctly, and wrap cooled cakes tightly in plastic wrap to retain moisture.
Q5: What frosting goes best with Red Velvet Cake?
Cream cheese frosting is the classic pairing, but you can also use buttercream, whipped cream, or even mascarpone frosting for a twist.
Conclusion
Red Velvet Cake is more than just a dessert—it’s a classic masterpiece that brings together rich flavor, velvety texture, and eye-catching beauty. From the delicate balance of cocoa and buttermilk to the creamy tang of the frosting, every bite is a perfect harmony of taste and texture. Whether you’re making it for a birthday, holiday, or just because, this cake never fails to impress.
With the right ingredients, careful preparation, and a touch of creativity, you can make a bakery-worthy Red Velvet Cake right in your own kitchen. So preheat that oven, gather your tools, and get ready to create a cake that’s as delicious as it is beautiful.


