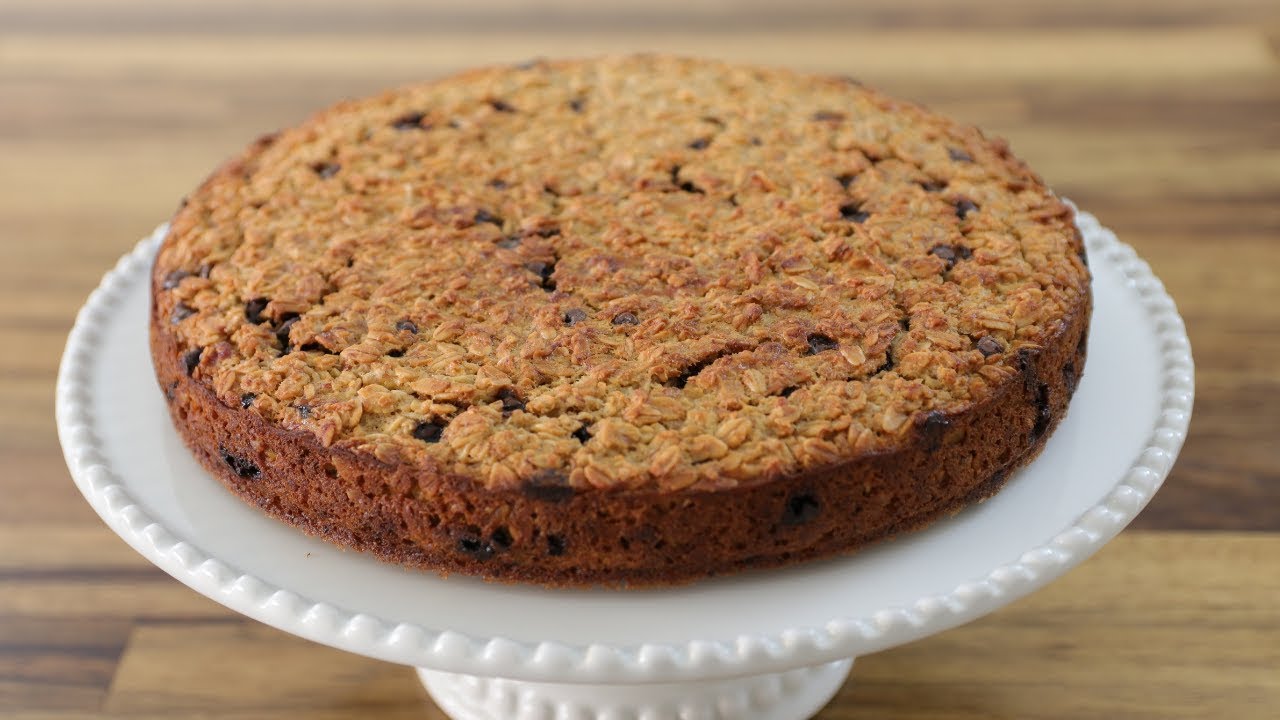
Oatmeal Cake Recipe: There’s something magical about oatmeal cake that sets it apart from the typical desserts we bake at home. Unlike a traditional sponge or chocolate cake, oatmeal cake has a wholesome, rustic quality that brings comfort in every bite. It’s soft, moist, and slightly chewy because of the oats, which makes it incredibly satisfying. What makes it even more appealing is the fact that it doesn’t require fancy ingredients—you can usually make it with pantry staples like oats, sugar, flour, and eggs.
Think of oatmeal cake as a beautiful blend of health and indulgence. It gives you the goodness of oats, which are rich in fiber, while still satisfying your sweet tooth. For many, it’s a nostalgic recipe that reminds them of home kitchens, family gatherings, or grandma’s baking days. Plus, its topping—often made with coconut, pecans, or brown sugar—adds a caramelized crunch that makes every slice unforgettable. Whether you’re looking for a comforting treat after dinner or a sweet snack with your coffee, oatmeal cake is always a winner.
History and Popularity of Oatmeal Cake
The origins of oatmeal cake can be traced back to the mid-20th century, when resourceful home bakers started creating desserts with simple, affordable ingredients. Oats, already a breakfast staple, found their way into baked goods for their texture and nutritional benefits. In the United States, oatmeal cake gained popularity in the 1960s and 70s, especially with the rise of the famous “Oatmeal Cake with Coconut-Pecan Topping.” It became known as a potluck favorite, a church social staple, and a family dessert that could feed a crowd without breaking the bank.
Today, oatmeal cake remains popular because of its simplicity and versatility. Unlike trendy desserts that require hours of preparation, this cake is straightforward, quick to make, and consistently delicious. It has even been adapted for modern dietary preferences, with many variations available for gluten-free, vegan, and low-sugar diets. The charm of oatmeal cake lies in its ability to be timeless—comforting enough for old-fashioned gatherings yet versatile enough for modern kitchens.
Ingredients You’ll Need
Main Ingredients for the Cake
To make a traditional oatmeal cake, you’ll need:
- Rolled oats – The heart of the recipe, providing texture and flavor.
- Boiling water – To soften the oats and give the cake its signature moistness.
- Butter (or margarine) – For richness and a tender crumb.
- Sugar (granulated and brown sugar) – A combination gives depth of sweetness.
- Eggs – Essential for binding and structure.
- All-purpose flour – The base that holds everything together.
- Baking soda & baking powder – For leavening, ensuring the cake rises.
- Cinnamon & nutmeg – Warm spices that enhance the oatmeal flavor.
- Salt – To balance the sweetness.
These ingredients may look simple, but together they create a cake that’s rich, moist, and bursting with flavor.
Topping Ingredients for Extra Flavor
The topping is what elevates an oatmeal cake from good to unforgettable. For the classic topping, you’ll need:
- Shredded coconut – Adds texture and a tropical sweetness.
- Chopped pecans (or walnuts) – For crunch and a nutty flavor.
- Brown sugar – Creates that irresistible caramelized top.
- Butter – Helps achieve a rich, slightly crisp topping.
- Milk or cream – For smoothness and to bind the topping together.
This topping is broiled onto the cake after baking, creating a golden, slightly crunchy layer that perfectly complements the soft, moist base.
Substitutions and Variations
The beauty of oatmeal cake is how adaptable it is. If you’re missing an ingredient or want a healthier twist, here are some substitutions:
- Butter → Coconut oil or vegan butter for dairy-free baking.
- Sugar → Honey, maple syrup, or coconut sugar for natural sweetness.
- All-purpose flour → Whole wheat flour or gluten-free flour blend for healthier alternatives.
- Milk → Almond, soy, or oat milk for lactose-free options.
- Eggs → Flaxseed or chia seed eggs for a vegan-friendly version.
These variations ensure that no matter your dietary preferences, you can still enjoy a delicious oatmeal cake.
Tools and Equipment Required
Essential Baking Tools
Even though oatmeal cake is simple to make, having the right tools makes the process smoother. Here’s what you’ll need:
- Mixing bowls (at least two—one for wet and one for dry ingredients)
- Measuring cups and spoons
- Wooden spoon or silicone spatula
- Whisk or electric mixer
- 9×13-inch baking pan (standard size for oatmeal cake)
- Cooling rack
These basics will help you whip up the cake without any hassle.
Optional Equipment for Ease
If you want to make your baking process even easier, here are some additional tools you might find useful:
- Stand mixer – Saves time when mixing large batches.
- Parchment paper – For easy removal of the cake from the pan.
- Food processor – If you want to grind oats into oat flour for a smoother texture.
- Offset spatula – Helpful for spreading the batter and topping evenly.
Remember, you don’t need all the fancy equipment to make oatmeal cake. A simple bowl and spoon will do the job just fine—just like grandma used to bake it!
Preparing the Ingredients
Measuring Ingredients Correctly
One of the most overlooked steps in baking is measuring ingredients accurately. Unlike cooking, where you can add a pinch of this and a splash of that, baking is a science. Too much flour and your cake turns dry, too much sugar and it becomes overly sweet. Here are some tips:
- Always spoon flour into the measuring cup and level it with a knife instead of scooping directly.
- For brown sugar, pack it firmly into the cup to get the right amount.
- Measure liquids at eye level using a clear measuring cup.
- Use measuring spoons for smaller amounts of spices and leavening agents.
Getting these measurements right ensures that your oatmeal cake comes out perfect every time.
Soaking the Oats for Perfect Texture
The secret to the best oatmeal cake lies in how you treat the oats. Before you even start mixing, you’ll need to soak the oats in boiling water. This step softens the oats, allowing them to blend seamlessly into the cake batter. Without soaking, the oats would stay too chewy and might even absorb moisture from the batter, resulting in a dry cake.
Here’s how to do it:
- Place rolled oats in a bowl.
- Pour boiling water over the oats.
- Let them sit for at least 15–20 minutes until the oats are plump and soft.
Once the oats are ready, you can fold them into the batter, ensuring that your cake has that perfect moist and tender crumb.
Step-by-Step Guide to Making Oatmeal Cake
Step 1 – Preheat the Oven
Before you start mixing ingredients, always preheat your oven. For oatmeal cake, set it to 350°F (175°C). Preheating ensures that when you place the cake in the oven, it begins baking immediately at the right temperature. This helps the cake rise properly and prevents uneven cooking.
Tip: Always check your oven with an oven thermometer. Sometimes, ovens can be off by 10–20 degrees, which can make or break your cake.
Step 2 – Prepare the Oat Mixture
Once your oven is heating up, it’s time to prepare the heart of the cake: the oats. As mentioned earlier, soaking them is non-negotiable. Start by combining rolled oats with boiling water in a bowl. Let them sit until they’ve absorbed all the liquid and softened to a porridge-like consistency. This step is crucial because it guarantees that your cake has the right amount of moisture without becoming heavy or soggy.
Think of this stage as creating the foundation of your cake. The oats are like little sponges, soaking up water to make them tender enough to melt into the batter. If you skip this, you risk ending up with a dry cake full of chewy bits. After soaking, stir in a little butter—this not only adds richness but also helps cool the oats slightly before adding them to the rest of your ingredients.
Pro tip: You can soak the oats while you measure the other ingredients. This saves time and makes the process flow more smoothly.
Step 3 – Mix the Wet and Dry Ingredients
Now comes the fun part—bringing everything together. First, whisk the eggs and sugars (both granulated and brown sugar) until light and slightly fluffy. This step ensures the sugar begins to dissolve and the eggs incorporate air, giving your cake a tender crumb. Add melted butter and vanilla extract to this mixture, blending until smooth.
In a separate bowl, sift together the flour, baking soda, baking powder, salt, cinnamon, and nutmeg. Sifting is important because it removes clumps and distributes the leavening agents evenly, which means your cake will rise uniformly.
Once both bowls are ready, slowly add the dry ingredients into the wet mixture, alternating with the soaked oats. Fold everything together gently with a spatula. Overmixing at this stage can lead to a dense, tough cake. The goal is to just combine the ingredients until you no longer see streaks of flour.
The batter should look slightly thick, moist, and speckled with softened oats. At this point, your kitchen will already start smelling like warm cinnamon and vanilla—it’s a promise of the deliciousness to come.
Step 4 – Pour Batter into the Pan
Grease your baking pan generously with butter or non-stick spray. For extra insurance, line the bottom with parchment paper—it makes removing the cake so much easier later. Pour the batter into the prepared pan and spread it evenly with a spatula.
The consistency of the batter will be slightly heavier than that of a sponge cake but lighter than banana bread. Make sure to smooth the surface so it bakes evenly. If you want to add a little flair, you can sprinkle some extra cinnamon or a few chopped nuts on top before baking, but remember that the real topping comes later.
This step is simple but important. Uneven batter means uneven baking—one corner of your cake might dry out while the other stays gooey. Take an extra minute to make it as level as possible, and you’ll thank yourself later when you slice into a perfectly baked cake.
Step 5 – Baking the Cake to Perfection
Slide the pan into your preheated oven and let the magic happen. Bake at 350°F (175°C) for about 35–40 minutes. However, every oven is a little different, so don’t just rely on time. Around the 30-minute mark, start checking the cake by inserting a toothpick into the center. If it comes out clean or with just a few moist crumbs, your cake is done.
The top should be golden brown, and the edges will start to pull slightly away from the sides of the pan. Be careful not to overbake, as this can dry out the cake. Remember, it will bake a bit more even after being removed from the oven due to residual heat.
Once done, remove the pan and place it on a cooling rack. Resist the urge to slice into it immediately—your cake still has one more delicious step coming: the topping.
Making the Topping
Preparing the Coconut-Pecan Topping
This topping is what transforms a humble oatmeal cake into something extraordinary. In a saucepan, melt butter, then stir in brown sugar and milk until smooth. Add shredded coconut and chopped pecans, mixing everything until well combined. The mixture should be thick and spreadable, almost like a chunky frosting.
This topping isn’t just decorative—it’s a flavor bomb. The coconut toasts beautifully under the broiler, the pecans add crunch, and the brown sugar caramelizes into a sticky-sweet glaze. It’s the perfect contrast to the soft, moist cake beneath.
For a twist, you can swap pecans for walnuts, almonds, or even hazelnuts. If you’re not a fan of coconut, try adding rolled oats or sunflower seeds instead. The idea is to create a topping that’s crunchy, sweet, and a little indulgent.
Applying the Topping to the Cake
Once the cake has cooled slightly (about 10–15 minutes out of the oven), spread the topping evenly across the surface. Don’t worry if it looks rustic—that’s part of its charm. Then, place the cake under the broiler for about 2–3 minutes. Keep a close eye on it, as sugar and coconut can burn quickly.
You’ll know it’s ready when the topping is bubbling, golden brown, and slightly crisp. At this stage, your kitchen will smell heavenly—like caramel, toasted coconut, and warm nuts all mingling together.
The broiled topping not only adds flavor but also locks in moisture, ensuring every bite is rich and satisfying. Let the cake cool for another 15 minutes before slicing. This gives the topping time to set into a sticky, crunchy layer of goodness.
Cooling and Serving the Cake
How to Cool the Cake Properly
Patience is key when it comes to cooling your oatmeal cake. If you cut into it too soon, the structure may collapse, and the topping can slide right off. After removing the cake from the oven and applying the topping, allow it to cool in the pan on a wire rack for at least 20–30 minutes. This resting time allows the cake to firm up, making it easier to slice without crumbling.
Cooling on a rack also ensures that air circulates around the pan, preventing condensation from forming at the bottom. If you skip this and leave the pan on a flat surface, steam may build up underneath, causing the cake’s base to turn soggy. Nobody wants a mushy bottom!
Once the cake has cooled to warm-room temperature, you can serve it directly from the pan or transfer it onto a serving tray. For special occasions, dust the top lightly with powdered sugar or drizzle a bit of caramel sauce to give it a polished, bakery-style look.
Best Ways to Slice and Serve
When it comes to slicing oatmeal cake, think neat squares or generous rectangles—similar to how you’d cut brownies or a coffee cake. Use a sharp serrated knife, and wipe it clean after each slice for tidy portions. Because of the sticky topping, this little trick helps keep the edges sharp and prevents the cake from sticking to your knife.
Oatmeal cake is best served slightly warm, when the topping is gooey and fragrant. Pair it with a scoop of vanilla ice cream for a decadent dessert, or enjoy it with a simple cup of black coffee for a cozy afternoon snack. Some people even prefer having it as a breakfast treat—after all, it does have oats, which makes it feel a bit healthier than other cakes!
If you’re hosting guests, serve the cake in individual ramekins or bowls with a dollop of whipped cream. Presentation can elevate this rustic dessert into something elegant without much effort.
Storage and Reheating Tips
How to Store Leftovers
The good news is that oatmeal cake stores beautifully, making it an ideal make-ahead dessert. To store leftovers:
- Room temperature: Keep the cake covered with foil or plastic wrap for up to 2 days.
- Refrigerator: For longer storage, place it in an airtight container and refrigerate for up to 5–6 days.
- Freezer: Wrap individual slices in plastic wrap, then place them in a freezer-safe bag. They’ll last up to 3 months.
If you’re freezing, be sure to let the cake cool completely first. Otherwise, condensation will form and create ice crystals, which may affect the texture when thawed.
Reheating for Freshness
There’s nothing quite like warm oatmeal cake, especially with that gooey topping. To reheat:
- Microwave: Heat individual slices for 20–30 seconds until warm.
- Oven: For a larger portion, cover the cake with foil and bake at 300°F (150°C) for about 10 minutes.
- Air fryer: Believe it or not, an air fryer works great—heat a slice at 320°F (160°C) for about 5 minutes to revive that crisp topping.
Pro tip: If you want an extra indulgent treat, add a pat of butter on top of a reheated slice—it melts into the cake and makes it taste freshly baked.
Variations of Oatmeal Cake
Healthier Versions with Less Sugar
If you want to enjoy oatmeal cake without the guilt, there are plenty of ways to lighten it up without losing flavor. Try these tweaks:
- Replace half the sugar with unsweetened applesauce or mashed bananas.
- Use Greek yogurt instead of butter to reduce fat while keeping moisture.
- Swap out some of the flour for whole wheat flour or almond flour for added nutrients.
- Add in chia seeds or flaxseeds for extra fiber.
The result is a cake that still tastes rich and comforting but won’t send your blood sugar soaring. These versions are perfect for those who want to indulge smartly.
Gluten-Free and Vegan Options
The beauty of oatmeal cake is how adaptable it is to dietary needs. Here’s how you can make it gluten-free or vegan:
- Gluten-free: Use certified gluten-free oats and replace all-purpose flour with a gluten-free flour blend. Ensure your baking powder is also gluten-free.
- Vegan: Substitute butter with coconut oil, milk with almond or soy milk, and eggs with flax eggs (1 tbsp ground flaxseed + 3 tbsp water per egg).
The texture and taste will still be incredible, and most people won’t even notice the difference. These adaptations make oatmeal cake a dessert that everyone at the table can enjoy.
Common Mistakes to Avoid
Overmixing the Batter
One of the most common mistakes in baking oatmeal cake is overmixing the batter. Once you combine wet and dry ingredients, stir only until you no longer see streaks of flour. Overmixing develops the gluten in flour, which can make your cake tough and chewy instead of soft and moist.
Think of it like folding a blanket—gentle, deliberate motions are better than rough shoves. Treat your batter with care, and it will reward you with a tender crumb.
Incorrect Oven Temperature
Another big mistake is baking at the wrong temperature. If the oven is too hot, the outside of the cake will brown too quickly while the inside stays raw. Too low, and the cake may turn dense and gummy. Always preheat your oven and, if possible, use an oven thermometer to double-check accuracy.
Also, avoid opening the oven door repeatedly while baking. Each time you peek, the temperature drops, and this can cause uneven baking or even a sunken center. Trust the process—your cake will thank you!
Nutritional Benefits of Oatmeal Cake
Oats and Their Health Benefits
Oats aren’t just tasty—they’re a nutritional powerhouse. Packed with soluble fiber, they help lower cholesterol, regulate blood sugar, and keep you feeling full longer. Oats also contain important vitamins and minerals like magnesium, iron, and zinc, which support overall health.
By adding oats to a cake, you’re sneaking in nutrition without compromising flavor. This makes oatmeal cake a slightly better choice compared to many other desserts that are made entirely with refined flour and sugar.
Why Homemade is Better
When you bake oatmeal cake at home, you control exactly what goes into it. Store-bought desserts are often loaded with preservatives, artificial flavors, and excessive sugar. Homemade oatmeal cake lets you use wholesome ingredients, adjust sweetness to your taste, and even experiment with healthier substitutions.
Plus, the act of baking itself has its own benefits—it’s therapeutic, rewarding, and fills your home with irresistible aromas. Nothing beats the pride of serving a cake you’ve made from scratch, knowing it’s fresher and better than anything you could buy.
Serving Suggestions
Perfect Pairings with Coffee or Tea
Oatmeal cake is one of those desserts that pairs beautifully with warm beverages. A hot cup of black coffee brings out the caramel notes of the topping, while herbal teas like chamomile or rooibos complement the cake’s subtle spiced flavors.
If you’re more of a latte lover, try pairing it with a cinnamon latte or chai tea for a cozy café-style experience right at home.
Dessert Combinations
Want to elevate your oatmeal cake into a show-stopping dessert? Try these combinations:
- Top with a scoop of vanilla or cinnamon ice cream.
- Drizzle with salted caramel or chocolate sauce.
- Serve with fresh berries and whipped cream for a lighter contrast.
- Add a dollop of mascarpone or cream cheese frosting for richness.
These extras make oatmeal cake versatile enough for both casual family dinners and fancy dinner parties.
FAQs about Oatmeal Cake Recipe
Can I make oatmeal cake ahead of time?
Yes! It actually tastes better the next day as the flavors deepen. Store it covered at room temperature or refrigerate if needed.
Do I have to use rolled oats?
Rolled oats work best, but quick oats can be used in a pinch. Avoid steel-cut oats, as they won’t soften enough for the cake.
Can I make oatmeal cake without the topping?
Absolutely. The cake is delicious on its own, though the topping adds a unique flavor and texture.
How do I know when my cake is done?
Insert a toothpick in the center—it should come out clean or with a few moist crumbs. The edges will also pull slightly from the pan.
Can I freeze oatmeal cake with the topping?
Yes, but wrap it well to avoid freezer burn. For best results, freeze without the topping and add it fresh after reheating.
Conclusion
Oatmeal cake is more than just a dessert—it’s a warm, comforting hug in cake form. With its soft, moist base and irresistible caramelized topping, it strikes the perfect balance between simple and indulgent. Whether you’re making it for a family gathering, a potluck, or just a cozy evening at home, this cake never disappoints.
Its beauty lies in its versatility—you can keep it classic, make it healthier, or adapt it for dietary needs without losing its charm. Plus, it’s easy to make, requires basic ingredients, and rewards you with flavors that feel both nostalgic and timeless.
So, the next time you’re craving something sweet yet wholesome, skip the store-bought treats and whip up an oatmeal cake. Trust me—your taste buds and your loved ones will thank you.


