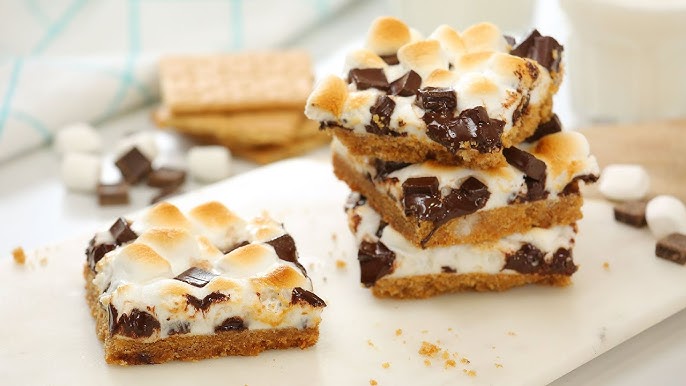
Magic Cookie Bars Recipe: Magic Cookie Bars, also known as seven-layer bars or Hello Dolly bars, are one of those desserts that look fancy but are surprisingly simple to make. Imagine a buttery graham cracker crust topped with layers of chocolate chips, coconut, and sweetened condensed milk that binds everything together into a chewy, crunchy, and utterly irresistible treat. These bars are a crowd favorite for potlucks, holidays, and family gatherings because they require minimal effort yet deliver maximum flavor.
They’re called “magic” for a reason—the way all the layers fuse together while baking feels like a little piece of kitchen sorcery. The best part? You don’t need advanced baking skills to whip up a batch. Whether you’re a beginner or a seasoned home baker, this step-by-step guide will walk you through creating the perfect Magic Cookie Bars that will have everyone reaching for seconds.
Ingredients You’ll Need
Before we jump into baking, let’s get our shopping list ready. Magic Cookie Bars are wonderfully flexible, and while the classic version has a set of traditional ingredients, you can swap or add based on your taste. Here’s a breakdown:
Base Ingredients (Crust)
- 1 ½ cups of graham cracker crumbs (about 10 full crackers, finely crushed)
- ½ cup (1 stick) of unsalted butter, melted
Topping Ingredients
- 1 can (14 oz) of sweetened condensed milk
- 1 cup of semi-sweet chocolate chips
- 1 cup of butterscotch chips (optional but delicious)
- 1 cup of shredded sweetened coconut
- 1 cup of chopped nuts (walnuts or pecans work best)
Substitution Options
- Instead of graham crackers, you can use crushed digestive biscuits, vanilla wafers, or even Oreos for a twist.
- For a nut-free version, replace nuts with crushed pretzels or more chocolate chips.
- If you prefer a less sweet version, try using dark chocolate chips instead of semi-sweet.
These simple ingredients come together in layers to create the chewy, crunchy, gooey dessert we all love.
Kitchen Tools You’ll Need
Even though this recipe is straightforward, having the right tools makes the process smoother.
Baking Tools
- 9×13-inch baking pan
- Parchment paper (for easy removal)
- Mixing bowls
Measuring Tools
- Measuring cups
- Measuring spoons
- Food scale (optional, but great for precision)
Storage Containers
- Airtight container for storing leftovers
- Freezer-safe bags if you want to freeze extras
Gathering these tools before you start ensures you won’t have to scramble halfway through.
Step-by-Step Guide to Making Magic Cookie Bars
Now that everything is ready, let’s start baking!
Step 1 – Preparing the Crust
Start by preheating your oven to 350°F (175°C). Grease or line your baking pan with parchment paper for easy cleanup. In a bowl, combine graham cracker crumbs with melted butter until the mixture looks like wet sand. Press it firmly into the bottom of the baking pan to form a smooth, even crust. This is the foundation of your bars, so take a moment to make sure it’s evenly packed.
Step 2 – Adding the Sweet Layers
Next comes the fun part—layering! Pour the sweetened condensed milk evenly over the crust. Sprinkle chocolate chips, butterscotch chips, coconut, and nuts one by one to create layers of texture and flavor. The condensed milk will seep down and act as glue, holding everything together as it bakes.
Step 3 – Baking the Bars
Place the pan into the preheated oven and bake for 25–30 minutes, or until the edges are golden brown and the center looks set. The aroma filling your kitchen will be irresistible, but resist the urge to cut into them right away.
Step 4 – Cooling and Cutting
Once baked, remove the pan from the oven and let it cool completely. If you try to cut while warm, the bars may fall apart. Once cooled, lift the bars out using parchment paper and cut them into squares or rectangles with a sharp knife.
Tips for Perfect Magic Cookie Bars
Even though this recipe is simple, a few tricks can help you make them absolutely perfect every single time.
Getting the Perfect Crust
Pressing the graham cracker crust firmly is essential. If it’s too loose, your bars may crumble. You can use the back of a measuring cup to press it down evenly.
Preventing Overbaking
Overbaking can make the bars too dry. Keep an eye on them after the 25-minute mark and pull them out once the edges are golden.
Storing for Freshness
Magic Cookie Bars can be stored at room temperature in an airtight container for up to 5 days. For longer storage, refrigerate for up to 2 weeks or freeze for up to 3 months.
Creative Variations of Magic Cookie Bars
The beauty of Magic Cookie Bars is that they can be endlessly customized. You don’t have to stick to the classic version—experimenting with flavors can turn this simple dessert into something brand new every time you bake it.
Holiday-Inspired Variations
- Christmas Bars – Add red and green candy-coated chocolates or peppermint chips for a festive touch.
- Halloween Bars – Use candy corn and orange sprinkles for spooky fun.
- Easter Bars – Toss in pastel-colored candies or mini chocolate eggs.
Flavor Swaps
- Replace butterscotch chips with white chocolate chips for a creamier flavor.
- Add a swirl of peanut butter or Nutella between layers for extra richness.
- Use salted caramel drizzle on top for a sweet-salty balance.
Diet-Friendly Versions
- Gluten-Free: Swap graham crackers with gluten-free cookies.
- Keto-Friendly: Use almond flour mixed with butter for the crust and sugar-free chocolate chips.
- Vegan: Replace condensed milk with coconut condensed milk and use dairy-free chocolate.
These tweaks allow you to keep the recipe fun and versatile while catering to different tastes and dietary needs.
Common Mistakes to Avoid
Even simple recipes can go wrong if you’re not careful. Here are some pitfalls to watch out for:
Using the Wrong Pan Size
If your pan is too small, the bars will be too thick and won’t bake evenly. Stick with a 9×13-inch pan for best results.
Not Lining the Pan
Skipping parchment paper may cause the bars to stick, making it tough to remove them cleanly. Always line or grease your pan.
Cutting Too Early
The bars must cool completely before cutting. If you rush, you’ll end up with a gooey mess instead of neat squares.
Overloading the Layers
It’s tempting to pile on extra chocolate or coconut, but too many toppings can make the bars heavy and soggy. Stick to recommended amounts for the perfect texture.
Avoiding these common mistakes ensures your bars turn out bakery-worthy every time.
Serving Suggestions for Magic Cookie Bars
Magic Cookie Bars are already delicious on their own, but the right serving idea can make them even more enjoyable.
Pairing with Drinks
- A cold glass of milk enhances the sweetness.
- Coffee or espresso balances the richness of the bars.
- Hot chocolate makes a cozy combination, especially in winter.
Dessert Platters
- Arrange them with brownies, cookies, and fruit for a beautiful party platter.
- Cut into mini squares for bite-sized treats at gatherings.
Creative Twists
- Crumble them over vanilla ice cream for a decadent sundae.
- Use them as layers in a trifle dessert with whipped cream and pudding.
These serving ideas take your bars from simple to special, making them perfect for any occasion.
Healthier Alternatives to Magic Cookie Bars
Let’s be honest—Magic Cookie Bars are rich and indulgent. But what if you want a lighter version that still tastes amazing?
Lightened-Up Ingredients
- Use reduced-fat condensed milk instead of full-fat.
- Choose unsweetened shredded coconut to cut down on sugar.
- Opt for dark chocolate chips instead of semi-sweet for added antioxidants.
Lower-Calorie Swaps
- Replace butter with coconut oil or light margarine.
- Swap chopped nuts for sunflower seeds or pumpkin seeds.
- Reduce the graham cracker crust amount slightly to cut carbs.
Portion Control
- Cut the bars into smaller squares to enjoy the flavor without overindulging.
- Store in the freezer and only thaw a piece or two when cravings hit.
These changes won’t make them a diet food, but they’ll definitely help you enjoy them guilt-free.
How to Store and Freeze Magic Cookie Bars
If you’re baking a big batch, you’ll want to know how to keep them fresh. Luckily, these bars store beautifully.
Storing at Room Temperature
- Place cooled bars in an airtight container.
- Keep in a cool, dry place for up to 5 days.
Refrigerating
- Store in the fridge if you prefer a firmer texture.
- Bars will last up to 2 weeks refrigerated.
Freezing for Long-Term Storage
- Wrap bars individually in plastic wrap or parchment paper.
- Place wrapped bars in a freezer-safe container or bag.
- Freeze for up to 3 months.
When ready to eat, just thaw at room temperature for 30 minutes, and they’ll taste as good as freshly baked.
Why Magic Cookie Bars Are Called “Magic”
If you’ve ever wondered why these treats carry such a whimsical name, the answer is simple—it’s because of the way they come together. Unlike most desserts that require careful mixing, creaming, or whipping, Magic Cookie Bars are essentially a “dump and bake” recipe. You just layer the ingredients one after another, pour on the sweetened condensed milk, and like magic, the oven does the rest.
The condensed milk acts as a glue, binding all the different flavors and textures into a chewy, gooey, crunchy bar that tastes like it took hours to make. People love calling them “magic” because you don’t have to fuss with doughs, batters, or complicated steps—yet you still end up with something bakery-worthy. It’s this simplicity, combined with the incredible results, that has made them a classic recipe in American kitchens since the 1960s.
So next time you serve them, you can smile when someone asks why they’re called Magic Cookie Bars—because the magic is in how effortless they are!
History of Magic Cookie Bars
Every classic recipe has a story, and Magic Cookie Bars are no exception. These beloved bars first gained popularity in the mid-20th century when condensed milk was widely used in home baking. According to food historians, the recipe was first published on the back of Eagle Brand sweetened condensed milk cans in the 1960s.
The “Hello Dolly Bars,” as they were also known, became an instant hit because they were budget-friendly, quick to prepare, and required no fancy equipment. Home bakers loved them because they could whip up a batch in minutes, and families adored the chewy, sweet, and nutty flavors. Over the years, the recipe spread like wildfire across households, potlucks, and bake sales.
Today, Magic Cookie Bars remain a nostalgic favorite, passed down through generations. They’re not just dessert—they’re a piece of baking history that connects families and brings back sweet childhood memories.
FAQs about Magic Cookie Bars Recipe
1. Can I make Magic Cookie Bars without nuts?
Yes! Simply leave out the nuts and replace them with extra chocolate chips, coconut, or pretzels for crunch.
2. Do I have to use sweetened condensed milk?
Yes, it’s essential for binding the layers together. Evaporated milk or regular milk won’t work the same way.
3. How long do Magic Cookie Bars last?
At room temperature, they last up to 5 days. In the fridge, up to 2 weeks, and in the freezer, up to 3 months.
4. Can I make these bars gluten-free?
Absolutely! Use gluten-free graham crackers or cookies for the crust.
5. Why are my bars too soft or falling apart?
They may not have cooled fully before cutting, or you added too many toppings. Always let them set completely before slicing.
Conclusion
Magic Cookie Bars are the perfect combination of simple preparation and irresistible flavor. With their buttery crust, gooey condensed milk, chocolatey goodness, and crunchy nuts, they’re the kind of dessert that never fails to impress. What makes them even better is their versatility—you can tweak them to suit any occasion, holiday, or dietary preference.
Whether you’re baking for a party, a family gathering, or just to satisfy your sweet tooth, these bars are a guaranteed hit. Their “magic” lies not only in how easy they are to make but also in the joy they bring to anyone who takes a bite.
So grab your ingredients, follow this step-by-step guide, and get ready to enjoy a dessert that’s as fun to make as it is to eat. Once you try them, you’ll understand why they’ve remained a classic for decades.


