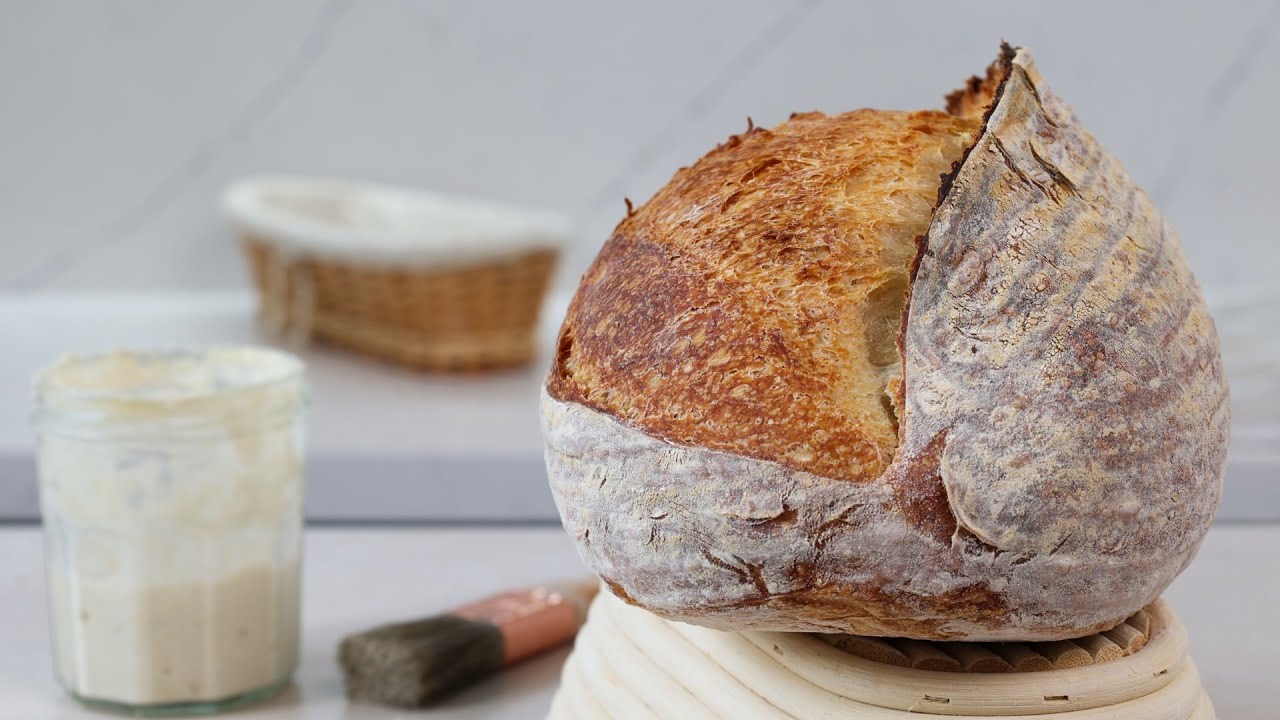
King Arthur Sourdough Recipe: If there’s one bread that has stood the test of time, it’s sourdough. Unlike quick breads or traditional yeasted loaves, sourdough carries a rich history, a depth of flavor, and a rustic charm that makes every slice special. Among the many recipes out there, the King Arthur sourdough recipe has become a favorite for both beginners and experienced bakers. Why? Because it combines centuries-old techniques with the reliability of King Arthur’s high-quality flour, ensuring consistent results.
Sourdough is more than just bread—it’s a living process. The fermentation of wild yeast and bacteria brings out flavors that commercial yeast can’t match. Plus, sourdough is easier to digest, has a longer shelf life, and boasts a crusty exterior with a soft, airy interior. King Arthur Flour, a trusted name in baking since 1790, offers flours that are strong, reliable, and perfect for achieving that artisan-style sourdough you’ve been craving.
So, whether you’re baking your very first sourdough loaf or refining your technique, this step-by-step guide will walk you through the entire process, from feeding your starter to pulling a golden-brown loaf out of the oven.
Ingredients You’ll Need
Before you dive into mixing and folding, let’s set the foundation with the right ingredients. Sourdough may sound intimidating, but in reality, it requires just a few simple staples. The quality of these ingredients, however, can make or break your loaf.
Essential Ingredients for the Starter
The starter is the heart of sourdough—it’s what gives the bread its rise, tang, and personality. Here’s what you’ll need:
- Unbleached all-purpose flour (King Arthur recommended for consistency)
- Whole wheat flour (helps boost fermentation and adds flavor)
- Filtered or spring water (avoid chlorinated tap water, as it can kill wild yeast)
A good starter is like a pet—it needs feeding, attention, and the right environment to thrive. King Arthur suggests a simple mix of flour and water, fed daily until it becomes bubbly and active. This process usually takes about 5–7 days.
Ingredients for the Dough
Once your starter is strong and active, you’ll need the following to make your sourdough dough:
- 500g King Arthur unbleached bread flour (for stronger gluten development)
- 100g whole wheat flour (for flavor and nutrition)
- 350g water (room temperature, filtered)
- 100g active sourdough starter
- 10g sea salt
These core ingredients will yield a rustic loaf with a chewy interior and crisp crust. The hydration level (amount of water relative to flour) makes a big difference in the final loaf texture.
Optional Add-Ins for Flavor
Want to get creative? Sourdough is the perfect canvas. Try adding:
- Seeds: sunflower, sesame, flax, or pumpkin for crunch.
- Dried fruits: raisins, cranberries, or figs for sweetness.
- Herbs: rosemary, thyme, or garlic for savory notes.
- Nuts: walnuts or pecans for earthy flavor.
These add-ins should be mixed in after the first stretch and fold so they’re evenly distributed without tearing the dough.
Tools and Equipment for Perfect Sourdough
Even though sourdough can be made with little more than a bowl and an oven, having the right tools can dramatically improve your results. Think of it like cooking with sharp knives versus dull ones—the right tools make the process smoother and more enjoyable.
Mixing and Measuring Tools
- Digital scale: accuracy is key in sourdough baking.
- Large mixing bowl: for combining ingredients and initial fermentation.
- Dough scraper: handy for folding and shaping without sticking.
Proofing Essentials
- Banneton (proofing basket): helps shape the dough and create that artisan swirl pattern.
- Tea towel or linen: if you don’t have a banneton, line a bowl with a floured towel.
Baking Tools for the Best Crust
- Dutch oven or cast-iron pot: traps steam to create that iconic crispy crust.
- Lame or sharp razor blade: for scoring the dough so it expands properly.
- Parchment paper: makes transferring the dough easier.
Investing in these tools ensures that your loaf rises beautifully, bakes evenly, and looks like it came straight from a bakery.
Step-by-Step Guide to Making King Arthur Sourdough
This is where the magic happens. Baking sourdough is a dance between time, temperature, and technique. Don’t rush the process—patience rewards you with incredible flavor and texture.
Step 1 – Preparing Your Starter
Your starter should be bubbly, airy, and at least doubled in size before using it in your dough. To achieve this:
- Feed your starter with equal parts flour and water (by weight).
- Leave it at room temperature for 4–8 hours.
- Once it’s active and passes the “float test” (a spoonful floats in water), it’s ready.
Using an underfed starter will result in dense bread, so don’t skip this step.
Step 2 – Mixing the Dough
Once your starter is active and bubbly, it’s time to mix the dough. This is where your sourdough journey really begins. Unlike regular yeasted breads, sourdough relies on slow fermentation, which gives the bread its unique tang and texture.
- In a large mixing bowl, combine 500g of King Arthur bread flour, 100g of whole wheat flour, and 350g of water. Mix until no dry flour remains.
- Add 100g of active starter to the bowl and gently mix it in.
- Finally, sprinkle in 10g of sea salt and knead lightly until incorporated.
At this point, your dough may feel a little shaggy and sticky—don’t panic. That’s exactly how it should be. Resist the temptation to add more flour, as this can make the loaf dense. Over time, the gluten will develop through a series of folds rather than kneading.
The beauty of sourdough is that the dough slowly transforms before your eyes. With each step, it becomes smoother, stronger, and easier to handle. If you’ve ever made bread before, you’ll notice this dough behaves differently—it’s more alive, elastic, and responsive.
Step 3 – Autolyse and Resting Stage
The autolyse stage is one of the most important steps in sourdough baking. This rest period allows the flour to fully hydrate, kick-starting gluten development and enhancing flavor.
Here’s how to do it:
- After mixing the flour and water (before adding starter and salt), cover the dough and let it rest for 30–60 minutes.
- During this time, enzymes in the flour begin breaking down starches into sugars, which makes fermentation smoother.
- Once the rest period is over, add your starter and salt, then continue mixing until evenly incorporated.
Think of autolyse as the dough’s “warm-up.” Just like stretching before a workout helps muscles move more freely, this stage preps the gluten network to stretch and hold air more effectively. The result? A loaf with better structure, flavor, and crumb texture.
Skipping autolyse won’t ruin your bread, but it can make it less airy and flavorful. Bakers who prioritize structure and taste never skip this step, and once you see the results, you won’t either.
Step 4 – Stretch and Fold Technique
Unlike traditional bread recipes that require heavy kneading, sourdough uses a gentler method known as the stretch and fold. This technique strengthens the gluten without deflating the dough, ensuring that your loaf has both strength and an open crumb.
Here’s how to do it:
- Wet your hands slightly to prevent sticking.
- Grab one side of the dough, stretch it upward, and fold it back over the center.
- Rotate the bowl a quarter turn and repeat. Do this 4 times (north, south, east, west).
Repeat this process every 30 minutes for 3–4 rounds during the first 2 hours of bulk fermentation.
Each stretch and fold session builds elasticity, structure, and air pockets in the dough. If you skip this, your sourdough may turn out flat or overly dense. Think of this stage as gently coaching the dough to rise higher, like a personal trainer guiding it through a workout.
Step 5 – Bulk Fermentation
After the stretch and folds, your dough needs time to rest and ferment. This stage, known as bulk fermentation, is where the magic of sourdough really happens.
- Place the dough in a lightly oiled bowl and cover it.
- Leave it at room temperature (ideally 75–78°F / 24–26°C) for 4–6 hours, depending on your starter’s strength and your room’s climate.
- The dough should rise noticeably, become airy, and show small bubbles across the surface.
During bulk fermentation, wild yeast and lactic acid bacteria get to work, producing gases that expand the dough and acids that give sourdough its signature tang.
How do you know when it’s ready? The dough should have increased by about 30–50% in volume, feel lighter, and jiggle slightly when you move the bowl. If it has doubled in size or started collapsing, it’s over-proofed.
This stage requires patience. Rushing it will give you a dense loaf, while over-fermenting can lead to sour flavors and weak structure. Once you master this timing, your sourdough will always be light, airy, and full of flavor.
Step 6 – Shaping the Dough
After bulk fermentation, your dough is airy, light, and filled with bubbles. Now comes the fun (and slightly tricky) part—shaping. Shaping isn’t just about making the loaf look pretty; it’s about creating surface tension so the dough can rise upward in the oven instead of spreading out flat.
Here’s how to do it:
- Gently transfer the dough onto a lightly floured surface. Use a bench scraper to help avoid deflating it.
- Flatten it slightly into a rectangle, then fold the top third down toward the center and the bottom third up over it, like folding a letter.
- Turn it 90 degrees, fold in the sides, then roll it gently into a round or oval shape, depending on your baking vessel.
- Use your hands or scraper to “tighten” the dough by gently dragging it across the surface toward you.
The goal here is to create a smooth, taut surface without tearing the dough. Don’t worry if it’s not perfect—practice makes progress. The better your shaping, the more dramatic your oven spring (that magical rise that happens in the first minutes of baking).
At this stage, your loaf should look neat and compact, ready for its final proof.
Step 7 – Final Proofing
Proofing, or the dough’s last rise before baking, is critical for developing flavor and structure. You have two main options:
- Room temperature proofing: Leave the shaped dough at room temp for 1–2 hours, until it becomes slightly puffy.
- Cold proofing (recommended): Place the dough in a banneton (or floured bowl) and refrigerate for 8–16 hours.
Cold proofing is especially popular among sourdough bakers because it makes the dough easier to score, develops deeper flavor, and gives you flexibility (bake the next morning instead of staying up late).
Signs your dough is ready: it should feel airy but not collapsed, and if you press it lightly with a finger, it should slowly spring back, leaving a slight indentation. If it springs back too quickly, it’s under-proofed. If it collapses, it’s over-proofed.
This stage sets the foundation for a loaf that’s flavorful, airy, and beautifully shaped.
Step 8 – Baking Your Sourdough
Finally, it’s time for the most exciting step—baking. This is where all your patience pays off as the dough transforms into a golden, crusty loaf.
- Preheat your oven to 475°F (245°C) with a Dutch oven inside. Heat for at least 30–45 minutes.
- When ready, carefully remove the hot Dutch oven and place a piece of parchment paper over your proofed dough. Flip the dough onto the paper, then gently lower it into the pot.
- Score the top with a lame or razor blade (a single deep slash helps control expansion).
- Cover with the lid and bake for 20 minutes.
- Remove the lid and bake for another 20–25 minutes, until the crust is deep golden brown.
That first cut of your blade (the score) is like opening a pathway for the dough to expand. Without it, your loaf may burst randomly.
Once baked, resist the urge to cut into it immediately! Let the loaf cool on a wire rack for at least 1–2 hours. This allows the crumb to set, making it easier to slice and enhancing flavor.
When you finally cut into your loaf, you’ll be rewarded with that signature crackling crust, chewy texture, and tangy aroma that only true sourdough offers.
Tips for Success with King Arthur Sourdough
Even with a solid recipe, sourdough can be unpredictable. But don’t worry—here are some tips that can help you master the art:
How to Control Fermentation
- Keep dough temperature around 75–78°F (24–26°C) for consistent results.
- If your kitchen is cold, use a proofing box or place the bowl in the oven with just the light on.
- Watch the dough, not the clock—every starter and environment is unique.
Common Mistakes to Avoid
- Using an immature starter: Always make sure it’s bubbly and active.
- Over-proofing: Dough that rises too long collapses in the oven.
- Adding too much flour: Sticky dough is normal—don’t overcompensate.
Improving Flavor and Texture
- Use a mix of flours (bread + whole wheat) for complexity.
- Extend cold fermentation for deeper sour flavor.
- Experiment with add-ins like seeds, herbs, or nuts to customize your loaf.
Sourdough isn’t just about following instructions—it’s about learning how the dough behaves and adjusting along the way. The more loaves you bake, the more instinctive it becomes.
Storing and Serving King Arthur Sourdough
So, you’ve pulled a gorgeous loaf out of the oven—now what? Proper storage and serving ensure your bread stays delicious for days.
Best Storage Practices
- Store at room temperature, wrapped in a clean kitchen towel or paper bag, for up to 2 days.
- For longer storage, place in a bread box to maintain crust while preventing staleness.
- To keep for more than 3–4 days, slice and freeze in airtight bags. Toast directly from frozen when needed.
Creative Serving Ideas
- Classic toast with butter and jam for breakfast.
- Sandwiches with fresh veggies, cheese, or meats.
- Garlic bread—slice, butter, and toast in the oven with garlic and herbs.
- Bread bowls—hollow out a round loaf and fill with soup or chili.
- Croutons or breadcrumbs made from leftovers.
Sourdough isn’t just bread—it’s the foundation for countless delicious meals.
FAQs about King Arthur Sourdough Recipe
1. How long does sourdough starter last?
If properly fed and stored, a starter can last indefinitely—some are over 100 years old!
2. Can I use whole wheat flour instead of all-purpose?
Yes, but whole wheat absorbs more water and produces a denser loaf. A mix of both works best.
3. Why is my sourdough dense?
Likely because of under-proofing, over-proofing, or using an inactive starter. Timing is key.
4. How do I know when my starter is ready?
It should double in size within 4–6 hours of feeding and pass the float test.
5. What’s the best way to reheat sourdough bread?
Wrap it in foil and warm in the oven at 350°F for 10–15 minutes to revive the crust and crumb.
Conclusion
Making sourdough with King Arthur flour is more than just a recipe—it’s an experience. From nurturing your starter to pulling a fragrant loaf from the oven, every step teaches patience, skill, and a deeper appreciation for the art of bread-making. The result? A loaf that’s crusty, tangy, and filled with rustic character.
Once you bake your first successful sourdough loaf, you’ll understand why so many bakers fall in love with the process. It’s not just food—it’s tradition, science, and creativity, all rolled into one beautiful loaf.


