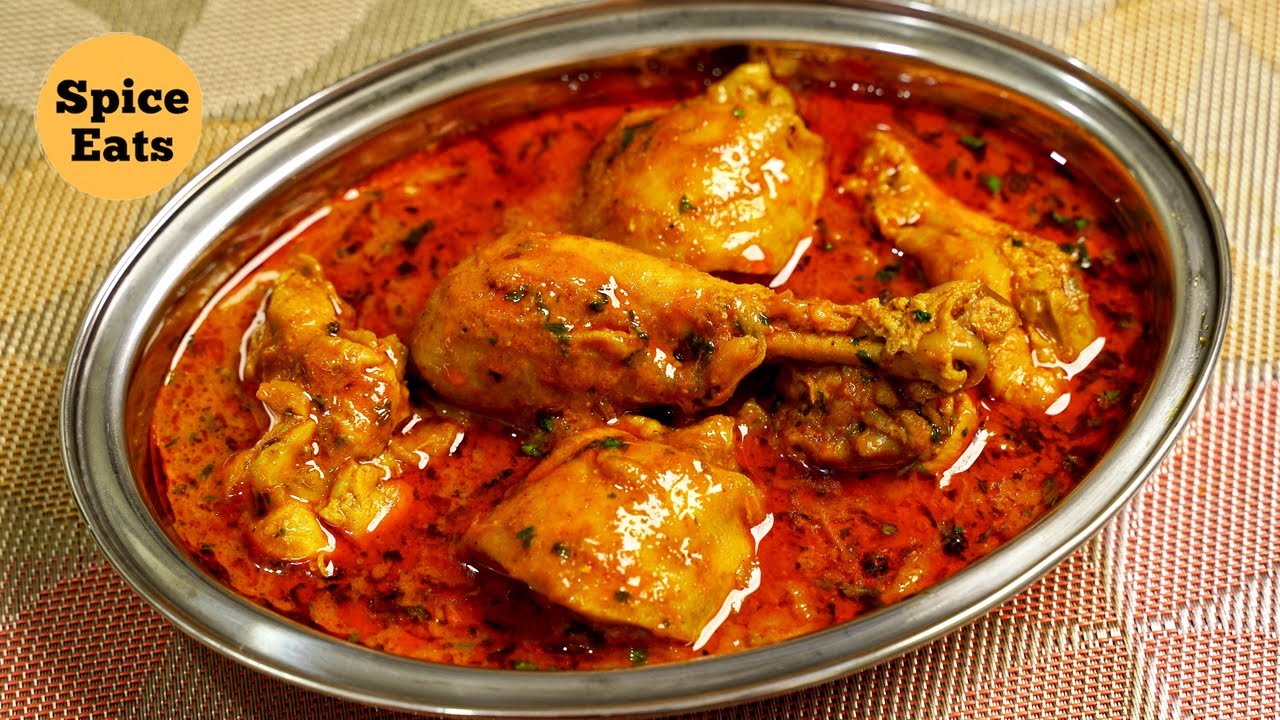
Indian Chicken Curry Recipe: Indian chicken curry isn’t just a meal—it’s a flavorful story passed down through generations. Every household in India has its own version, each influenced by region, tradition, and personal taste. Whether it’s the fiery red curries of the South or the rich, creamy gravies of the North, chicken curry is a cornerstone of Indian cuisine. What makes this dish so universally loved is its ability to blend intense flavors into a harmonious, comforting bowl of goodness. It’s the kind of meal that brings families together and reminds many of home-cooked warmth.
In Indian culture, food is more than sustenance—it’s an experience. Chicken curry plays a central role during festivals, family dinners, and Sunday lunches. It’s often the star attraction at celebrations, served alongside fresh rotis or basmati rice. The magic of Indian chicken curry lies in the medley of spices—each one bringing depth, heat, and aroma.
So, whether you’re new to Indian cuisine or a seasoned foodie, this step-by-step guide will show you how to recreate this iconic dish in your kitchen with ease and authenticity.
Why This Recipe Stands Out
This recipe isn’t about shortcuts or watered-down versions—it’s an authentic Indian chicken curry made simple. Every step is clearly broken down so even beginners can follow along without feeling overwhelmed. We focus on building flavors layer by layer, just like it’s done in traditional Indian kitchens.
We’ve tested this recipe countless times, ensuring it delivers on flavor, consistency, and that soul-satisfying richness that defines a great curry. And if you’re worried about spice levels or time, don’t be. We’ve included tips to customize the heat, and the entire dish can be done in just about an hour from start to finish.
Ingredients You’ll Need
Chicken and Protein Essentials
For a classic chicken curry, bone-in chicken pieces are ideal. They add flavor and keep the meat juicy during cooking. However, boneless chicken thighs also work great if you’re looking for a quicker cook time and easier serving.
- 1 kg (2.2 lbs) bone-in chicken pieces (thighs and drumsticks preferred)
- Optional: Boneless chicken thighs (for quicker prep)
Chicken thighs are preferred over breasts because they stay moist and absorb the spices better. You want meat that can simmer and soak up the curry without drying out.
Fresh Vegetables and Herbs
Fresh produce is key to creating the base of any good Indian curry. Onions, tomatoes, garlic, and ginger form the backbone of your curry’s flavor.
- 3 large onions (finely chopped)
- 3 medium ripe tomatoes (pureed or finely chopped)
- 6 garlic cloves (minced)
- 1.5-inch piece of fresh ginger (grated)
- Fresh cilantro leaves (for garnish)
- Green chilies (optional, for extra heat)
These ingredients not only provide flavor but help create a luscious gravy when cooked down. Tomatoes add tanginess, onions bring sweetness, and ginger-garlic gives that signature pungent kick.
Essential Indian Spices and Seasonings
Spices are where the magic really happens. Indian cuisine is all about balance—each spice plays a role in creating that rich, warm flavor profile.
- 1 tsp turmeric powder
- 2 tsp red chili powder (adjust to taste)
- 2 tsp coriander powder
- 1.5 tsp garam masala
- 1 tsp cumin seeds
- 1-2 bay leaves
- Salt to taste
Optional additions for deeper flavor:
- 1 tsp kasuri methi (dried fenugreek leaves)
- 1-2 cardamom pods
- 1 small cinnamon stick
Each of these spices has a purpose. Turmeric gives color and earthiness, chili powder adds heat, coriander adds citrusy brightness, and garam masala brings the warm, finishing touch.
Oils, Liquids, and Bases
You’ll need the right oils and liquids to bring everything together. Ghee adds richness, while neutral oil like sunflower or canola helps sauté without overpowering the spices.
- 3 tbsp oil (sunflower, canola, or vegetable)
- Optional: 1 tbsp ghee (for extra richness)
- 1 cup water (adjust for desired gravy consistency)
- Optional: ¼ cup yogurt (for marination or creaminess)
Water helps to simmer the curry and blend the spices, while yogurt, if used in marination, tenderizes the chicken and adds tang.
Tools and Equipment
Kitchen Tools You’ll Need
Making Indian chicken curry doesn’t require a professional kitchen setup, but having the right tools will make things smoother and more efficient.
- Large heavy-bottomed pot or deep pan (preferably non-stick or stainless steel)
- Wooden spoon or spatula for stirring
- Sharp knife and cutting board
- Blender or food processor (for pureeing tomatoes or making a ginger-garlic paste)
- Mixing bowls (for marination and prep)
- Measuring spoons and cups
The key here is even heat distribution. A heavy-bottomed pan ensures your spices don’t burn and helps develop deep flavor as the curry simmers.
Recommended Cookware for Best Results
While any sturdy pan will work, traditional Indian kitchens often use:
- Kadhai: A deep, circular pan with sloping sides, great for frying and simmering.
- Pressure cooker: Speeds up cooking, especially if you’re short on time.
- Dutch oven: Holds heat well and works great for long simmers.
Using a lid is crucial—especially during the final simmer. It helps trap steam and meld all the flavors beautifully.
Preparation Steps Before Cooking
How to Marinate the Chicken
Marination is not just optional—it’s essential if you want juicy, flavorful chicken. Even a 30-minute marination can transform your dish.
Marinade Mix:
- 1 tsp turmeric
- 1 tsp chili powder
- 1 tsp salt
- Juice of half a lemon or 2 tbsp yogurt
- 1 tbsp ginger-garlic paste
Mix the spices and yogurt or lemon juice in a bowl. Coat the chicken pieces thoroughly and let them rest in the fridge for 30 minutes to 2 hours. Yogurt helps tenderize the meat while spices begin infusing flavor. This simple step makes all the difference.
Prepping Onions, Garlic, and Tomatoes
Chop onions finely—this helps them caramelize faster and form a smoother gravy. For garlic and ginger, either mince them or make a paste using a blender. Tomatoes can be chopped or pureed depending on the consistency you prefer.
Prep everything beforehand and place each component in small bowls. This not only saves time but keeps you focused during cooking, avoiding the classic “wait, where’s the garlic?” moment.
Measuring and Organizing Your Spices
Indian cooking is fast-paced once you start. So measure out all your spices in advance and keep them ready in small ramekins or a spice tray. This mise-en-place approach ensures you don’t overcook your aromatics while scrambling to find your cumin.
Step-by-Step Cooking Guide
Step 1: Sautéing Onions and Aromatics
This is where the foundation of your curry is built. Start by heating oil in your heavy-bottomed pan over medium heat. Once the oil is hot, toss in the cumin seeds and bay leaves. Let them sizzle for a few seconds until aromatic. This “tempering” step wakes up the spices and adds deep, nutty flavor right from the start.
Next, add the finely chopped onions. This stage is key—you don’t want to rush it. Sauté the onions for 10-15 minutes, stirring frequently. Let them go past golden brown to a deep, rich caramel color. This slow cooking releases natural sugars and gives your curry its signature sweetness and depth.
Now, add the minced garlic and grated ginger. Sauté for another 2-3 minutes until the raw smell disappears and everything smells irresistibly good. This is the point where your kitchen starts to feel like a full-on Indian restaurant.
Pro Tip: Add a pinch of salt to help the onions break down faster and deepen their flavor even more.
Step 2: Adding Tomatoes and Spices
Once the aromatics are cooked down, it’s time to bring in the tang. Add the chopped or pureed tomatoes and stir well. Cook them down for at least 10 minutes on medium heat until the oil starts to separate from the mixture. This is an important sign—when oil begins to release, your masala is cooked and no longer raw.
Now, sprinkle in your spices:
- Turmeric powder
- Red chili powder
- Coriander powder
- Garam masala (hold some back for the end)
- Optional: Kasuri methi, cinnamon stick, cardamom
Toast the spices for 2-3 minutes, letting them mix well with the tomato-onion base. This stage, known as “bhunao,” helps the spices bloom and enhances their flavor without turning bitter.
Be generous with your stirring—it keeps the mixture from sticking and ensures everything blends beautifully.
Step 3: Cooking the Marinated Chicken
Once your masala is beautifully cooked, it’s time to introduce the star—your marinated chicken. Add the chicken pieces to the pan, making sure they’re coated well with the masala. Turn the heat to medium-high and cook for 8-10 minutes, stirring often. You’ll notice the chicken changing color and absorbing the spice base.
At this point, don’t add water yet. Let the chicken sear and soak in the flavors. This dry cooking stage adds complexity and ensures the chicken won’t taste bland.
If you used yogurt in the marinade, the natural acidity will tenderize the meat and create a creamy texture in your curry once it simmers.
You might notice bits sticking to the bottom of the pan—don’t panic. That’s flavor gold. A splash of water or stock can deglaze the pan and bring all that goodness back into the sauce.
Step 4: Simmering to Build Flavors
Now add about a cup of water (adjust depending on how thick or runny you want your curry) and bring it to a boil. Once boiling, reduce the heat to low, cover the pan, and let it simmer for 20-25 minutes.
This slow simmer is what transforms your dish from tasty to unforgettable. The chicken becomes tender, the spices meld together, and the gravy thickens naturally. Stir occasionally to ensure nothing sticks or burns.
If you prefer a creamier finish, this is the stage where you can stir in a splash of cream, a dollop of ghee, or even some coconut milk (for a South Indian twist).
Taste and adjust seasoning—add more salt or garam masala if needed.
Step 5: Final Garnish and Resting Time
After simmering, your chicken curry is nearly done. Sprinkle the remaining garam masala and a handful of chopped cilantro over the top. Cover the pan and let the curry rest for 5-10 minutes off the heat.
This short resting time allows the flavors to settle and deepen. It’s like letting a good steak rest—essential for the best taste.
Right before serving, give it one final stir. The aroma should be rich, warm, and utterly inviting.
Optional garnishes:
- A squeeze of fresh lemon juice for brightness
- Fried onions for crunch
- A drizzle of ghee for a luxe touch
Tips for the Best Chicken Curry
Adjusting Heat Levels
Not everyone enjoys curry with the same level of spice, and that’s okay. Here’s how to customize the heat without losing flavor:
- For a mild curry: Use less chili powder, skip green chilies, and opt for Kashmiri red chili powder (mild but colorful).
- For medium heat: Stick to the recipe but balance it with a spoon of cream or yogurt at the end.
- For fiery lovers: Add fresh chopped green chilies with the onions or a dash of hot chili oil during the final simmer.
The key is layering. Don’t dump all the chili in at once—build the heat as you go.
How to Get the Perfect Gravy Consistency
This is where many home cooks struggle. Too thin, and it’s soupy. Too thick, and it feels like paste. Here’s the trick:
- For thicker gravy: Let the curry simmer uncovered for 5-10 extra minutes. You can also mash some of the onions with the back of your spoon to naturally thicken the sauce.
- For thinner gravy: Add a little hot water or chicken stock toward the end and adjust the salt to match.
- For creamy gravy: Stir in a spoon of yogurt or cream after turning off the heat. It gives a rich texture and balances spice.
Common Mistakes to Avoid
- Adding spices too early – This can make them burn and turn bitter. Always toast spices after onions and tomatoes are cooked.
- Using low-quality spices – Old, stale spices lose potency. Use fresh ones for the best flavor.
- Skipping the marination – It might seem skippable, but marination seriously enhances the flavor and texture.
- Not sautéing onions enough – Undercooked onions leave a raw aftertaste. Go golden or go home!
- Overcooking the chicken – Especially with boneless pieces. Once tender, turn off the heat and let it rest.
Serving Suggestions
Best Sides to Pair With Chicken Curry
A great curry deserves equally great accompaniments. Here are some classic options:
- Basmati Rice: The long, fragrant grains are perfect for soaking up that gravy.
- Jeera Rice (Cumin Rice): Lightly spiced and aromatic.
- Roti or Naan: Ideal for scooping up every last drop.
- Paratha: Flaky, buttery, and indulgent.
For a healthier twist, you can also serve it with:
- Quinoa
- Brown rice
- Whole wheat flatbread
And don’t forget the sides:
- Fresh cucumber raita (yogurt dip)
- Kachumber salad (onion-tomato-cucumber mix)
- Mango chutney or pickles
Presentation Tips for Hosting Guests
If you’re serving this dish at a dinner party or family gathering, here’s how to make it pop:
- Serve the curry in a clay pot or copper handi for an authentic look.
- Garnish with fresh cilantro, fried onions, and a swirl of cream or ghee.
- Pair with a vibrant side salad and Indian-style drinks like mango lassi or masala chai.
- Add a decorative rice mold or stack naan artistically in a bread basket.
A well-presented dish not only impresses but enhances the overall experience.
Storage and Reheating Tips
How to Store Leftovers
Chicken curry tastes even better the next day, once the flavors have had more time to marry. If you’ve got leftovers, you’re in luck! Here’s how to store them properly:
- Refrigerator: Let the curry cool completely before transferring it to an airtight container. It can stay fresh in the fridge for up to 3–4 days.
- Freezer: For longer storage, portion the curry into freezer-safe containers or heavy-duty zip bags. It freezes beautifully and lasts up to 2–3 months.
- Labeling: Always label with the date so you know when it was made.
Avoid storing curry in metal containers, as the acidic ingredients (like tomatoes and lemon juice) can react with the metal and affect the flavor over time.
If the curry thickens after storage (which it usually does), just add a splash of water when reheating to bring it back to its original consistency.
Reheating Without Losing Flavor
The key to reheating chicken curry is doing it gently. You want to preserve the texture of the chicken and not dry it out.
Stovetop Method (Best Option):
- Pour the curry into a pan.
- Add a bit of water or broth if it’s too thick.
- Heat on medium-low until it’s warmed through, stirring occasionally.
Microwave Method (Quick Option):
- Place the curry in a microwave-safe dish.
- Cover with a lid or plate (to avoid splatter).
- Heat in 1-minute intervals, stirring in between until hot.
Bonus Tip: Add a tiny knob of butter or a splash of cream while reheating to revive the richness of the curry.
FAQs about Indian Chicken Curry Recipe
1. What type of chicken is best for curry?
Bone-in chicken, especially thighs and drumsticks, is ideal because it adds more flavor to the curry. However, boneless chicken thighs are great if you’re looking for convenience and quicker cooking.
2. Can I make this dish ahead of time?
Absolutely! In fact, Indian chicken curry tastes even better the next day. The spices deepen, and the gravy gets richer as it rests. Just reheat gently and enjoy.
3. How do I make it less spicy?
Use mild chili powder (like Kashmiri chili) and skip the green chilies. You can also add a spoon of cream or yogurt at the end to mellow out the heat.
4. Can I freeze Indian chicken curry?
Yes! It freezes very well. Store in airtight containers or freezer bags and freeze for up to 2–3 months. Thaw overnight in the fridge before reheating.
5. What are good vegetarian alternatives?
Swap the chicken for paneer (Indian cottage cheese), chickpeas, tofu, or mixed vegetables. Follow the same spice base for delicious vegetarian variations.
Conclusion
There you have it—a fully loaded, step-by-step guide to making authentic Indian chicken curry that’s not just bursting with flavor but easy enough for anyone to follow. From prepping and marinating the chicken to toasting spices and simmering the perfect gravy, this dish is a sensory journey through the heart of Indian cooking.
What makes this recipe truly special is its adaptability. You can make it mild or spicy, creamy or bold, and pair it with anything from rice to roti. Whether you’re cooking for a weeknight dinner or impressing guests at a party, this chicken curry will leave a lasting impression—and probably a few people asking for seconds.
So grab your spices, put on some good music, and get ready to fill your kitchen with the rich aromas of India. Trust me—once you’ve made this chicken curry from scratch, you’ll never go back to store-bought sauces again.


