Harissa Paste Recipe: When it comes to flavor-packed condiments, Harissa paste is a true superstar in North African cuisine. It’s fiery, smoky, aromatic, and incredibly versatile. Whether you want to add heat to your soups, marinades, grilled meats, or even roasted vegetables, this paste can instantly transform a dish from ordinary to extraordinary. But what exactly is Harissa, and why has it become a staple not only in Tunisia, where it originated, but also in kitchens across the globe?
In this guide, we’ll take you step by step through the process of making authentic Harissa paste at home. From selecting the right chilies to properly storing your paste for long-lasting freshness, this guide will help you master the art of making this fiery condiment.
Ingredients You’ll Need
Before you dive into making Harissa, it’s important to know exactly what you’ll need. While recipes may vary slightly depending on region and personal preference, the core ingredients remain the same. The beauty of this recipe lies in its flexibility—you can adapt it to your taste.
Main Ingredients:
- Dried Red Chilies – The backbone of Harissa. Choose chilies based on the heat level you prefer. Popular choices include guajillo, pasilla, or New Mexico chilies for mild versions, or hotter ones like cayenne or bird’s eye for fiery results.
- Garlic Cloves – Fresh garlic adds pungency and depth.
- Olive Oil – Acts as both a binding agent and a preservative. Use extra virgin olive oil for best flavor.
- Spices – Cumin, coriander seeds, and caraway seeds are the classic trio that gives Harissa its earthy aroma.
- Salt – Essential for balancing flavors.
Optional Add-ins for Flavor Variations:
- Roasted Red Bell Peppers – Adds sweetness and balance to the heat.
- Tomato Paste – Creates a richer, slightly tangy paste.
- Smoked Paprika – For an extra smoky punch.
- Lemon Juice or Vinegar – Adds acidity to brighten the flavors.
Ingredient Substitutions and Alternatives:
If you don’t have access to traditional North African chilies, don’t worry. You can substitute with other dried chilies available at your local store. Similarly, sunflower oil can replace olive oil if you want a neutral flavor. If caraway seeds are hard to find, you can skip them or use fennel seeds as a mild alternative.
The key to a great Harissa is balance—too much spice can overpower, while too little oil can make the paste dry and hard to spread. Having your ingredients measured and ready before starting will make the process smooth and enjoyable.
Tools and Equipment Required
Like any great recipe, the right tools can make a huge difference. Making Harissa doesn’t require fancy equipment, but a few essentials will help you achieve the perfect consistency and flavor.
Blender vs Mortar and Pestle
If you want convenience, a blender or food processor will save you time and effort. It quickly turns soaked chilies and spices into a smooth, thick paste. However, if you’re looking for tradition and authenticity, using a mortar and pestle is the way to go. Crushing the ingredients by hand releases oils more gradually, giving the paste a slightly rustic texture and deeper flavor.
Storage Containers
Once your Harissa is ready, you’ll need an airtight container or sterilized glass jar to store it. Glass is ideal because it doesn’t absorb odors or flavors. Make sure to cover the surface of the paste with a thin layer of olive oil to keep it fresh longer.
Preparing Ingredients for Blending
Before blending, dried chilies need to be rehydrated by soaking in hot water for about 30 minutes. Spices like cumin and coriander should be toasted in a dry pan to unlock their full aroma. Garlic can be roasted lightly to mellow its sharpness, though raw garlic works well too if you like it punchier.
Having these tools and preparations in place ensures the process flows smoothly and your Harissa comes out rich and full of flavor.
Step-by-Step Guide to Making Harissa Paste
This is where the magic happens. Let’s break down the entire process into simple, manageable steps so you can recreate authentic Harissa right in your kitchen.
Step 1 – Choosing and Preparing the Chili Peppers
The choice of chili peppers will determine the flavor and heat of your Harissa. Mild dried chilies like guajillo give a smoky-sweet base, while hotter chilies like cayenne add fiery intensity. To prepare them:
- Remove stems and seeds (unless you want extra heat).
- Soak the dried chilies in hot water for 20–30 minutes until soft.
- Drain and pat them dry before blending.
Soaking not only softens the chilies but also mellows out their bitterness, ensuring a smoother paste.
Step 2 – Toasting the Spices
Toasting spices is one of the most important steps because it enhances their aroma and flavor. Here’s how:
- Heat a dry skillet over medium heat.
- Add cumin, coriander, and caraway seeds.
- Toast for 1–2 minutes until fragrant, being careful not to burn them.
- Grind them into a fine powder using a spice grinder or mortar and pestle.
This step takes only a few minutes but elevates your Harissa from ordinary to exceptional. Freshly ground spices are always more potent than pre-ground ones.
Step 3 – Blending the Ingredients into a Paste
Now it’s time to bring everything together:
- Add the softened chilies, garlic, ground spices, and a splash of olive oil to your blender.
- Blend until you achieve a thick, smooth paste.
- Add more olive oil gradually until the paste reaches a spreadable consistency.
If you’re using a mortar and pestle, crush the ingredients slowly, starting with garlic and spices before adding the chilies. This method creates a chunkier, rustic texture.
Step 4 – Adjusting the Flavor and Consistency
Taste your Harissa at this stage. If it’s too spicy, add roasted red bell peppers or a touch of tomato paste to mellow it. If it feels too thick, add more olive oil. For tanginess, a squeeze of lemon juice works wonders.
Remember: Harissa should be bold, smoky, and slightly tangy—not just fiery. Adjust it until it matches your taste.
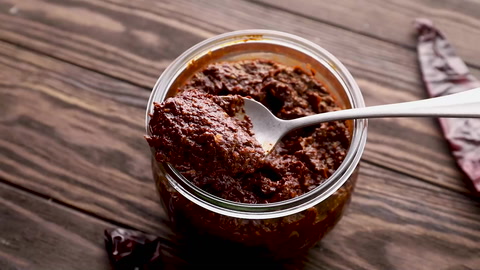
Step 5 – Storing Your Harissa Paste
Transfer your Harissa into a sterilized glass jar. Smooth the surface and pour a thin layer of olive oil on top to seal it. Store it in the refrigerator, where it can last up to 3 weeks. For longer storage, you can freeze it in small portions.
And there you have it—homemade Harissa paste ready to spice up your dishes!
Different Types of Harissa
Though Tunisia is the birthplace of Harissa, variations exist across North Africa. Each has its own twist:
Traditional Tunisian Harissa
Made primarily with dried chilies, garlic, cumin, and caraway, this is the most authentic version. It’s bold, fiery, and used as a daily condiment in Tunisian homes.
Moroccan Harissa
Moroccan Harissa often includes roasted red peppers for a sweeter, smokier balance. It’s slightly milder and works beautifully with tagines and couscous.
Mild vs Spicy Versions
If you’re not a fan of extreme heat, you can create a milder version by reducing the number of hot chilies and balancing with bell peppers or tomato paste. On the other hand, chili lovers can amp up the heat by keeping seeds in and using extra-hot varieties like bird’s eye chilies.
Health Benefits of Harissa Paste
While Harissa is best known for its fiery kick, it’s also packed with health benefits that make it more than just a tasty condiment. Since it’s made primarily from chilies, garlic, and spices, each ingredient contributes nutritional value and natural wellness properties.
Chilies, the star of Harissa, are rich in capsaicin, the compound responsible for their spiciness. Capsaicin has been studied for its metabolism-boosting effects, helping the body burn calories more efficiently. It’s also believed to have anti-inflammatory and pain-relieving properties, which explains why spicy foods sometimes provide relief from congestion or joint stiffness.
Garlic, another key ingredient, is well-known for its antimicrobial and immune-boosting qualities. It’s loaded with antioxidants and compounds like allicin that can support heart health and help fight off colds. Combined with the healthy fats from olive oil, Harissa becomes not just flavorful, but also heart-friendly.
The spices—cumin, coriander, and caraway—bring their own set of benefits. Cumin aids digestion, coriander is linked to improved blood sugar control, and caraway helps reduce bloating. Together, they make Harissa a spice paste that nourishes as much as it excites the taste buds.
Of course, moderation is key. Since Harissa is spicy and salty, overindulging might upset sensitive stomachs. But when used sensibly, this paste can be a delicious way to spice up meals while also giving your body a healthy boost.
How to Use Harissa Paste in Everyday Cooking
Now that you’ve mastered the recipe, the fun part is figuring out how to use it. Harissa is incredibly versatile, and once you have a jar in your fridge, you’ll find yourself reaching for it constantly.
As a Marinade
Mix Harissa with olive oil, lemon juice, and a touch of yogurt to create a flavorful marinade for chicken, beef, or fish. The paste penetrates the meat, giving it a smoky, spicy edge.
In Soups and Stews
A spoonful of Harissa can completely transform a pot of soup or stew. It’s especially delicious in lentil soup, vegetable stews, or chickpea-based dishes.
For Roasted Vegetables
Toss vegetables like carrots, cauliflower, or potatoes in Harissa and olive oil before roasting. The heat caramelizes with the veggies, creating a sweet-spicy balance that’s irresistible.
As a Sandwich Spread
Forget mayonnaise—spread Harissa on sandwiches, burgers, or wraps for an instant upgrade. Pair it with grilled vegetables, cheese, or meats for maximum impact.
In Grains and Pasta
Stir Harissa into cooked couscous, quinoa, or pasta for a quick and flavorful meal. A little goes a long way, so start small and adjust to taste.
Once you start experimenting, you’ll realize Harissa can be added to almost anything that could use a burst of bold flavor.
Tips for Perfecting Your Harissa Paste
Even though Harissa is a simple recipe, a few extra tips can help ensure yours turns out perfect every time.
- Balance Heat and Flavor – Don’t just pile on the hottest chilies you can find. Mix mild and hot varieties to achieve depth instead of one-dimensional fire.
- Use Fresh Spices – Stale, pre-ground spices won’t deliver the same punch. Toast and grind whole spices for maximum aroma.
- Olive Oil Quality Matters – Since olive oil is a key ingredient, using a good-quality extra virgin variety makes a huge difference in flavor and shelf life.
- Adjust Consistency Slowly – Add olive oil gradually while blending. It’s easier to thin out a paste than to fix one that’s too runny.
- Rest Before Using – Like many spice pastes, Harissa tastes better after sitting for at least 24 hours. The flavors meld and intensify over time.
With these small adjustments, your homemade Harissa will rival—or even surpass—store-bought versions.
Common Mistakes to Avoid
While making Harissa is straightforward, a few common pitfalls can affect the final result.
- Using Only One Type of Chili: This can make your paste too bland or too fiery. Mixing different varieties creates complexity.
- Skipping the Toasting Step: Raw spices lack the depth that toasting brings. This step is essential for authentic flavor.
- Not Removing Seeds and Skins: Leaving too many seeds can make Harissa unbearably hot, while tough skins may affect texture.
- Adding Too Much Oil Early: Overdoing it with oil at the start makes blending difficult and may result in an oily paste.
- Improper Storage: Without a protective oil layer, Harissa spoils quickly. Always cover the surface with olive oil when storing.
Avoiding these mistakes ensures your Harissa is not only flavorful but also long-lasting and versatile.
How to Store Harissa Paste for Maximum Freshness
Once you’ve gone through the effort of making Harissa, you’ll want it to last. Thankfully, proper storage can extend its shelf life significantly.
The best method is to store Harissa in a sterilized glass jar. After filling the jar with the paste, smooth the surface and cover it with a thin layer of olive oil. This prevents air from reaching the paste, which helps keep it fresh and flavorful. Each time you use some, top it off with more oil before resealing.
In the refrigerator, Harissa will stay fresh for about 3 weeks. For longer storage, consider freezing it in ice cube trays. Once frozen, transfer the cubes to a freezer bag. This way, you can easily pop out a small portion whenever you need it, without thawing the whole batch.
Avoid using plastic containers, as they can absorb odors and stains from the chilies and spices. Glass jars not only preserve the flavor but also make for a visually appealing way to showcase your homemade condiment.
Pairing Harissa with Different Cuisines
One of the best things about Harissa paste is how easily it blends into different cuisines beyond its North African roots. While it is a staple in Tunisia, Morocco, and Algeria, its versatility allows it to cross cultural boundaries and enhance global dishes.
Middle Eastern Cuisine
Harissa pairs beautifully with Middle Eastern dishes. Add it to hummus for a spicy twist, drizzle it over shawarma wraps, or use it as a dip for warm pita bread. It also complements lamb kebabs and grilled chicken, giving them an extra smoky punch.
Mediterranean Cuisine
In Mediterranean cooking, Harissa works wonderfully with seafood. Imagine grilled prawns brushed with Harissa oil or baked fish topped with a Harissa-tomato sauce. It also enhances vegetable-based dishes like ratatouille or roasted eggplants, bringing out earthy flavors.
Western Fusion
In Western kitchens, Harissa has become a gourmet addition. Chefs use it in gourmet burgers, pasta sauces, and even as a base for pizza instead of tomato sauce. A dollop in mac and cheese or scrambled eggs instantly transforms them into something exciting.
Asian Influences
Although not traditional, Harissa can be paired with Asian flavors. For instance, it works well in stir-fries, noodle bowls, or as a spicy base for curry soups. Mixing Harissa with soy sauce creates a unique glaze for meats and vegetables.
This adaptability is why Harissa has become a global pantry essential. No matter what cuisine you enjoy, there’s always room for a touch of Harissa.
Homemade Harissa vs Store-Bought Harissa
You might be wondering whether it’s worth making Harissa at home when jars are available in most grocery stores. Both options have their advantages, but there are clear differences.
Flavor
Homemade Harissa is fresher, richer, and customizable. You control the spice level, smokiness, and consistency. Store-bought versions are often standardized, sometimes lacking depth or freshness.
Ingredients
When you make Harissa at home, you know exactly what goes into it. Store-bought Harissa may contain preservatives, added sugar, or lower-quality oils. Homemade versions use pure, fresh ingredients.
Convenience
Store-bought Harissa wins in terms of convenience—you just open the jar and use it. Homemade Harissa takes time and effort, especially with soaking chilies and toasting spices.
Cost
Depending on your access to spices and chilies, making Harissa at home can be cheaper in the long run. A big batch stored properly can last weeks, while store-bought jars are often smaller and pricier.
Ultimately, homemade Harissa offers unmatched flavor, while store-bought versions provide ease. If you love experimenting with flavors, making it yourself is highly rewarding.
Creative Variations of Harissa Paste
Harissa is incredibly versatile, and with a little creativity, you can make unique versions tailored to your tastes.
- Smoky Harissa: Use smoked chilies or smoked paprika to give the paste a deeper, woodsy flavor.
- Sweet Harissa: Add roasted red bell peppers and a drizzle of honey for a balance of heat and sweetness.
- Green Harissa: Replace red chilies with green ones, and add herbs like cilantro, parsley, and mint for a fresh, herbaceous version.
- Nutty Harissa: Blend in toasted almonds or walnuts to give the paste a creamy, nutty richness.
- Citrusy Harissa: Add orange zest or lemon peel to brighten the paste with a refreshing tang.
These variations allow you to keep experimenting, ensuring you never get bored of Harissa. Each tweak can create a whole new flavor profile for different dishes.
Serving Suggestions and Recipe Ideas
If you’re looking for inspiration, here are some delicious ways to put your Harissa paste to use:
- Harissa Chicken Skewers – Marinate chicken chunks in Harissa, olive oil, and lemon juice, then grill to perfection.
- Spicy Harissa Hummus – Blend Harissa into classic hummus for a smoky, spicy dip.
- Harissa Pasta Sauce – Stir Harissa into tomato sauce and toss with pasta for a quick meal.
- Harissa Roasted Vegetables – Coat carrots, cauliflower, or potatoes in Harissa before roasting.
- Harissa Couscous Salad – Mix Harissa with olive oil and lemon juice for a zesty salad dressing.
- Harissa Grilled Fish – Brush Harissa on salmon or white fish before grilling.
- Eggs with Harissa – Add a spoonful of Harissa to scrambled eggs or shakshuka for a spicy breakfast.
The possibilities are endless, and once you start incorporating Harissa into your meals, it may quickly become your go-to condiment.
FAQs about Harissa Paste Recipe
1. Is Harissa very spicy?
Harissa can be very spicy, but it doesn’t have to be. You can adjust the heat level by choosing milder chilies or balancing with roasted peppers and tomato paste.
2. Can I make Harissa without olive oil?
Yes, but olive oil adds richness and helps preserve the paste. If you need an alternative, sunflower oil or avocado oil works.
3. How long does homemade Harissa last?
Stored in a glass jar with a layer of olive oil on top, Harissa lasts about 3 weeks in the fridge. You can also freeze it in portions for longer storage.
4. What can I use instead of Harissa?
If you don’t have Harissa, you can substitute with sriracha, chili garlic paste, or even sambal oelek, though the flavor will differ.
5. Can I use fresh chilies instead of dried ones?
Yes, fresh chilies can be used, but the flavor will be brighter and less smoky. Dried chilies give Harissa its deep, complex taste.
Conclusion
Harissa paste is more than just a condiment—it’s a cultural staple, a flavor enhancer, and a culinary powerhouse. From its origins in Tunisia to its global popularity today, Harissa has captured the hearts of food lovers who crave depth, spice, and versatility in their cooking.
By making Harissa at home, you not only experience the joy of creating something authentic but also gain the ability to tailor it to your taste—whether you prefer it mild, smoky, or fiery hot. With just a handful of chilies, spices, and olive oil, you can craft a paste that transforms everyday meals into extraordinary dishes.
So, the next time you want to elevate your cooking, don’t reach for store-bought sauces—make your own Harissa paste. It’s bold, aromatic, and endlessly adaptable, guaranteed to become one of your favorite kitchen staples.


