Dango Recipe: Dango is a traditional Japanese sweet dumpling made from rice flour and often served on skewers. Think of it as Japan’s version of a chewy, soft snack that can be both savory and sweet. Typically, three to five balls are skewered together and sometimes served with sauces like sweet soy glaze (mitarashi) or red bean paste. Its texture is delightfully chewy—similar to mochi—but slightly denser and firmer.
You’ll usually find dango sold at Japanese festivals, tea houses, or specialty dessert shops. It’s not just food; it’s a cultural symbol. From anime scenes to cherry blossom picnics, dango is everywhere in Japanese media and real life.
This snack is incredibly versatile—it can be served hot or cold, and adapted to all seasons. From hanami dango during cherry blossom season to mitarashi dango enjoyed year-round, it fits every mood and moment.
A Brief History of Dango
Dango dates back to the Jomon period in Japanese history. Originally, it was made as an offering to the gods during Shinto rituals. Over time, it evolved into a sweet treat enjoyed by everyone from emperors to commoners. By the Edo period, regional varieties had emerged, each with its twist on the basic recipe.
Its name is derived from the Japanese word “dan” meaning group, and “go” meaning child—reflecting the way the balls are bunched together on skewers. Traditionally made from uruchi rice flour (non-glutinous rice), modern versions sometimes use mochiko (glutinous rice flour) or shiratamako for that chewy bite.
From Kyoto to Tokyo, every region has its own style. For instance, in Kanto, people love mitarashi dango with sweet soy glaze. Meanwhile, Kansai prefers sanshoku dango—three-color dango representing the seasons.
Types of Dango You Should Know
Here’s a quick breakdown of some popular dango varieties:
- Mitarashi Dango: Glazed with a sweet soy sauce; the most iconic variety.
- Anko Dango: Topped with red bean paste (anko); perfect for those who like earthy sweetness.
- Bocchan Dango: Three-color dango with red (from red beans), yellow (from eggs), and green (from green tea).
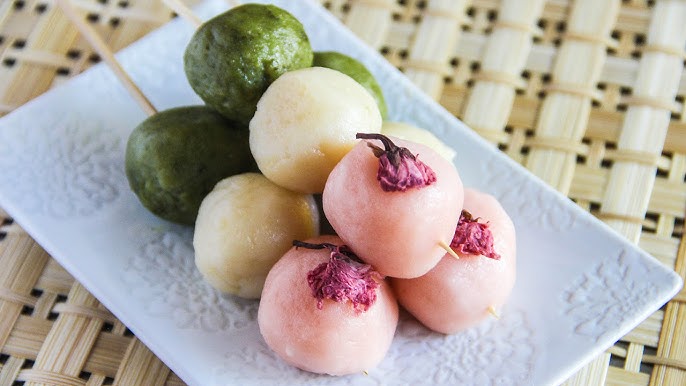
- Hanami Dango: Popular during cherry blossom season, featuring pink, white, and green balls.
- Kibi Dango: Made with millet flour and referenced in Japanese folklore.
- Yaki Dango: Grilled over a flame for a smoky flavor.
Each variety tells a story—whether it’s the season, the region, or the tradition behind it.
Ingredients You’ll Need
Basic Ingredients for Traditional Dango
Making dango requires only a handful of ingredients, which is part of its charm. The essential ingredient is rice flour. Depending on the texture you want, you can choose between:
- Shiratamako – Glutinous rice flour; creates the chewiest texture.
- Joshinko – Non-glutinous rice flour; gives a firmer bite.
- Mochiko – Glutinous rice flour, finer than shiratamako.
You can also mix flours (e.g., 50% shiratamako and 50% joshinko) for a balanced texture.
Other ingredients include:
- Water – Usually lukewarm for easier dough mixing.
- Sugar (optional) – For a subtly sweet dough.
- Potato starch or cornstarch – Used for dusting to prevent sticking.
- Bamboo skewers – Traditional and aesthetic.
Pro Tip: Using a combination of shiratamako and joshinko can elevate your dango’s texture, making them firm yet delightfully chewy.
Optional Toppings and Sauces
Dango is a blank canvas, and you can personalize it endlessly. Here are some common toppings:
- Sweet soy glaze (mitarashi sauce) – Soy sauce, sugar, and starch thickened into a glossy finish.
- Anko (red bean paste) – Smooth or chunky, it adds natural sweetness.
- Kinako (roasted soybean flour) – Earthy and nutty, often mixed with sugar.
- Matcha powder or glaze – Adds a bitter, aromatic contrast to the sweet dough.
- Sesame paste – Deep, nutty, and rich.
You can mix and match these toppings based on your mood or occasion.
Where to Buy Dango Ingredients
If you’re not in Japan, don’t worry—most Asian grocery stores stock these ingredients. You can also find them online from websites like:
- Amazon
- Walmart (Asian food aisle)
- Local Japanese or Korean grocery stores
- Specialty Asian online shops like Umami Cart or Asian Mart
Always check the labels for 100% rice flour, especially if you’re gluten-sensitive.
Equipment and Tools Required
Kitchen Tools Checklist
To make dango efficiently, it’s essential to have the right tools. Luckily, this recipe is simple and doesn’t require a fancy kitchen setup. Here’s what you’ll need:
- Mixing bowls: Medium and large sizes for preparing the dough.
- Measuring cups and spoons: Precision matters for the perfect dough consistency.
- Silicone spatula or wooden spoon: For stirring the dough.
- Steamer or pot for boiling: Boiling is the most common method, but steaming also works.
- Strainer or slotted spoon: To retrieve the cooked dango balls.
- Bamboo skewers: Traditional skewers that also give a nice presentation.
- Non-stick tray or plate: To place the dango after boiling.
- Brush (if grilling): For applying sauces like mitarashi if you’re grilling or pan-searing.
Each item plays a vital role. A simple mistake—like not having a non-stick surface—can lead to your dango sticking and tearing.
Tips on Choosing the Right Skewers
Bamboo skewers are the most traditional choice. Here’s what to consider:
- Length: 6 to 8 inches is perfect. Too long and they’re unwieldy; too short and they don’t hold enough.
- Thickness: Go for medium-thick skewers so they’re strong enough to hold the dango without splitting.
- Soak before use: If you’re grilling, soak them in water for 10–15 minutes to prevent burning.
Presentation is key when serving dango. Clean, uniform skewers enhance the visual appeal, making them perfect for photos or serving at parties.
Step-by-Step Dango Recipe
Step 1: Mixing the Dough
Start by choosing your rice flour—either shiratamako, joshinko, mochiko, or a mix. A balanced mix of glutinous and non-glutinous flour gives the best texture.
Ingredients:
- 100g shiratamako
- 100g joshinko
- ~120ml warm water
Instructions:
- In a large mixing bowl, combine the two flours.
- Slowly add warm water while mixing with your hands or spatula.
- Mix until a soft, pliable dough forms—neither too wet nor crumbly.
- If it’s too dry, add water one teaspoon at a time.
- If too wet, add a pinch more rice flour.
The texture should feel like soft earlobe skin—springy and smooth. This analogy is used by many Japanese cooks, and it works perfectly. If the dough cracks when shaped, it’s too dry. If it sticks to your hands, it’s too wet.
Let the dough rest for 5–10 minutes before shaping.
Step 2: Shaping the Dango Balls
Now comes the fun part—shaping your dango.
- Divide the dough into even portions.
- Roll each portion into a smooth, round ball. You should get about 18–24 balls depending on size.
- Keep the balls uniform in size for even cooking.
Tips:
- Use lightly damp hands to prevent sticking.
- Make sure there are no cracks in the dough balls—these could split during boiling.
- Place each ball on a tray dusted with cornstarch or covered with parchment paper to avoid sticking.
If you want colored dango (like hanami style), you can knead matcha powder (for green), red bean (for pink), or food coloring into different dough sections.
Step 3: Boiling the Dango
Boiling is the standard method to cook dango.
- Bring a pot of water to a rolling boil.
- Gently drop the dango balls in, not all at once.
- Stir occasionally to prevent sticking.
- The balls will initially sink. When they float to the surface, continue to boil for 1–2 more minutes to ensure they’re cooked through.
Post-Boiling:
- Use a slotted spoon to transfer dango into ice-cold water.
- Let them chill for 1–2 minutes—this shocks the dough and makes it extra chewy.
- Drain and dry on a paper towel or clean cloth.
This method gives you perfectly bouncy, shiny, and smooth dango every time.
Step 4: Skewering and Serving
Once your dango balls are dry, it’s time to skewer and serve.
- Thread 3 to 5 balls per bamboo skewer.
- For a traditional look, keep them tightly packed together.
- If you’re making multiple flavors or colors, arrange them attractively—think green, white, pink for hanami dango.
You can serve them as is, or proceed to pan-sear or grill them. Slight charring adds depth of flavor and texture.
Serving Options:
- Brush with mitarashi glaze.
- Top with a spoonful of anko paste.
- Dust with kinako or matcha powder.
Presentation makes a difference. Use Japanese ceramic plates or small trays for a true cultural touch.
Making the Sauce (Optional)
Sweet Soy Glaze (Mitarashi)
This sauce is a game-changer. Mitarashi sauce is sticky, sweet, and slightly salty—coating your dango in a golden, glossy layer of flavor.
Ingredients:
- 3 tbsp soy sauce
- 3 tbsp sugar
- 2 tbsp mirin (optional but traditional)
- 1 tbsp cornstarch
- ½ cup water
Instructions:
- Mix all ingredients in a small saucepan.
- Stir continuously over medium heat until it thickens.
- Once it reaches a syrupy consistency, remove from heat.
Application:
- Use a brush to coat the grilled dango balls.
- Serve immediately while warm and glossy.
The contrast between the chewy dango and the sticky, umami-rich sauce is irresistible.
Other Popular Dango Sauces
Want to switch it up? Here are a few more to try:
- Anko Sauce: Warm red bean paste thinned with a bit of water or sweet syrup.
- Black Sesame Paste: Toasted black sesame seeds blended with honey or sugar.
- Kinako Sugar Dusting: Mix roasted soybean flour with sugar and lightly coat the dango.
- Matcha Sauce: Sweetened green tea glaze made from matcha, sugar, and water.
These variations offer both visual appeal and flavor diversity—ideal if you’re making a dango platter for guests.
Presentation and Serving Tips
How to Serve Dango Like a Pro
Once your dango is cooked, skewered, and sauced, it’s time to think about presentation. After all, we eat with our eyes first, right? Traditional Japanese presentation emphasizes simplicity and elegance. Follow these serving tips to impress anyone—yourself included.
Plating Ideas:
- Use small Japanese plates or black ceramic dishes to make the colors pop.
- Arrange skewers neatly, with sauce drizzled artfully over the top.
- For hanami dango, alternate green, white, and pink balls for visual harmony.
- Place a small mound of kinako powder on the side for dipping.
Garnish Options:
- Sprinkle a few sesame seeds or matcha powder.
- Add a tiny cherry blossom or edible flower for spring flair.
- Serve with a cup of matcha or green tea to complete the experience.
Hosting Tip: Hosting a dinner party or Japanese-themed evening? Consider serving dango on a bamboo tray lined with parchment. It instantly sets the tone.
Dango isn’t just a snack—it’s an experience. Take the extra minute to style it, and you’ll feel like you’ve just walked into a Tokyo tea house.
Dango Pairings and Occasions
Dango shines in all seasons. Here’s when and how to serve it:
- Hanami (cherry blossom viewing): Serve hanami dango in pink, white, and green.
- Summer festivals: Grilled mitarashi dango are smoky and satisfying.
- Winter tea ceremonies: Red bean or sesame dango warms the soul.
- Children’s Day: Kibi dango is symbolic and fun for kids.
Best Drink Pairings:
- Hot or iced matcha
- Hojicha (roasted green tea)
- Genmaicha (brown rice tea)
- Sweet sake (for adult gatherings)
Whether it’s a holiday, a weekend treat, or a creative cooking day, dango fits right in.
Storing and Reheating Dango
How to Store Dango for Freshness
Dango is best eaten fresh, but if you have leftovers, there are ways to store them without losing their chewy goodness.
Short-Term Storage (Same Day):
- Keep the cooked and unsauced dango covered with plastic wrap at room temperature for up to 6 hours.
Refrigeration (1–2 Days):
- Place dango in an airtight container with parchment paper between layers.
- Do not add sauce before refrigerating; it’ll turn sticky and soggy.
Freezing (Up to 1 Month):
- Place uncooked or boiled dango balls (not skewered) on a tray to freeze individually.
- Once frozen, transfer to a ziplock bag and remove air.
- To thaw, boil or microwave briefly, then skewer and add sauce.
Pro Tip: Sprinkle a few drops of water before microwaving to restore softness.
Best Practices for Reheating
Reheating dango properly ensures they stay soft and chewy.
Microwave Method:
- Place dango on a plate.
- Cover with a damp paper towel.
- Microwave for 10–15 seconds at medium heat.
Boiling Method:
- Reboil gently for 30–60 seconds.
- Pat dry before serving or skewering again.
Grill or Pan Method (for Yaki Dango):
- Lightly pan-fry or grill until warmed through and slightly crisp.
- Brush sauce afterward.
Reheated dango may not be exactly like fresh, but it can come very close with the right technique.
Nutritional Information
Calories and Nutrients Breakdown
Dango is a simple snack, but what about its nutrition profile? Let’s break it down per skewer (about 3 balls):
| Nutrient | Amount (approx.) |
|---|---|
| Calories | 140–160 kcal |
| Carbohydrates | 30–35g |
| Sugar (with sauce) | 10–15g |
| Fat | <1g |
| Protein | 2–3g |
| Fiber | 1g |
Key Notes:
- Dango is low in fat and cholesterol-free.
- It’s high in carbs due to the rice flour, making it an energy-boosting snack.
- Adding sauces like anko or mitarashi can significantly increase sugar content.
Perfect for a quick energy bite, especially before a workout or during festivals when you’re walking a lot!
Healthier Alternatives and Substitutes
Want to make your dango a bit healthier? Here are some suggestions:
- Use less sugar in sauces or go sugar-free with natural sweeteners like stevia.
- Add fiber by mixing in small amounts of oat or whole-grain flour (though this may change texture).
- Use sweet potato or pumpkin in the dough for added vitamins and color.
- Top with fruit puree instead of sugar-heavy sauces.
If you’re watching your gluten intake, the great news is that most dango made with 100% rice flour are naturally gluten-free. Just double-check the sauce ingredients for hidden gluten in soy sauce.
Troubleshooting Common Issues
Why is My Dango Dough Too Sticky?
Sticky dough is a common issue, especially when using mochiko or too much water.
Solutions:
- Add more rice flour slowly until it becomes manageable.
- Dust your hands and surface with cornstarch or potato starch.
- Mix the dough longer—sometimes kneading helps it bind better.
Prevention Tip: Always add water gradually and knead well to allow the flour to absorb moisture evenly.
Dango Falling Apart When Boiled?
This issue usually means the dough wasn’t kneaded properly or had too much water.
Fixes:
- Ensure your dough has a soft but firm consistency.
- Let the dough rest before boiling to improve elasticity.
- Test one ball in boiling water before cooking the whole batch.
Also, avoid stirring too much in the pot during boiling—it can break the balls apart. Gently nudge them if needed, but don’t be rough.
FAQs about Dango Recipe
Can I Make Dango with Regular Flour?
Not recommended. Regular wheat flour doesn’t provide the unique chewy texture that rice flour does. Dango requires glutinous or non-glutinous rice flour for authenticity. If you use regular flour, you’ll end up with a completely different dough—closer to bread than mochi.
How Long Does Dango Last?
Fresh dango lasts about 1–2 days if stored properly in the refrigerator. Without sauce, they hold up better. With sauce, the shelf life shortens. For longer storage, freezing is your best bet. Just make sure to store them without the skewers or sauce.
Is Dango Gluten-Free?
Yes, most dango recipes using 100% rice flour (shiratamako, joshinko, or mochiko) are naturally gluten-free. However, always check your soy sauce or other toppings, as they may contain gluten. Use tamari or gluten-free soy sauce for a safer option.
Can I Freeze Dango?
Absolutely! Freeze the unskewered, unsauced dango balls individually on a tray, then store in a ziplock bag. They can last up to one month. To enjoy, reboil or microwave them with a bit of water to bring back that soft, chewy texture.
What’s the Difference Between Mochi and Dango?
Though similar, mochi and dango are made from different rice flours and have distinct textures. Mochi is made from pounded glutinous rice, resulting in a stretchier, softer texture. Dango is made from rice flour and tends to be denser and more structured. Both are chewy, but in different ways.
Conclusion
We walked through everything you need to get started: the essential ingredients, the right tools, tips for perfect texture, step-by-step cooking methods, sauce options, and even presentation ideas. Each section brings you closer to mastering the art of dango-making.
And let’s be real—once you’ve tasted homemade dango, it’s hard to go back to store-bought. The chewiness, the freshness, and the ability to customize flavors are unmatched. Plus, it’s a fantastic conversation starter and makes for great homemade gifts.
So, go ahead—gather your ingredients, clear your kitchen counter, and dive into this delicious project. You’ll not only learn a new skill but also treat yourself and your loved ones to something truly special.


