Cuban Bread Recipe: Cuban bread is more than just bread—it’s a piece of history baked into a golden, crispy loaf. Originating from the vibrant Cuban-American communities of Florida, particularly in Tampa and Miami, Cuban bread has long been the backbone of iconic dishes like the Cuban sandwich. At first glance, it may look like a long, pale cousin of French or Italian bread, but once you bite into it, you’ll notice the difference immediately. Its crisp crust and soft, slightly chewy inside make it distinct and unforgettable.
Traditionally, Cuban bread is baked with lard, which lends a unique richness that other bread varieties can’t quite match. The simplicity of its ingredients also speaks volumes—just flour, water, yeast, salt, sugar, and lard. No fancy add-ons, just honest ingredients that come together to form a loaf that carries with it the culture and traditions of Cuba and its diaspora.
Over time, Cuban bread has become a staple not only in Cuban households but also across the United States. Its history is tied deeply to immigrant communities, especially in Florida, where Cuban bread bakeries became community landmarks. Today, learning how to make Cuban bread at home is not just about baking—it’s about keeping tradition alive while enjoying one of the most comforting foods imaginable.
Why Cuban Bread is Special
So, what makes Cuban bread so unique? It’s not just bread—it’s an experience. Unlike French baguettes, which are denser and chewier, Cuban bread is lighter with a softer crumb inside. It’s perfect for pressing in a Cuban sandwich (known as a “Cubano”) because it holds up beautifully without overpowering the fillings.
The secret ingredient here is lard. While many breads use butter or oil, Cuban bread’s use of lard gives it a flavor that’s subtly savory and a texture that’s airy yet sturdy. Some modern versions substitute vegetable shortening or oil for lard, but purists will tell you that nothing can truly replace the authentic taste that lard provides.
Another unique aspect is its baking technique. Authentic Cuban bread is often scored with a palm frond across the top before baking, giving it a distinct look. While that might be hard to replicate at home, a simple slash with a sharp knife will still give you that characteristic Cuban bread appearance.
In essence, Cuban bread is special because of its cultural ties, unique ingredients, and its role in one of the most beloved sandwiches in the world. It’s not just bread—it’s a tradition wrapped in a crispy crust.
Ingredients You’ll Need
Before diving into the step-by-step recipe, let’s gather everything you’ll need. Cuban bread doesn’t require a long list of ingredients—simplicity is its beauty. But each ingredient plays a crucial role in creating that perfect balance of flavor and texture.
Here’s what you’ll need:
- Flour (Bread Flour Preferred): The backbone of your bread. Bread flour has a higher protein content than all-purpose flour, which gives Cuban bread its structure and chewiness. If you only have all-purpose flour, that will work too, though the texture might be slightly different.
- Warm Water: Essential for activating the yeast and hydrating the flour. The water should be warm, not hot—about 100–110°F is perfect.
- Active Dry Yeast: This is what makes your bread rise. You can also use instant yeast, but the process will be slightly quicker.
- Sugar: A small amount of sugar not only feeds the yeast but also balances the flavor.
- Salt: Brings out the flavors and controls yeast activity.
- Lard (Traditional) or Shortening: The star ingredient. Lard gives Cuban bread its authentic taste and texture. Vegetable shortening or even neutral oils can be used if lard isn’t available.
Optional but traditional:
- Palm Frond or Banana Leaf Strip: For authenticity, this is placed across the top of the loaf before baking, giving it its signature look. At home, a knife slash works just fine.
Having all your ingredients measured and ready before starting makes the process smooth and enjoyable. Think of this stage as laying out your paint and brushes before starting a masterpiece—you’re setting yourself up for success.
Equipment You’ll Need
Making Cuban bread doesn’t require a fancy bakery setup, but having the right tools will make your job easier and ensure great results. Here’s what you’ll need:
- Large Mixing Bowl: For combining all your ingredients. A sturdy bowl is best, since you’ll be mixing and kneading.
- Wooden Spoon or Dough Hook (Mixer): You can knead by hand the traditional way, but if you have a stand mixer with a dough hook, it can save time and effort.
- Kitchen Scale (Optional but Recommended): Bread baking is all about precision. Measuring flour and water by weight gives more consistent results.
- Clean Towel or Plastic Wrap: To cover the dough while it rises and prevent it from drying out.
- Baking Sheet or Loaf Pan: Traditionally, Cuban bread is baked free-form on a sheet pan, but loaf pans can work too if you prefer uniform shape.
- Sharp Knife or Lame: For scoring the top of the bread before baking.
- Oven with Baking Stone (Optional): A baking stone helps create an evenly crispy crust, but if you don’t have one, a regular oven rack works fine.
If you’re baking Cuban bread for the first time, don’t stress about not having professional equipment. Even with just a bowl, spoon, and oven, you can make authentic Cuban bread that tastes amazing. The magic really comes from the process and ingredients—not the tools.
Step-by-Step Guide to Making Cuban Bread
Now for the exciting part—the actual baking process. Making Cuban bread is a rewarding experience, and while it does take some time (thanks to rising periods), the steps are simple and approachable, even for beginners.
Step 1: Preparing the Yeast Mixture
Start by dissolving your yeast in warm water with a pinch of sugar. Let it sit for 5–10 minutes until it becomes foamy. This step is crucial because it ensures your yeast is alive and active. If nothing happens, your yeast might be expired, and you’ll need to start over with fresh yeast.
Step 2: Mixing the Dough
Once the yeast is activated, add the remaining sugar, salt, lard, and part of the flour. Stir until it comes together, then gradually add more flour until a dough forms. The dough should be slightly sticky but manageable.
Step 3: Kneading the Dough
Knead the dough for about 8–10 minutes by hand or 5–6 minutes with a stand mixer. Kneading develops the gluten, which gives Cuban bread its structure and chew. You’ll know it’s ready when the dough is smooth, elastic, and bounces back when pressed.
Step 4: First Rise (Proofing)
Place the dough in a greased bowl, cover with a towel, and let it rise for about 1–2 hours, or until it doubles in size. This is where patience pays off—the yeast is working its magic.
Step 5: Shaping the Loaves
After the first rise, punch down the dough to release air. Divide it into two equal portions and shape them into long, baguette-like loaves. Place them on a baking sheet lined with parchment paper.
Step 6: Final Rise
Cover the loaves again and let them rise for another 45–60 minutes. They should puff up nicely, getting closer to their final size.
Step 7: Baking Techniques
Preheat your oven to 375°F (190°C). Just before baking, score the tops with a knife or place a strip of palm frond for authenticity. Bake for 25–30 minutes, or until the crust is golden brown and the loaves sound hollow when tapped.
When you pull them out of the oven, your kitchen will smell heavenly—and you’ll know you’ve just created something truly special.
Tips for Achieving the Perfect Cuban Bread
Baking bread can feel intimidating, but Cuban bread is known for being one of the simpler breads to make. With just a few tricks, you can take your loaf from “pretty good” to “authentic bakery-level.”
First, pay attention to your yeast activity. If your yeast isn’t properly activated, your bread won’t rise, and you’ll end up with a dense loaf. Always check that foamy mixture in the beginning—it’s your guarantee that the yeast is alive and ready to do its job.
Next, be mindful of your kneading technique. Over-kneading can make the bread tough, while under-kneading leaves it flat and dense. You’re aiming for smooth, elastic dough that springs back when poked. Think of it like stretching a balloon—you want it to hold shape without tearing.
Another key factor is hydration. If your dough feels too dry, don’t be afraid to add a splash of water. Conversely, if it’s sticking like glue, dust with a little flour. Bread dough should be slightly tacky but not unmanageable.
When it comes to baking, steam is your best friend. Professional bakeries use steam ovens to achieve that signature crisp crust. At home, you can mimic this by placing a shallow pan of water in the oven while baking. This creates steam and helps the crust form beautifully.
Finally, remember the golden rule: don’t cut into the bread too soon. As tempting as it is to slice into your fresh loaf right away, letting it rest for 15–20 minutes ensures the inside sets properly. Patience here will reward you with perfect texture.
Serving Suggestions
Cuban bread is versatile, and while its most famous use is in the iconic Cuban sandwich, it doesn’t stop there.
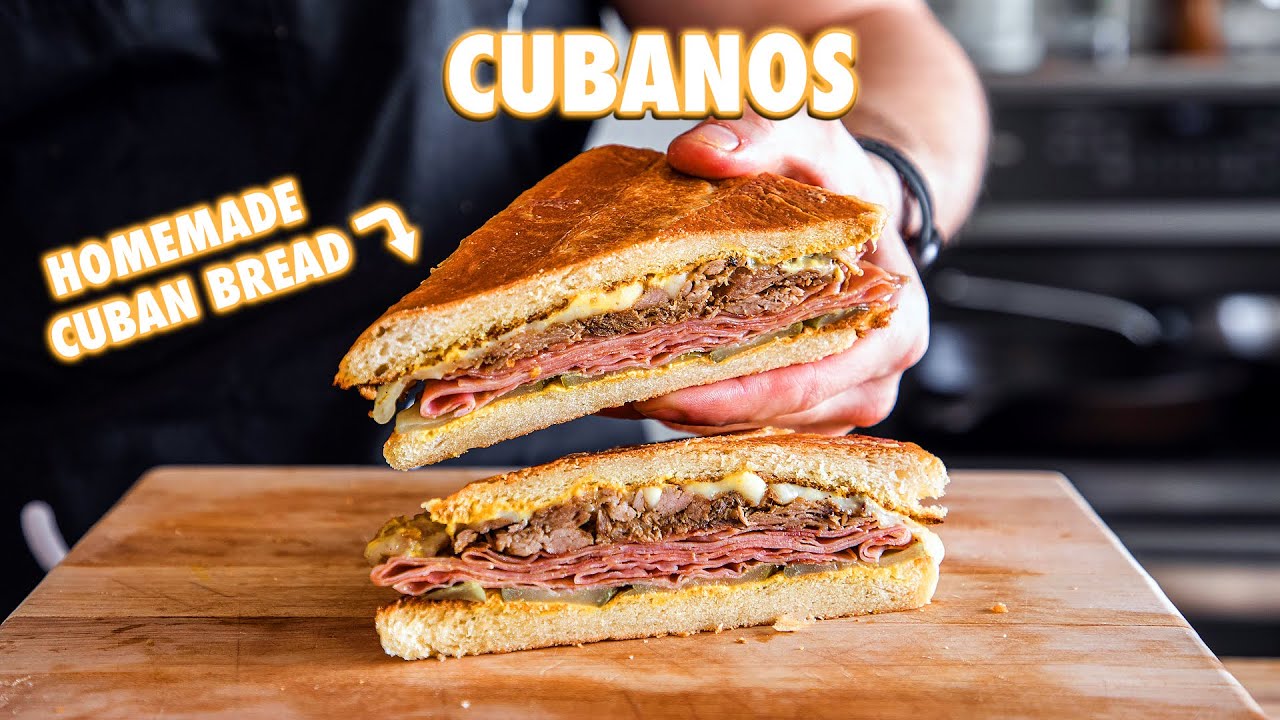
A traditional Cuban sandwich (or Cubano) is made with layers of roast pork, ham, Swiss cheese, pickles, and mustard, all pressed between slices of Cuban bread until crispy and melty. Without Cuban bread, the sandwich simply isn’t the same—it provides the right balance of crispness and chew that holds everything together.
But Cuban bread isn’t just for sandwiches. Here are some other ways to enjoy it:
- With Coffee (Café con Leche): In Cuban households, it’s common to slice Cuban bread, butter it generously, and dunk it into hot café con leche.
- As Toast: Its light, airy crumb makes it perfect for toasting and topping with butter, jam, or even avocado.
- With Soups and Stews: Cuban bread is excellent for soaking up broths, from Cuban black bean soup to hearty stews.
- As a Side Dish: Pair it with roasted meats, grilled fish, or even salads for a complete meal.
The beauty of Cuban bread lies in its adaptability—it’s as at home in a humble breakfast as it is in a restaurant-quality sandwich.
Storing Cuban Bread Properly
Like many homemade breads, Cuban bread is best enjoyed fresh. In fact, one of its quirks is that it tends to go stale faster than other breads because it doesn’t contain preservatives. That means storage is important if you want to make the most of your loaf.
For short-term storage, simply wrap the cooled bread in a clean kitchen towel or place it in a paper bag. This keeps the crust crisp while preventing it from drying out too quickly. Avoid plastic bags unless you want a softer crust.
If you need to store it longer than a day, freezing is the way to go. Slice the bread before freezing so you can easily grab what you need later. Wrap it tightly in plastic wrap and then in aluminum foil or a freezer bag. When you’re ready to enjoy it, just pop it in the oven or toaster for a few minutes—it will taste almost as fresh as the day you baked it.
One thing to avoid? Refrigeration. Storing Cuban bread in the fridge makes it go stale faster due to a process called starch retrogradation. So, either eat it fresh, keep it at room temperature for a day or two, or freeze it for longer storage.
Health Considerations and Substitutions
Cuban bread, like most traditional recipes, wasn’t designed with modern health trends in mind. Its use of lard and white flour makes it indulgent, but with a few tweaks, you can adapt the recipe to your dietary needs.
For a healthier version, you can substitute part of the white bread flour with whole wheat flour. This will add fiber and nutrients, though it will slightly change the texture.
If you’re concerned about lard, replace it with olive oil or vegetable shortening. While this won’t perfectly replicate the authentic flavor, it’s still delicious and lighter. Some bakers even use coconut oil for a unique twist.
For those who are vegan or vegetarian, skipping lard and using plant-based fats is an easy switch. You’ll still get fluffy, flavorful bread that pairs beautifully with your meals.
Gluten-free? Cuban bread is naturally gluten-heavy due to its bread flour base. However, you can experiment with gluten-free bread flour blends, though the results will be different. Cuban bread’s charm lies in its gluten structure, so this substitution may require trial and error.
In moderation, Cuban bread can be enjoyed by almost anyone. After all, bread is meant to be comforting—and what’s life without a slice of warm, fresh-baked bread once in a while?
Cuban Bread vs. Other Breads
At first glance, Cuban bread may look similar to French or Italian loaves, but once you taste it, the differences become clear.
- Cuban Bread vs. French Bread: French baguettes are dense, chewy, and have a thicker crust. Cuban bread, on the other hand, is lighter, airier, and has a thinner crust that cracks easily.
- Cuban Bread vs. Italian Bread: Italian loaves often include olive oil, which gives them a richer, more complex flavor. Cuban bread’s use of lard sets it apart, offering a unique savory taste with a delicate crumb.
- Cuban Bread vs. White Sandwich Bread: Unlike the soft, pillowy texture of commercial sandwich bread, Cuban bread balances crispness and softness, making it perfect for pressing in a sandwich grill.
If bread were personalities, French bread would be serious and structured, Italian bread warm and flavorful, and Cuban bread cheerful and approachable—meant to bring people together at the table.
Cultural Significance of Cuban Bread
Cuban bread is more than a recipe—it’s a symbol of heritage, identity, and community. For many Cuban families, especially those in Florida, it’s tied deeply to tradition and nostalgia. In places like Tampa and Miami, bakeries that produce Cuban bread are not just shops—they’re landmarks, often family-run businesses that have been part of the community for decades.
In Tampa, for example, La Segunda Central Bakery has been baking Cuban bread for over a century. Locals still line up early in the morning to grab fresh loaves, and restaurants proudly serve their sandwiches on this iconic bread. Cuban bread is often delivered in brown paper bags, and in the past, delivery boys would hang them on doors with a nail instead of knocking. This bread wasn’t just food—it was woven into daily life.
In Cuban households, Cuban bread carries the spirit of togetherness. It’s shared at breakfast with café con leche, placed at the dinner table alongside meals, and packed into lunchboxes in the form of Cubanos. For immigrants, especially those who left Cuba decades ago, baking or buying Cuban bread is a way of staying connected to their roots.
Today, Cuban bread stands as a bridge between cultures. It represents the fusion of Cuban tradition with American life. From family gatherings to restaurant menus, it continues to play a starring role in keeping Cuban culinary culture alive, not only in Florida but across the United States.
Troubleshooting Your Cuban Bread
Even the best bakers face hiccups when making bread, and Cuban bread is no exception. Let’s look at some common problems and how to fix them.
Problem: The bread didn’t rise.
Likely cause: Your yeast was inactive. Always check that your yeast foams in warm water before adding other ingredients. Expired yeast is a common culprit.
Problem: The bread is too dense.
Likely cause: Under-kneading or not enough rising time. Remember, kneading builds gluten, and rising allows air bubbles to develop. Be patient—it’s worth the wait.
Problem: The crust is too hard.
Likely cause: Overbaking or too little steam. Try reducing your baking time slightly and adding steam by placing a pan of water in the oven.
Problem: The bread is too soft or soggy.
Likely cause: Cutting too soon after baking. Bread continues to cook slightly after coming out of the oven. Letting it rest for at least 15 minutes ensures the inside sets properly.
Problem: The loaf looks flat.
Likely cause: Over-proofing (letting it rise too long). Once the dough rises and starts to collapse, it loses structure. Stick to the suggested times.
Bread baking is as much an art as it is a science. Mistakes are part of the learning process, and each loaf teaches you something new. The beauty of Cuban bread is its simplicity—it forgives small errors while rewarding effort with delicious results.
Expert Baking Tips for Beginners
If this is your first time baking bread at home, Cuban bread is the perfect place to start. Here are some expert tips to guide you through the process:
- Start with Fresh Ingredients: Old flour, expired yeast, or rancid lard can ruin your bread. Freshness makes all the difference.
- Use the Windowpane Test: After kneading, stretch a small piece of dough between your fingers. If it forms a thin, translucent “windowpane” without tearing, your gluten is developed and ready.
- Don’t Rush the Rise: Bread baking is a game of patience. Even if you’re tempted to shorten the proofing time, letting the dough rise properly ensures better flavor and texture.
- Score with Confidence: When slashing the top of the dough, use a sharp knife and make quick, clean cuts. This allows the bread to expand naturally in the oven.
- Invest in an Oven Thermometer: Ovens are often inaccurate. A thermometer ensures you’re baking at the correct temperature, which is key for a consistent crust.
- Practice, Don’t Stress: Every baker has had their share of “less-than-perfect” loaves. With each attempt, your technique improves, and your confidence grows.
Think of bread baking like riding a bike—awkward at first, but once you get the feel for it, it becomes second nature. Cuban bread, with its simple ingredients and forgiving nature, is the perfect starting point for your bread-baking journey.
FAQs about Cuban Bread Recipe
1. How long does Cuban bread stay fresh?
Cuban bread is best eaten the same day it’s baked. It typically lasts 1–2 days at room temperature before it starts to stale. For longer storage, freeze it.
2. Can I make Cuban bread without lard?
Yes, you can substitute lard with vegetable shortening, olive oil, or even butter. The flavor will be slightly different, but the bread will still turn out delicious.
3. What makes Cuban bread different from French bread?
The main differences are texture and fat.Cuban bread is lighter, airier, and uses lard, whereas French bread is denser, chewier, and usually made with no added fat.
4. Do I need special equipment to bake Cuban bread?
Not at all! A simple mixing bowl, baking sheet, and oven are all you need. While tools like a stand mixer or baking stone can help, they aren’t necessary.
5. Can I use Cuban bread for other sandwiches besides Cubanos?
Absolutely! Cuban bread is versatile and works well with turkey, chicken, veggie fillings, or even just butter and jam.
Conclusion
Cuban bread isn’t just food—it’s tradition, culture, and comfort baked into every loaf. With its crispy crust, soft airy interior, and rich flavor from lard, it stands apart from other breads while still being simple enough for beginners to make at home. Whether you’re enjoying it with café con leche, serving it alongside dinner, or building the perfect Cuban sandwich, this bread has a way of making every meal special.
By following this step-by-step guide, gathering the right ingredients, and practicing a little patience, you’ll be able to bake authentic Cuban bread in your own kitchen. Each loaf you make connects you to a tradition that has been cherished for generations. So, roll up your sleeves, preheat that oven, and start baking—it’s time to bring a little Cuban warmth into your home.


