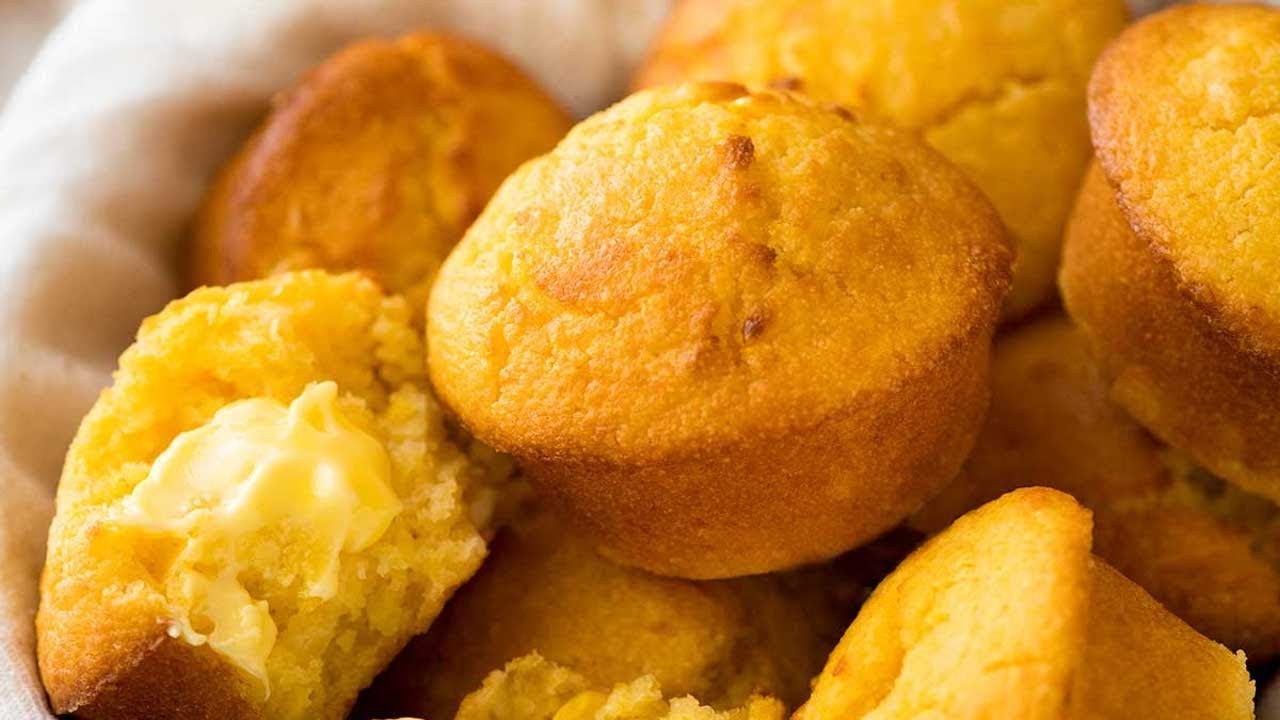
Corn Muffins Recipe: Corn muffins are a warm hug in the form of food. Slightly sweet, slightly crumbly, and perfectly golden, they’re a comfort classic that fits just as well on a breakfast plate as it does beside a bowl of chili. These humble little treats are a staple in American kitchens, especially in the South, where cornbread is practically a love language. Corn muffins take all that’s good about cornbread and package it into an easy, portable size—perfect for on-the-go snacking or quick meal accompaniments.
What makes them truly appealing is their versatility. You can keep them plain for a traditional taste, add a touch of honey for extra sweetness, or even fold in jalapeños and cheddar for a savory kick. They’re the kind of recipe you can whip up in 30 minutes without needing to fuss over complicated steps. Plus, there’s something about that golden dome on top that makes them irresistibly inviting.
If you’ve never made them before, don’t worry—we’re going to break it down step by step so you can get bakery-quality results right in your own kitchen.
What Makes Corn Muffins Special
Corn muffins stand apart from regular muffins because they rely on cornmeal for both texture and flavor. Unlike the soft, cake-like crumb you might expect in a blueberry muffin, corn muffins have a slightly gritty, hearty bite. This comes from the cornmeal, which gives them that signature rustic feel.
Here’s why they’re unique:
- Texture: They strike a balance between fluffy and dense, thanks to the combination of flour and cornmeal.
- Flavor: Naturally sweet with a hint of savory earthiness from the corn.
- Versatility: Can be served sweet, savory, plain, or with mix-ins.
- Speed: You can have them from mixing bowl to plate in under an hour.
They’re also deeply tied to American food history, with roots in Native American cuisine. The early recipes were much simpler, often just cornmeal and water, cooked over an open flame. Over time, with the introduction of baking powder, milk, and eggs, they evolved into the light, fluffy muffins we know today.
A Brief History of Corn Muffins
Corn muffins trace their origins to Native American cornbread, which itself predates the arrival of Europeans in North America. Corn was a staple crop, and grinding it into meal was one of the earliest ways to create filling, portable food. Early settlers quickly adopted the practice, blending Old World baking techniques with New World ingredients.
By the 19th century, baking powder became widely available, allowing bakers to make lighter, fluffier muffins instead of dense, flat cakes. The South became particularly fond of corn-based bread, often skipping sugar entirely for a more savory taste. Meanwhile, in the North, sweeter variations took hold, leading to the modern corn muffin’s slight sweetness.
Today, corn muffins are found everywhere—from casual diners to upscale brunch spots—and they continue to be a favorite at family gatherings, especially during holidays like Thanksgiving.
Ingredients You’ll Need
Before we dive into mixing and baking, let’s get our pantry sorted. The beauty of corn muffins is that they don’t require fancy or hard-to-find ingredients. In fact, you probably already have most of these in your kitchen.
Core Ingredients for Corn Muffins
Here’s the foundation of a classic corn muffin recipe:
- Cornmeal – The star of the show. Choose medium-grind for the perfect balance of texture.
- All-Purpose Flour – Helps give structure and softness to the muffins.
- Baking Powder – Your leavening agent for that nice rise.
- Salt – Balances and enhances flavor.
- Sugar – Adds subtle sweetness (adjust to taste).
- Milk – Moistens the batter and adds richness.
- Eggs – Bind the ingredients and contribute to fluffiness.
- Butter or Oil – Adds moisture and flavor.
Optional Add-Ins for Extra Flavor
Want to jazz up your muffins? Here are some tasty mix-ins:
- Shredded cheddar cheese
- Chopped jalapeños
- Fresh corn kernels
- Cooked bacon bits
- Honey drizzle after baking
Ingredient Substitutions and Alternatives
- Gluten-Free: Use a 1:1 gluten-free baking flour.
- Dairy-Free: Substitute almond milk or oat milk for regular milk, and use coconut oil instead of butter.
- Egg-Free: Replace eggs with flaxseed meal and water (1 tbsp flaxseed meal + 3 tbsp water per egg).
Essential Kitchen Tools and Equipment
Even the best recipe can go sideways without the right tools. Luckily, corn muffins don’t require anything fancy, but a few kitchen basics will make your baking smoother.
Baking Pans and Liners
- Standard 12-cup muffin tin
- Paper muffin liners or silicone baking cups (optional, but help with easy cleanup)
- Non-stick cooking spray if you’re skipping liners
Mixing Bowls and Measuring Tools
- Two mixing bowls (one for dry, one for wet ingredients)
- Measuring cups and spoons for precision
- A whisk or wooden spoon for mixing
- Rubber spatula for scraping batter
Step-by-Step Guide to Making Corn Muffins
Now that we’ve got our ingredients and tools ready, it’s time to dive into the actual baking process. Corn muffins are refreshingly straightforward, but as with all baking, precision matters. Follow these steps closely, and you’ll be rewarded with warm, golden muffins that are soft inside and lightly crisp on top.
Step 1 – Preheat Your Oven
Before you even touch a mixing bowl, turn your oven on. Corn muffins need a consistent, hot temperature to rise properly and bake evenly.
Why preheating matters:
If you put muffins into an oven that’s still warming up, you risk getting flat, dense muffins instead of those fluffy, dome-topped beauties. Preheating ensures that the baking powder activates at the right moment.
Temperature:
- Preheat to 375°F (190°C) for a balance of golden tops and a moist center.
- If you prefer a slightly crispier top, go for 400°F (200°C)—just keep a closer eye on baking time.
Pro Tip: Place your oven rack in the center position for even heat distribution. While your oven heats up, you can start prepping your batter so you’re not wasting time.
Step 2 – Prepare the Dry Ingredients
Grab your larger mixing bowl—this will hold your dry ingredients.
Ingredients to combine:
- 1 cup cornmeal
- 1 cup all-purpose flour
- 1 tablespoon baking powder
- ½ teaspoon salt
- ⅓ cup sugar (adjust to taste)
Method:
- Measure each ingredient carefully—baking is a science, and even small changes can affect texture.
- Use a whisk to blend everything together. This isn’t just about mixing; whisking aerates the flour and evenly distributes the baking powder so your muffins rise evenly.
Why mix dry ingredients separately? It prevents clumps of baking powder or salt from ruining bites of your muffin and ensures that all leavening is evenly spread throughout the batter.
Step 3 – Mix the Wet Ingredients
Now, in a separate bowl, it’s time for the wet team to shine.
Ingredients to combine:
- 1 cup milk
- 2 large eggs
- ½ cup melted butter (or ½ cup vegetable oil)
Method:
- Beat the eggs lightly before adding the milk and melted butter.
- Whisk until smooth—no streaks of egg or milk should be visible.
Pro Tip:
Make sure your melted butter is slightly cooled before adding it to the eggs; hot butter can start cooking the eggs prematurely, which leads to lumps in your batter.
Step 4 – Combine Wet and Dry Mixtures
Here’s where the magic happens—bringing your batter to life.
How to do it right:
- Pour the wet ingredients into the dry ingredients.
- Gently stir with a wooden spoon or rubber spatula until just combined.
- Stop mixing as soon as the flour streaks disappear—overmixing is a muffin’s worst enemy.
Why overmixing is bad: It develops gluten in the flour, making muffins tough instead of tender. Remember: lumps are okay in muffin batter. They’ll bake out beautifully.
Step 5 – Fill the Muffin Tin
Now for the fun part—getting that batter into the pan.
Tips for filling:
- Line your muffin tin with paper liners or grease with non-stick spray.
- Use an ice cream scoop for even portioning—this helps all your muffins bake at the same rate.
- Fill each cup about ⅔ to ¾ full.
Optional step: Sprinkle the tops with a pinch of coarse sugar for a sweet crunch or shredded cheddar for a savory finish.
Tips for Perfect Corn Muffins Every Time
Making great corn muffins isn’t just about following the recipe—it’s about knowing the little tricks that take them from good to irresistible.
Preventing Dry or Crumbly Muffins
Dryness is a common complaint, and it often comes down to two things: overbaking and using too little fat.
How to avoid it:
- Check early: Start checking for doneness a couple of minutes before the recipe suggests. A toothpick inserted in the center should come out clean or with a few moist crumbs.
- Don’t skimp on fat: Butter, oil, or a combination keeps the muffins moist.
- Store correctly: Keep them in an airtight container once cooled.
Achieving a Golden, Crispy Top
That beautiful golden dome is part of the corn muffin’s charm.
Techniques:
- Bake at a slightly higher temperature for the first 5 minutes, then lower it.
- Brush the tops with melted butter before baking for extra crispiness.
- Sprinkle with sugar for a sweet crust or cornmeal for a rustic finish.
Variations of Corn Muffin Recipes
One of the best things about corn muffins is their flexibility. Once you’ve mastered the base recipe, you can tweak it endlessly to suit your mood, the season, or what’s in your pantry.
Savory Corn Muffins
Perfect alongside soups, stews, and barbecued meats, savory corn muffins are hearty and comforting.
How to make them savory:
- Reduce sugar to 1–2 tablespoons or skip it altogether.
- Stir in shredded cheddar cheese, crumbled bacon, or diced jalapeños for a spicy kick.
- Add chopped herbs like chives, rosemary, or thyme for a fresh aroma.
Savory muffins can also serve as a grab-and-go breakfast option when paired with scrambled eggs or avocado slices.
Sweet Corn Muffins
For those who want their muffins to double as dessert, sweet corn muffins are the answer.
Sweet add-ins:
- Honey or maple syrup in place of some sugar for a richer sweetness.
- Fresh berries, such as blueberries or raspberries.
- A swirl of jam or chocolate chips for a treat-like twist.
These are perfect for brunch tables or afternoon tea. Pair them with a cup of coffee or hot cocoa, and you’ve got comfort in a bite.
Gluten-Free Corn Muffins
Cornmeal itself is naturally gluten-free, but most recipes use a blend of cornmeal and wheat flour. For a gluten-free option:
- Replace all-purpose flour with a gluten-free baking blend (1:1 ratio).
- Ensure all other ingredients, especially baking powder, are certified gluten-free.
This variation delivers the same golden, moist muffin while catering to dietary needs.
Storing and Reheating Corn Muffins
Corn muffins are best eaten fresh, but you can store them for later without sacrificing too much flavor or texture.
Best Practices for Storage
- Room Temperature: Store in an airtight container for up to 2 days.
- Refrigeration: Keep in the fridge for up to 5 days—just note that they may dry out faster.
- Freezing: Wrap each muffin individually in plastic wrap and place in a freezer bag. They’ll keep well for up to 3 months.
How to Reheat Without Drying Out
- Oven Method: Wrap muffins in foil and warm at 300°F (150°C) for 10 minutes.
- Microwave: Wrap in a damp paper towel and heat for 15–20 seconds.
- Toaster Oven: Gives a nice crisp to the edges—heat for 5–6 minutes.
Pro tip: Add a small pat of butter when reheating to revive moisture and flavor.
Common Mistakes to Avoid
Baking corn muffins isn’t complicated, but a few easy missteps can ruin your batch.
Overmixing the Batter
This is the number one muffin mistake. Stirring too much develops gluten, leading to tough, chewy muffins instead of tender, crumbly ones.
Rule: Mix just until the dry ingredients disappear into the wet mixture—lumps are fine.
Using Cold Ingredients
Cold eggs, milk, or butter can prevent your batter from blending smoothly and may affect how evenly your muffins rise.
Fix: Let all refrigerated ingredients sit at room temperature for about 20 minutes before starting.
Serving Suggestions
Corn muffins are incredibly versatile—they work in multiple meals and occasions.
Best Foods to Pair with Corn Muffins
- Chili and stews (the classic pairing)
- Fried chicken or barbecue ribs
- Creamy soups like potato or butternut squash
- Breakfast platters with eggs and bacon
Corn Muffins for Breakfast, Lunch, and Dinner
- Breakfast: Serve with butter and honey or alongside scrambled eggs.
- Lunch: Pair with a salad or sandwich for a quick mid-day boost.
- Dinner: Perfect with hearty mains like roasted meats or pasta dishes.
Nutritional Information
It’s nice to know what’s going into your muffins, especially if you’re keeping track of your diet.
Calories and Macronutrient Breakdown
(Average per muffin, using the base recipe)
- Calories: ~200
- Protein: 4g
- Carbs: 28g
- Fat: 8g
- Fiber: 2g
Healthier Ingredient Swaps
- Use whole wheat flour for extra fiber.
- Swap butter for olive oil to boost healthy fats.
- Replace some sugar with applesauce or mashed banana for natural sweetness.
FAQs about Corn Muffins Recipe
1. Can I make corn muffins without sugar?
Yes—just skip the sugar for a more savory muffin, or replace it with honey for natural sweetness.
2. Can I use corn flour instead of cornmeal?
Corn flour is much finer and will change the texture, making the muffins more cake-like. Cornmeal is best for the traditional crumb.
3. How do I know when corn muffins are done?
Insert a toothpick into the center—if it comes out clean or with a few moist crumbs, they’re ready.
4. Can I add fresh corn kernels to the batter?
Absolutely! They’ll add bursts of sweetness and extra moisture.
5. Can I make the batter ahead of time?
It’s best to bake muffins immediately after mixing to ensure they rise properly.
Conclusion
Corn muffins are one of those recipes that everyone should have in their baking repertoire. They’re simple, quick, and endlessly adaptable. Whether you like them sweet or savory, fresh out of the oven or toasted the next day, they have a place in every kitchen. With the right ingredients, a bit of care in mixing, and attention to baking time, you’ll be enjoying golden, fluffy muffins that impress every time.


