Chocolate Pudding Pie Recipe: Few desserts are as universally loved as a rich, creamy chocolate pudding pie. The velvety smooth texture of homemade pudding, combined with a buttery crust and topped with whipped cream, creates a dessert that feels indulgent yet comforting. Whether it’s served at a summer picnic, a holiday dinner, or as a casual weekend treat, this pie always seems to disappear quickly.
Why Chocolate Pudding Pie is a Crowd Favorite
Chocolate pudding pie ticks all the boxes for dessert lovers—it’s easy to make, can be prepared ahead of time, and appeals to nearly everyone’s sweet tooth. The balance of flavors between the slightly salty crust, the sweet chocolate filling, and the airy whipped topping makes it a well-rounded dessert. Plus, you can customize it with nuts, caramel drizzle, or even a sprinkle of sea salt for a gourmet twist.
The Perfect Dessert for Any Occasion
From birthdays to holiday dinners, chocolate pudding pie works for any setting. It’s easy enough for beginner bakers yet elegant enough to impress at formal events. The best part? It can be made with minimal ingredients and doesn’t require hours of labor. If you’re looking for a make-ahead dessert that will wow your guests, this recipe is your new go-to.
Ingredients You’ll Need
Main Ingredients for the Crust
- 1 ½ cups crushed graham crackers or Oreo cookies (depending on your preference)
- ⅓ cup granulated sugar
- 6 tablespoons unsalted butter, melted
The crust is the foundation of your pie, and you have options—graham cracker crusts offer a light, buttery base, while Oreo crusts give a deep chocolatey punch. Mixing the crumbs with sugar and melted butter ensures that the crust holds together and provides a crunchy contrast to the creamy filling.
Ingredients for the Chocolate Pudding Filling
- 2 ¾ cups whole milk
- ½ cup granulated sugar
- ¼ cup unsweetened cocoa powder
- ¼ cup cornstarch
- ¼ teaspoon salt
- 4 ounces semi-sweet chocolate, chopped
- 1 teaspoon vanilla extract
The pudding is the star of the show—rich, creamy, and bursting with chocolate flavor. The combination of cocoa powder and melted chocolate gives depth, while cornstarch thickens the mixture to perfection. Vanilla extract adds a warm, aromatic note.
Topping Ingredients for Extra Flavor
- 1 cup heavy whipping cream
- 2 tablespoons powdered sugar
- 1 teaspoon vanilla extract
Optional: Chocolate shavings, caramel drizzle, or chopped nuts for garnish.
Essential Kitchen Tools
Mixing and Measuring Equipment
To make this recipe foolproof, precise measurements are essential. Have measuring cups, measuring spoons, and at least two mixing bowls ready. A whisk will help keep the pudding smooth, while a rubber spatula is perfect for scraping every bit of chocolate goodness into the crust.
Cooking and Baking Utensils
You’ll need a medium-sized saucepan for making the pudding, a pie dish for the crust, and a wooden spoon for stirring. A baking sheet can also come in handy if you’re baking the crust for extra crispiness.
Serving Accessories
A sharp knife for clean slices, a pie server for presentation, and dessert plates will make serving a breeze. If you want to add an extra flourish, use a piping bag to decorate with whipped cream before serving.
Step-by-Step Guide to Making Chocolate Pudding Pie
Step 1 – Preparing the Pie Crust
- Preheat your oven to 350°F (175°C).
- In a mixing bowl, combine crushed graham crackers (or Oreo cookies) with sugar and melted butter. Stir until the crumbs are evenly coated.
- Press the mixture firmly into the bottom and sides of a 9-inch pie dish. Use the back of a spoon or a flat-bottomed glass for an even layer.
- Bake for 8–10 minutes if you prefer a crisp crust, or chill in the fridge for a no-bake option.
- Let the crust cool completely before adding the pudding.
The crust can make or break your pie, so be sure it’s firmly packed to prevent crumbling when slicing. If using Oreos, you can skip adding sugar since they’re already sweet.
Step 2 – Making the Chocolate Pudding Filling
The heart of this dessert is the luscious, creamy chocolate pudding. Follow these steps carefully to ensure a perfectly smooth texture without lumps:
- Mix the dry ingredients: In a medium saucepan (before turning on the heat), whisk together sugar, cocoa powder, cornstarch, and salt. Combining them first prevents clumping once you add the liquid.
- Add the milk: Gradually whisk in the milk, making sure to dissolve all the dry ingredients evenly. A slow pour helps keep the mixture smooth.
- Cook the pudding: Place the saucepan over medium heat, stirring constantly. The mixture will start to warm, then thicken after about 7–10 minutes. You’ll know it’s ready when it coats the back of a spoon.
- Add chocolate and vanilla: Remove from heat, then stir in the chopped semi-sweet chocolate and vanilla extract until fully melted and silky.
- Cool slightly: Let the pudding rest for 5–10 minutes to cool slightly before pouring into the crust. This prevents the crust from getting soggy.
Pro Tip: If you want your pudding ultra-smooth, strain it through a fine-mesh sieve before pouring it into the crust. This extra step catches any tiny bits of cooked cornstarch or cocoa.
Step 3 – Assembling the Pie
Once your crust is cool and your pudding is ready, it’s time to bring everything together:
- Pour the pudding into the cooled crust, using a spatula to spread it evenly to the edges.
- Tap the pie dish gently on the counter to remove any air bubbles.
- Cover with plastic wrap, pressing it directly onto the pudding surface to prevent a “skin” from forming.
- Chill the pie in the refrigerator for at least 4 hours, but overnight chilling will give you the cleanest slices and richest flavor.
This chilling time is crucial—cutting too soon will result in runny slices. Think of it as letting your pie “set up” for its big debut.
Step 4 – Adding the Topping
The topping is your chance to make this dessert look irresistible:
- In a chilled mixing bowl, whip the heavy cream with an electric mixer until soft peaks form.
- Add powdered sugar and vanilla extract, then continue whipping until stiff peaks form.
- Spread the whipped cream over the chilled pudding layer, or pipe it decoratively for a more elegant presentation.
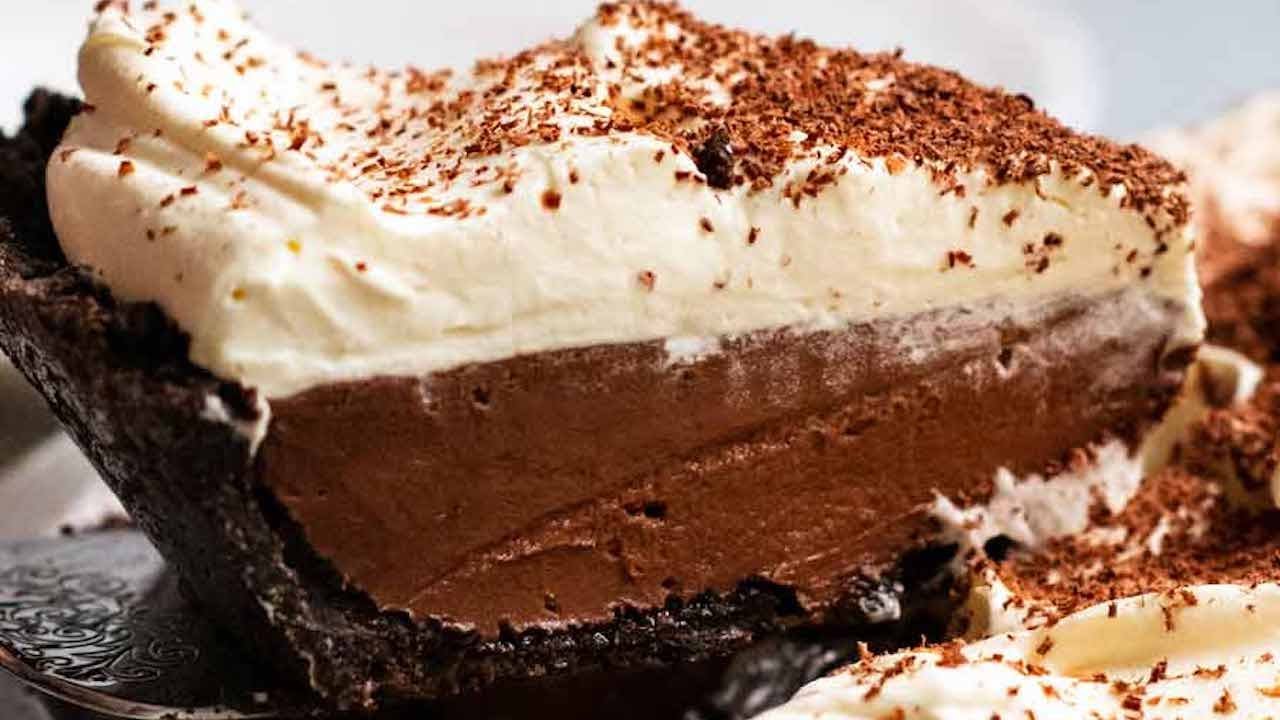
- Add optional garnishes—chocolate shavings, caramel drizzle, or a sprinkle of crushed nuts—for extra texture and flavor.
Not only does whipped cream add a light and airy finish, but it also balances the richness of the chocolate pudding beautifully.
Step 5 – Chilling and Serving
Before slicing into your masterpiece, give it one last chill in the fridge for 30–60 minutes after adding the topping. This helps the layers hold together perfectly when cut.
When ready to serve:
- Use a sharp knife dipped in hot water (then wiped dry) for clean slices.
- Serve on chilled dessert plates for an extra-refreshing touch.
- Store leftovers covered in the refrigerator for up to 3 days.
Your guests will be greeted with a creamy chocolate bite, a buttery crust crunch, and a cloud-like whipped topping—all in one forkful.
Tips for the Perfect Chocolate Pudding Pie
How to Avoid a Runny Pudding
The key to a firm pudding is proper thickening. Always cook the pudding until it fully coats the back of a spoon, and never skip the chilling time. Using the right amount of cornstarch is essential—too little, and the filling won’t hold; too much, and it can taste starchy.
Creative Flavor Variations
- Mocha Twist: Add 1 teaspoon of instant espresso powder to the pudding mix.
- Peanut Butter Layer: Spread a thin layer of peanut butter on the crust before adding the pudding.
- Mint Chocolate: Stir in a few drops of peppermint extract along with the vanilla.
These variations can give your pie a whole new personality while still keeping the rich chocolate core.
Common Mistakes to Avoid
Overcooking or Undercooking the Pudding
One of the most frequent pitfalls in making chocolate pudding pie is getting the pudding texture wrong. If you overcook it, the mixture can become grainy and lose its silky smoothness. Cornstarch-based puddings tend to go from perfect to over-thickened very quickly, so once you see it coat the back of a spoon and it starts to bubble slowly, take it off the heat immediately.
On the other hand, undercooking the pudding will leave it thin and runny, and it won’t set properly even after hours in the fridge. Always give it enough time on medium heat while whisking constantly to ensure the starch fully activates. Think of it like cooking pasta—you want it done “just right” before you stop.
Choosing the Wrong Crust Type
The crust is just as important as the filling. A weak crust can crumble when sliced, making it hard to serve neat pieces. Graham cracker crusts work wonderfully for a light contrast, while Oreo crusts give you a double chocolate hit. Avoid overly thin crusts, as they might get soggy under the pudding’s moisture. Also, make sure to compact the crumbs well with a flat-bottomed glass for stability.
Storing and Serving Suggestions
Refrigeration Tips
Chocolate pudding pie should always be stored in the refrigerator. Keep it covered with plastic wrap or in an airtight container to prevent it from absorbing any fridge odors. Properly stored, it will stay fresh for about 3 days. If you plan to serve it to guests, you can prepare it a day in advance for the best flavor and texture.
Freezing for Later Use
While whipped cream doesn’t always freeze well due to texture changes, you can freeze the pudding pie without the topping. Wrap the pie tightly in plastic wrap and aluminum foil, then freeze for up to 2 months. When ready to serve, thaw in the fridge overnight and add the whipped cream topping just before serving.
Healthier Alternatives for Chocolate Pudding Pie
Low-Sugar and Vegan Versions
For a lower-sugar pie, replace regular sugar with a natural sweetener like monk fruit or stevia. You can also use dark chocolate with a high cocoa percentage for a richer flavor and less sugar.
To make a vegan version, swap whole milk with almond, oat, or coconut milk, and use dairy-free chocolate. Coconut cream works beautifully as a whipped topping substitute.
Gluten-Free Crust Options
Gluten-free graham crackers or almond flour crusts are great alternatives for those with gluten sensitivities. Simply mix with melted butter (or vegan butter) and press into your pie dish as you would a traditional crust.
Nutritional Information
Calories, Fats, and Sugar Content
A traditional slice of chocolate pudding pie (with whipped cream) can contain around 300–400 calories, depending on the crust and toppings. Most of these calories come from fats and sugars, making it a treat best enjoyed in moderation.
Portion Control Tips
Cut the pie into smaller slices to help keep portions in check. You can also serve it in small dessert cups or shot glasses for a lighter treat that still satisfies a sweet craving.
FAQs about Chocolate Pudding Pie Recipe
1. Can I make chocolate pudding pie without baking?
Yes! Simply prepare a no-bake crust by pressing crumbs and butter into a pie dish, then chilling it before adding the pudding.
2. What is the best chocolate for pudding pie?
Semi-sweet chocolate strikes a perfect balance, but you can use dark chocolate for a more intense flavor.
3. Can I prepare it a day ahead?
Absolutely. In fact, chilling overnight often improves the texture and flavor.
4. How long can it stay fresh in the fridge?
About 3 days when stored properly in an airtight container.
5. Can I substitute milk with almond milk?
Yes, almond milk works well, though the texture may be slightly lighter.
Conclusion
Chocolate pudding pie is a dessert that truly checks all the boxes—it’s creamy, rich, easy to make, and endlessly customizable. With a buttery crust, smooth chocolate filling, and fluffy whipped topping, it’s the kind of dessert that earns you compliments every single time. By following these step-by-step instructions and tips, you’ll create a pie that not only tastes incredible but also slices beautifully for a picture-perfect presentation.


