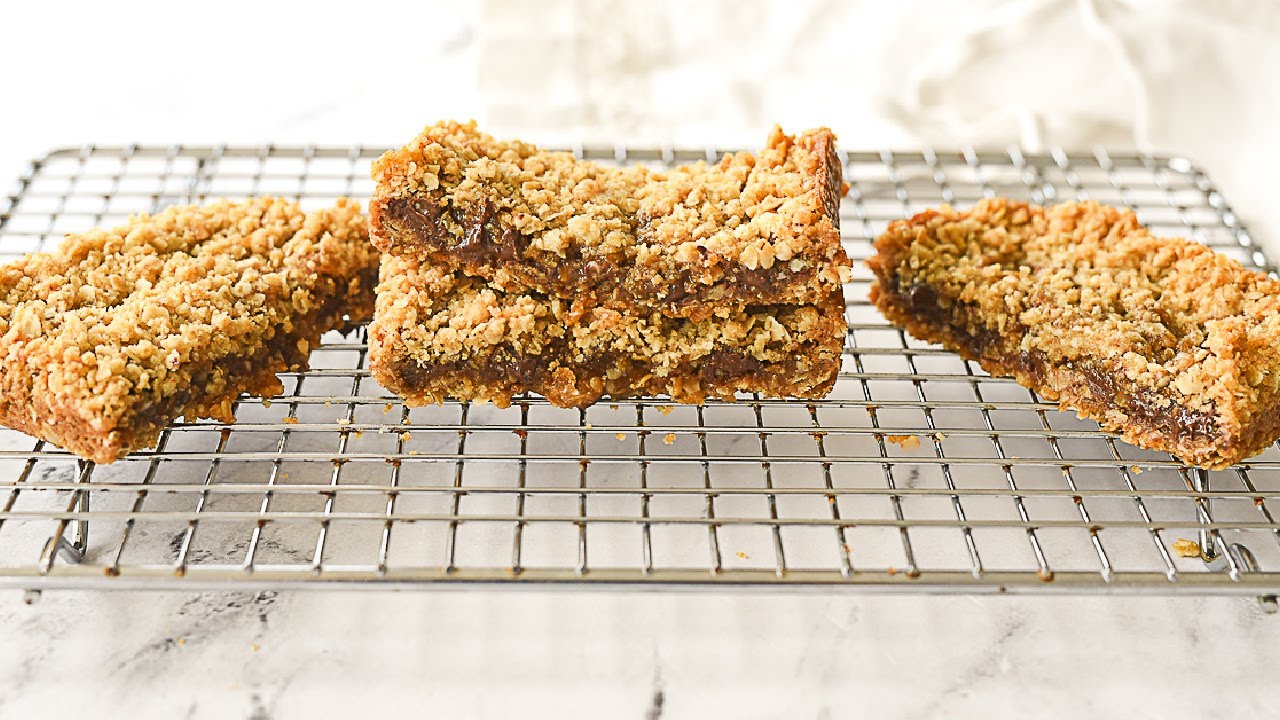
Carmelitas Recipe: Carmelitas are one of those desserts that you try once and then can’t stop thinking about. They’re chewy, gooey, and layered with flavors that make your taste buds do a little happy dance. Essentially, Carmelitas are dessert bars made with a buttery oat crust, a rich caramel filling, and a generous sprinkling of chocolate chips. When baked together, these layers create a melt-in-your-mouth treat that’s both comforting and indulgent.
One of the best things about Carmelitas is their texture. The oats add a subtle crunch and nuttiness, while the caramel brings smooth sweetness, and the chocolate chips melt into the filling for that extra creamy richness. They’re the kind of treat you can enjoy with a glass of milk, a hot cup of coffee, or even just on their own when you need a little pick-me-up.
Unlike more complicated desserts, Carmelitas are straightforward to make and don’t require fancy techniques. Even if you’re a beginner in the kitchen, you can whip up a batch without much stress. The combination of pantry staples like flour, oats, butter, sugar, and chocolate chips makes them an accessible dessert for anyone looking to impress without spending hours baking.
The Origin of Carmelitas
While the exact origins of Carmelitas aren’t crystal clear, they likely gained popularity in the United States in the mid-to-late 20th century, when dessert bars became a staple at potlucks and bake sales. Recipes featuring oats, chocolate, and caramel began popping up in community cookbooks and family recipe boxes, each with its own twist.
Carmelitas fit perfectly into that era of comfort baking—simple recipes that deliver big on flavor. The name itself suggests indulgence, with “Carmelitas” evoking thoughts of caramel richness and perhaps a hint of elegance. Over time, the recipe has evolved, with bakers experimenting by adding nuts, using salted caramel, or even swapping in white chocolate.
Today, Carmelitas remain a beloved classic, often served during the holidays, but they’re just as welcome at a summer picnic or a rainy-day movie marathon. Their adaptability and long shelf life make them a go-to for anyone who loves to bake and share.
Why You’ll Love This Carmelitas Recipe
Perfect for Any Occasion
One of the best things about Carmelitas is their versatility. Hosting a dinner party? Serve them as a decadent dessert. Need a bake sale contribution? They’ll sell out fast. Want something sweet for a weekend treat? They fit the bill perfectly. These dessert bars have a universal appeal, which is why they’re a favorite across generations.
Carmelitas also travel well. You can bake them ahead of time, store them in an airtight container, and they’ll still taste amazing a few days later. This makes them ideal for gifting or taking to work for a mid-afternoon snack. Their combination of chewy texture and gooey filling ensures they remain delicious, even when eaten at room temperature.
What’s more, you can easily scale this recipe up or down depending on your needs. Hosting a big crowd? Double the batch in a larger baking dish. Just baking for yourself? Halve the recipe and save some for later. The flexibility of Carmelitas is part of what makes them such a beloved dessert.
The Irresistible Combination of Flavors
When it comes to flavor, Carmelitas are a triple threat: buttery oats, velvety caramel, and rich chocolate. Each bite offers a perfect balance of sweet and salty, chewy and crunchy. The oats give the dessert a rustic, homey feel, while the caramel adds luxurious smoothness. The chocolate chips, meanwhile, provide just the right amount of cocoa depth without overpowering the other ingredients.
This flavor combination is universally appealing because it engages multiple taste sensations. The caramel provides that melt-on-your-tongue sweetness, while the oats add earthiness, and the chocolate chips contribute both richness and slight bitterness. It’s this harmony of flavors that keeps people coming back for more.
You can also customize the taste to suit your preferences. Add a pinch of sea salt for a salted caramel twist, sprinkle in some chopped pecans or walnuts for a nutty crunch, or use dark chocolate chips for a more intense cocoa flavor. No matter how you tweak the recipe, the core combination of oats, caramel, and chocolate will never fail you.
Key Ingredients for Carmelitas
The Role of Oats in the Crust
Oats are more than just a filler in Carmelitas—they’re the backbone of the dessert’s structure and texture. Rolled oats, in particular, give the crust and topping their signature chewiness. They also add a nutty flavor that balances the sweetness of the caramel and chocolate.
In most Carmelitas recipes, oats are combined with flour, brown sugar, and butter to create a crumbly mixture. Half of this mixture is pressed into the bottom of the baking dish to form the base, while the other half is sprinkled on top to create the crumbly topping. This layering ensures that every bite has both a sturdy base and a crunchy finish.
If you want to experiment, you can use quick oats for a softer texture or steel-cut oats for extra chew (though you may need to adjust baking times). For those who prefer gluten-free desserts, gluten-free oats and flour blends can easily be substituted without compromising taste or texture.
Why Use Sweetened Condensed Milk
Sweetened condensed milk is a key player in creating the caramel layer for Carmelitas. When combined with butter and brown sugar, it transforms into a thick, creamy caramel sauce that’s rich and indulgent. Its high sugar content helps achieve that sticky, gooey consistency that makes Carmelitas so addictive.
Unlike regular milk, sweetened condensed milk has a dense, syrupy texture due to the evaporation of most of its water content. This concentration not only boosts its sweetness but also ensures the caramel layer holds together instead of soaking into the crust.
It’s worth noting that you can make your own sweetened condensed milk if you prefer a homemade approach. However, using the canned version saves time and guarantees consistency, which is important for achieving that perfect caramel layer every time.
The Magic of Caramel and Chocolate Chips
Caramel and chocolate are the stars of this recipe, and together they create a flavor profile that’s rich, comforting, and just a little bit indulgent. The caramel, made from sweetened condensed milk, butter, and brown sugar, forms the gooey middle layer that binds the bars together.
Chocolate chips, on the other hand, melt slightly into the caramel as the bars bake, creating little pockets of creamy chocolate throughout. Semi-sweet chocolate chips are a popular choice because they balance the caramel’s sweetness, but you can use milk chocolate for a sweeter dessert or dark chocolate for a richer taste.
For an extra-special twist, you could even mix in some white chocolate chips or caramel chips along with the traditional ones. The result is a dessert that’s complex in flavor but still incredibly easy to make.
Tools and Equipment You’ll Need
Baking Essentials
While Carmelitas don’t require specialized equipment, having the right tools will make the process smoother and ensure consistent results. Here’s what you’ll need:
- 9×13-inch baking dish – Ideal for even cooking and creating the perfect bar thickness.
- Mixing bowls – One for the oat crust mixture and another for the caramel sauce.
- Measuring cups and spoons – Accurate measurements are key to balanced flavors and textures.
- Saucepan – For melting butter and preparing the caramel sauce.
- Rubber spatula – For scraping every last bit of caramel goodness from the pan.
- Parchment paper – Makes removing the bars from the pan a breeze and reduces cleanup.
These essentials will help you execute the recipe efficiently without unnecessary frustration.
Optional Gadgets for Better Results
While not strictly necessary, a few extra tools can elevate your Carmelitas game:
- Stand mixer or hand mixer – Speeds up mixing, especially when creaming butter and sugar.
- Digital kitchen scale – For precise measurements, particularly useful when baking for consistency.
- Offset spatula – Helps spread caramel and oat mixtures evenly without disturbing the layers.
- Cooling rack – Ensures the bars cool evenly and prevents soggy bottoms.
By investing in these tools, you can make the baking process even more enjoyable while guaranteeing professional-quality results at home.
Step-by-Step Carmelitas Recipe
Step 1 – Preparing the Ingredients
Before you even think about turning on the oven, gather all your ingredients and measure them out. This will not only save time but also prevent mistakes—like realizing halfway through that you’re out of brown sugar.
For this recipe, you’ll need:
- 2 cups rolled oats
- 2 cups all-purpose flour
- 1 ½ cups brown sugar, packed
- 1 teaspoon baking soda
- 1 cup unsalted butter, melted
- 14 oz can sweetened condensed milk
- 1 cup semi-sweet chocolate chips
- 1 ½ cups caramel candies or homemade caramel sauce
- 2 tablespoons heavy cream
Prepping everything ahead of time—also known as “mise en place” in culinary terms—ensures a smoother baking process. You’ll be able to move seamlessly from step to step without the stress of last-minute scrambling.
Step 2 – Making the Oat Crust
The oat crust is the foundation of your Carmelitas, and getting it right sets the stage for that perfect bite. In a large mixing bowl, combine your rolled oats, all-purpose flour, brown sugar, and baking soda. Stir them together until everything is evenly distributed. This dry mixture is what gives the bars their structure and chewy texture.
Next, pour in the melted butter and mix until the oats and flour are evenly coated. The mixture should have a crumbly texture but still stick together slightly when pressed between your fingers. This means you’ve got the right balance of moisture and dry ingredients.
Take half of this oat mixture and firmly press it into the bottom of your prepared 9×13-inch baking dish lined with parchment paper. You want a solid, even layer so the caramel filling won’t seep through. Use the back of a spoon or an offset spatula to smooth it out—think of it like laying a foundation for a house; you want it level and sturdy.
Once the bottom layer is in place, pop the dish into a preheated oven at 350°F (175°C) for about 10 minutes. This pre-baking step helps the crust set, making it strong enough to hold up to the caramel filling later.
Step 3 – Preparing the Caramel Filling
Now comes the magic—the gooey caramel that makes Carmelitas so irresistible. In a medium saucepan over low to medium heat, combine your caramel candies (or homemade caramel sauce) with the heavy cream. Stir constantly to prevent burning and ensure a smooth, lump-free texture.
If you’re using caramel candies, they’ll take a few minutes to melt down completely. Patience is key here; rushing the process can cause the caramel to scorch. Once melted, stir in the sweetened condensed milk. This not only adds sweetness but also makes the caramel creamier and more stable when baked.
Your kitchen will start to smell like a candy shop at this point, and it’s tempting to just eat the caramel with a spoon—but resist! This silky mixture will be the heart of your dessert, so pour it carefully over the pre-baked oat crust once it’s ready. Spread it evenly, making sure it reaches all corners of the dish.
Step 4 – Layering and Baking
After spreading the caramel filling, sprinkle the chocolate chips evenly over the top. The heat from the caramel will begin to soften them, creating pockets of molten chocolate that meld beautifully with the caramel.
Now, take the remaining oat mixture and gently crumble it over the chocolate layer. Don’t press too hard—you want this top layer to stay slightly crumbly for that signature texture.
Place the dish back into the oven and bake for another 15–20 minutes, or until the top is golden brown and the edges are bubbling. Keep a close eye during the last few minutes to prevent over-browning.
The smell at this point will be nothing short of intoxicating—rich caramel, toasty oats, and warm chocolate blending into a dessert symphony.
Step 5 – Cooling and Cutting
As tempting as it is to dive right in, patience will reward you here. Carmelitas need to cool completely before cutting to allow the caramel to set. If you cut them too soon, you’ll end up with a delicious but gooey mess.
Once out of the oven, place the baking dish on a cooling rack and let it sit at room temperature for at least two hours. If you’re in a hurry, you can pop them in the fridge for about an hour to speed things up, but the texture is best when cooled slowly.
When ready to cut, use a sharp knife and make sure to wipe the blade between cuts to keep the edges neat. Carmelitas can be cut into squares or bars, depending on how generous you want your portions to be.
Store leftovers in an airtight container at room temperature for up to three days, or refrigerate for a firmer texture. They also freeze beautifully—just wrap them individually in plastic wrap and store in a freezer-safe bag for up to three months.
Tips for Perfect Carmelitas Every Time
Choose Quality Ingredients
The better the ingredients, the better the final dessert. Since this recipe relies on just a few main components—oats, caramel, chocolate—it’s worth investing in high-quality versions. Opt for real butter instead of margarine, as it provides richer flavor and a more tender crust. Use pure vanilla extract if you choose to add extra aroma, and consider organic rolled oats for a heartier texture.
For the chocolate, high-quality semi-sweet or dark chocolate chips melt better and taste richer than generic brands. As for caramel, homemade is always an option, but if you’re going for store-bought candies, pick a brand known for smooth, creamy texture rather than grainy or overly hard varieties.
Don’t Skip Pre-Baking the Crust
It might be tempting to just layer everything at once, but pre-baking the bottom crust is essential. Without this step, the caramel may seep into the raw dough, making it soggy rather than crisp and chewy. That quick 10-minute bake helps the base firm up and ensures the final bars hold their shape.
Be Patient with Cooling
The hardest part of making Carmelitas is waiting for them to cool before cutting. This cooling time allows the caramel to set and the flavors to meld. Cutting too early will give you a gooey mess that’s hard to serve. A little patience here goes a long way toward picture-perfect dessert bars.
Flavor Variations to Try
Salted Caramel Twist
Add a sprinkle of flaky sea salt over the caramel layer before adding the top oat crust. This creates that sweet-and-salty contrast that makes desserts extra addictive.
Nut Lovers’ Version
Chopped pecans or walnuts add crunch and a toasty, nutty flavor. Sprinkle them over the caramel layer along with the chocolate chips for extra texture.
White Chocolate & Raspberry
For a fruitier take, swap the semi-sweet chocolate chips with white chocolate and drizzle raspberry preserves over the caramel before adding the top crust.
Peanut Butter Caramelitas
Mix a few tablespoons of peanut butter into the caramel sauce for a nutty, rich variation that pairs beautifully with chocolate.
Serving Suggestions
Carmelitas are delicious as-is, but you can elevate the experience with a few serving ideas:
- With Ice Cream – Serve warm Carmelitas with a scoop of vanilla ice cream for the ultimate dessert.
- Coffee Pairing – Enjoy with a hot cup of coffee or cappuccino for a cozy afternoon treat.
- Holiday Dessert Platter – Include them alongside brownies, cookies, and fudge for festive gatherings.
- Gift Boxes – Wrap them individually and place them in a decorated tin or box for a thoughtful homemade gift.
Storage and Make-Ahead Tips
Room Temperature Storage
Store your Carmelitas in an airtight container at room temperature for up to three days. This keeps the crust chewy and the caramel soft.
Refrigeration
If you prefer a firmer texture, refrigerate them for up to one week. Just remember that refrigeration can make caramel slightly harder, so let them sit at room temperature for a few minutes before serving.
Freezing
For long-term storage, wrap individual bars in plastic wrap and place them in a freezer-safe bag. They’ll keep for up to three months. To serve, thaw at room temperature for about an hour.
Common Mistakes to Avoid
- Skipping the Lining – Always use parchment paper in your baking dish; it makes removing and cutting the bars much easier.
- Overbaking – The top should be golden, not dark brown. Overbaking can make the crust dry and the caramel too firm.
- Cutting Too Soon – Let the bars cool completely; otherwise, they’ll fall apart when sliced.
- Uneven Layering – Spread caramel and chocolate evenly so every bite is balanced.
FAQs about Carmelitas Recipe
1. Can I make Carmelitas gluten-free?
Yes, simply swap regular flour for a gluten-free flour blend and use certified gluten-free oats.
2. Can I use homemade caramel sauce?
Absolutely! Just make sure it’s thick enough to hold its shape when layered in the bars.
3. What’s the best way to cut Carmelitas cleanly?
Use a sharp knife, wipe it clean between cuts, and make sure the bars are fully cooled.
4. Can I make these without chocolate chips?
Yes, you can skip the chocolate or replace it with white chocolate, peanut butter chips, or even butterscotch chips.
5. How do I keep my caramel from hardening too much?
Avoid overcooking the caramel on the stove and don’t overbake the bars. Adding heavy cream helps keep the caramel soft.
Conclusion
Carmelitas are the kind of dessert that never goes out of style—rich, gooey, chewy, and full of irresistible flavor. Whether you’re baking them for a holiday party, a weekend treat, or just because you deserve something sweet, this step-by-step recipe ensures success every time. With a buttery oat crust, a creamy caramel center, and pockets of melted chocolate, these dessert bars are guaranteed to win over everyone who tries them.
So grab your ingredients, preheat the oven, and get ready to fill your kitchen with the comforting aroma of homemade Carmelitas. They’re not just dessert—they’re a little square of happiness in every bite.


