Caramel Candy Recipe: Caramel candy is a beloved treat that has delighted sweet tooths for generations. Its smooth, creamy texture combined with that deep, rich sweetness makes it a timeless favorite. Whether you enjoy it plain, with a touch of sea salt, or covered in chocolate, caramel candy offers a melt-in-your-mouth experience unlike any other. The beauty of caramel is that it can be enjoyed in so many forms—soft and chewy, hard and brittle, or as a topping for ice cream and desserts.
But making caramel candy at home is more than just following a recipe—it’s about crafting a small piece of edible art. Each stage, from melting the sugar to cutting the final pieces, requires a touch of patience and attention. The reward, however, is worth every second: golden, buttery bites that taste far better than anything you’ll find in a store.
Caramel isn’t just candy; it’s a tradition in many families. People make it for holidays, special events, or as homemade gifts. Once you learn the technique, it’s a skill you can use to create countless variations.
What Makes Caramel Candy So Special
Caramel candy stands out because it offers a complex flavor profile that comes from a simple process: caramelization. As sugar heats up, its molecules break down and create hundreds of new flavor compounds, ranging from sweet and buttery to nutty and slightly bitter. This is why caramel has such a distinctive taste—it’s a perfect balance of sweet and savory with a depth that pure sugar doesn’t have.
Another reason caramel is so loved is its versatility. You can make it soft and chewy for a satisfying bite, or cook it longer for a firmer texture that snaps in your mouth. You can also pair it with a variety of other flavors—chocolate, vanilla, coffee, nuts, and even chili for a spicy kick.
Making caramel at home also gives you complete control over the ingredients. You can adjust the sweetness, choose high-quality butter and cream, or experiment with alternative sugars like coconut sugar for a richer flavor.
Brief History of Caramel Candy
Caramel has a long and fascinating history. It’s believed that as far back as the 17th century, American settlers were making early versions of caramel by boiling sugar and water together. However, these early caramels were likely hard candies rather than the soft, buttery confections we enjoy today.
The addition of milk and butter in the 19th century transformed caramel into the smooth treat we know now. This change likely came from advancements in dairy processing and the growing availability of fresh cream. By the late 1800s, caramel candies were mass-produced in factories, making them more accessible to the public.
Interestingly, some of the world’s most famous candy brands—such as Hershey’s—actually started with caramel before moving into chocolate. Caramel was not only a popular sweet but also an important stepping stone in confectionery history.
Ingredients for Perfect Caramel Candy
Essential Ingredients You Need
To make perfect caramel candy, you only need a few simple ingredients, but the quality of each one matters:
- Granulated Sugar – The main component of caramel. White sugar works best for a clean, golden color.
- Unsalted Butter – Adds richness and smoothness. High-quality butter makes a noticeable difference.
- Heavy Cream – Creates the creamy texture. Must be at least 36% fat for best results.
- Corn Syrup – Helps prevent sugar crystals from forming, keeping your caramel smooth.
- Salt – Enhances flavor. Sea salt works beautifully here.
- Vanilla Extract – Adds warmth and depth to the final taste.
Pro tip: Measure everything before you start cooking. Caramel moves fast once it reaches certain temperatures, and having everything ready prevents mistakes.
Optional Add-Ins for Extra Flavor
While classic caramel is amazing on its own, adding extra ingredients can take it to the next level:
- Sea Salt Flakes – For a salted caramel twist.
- Chopped Nuts – Almonds, pecans, or hazelnuts add crunch and nutty flavor.
- Chocolate Drizzle – Adds richness and a gourmet feel.
- Espresso Powder – For a subtle coffee undertone.
- Spices – Cinnamon, nutmeg, or even cardamom for a warm, exotic touch.
Experimenting with flavors is part of the fun. Just remember that anything you add should complement, not overpower, the caramel’s natural sweetness.
Tools and Equipment Required
Must-Have Kitchen Tools
Making caramel candy isn’t complicated, but it does require a few essential tools:
- Heavy-Bottomed Saucepan – Prevents burning by distributing heat evenly.
- Candy Thermometer – Ensures accuracy when reaching the perfect temperature.
- Wooden Spoon or Heatproof Silicone Spatula – For stirring without melting or warping.
- Measuring Cups and Spoons – Precision matters in candy-making.
- Baking Pan – Lined with parchment paper for cooling and cutting the candy.
- Sharp Knife or Kitchen Scissors – For cutting pieces once cooled.
- Wax Paper – For wrapping candies individually.
Safety Tips When Working with Hot Sugar
Caramel-making involves extremely hot sugar syrup—often over 300°F (150°C)—which can cause severe burns if mishandled. Here’s how to stay safe:
- Never touch hot caramel directly.
- Use long-handled spoons or spatulas to stir.
- Keep children and pets out of the kitchen while cooking.
- Wear oven mitts when pouring caramel into pans.
- Work in a clean, uncluttered space to avoid accidents.
Caramel can be intimidating at first, but with a little caution and preparation, it’s completely manageable.
Preparing Your Workspace
Setting Up for Success
Before you even turn on the stove, set yourself up for success by organizing your space. Have all your ingredients measured and placed in small bowls, and make sure your tools are within arm’s reach. Lay out your parchment-lined baking pan so it’s ready to go the moment your caramel reaches the right temperature.
Having everything prepared not only reduces stress but also ensures your caramel doesn’t overcook while you scramble to find a missing tool.
Prepping Ingredients in Advance
Prepping ingredients is crucial because caramel-making is a fast process. Once sugar starts heating, you have only seconds to make adjustments before it moves to the next stage.
- Measure sugar, corn syrup, and cream before starting.
- Cut butter into small pieces so it melts quickly and evenly.
- Warm your cream slightly to prevent sudden temperature changes when adding it to hot sugar—this helps avoid splattering.
By following these prep steps, you can focus entirely on the process and enjoy a smoother cooking experience.
Step-by-Step Caramel Candy Recipe
Step 1 – Heating the Sugar
Making caramel starts with heating the sugar until it melts into a golden liquid. You can do this using the dry method (melting sugar alone) or the wet method (melting sugar with water and corn syrup). The wet method is easier for beginners because it reduces the risk of burning.
Place sugar, corn syrup, and water into a heavy-bottomed saucepan. Heat over medium heat without stirring until the sugar dissolves completely. Once dissolved, you can gently swirl the pan to ensure even cooking. Watch carefully as the mixture begins to change color—it can go from golden brown to burnt in seconds.
The key is patience. Let the heat work its magic without rushing the process.
Step 2 – Adding Butter and Cream
Once your sugar reaches a light amber color, it’s time to add the butter. Drop it in carefully—hot caramel will bubble vigorously when fat is introduced. Stir slowly until the butter is fully melted and incorporated.
Next, slowly pour in the warm heavy cream. The bubbling will intensify, so keep your hands and face a safe distance from the pot. Adding the cream too quickly can cause splattering, so go slow and steady.
This stage transforms the caramel from a simple sugar syrup into a rich, creamy confection. The fats from the butter and cream coat the sugar molecules, giving the candy its smooth, chewy texture. The aroma at this point is absolutely mouthwatering—a buttery, toffee-like scent that fills the kitchen.
Once the cream is fully mixed in, you’re ready for the most critical part: temperature control.
Step 3 – Reaching the Perfect Temperature
Temperature is the heart of candy-making. If you want soft, chewy caramel, you’ll need to heat the mixture to the “firm ball” stage—about 245°F (118°C). If you prefer a firmer caramel that holds its shape better, go a little higher—around 250°F (121°C).
Use a candy thermometer to track the temperature accurately. Keep the heat steady and avoid rushing. Stir occasionally to prevent scorching, but be careful not to introduce too much air, as bubbles can make your caramel grainy.
If you overshoot the temperature, your caramel will be too hard and brittle. Undercook it, and you’ll end up with a sticky mess that never quite sets. Patience and precision are key here—trust your thermometer.
Step 4 – Pouring and Cooling
Once you’ve reached the desired temperature, immediately remove the saucepan from the heat. Stir in your vanilla extract at this point—adding it earlier can cause the flavor to burn off.
Quickly but carefully pour the hot caramel into your prepared parchment-lined baking pan. Avoid scraping the bottom of the pot, as that can introduce hardened bits into your smooth caramel.
Allow the caramel to cool at room temperature for at least 2–3 hours. Cooling too quickly in the fridge can cause uneven texture, while cooling too slowly can make cutting messy. Once set, the caramel should be firm enough to hold its shape but soft enough to cut cleanly.
Step 5 – Cutting and Wrapping the Candies
When the caramel is completely cool, lift it from the pan using the parchment paper. Place it on a cutting board and use a sharp knife or greased kitchen scissors to cut it into bite-sized squares or rectangles.
To prevent sticking, wrap each piece in a small square of wax paper, twisting the ends like traditional candy wrappers. Not only does this keep them fresh, but it also makes them perfect for gifting.
Properly wrapped caramel candies can last up to 3 weeks at room temperature—though they rarely last that long once people know they’re in the house.
Common Mistakes and How to Avoid Them
Overcooking or Undercooking Caramel
- Overcooking: Leads to hard, bitter caramel. Always remove from heat the moment you reach your target temperature.
- Undercooking: Results in sticky caramel that won’t set. Double-check your thermometer and heat slowly.
Preventing Sugar Crystallization
Crystallization is the enemy of smooth caramel—it makes the texture grainy. To avoid this:
- Use corn syrup, which helps keep sugar molecules separate.
- Avoid stirring once sugar dissolves.
- Brush the sides of your saucepan with a wet pastry brush to wash away stray sugar crystals.
Storing Caramel Candy
Best Practices for Freshness
Caramel candy, when stored correctly, can stay delicious for weeks. The key is protecting it from both air and moisture. Always wrap each piece in wax paper or parchment to prevent sticking. Store the wrapped candies in an airtight container, preferably in a cool, dry place away from direct sunlight.
If your home tends to be warm, you can refrigerate caramel candies, but be sure to bring them back to room temperature before serving so they regain their soft, chewy texture. Caramel straight from the fridge can feel too firm and lose its melt-in-your-mouth appeal.
Humidity is another enemy of caramel. Too much moisture in the air can make the candies sticky, while overly dry conditions can cause them to harden. The sweet spot is a stable, moderate environment.
Long-Term Storage Options
For longer storage, caramel candies can be frozen. Place wrapped candies in a freezer-safe bag, pressing out as much air as possible before sealing. They can last up to 6 months frozen without losing quality.
To thaw, simply place them in the refrigerator for a few hours, then let them come to room temperature before unwrapping. This gradual thawing prevents condensation from forming, which could make them sticky.
Flavor Variations to Try
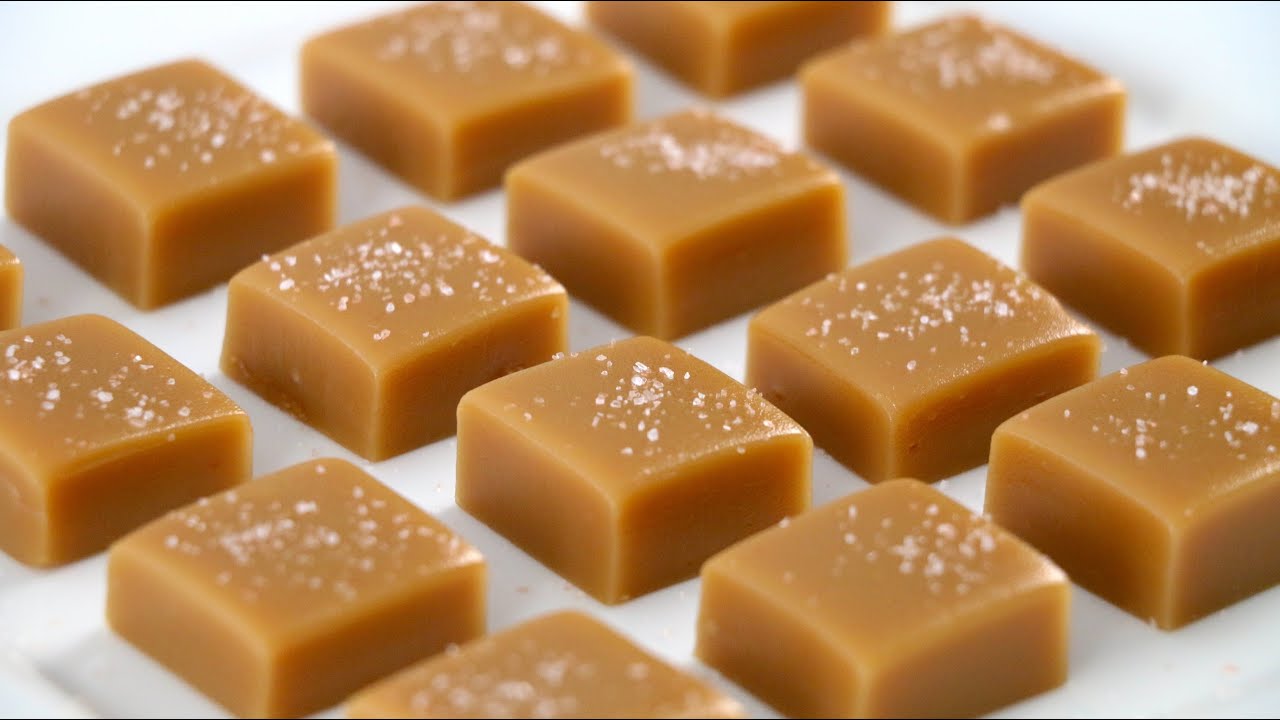
Salted Caramel Version
Salted caramel has taken the dessert world by storm, and for good reason—it’s a perfect balance of sweet and savory. To make this version, simply sprinkle flaky sea salt over the top of your caramel immediately after pouring it into the pan. The heat will help the salt crystals stick without melting completely, leaving bursts of flavor in every bite.
Chocolate-Dipped Caramel Candy
If you want a truly decadent treat, try dipping cooled caramel pieces into melted dark, milk, or white chocolate. Let the chocolate set completely before wrapping. This combination offers a delightful contrast—the snap of chocolate followed by the soft chew of caramel.
For an extra touch, sprinkle crushed nuts, coconut flakes, or a pinch of sea salt on top before the chocolate hardens.
Nutty Caramel Candy
Adding chopped nuts—like pecans, almonds, or hazelnuts—directly into the caramel mixture before pouring it into the pan creates a wonderful crunch and nutty undertone. Be sure to toast the nuts beforehand to bring out their natural oils and deepen the flavor.
Serving Ideas for Caramel Candy
As a Dessert Table Highlight
Caramel candies are fantastic for parties, holidays, and special gatherings. Arrange them on a decorative platter alongside other homemade sweets, or package them in small favor bags for guests to take home.
They also pair beautifully with coffee or hot chocolate—the caramel slowly melts in your mouth as you sip, creating a warm, cozy flavor experience.
Gift Wrapping Ideas
Homemade caramel candy makes an excellent gift. Wrap pieces individually in colorful wax paper or cellophane, then place them in tins, jars, or small gift boxes. Add ribbons, tags, or even handwritten notes for a personal touch.
A jar of salted caramel pieces tied with a rustic twine bow can be a heartfelt present for teachers, neighbors, or coworkers during the holidays.
Health Considerations
Sugar Content and Alternatives
Caramel candy is undeniably high in sugar, which makes it a treat best enjoyed in moderation. However, if you’re looking to reduce sugar, you can experiment with alternative sweeteners like coconut sugar, honey, or maple syrup. Just be aware that these substitutions can change the flavor and texture.
Allergen Concerns
Traditional caramel candy contains dairy, so it’s not suitable for people with lactose intolerance or dairy allergies. Luckily, plant-based alternatives exist—swap the butter for vegan butter and the heavy cream for full-fat coconut cream to create a dairy-free caramel that’s just as delicious.
FAQs about Caramel Candy Recipe
Q1: Can I make caramel without corn syrup?
Yes, but it’s trickier. Without corn syrup, you’ll need to be extra careful to prevent crystallization—adding a small amount of lemon juice or cream of tartar can help.
Q2: Why is my caramel grainy?
This is usually due to sugar crystallization. Avoid stirring once the sugar dissolves and brush down the sides of the pan with water to prevent crystals from forming.
Q3: Can I double the recipe?
Yes, but use a larger pot to avoid overflow, and expect cooking time to increase slightly.
Q4: How do I know when my caramel is done without a thermometer?
You can use the cold-water test: drop a bit of caramel into a bowl of cold water—if it forms a firm but pliable ball, it’s ready.
Q5: Can I make caramel candy vegan?
Absolutely—use plant-based butter and coconut cream instead of dairy ingredients.
Conclusion
Caramel candy may seem intimidating at first, but once you understand the process—melting sugar, adding cream and butter, monitoring temperature—it becomes a rewarding kitchen skill. From soft, buttery bites to salted, chocolate-covered, or nut-studded creations, caramel candy offers endless possibilities for flavor and presentation.
With a little patience, the right tools, and some practice, you can create a confection that rivals anything from a high-end candy shop. Whether you’re making it for yourself, your family, or as a heartfelt gift, the joy of homemade caramel is in both the making and the sharing.