Caramel Apples Recipe: Caramel apples are more than just a dessert; they’re a nostalgic experience that transports many of us back to fairs, carnivals, and crisp autumn afternoons. Picture this: the glossy caramel glaze hugging a fresh, crisp apple, delivering a perfect balance of sweetness and tartness with every bite. This treat has a unique charm because it’s both indulgent and slightly wholesome—after all, there’s a fruit under there! From children’s parties to romantic date nights, caramel apples fit in everywhere. They’re also incredibly versatile—you can keep them classic or dress them up with nuts, sprinkles, or even a drizzle of chocolate. The magic lies in their simplicity, yet they never fail to make a lasting impression. Whether you’re a home cook looking for a fun kitchen project or just someone who loves to spoil friends and family, learning to make caramel apples is a skill that will earn you instant smiles.
Origins and History of Caramel Apples
The caramel apple as we know it today has a surprisingly modern origin. While candied apples (coated with hard sugar syrup) date back to the early 1900s, caramel apples became popular in the mid-20th century thanks to the creativity of confectioners. The widely accepted story credits Dan Walker, a Kraft Foods employee, who in the 1950s experimented with melting surplus caramel candies and dipping apples into the gooey mix. The combination was an instant hit, especially during the fall season and Halloween celebrations. Today, caramel apples are enjoyed worldwide and are often associated with harvest festivals, trick-or-treating, and cozy family gatherings. Despite their global reach, they still carry a distinctly homemade charm—a testament to their timeless appeal.
Why Make Caramel Apples at Home?
The Benefits of Homemade vs. Store-Bought
Store-bought caramel apples can be convenient, but they often come with drawbacks—overly processed caramel, waxy apples, and limited customization. When you make caramel apples at home, you’re in complete control of the quality and freshness. You get to choose the crispest, juiciest apples, prepare silky-smooth caramel from scratch, and ensure that every bite is just right. Plus, homemade versions avoid unnecessary preservatives and artificial flavors. The process itself is also part of the fun—there’s something deeply satisfying about watching molten caramel cascade over an apple you’ve prepared yourself. And let’s be honest: they taste so much better fresh out of your own kitchen.
Customization and Creativity in Your Kitchen
Homemade caramel apples give you creative freedom. Want to add a layer of crushed pretzels for a salty crunch? Go for it. Prefer a dark chocolate drizzle with sea salt? No one’s stopping you. You can tailor your caramel apples to match the theme of a party, a holiday, or even someone’s favorite flavors. For Halloween, you might coat them in black and orange sprinkles; for Christmas, a drizzle of white chocolate and peppermint bits will do the trick. Making them at home also allows for dietary adjustments, such as using vegan caramel or sugar-free coatings. It’s not just a recipe—it’s a blank canvas for edible art.
Essential Ingredients for Perfect Caramel Apples
Choosing the Right Apples
The apple you choose will make or break your caramel apple experience. A crisp, tart apple provides the perfect contrast to sweet caramel. Granny Smith apples are the classic choice because of their firm texture and tangy flavor, which balances the richness of caramel beautifully. However, Honeycrisp, Fuji, or Pink Lady apples are also great options if you prefer a sweeter base. Whichever variety you pick, make sure the apples are fresh, firm, and free from bruises. Organic apples are ideal since they usually have less wax coating, making the caramel adhere better. If your apples are store-bought, it’s important to wash them thoroughly and remove any wax so the caramel sticks evenly.
Caramel Ingredients – The Golden Formula
A great caramel apple starts with a great caramel recipe. You’ll need:
- Granulated sugar – the base for sweetness.
- Unsalted butter – for richness and a smooth texture.
- Heavy cream – to give the caramel its luxurious, creamy consistency.
- Corn syrup – to prevent crystallization and keep the caramel silky.
- Vanilla extract – for a subtle, aromatic depth.
- A pinch of salt – to enhance flavor and balance sweetness.
The key is to cook the caramel to the right temperature (around 245°F/118°C for the perfect “soft ball” stage) so it’s pliable yet firm enough to hold its shape once cooled.
Optional Toppings for Extra Flavor
Toppings are where your creativity can shine. Here are some favorites:
- Crushed nuts (peanuts, almonds, pecans, walnuts) for crunch.
- Sprinkles for a festive look.
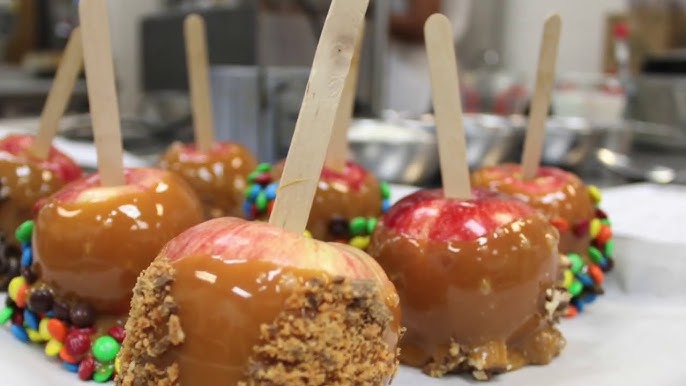
- Mini chocolate chips for an extra indulgent bite.
- Crushed cookies for a playful twist.
- Shredded coconut for a tropical vibe.
- Sea salt flakes for a gourmet touch.
Pro tip: Always prepare your toppings in small bowls ahead of time so you can roll the caramel-coated apples immediately after dipping—this ensures the toppings stick perfectly.
Tools and Equipment You’ll Need
Basic Kitchen Tools
To make caramel apples, you don’t need an entire bakery’s worth of tools. At the most basic level, you’ll need:
- A heavy-bottomed saucepan for cooking the caramel.
- A candy thermometer to monitor temperature accurately.
- Wooden skewers or sturdy lollipop sticks for holding the apples.
- A baking sheet lined with parchment or a silicone mat to prevent sticking.
Specialty Tools for Professional Results
If you want to elevate your caramel apple game, a few extra tools can make the process smoother:
- Dipping tools or deep glass measuring cups for easier coating.
- Cooling rack for drip-free setting.
- Apple corer and slicer if you want to make caramel apple slices instead of whole apples.
- Decorating squeeze bottles for precise chocolate drizzles.
Having the right equipment ensures the process is less messy, more efficient, and produces consistent, professional-looking results.
Step-by-Step Guide to Making Caramel Apples
Step 1 – Preparing the Apples
Preparation is key to caramel apples that turn out as good as they taste. Start by washing your apples thoroughly in hot water to remove any wax or residue. You can use a bit of vinegar or baking soda for extra cleaning power. Dry the apples completely—any moisture can cause the caramel to slip off. Insert wooden sticks into the stem end of each apple, making sure they’re firmly in place. If you want to get creative, you can use decorative sticks or skewers to match your event’s theme. Place the prepared apples on a parchment-lined baking sheet and set them aside while you make the caramel.
Step 2 – Making the Caramel
This is where the magic happens. In a heavy-bottomed saucepan, combine sugar, corn syrup, and water over medium heat. Stir until the sugar dissolves, then let it boil without stirring until it reaches a deep amber color—this is usually around 320°F (160°C). At this point, carefully whisk in the butter and cream (stand back, as it will bubble vigorously). Continue cooking until the caramel reaches the “soft ball” stage at about 245°F (118°C). Remove from heat and stir in the vanilla extract and a pinch of salt. Your caramel should be thick, glossy, and smooth, with a rich golden-brown hue.
One important tip: never rush caramel. High heat can cause it to burn quickly, and there’s no saving burnt caramel—it will taste bitter no matter what you do. Patience is your best friend here. Keep your candy thermometer handy and resist the urge to crank up the heat. Slow, steady cooking ensures that your caramel develops its signature deep flavor without any unpleasant bitterness.
Step 3 – Dipping the Apples
Once your caramel is ready, it’s time for the fun part—dipping. Working quickly (but carefully), tilt your saucepan slightly and dip each apple into the caramel, twirling it to ensure an even coat. Let the excess caramel drip back into the pan before placing the apple on your parchment-lined baking sheet. If you prefer a thicker caramel layer, you can dip the apple twice, allowing the first coat to cool for a minute before adding the second.
For an extra-smooth finish, avoid scraping the apple against the side of the pan. Instead, let gravity and the caramel’s natural thickness create that perfect glossy shell. Remember, caramel sets quickly, so work efficiently and have your toppings ready to go if you’re using them.
Step 4 – Adding Toppings
If you’re going for a classic caramel apple, you can stop here—but why not take things up a notch? While the caramel is still warm and sticky, roll your apple in toppings like crushed nuts, mini chocolate chips, or sprinkles. For more intricate designs, try drizzling melted chocolate in zigzag patterns or dipping the bottom half of the apple into crushed cookies.
One trick to making toppings stick better is to gently press them into the caramel rather than just rolling. This ensures they adhere firmly and don’t fall off when you take that first glorious bite. You can even combine toppings—imagine a caramel apple rolled in pecans, drizzled with dark chocolate, and sprinkled with sea salt. Pure decadence!
Step 5 – Setting and Serving
After dipping and decorating, let your apples set on the prepared baking sheet at room temperature for about 30–45 minutes. If you’re in a hurry, you can place them in the refrigerator for 15 minutes, but avoid leaving them in too long—caramel can become sticky from condensation when brought back to room temperature.
When serving, you can wrap each apple in clear cellophane tied with a ribbon for gifting or slice them into wedges for easier eating. Slicing is especially useful for parties, as it prevents sticky fingers and allows guests to enjoy smaller portions. If you want to get really fancy, arrange the sliced caramel apples on a platter with small bowls of melted chocolate and caramel for dipping—instant dessert bar!
Tips for Achieving the Perfect Caramel Texture
Common Mistakes and How to Avoid Them
Caramel can be temperamental, but with a few tricks, you can master it every time:
- Grainy Caramel? This happens when sugar crystallizes. Avoid stirring once the sugar dissolves and use a pastry brush dipped in water to wash down sugar crystals from the pan’s sides.
- Caramel Too Hard? You may have overcooked it past the soft-ball stage. Use a candy thermometer and remove the caramel from heat at the correct temperature.
- Caramel Too Runny? It likely wasn’t cooked long enough. Return it to the heat and cook a little longer until it reaches the right consistency.
- Caramel Slipping Off the Apples? This usually happens if the apples weren’t completely dry or still had wax coating. Always clean and dry them thoroughly before dipping.
Perfect caramel has a smooth, satiny finish that clings to the apple without sliding off or becoming too chewy. It should hold its shape when bitten into but melt pleasantly in your mouth—a delicate balance that comes with practice and patience.
Creative Variations of Caramel Apples
Gourmet Flavors and Styles
Once you’ve mastered the classic caramel apple, it’s time to experiment. Try infusing your caramel with flavors like cinnamon, espresso, or even a hint of bourbon for an adult twist. Roll your apples in crushed pretzels for a salty crunch or dip them in white chocolate before adding freeze-dried strawberries for a fruity punch. You can even create layered apples by alternating caramel and chocolate coatings for a truly decadent treat.
Seasonal and Holiday-Themed Ideas
Caramel apples are a blank canvas for seasonal creativity. For Halloween, coat them in black and orange sprinkles or edible glitter. For Christmas, try a peppermint bark version—dip in white chocolate, sprinkle with crushed candy canes, and drizzle with dark chocolate. In the spring, pastel sprinkles or edible flowers make for a charming Easter dessert. The possibilities are endless, and themed caramel apples make fantastic edible gifts for friends, family, and coworkers.
Storing and Preserving Caramel Apples
Short-Term Storage Tips
Caramel apples are best enjoyed fresh, but if you need to store them, keep them in a cool, dry place. Avoid leaving them in direct sunlight or a warm kitchen, as heat will cause the caramel to soften and slide off. For short-term storage (up to 2 days), wrap each apple individually in wax paper or parchment to prevent sticking, then place them in an airtight container. Storing them in the refrigerator can extend freshness to about 4–5 days, but be aware that condensation might make the caramel sticky when brought back to room temperature.
If you’ve made a batch for an event the next day, the fridge is your safest option—just remove them 30 minutes before serving so the caramel softens slightly and the flavors are more pronounced.
Can You Freeze Caramel Apples?
Technically, yes, but it’s not ideal. Freezing changes the texture of both the caramel and the apple. Once thawed, the caramel can become grainy, and the apple might turn mushy. If you must freeze them (perhaps for long-term storage), wrap them tightly in plastic wrap and place them in a freezer-safe bag. Thaw in the refrigerator overnight, then allow them to reach room temperature before serving. Just keep in mind: while the flavor may still be good, the texture won’t be as crisp and satisfying as a fresh caramel apple.
Serving Ideas and Presentation Tips
Fun Ways to Serve at Parties
Caramel apples are party showstoppers, but they can also be a little tricky to eat. To make them more guest-friendly, consider slicing them into wedges and serving them on skewers. This eliminates the “sticky face” problem and makes them easier for kids to enjoy. You can also create a DIY caramel apple bar where guests choose their toppings and decorate their own apples—it’s interactive, fun, and ensures everyone gets exactly what they want.
For large gatherings, wrap each apple in clear cellophane with a decorative ribbon for an elegant touch. Add a personalized tag for weddings, birthdays, or baby showers. This not only makes them look beautiful but also keeps them fresh and hygienic for transport or gifting.
Elegant Presentation for Special Occasions
If you’re serving caramel apples at a more formal event, presentation matters. Consider placing them on tiered cake stands for height and visual appeal. You could also drizzle them with gold or silver edible dust for a glamorous finish. Another stylish option is to use gourmet sticks—think polished wooden skewers, candy-striped straws, or even cinnamon sticks for a rustic fall vibe. Pairing caramel apples with wine or cider at a fall-themed gathering can also elevate them from casual snack to sophisticated dessert.
Healthier Alternatives for Caramel Apples
Low-Sugar and Vegan Options
If you love caramel apples but want a lighter or plant-based version, there are plenty of options. For a low-sugar alternative, you can use sugar substitutes like monk fruit or erythritol in your caramel recipe. The texture and taste will be slightly different but still delicious. You could also make a “skinny” caramel sauce with dates blended with almond milk and a touch of vanilla—it’s naturally sweet and packed with fiber.
For a vegan version, replace the heavy cream with coconut cream and the butter with a plant-based alternative. This creates a luscious caramel with a subtle coconut undertone that pairs beautifully with tart apples. Using dark chocolate for drizzles and dairy-free toppings ensures your treat is 100% vegan-friendly.
These alternatives are perfect for health-conscious individuals, but they still deliver on the indulgence factor, proving that you don’t need refined sugar or dairy to make a truly satisfying caramel apple.
FAQs about Caramel Apples Recipe
1. Can I Make Caramel Apples Ahead of Time?
Yes! You can prepare them a day or two in advance. Just wrap them individually and store them in the fridge. Remove them from the refrigerator about 30 minutes before serving for the best texture and flavor.
2. What’s the Best Caramel Brand to Use?
If you’re not making caramel from scratch, Kraft Caramels are a popular choice—they melt smoothly and have a classic flavor. For a richer taste, try Werther’s Original Soft Caramels.
3. How to Prevent Caramel from Cracking?
Cracking often happens when caramel is overcooked. Keep an eye on the temperature and stop cooking once it reaches the soft-ball stage (245°F / 118°C).
4. Can I Use Store-Bought Caramel Sauce?
Yes, but make sure it’s thick enough to coat the apples. If it’s too thin, you can simmer it gently until it reduces to a thicker consistency.
5. How Long Do Caramel Apples Last?
When stored in the fridge, caramel apples can last up to 5 days. However, the fresher they are, the better the taste and texture will be.
Conclusion
Caramel apples are the perfect combination of crisp, juicy fruit and rich, buttery sweetness—a treat that’s as beautiful as it is delicious. Whether you stick to the traditional recipe or experiment with gourmet toppings and creative variations, making them at home is an experience worth savoring. From preparation to presentation, every step offers a chance to infuse your personality and creativity into the final product.
So the next time you’re looking for a dessert that’s both nostalgic and impressive, grab some fresh apples, whip up a batch of caramel, and let your imagination run wild. Not only will you end up with a tray of irresistible treats, but you’ll also create memories worth cherishing.


