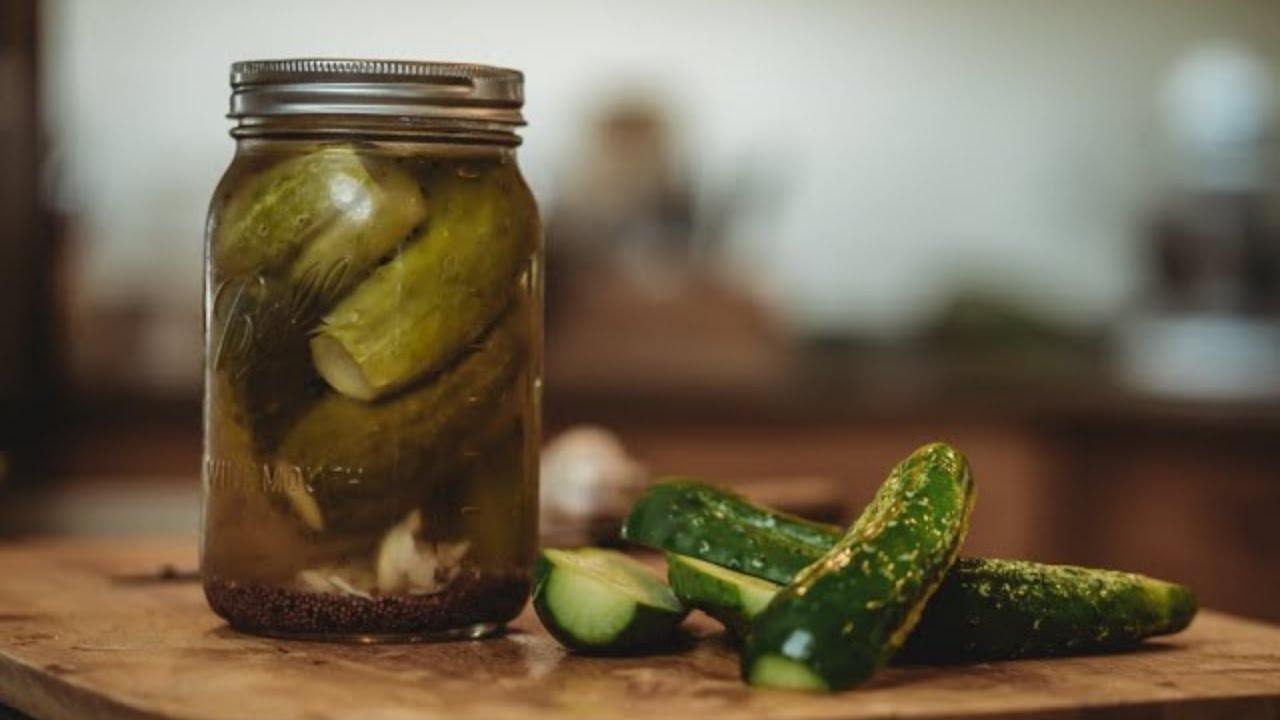
Canned Dill Pickle Recipe: Canned dill pickles are cucumbers preserved in a vinegar-based brine flavored with dill, garlic, and various spices. The canning process seals the jars in a way that prevents bacterial growth, allowing the pickles to last for months without refrigeration until opened. Unlike quick refrigerator pickles, canned pickles undergo a heat-processing stage, giving them a more intense, well-rounded flavor and longer shelf life. Think of them as little jars of tangy, crunchy treasures you can open any time of year, even when fresh cucumbers are long gone from the garden.
When done right, canned dill pickles balance saltiness, tang, and herbal notes in a way that’s both refreshing and addictive. They’re not just a side dish—they’re an experience. Whether you like them crisp enough to snap or with a softer bite, there’s a joy in opening a jar you made yourself.
Why Make Your Own Instead of Buying?
While store-bought pickles are convenient, homemade canned dill pickles offer superior freshness and control over ingredients. When you make them yourself, you decide the salt level, the tanginess, and the intensity of flavors like garlic and dill. You can also avoid unnecessary additives, artificial colors, and preservatives often found in commercial versions.
Homemade pickles are also a cost-effective way to preserve excess cucumbers from your garden or a farmers market haul. Plus, there’s something deeply satisfying about stacking your pantry shelves with jars you crafted with your own hands. Every jar is a little reminder of the summer harvest, ready to brighten up winter meals.
Health Benefits of Dill Pickles
Nutritional Value of Cucumbers
Cucumbers are naturally low in calories but rich in hydration—about 95% water—making them a refreshing snack. They also contain small amounts of vitamin K, vitamin C, potassium, and magnesium, all of which support bone health, immune function, and proper hydration balance. When pickled, cucumbers retain most of these nutrients while gaining a tangy flavor from the brine.
Pickling doesn’t just preserve them; it enhances their flavor profile, making it more likely you’ll actually eat your veggies. This can be particularly helpful for picky eaters or kids who may not love fresh cucumbers but will happily crunch on a flavorful pickle spear.
Role of Dill and Garlic in Health
Dill isn’t just there for aroma—it’s a natural antioxidant that may help fight inflammation and support digestion. Garlic, another common pickle ingredient, has antibacterial properties and is known for supporting heart health by potentially lowering cholesterol and blood pressure levels.
When combined in a brine, these ingredients don’t just taste amazing—they can also contribute to gut health, especially if you opt for naturally fermented pickles rather than only vinegar-based ones. While canning does involve heat processing that reduces probiotic content compared to fermentation, the health benefits of the base ingredients still make dill pickles a wholesome choice.
Essential Ingredients for Canned Dill Pickles
Fresh Cucumbers – The Star Ingredient
Not all cucumbers are created equal when it comes to pickling. Pickling cucumbers, such as Kirby or Boston Pickling varieties, are shorter, thicker, and have bumpy skins that hold up better during the canning process. They tend to remain crisp even after sitting in brine for months.
Freshness is key. Choose cucumbers that are firm, with vibrant green skin and no soft spots or yellowing. If possible, use them within 24 hours of harvest or purchase to lock in that just-picked crunch. Soaking them in ice water for an hour before pickling can help firm them up even more.
Vinegar, Salt, and Water – The Preserving Trio
The brine is the heart of any canned pickle recipe. For dill pickles, white distilled vinegar or apple cider vinegar works best, as both have an acidity of at least 5%—crucial for safe preservation. Non-iodized canning or pickling salt is preferred, as table salt can cause cloudiness in the brine.
The water should be clean and free of any strong flavors or chlorine, as these can affect the taste. The typical brine ratio for dill pickles is 1:1 vinegar to water, with enough salt to create a tangy but balanced flavor.
Spices and Herbs for Flavor Perfection
Classic dill pickles get their distinct flavor from fresh dill heads or fronds, garlic cloves, and pickling spices such as mustard seeds, peppercorns, and coriander seeds. Some people like to add a touch of sugar to soften the vinegar’s sharpness, but that’s optional.
You can also experiment with red pepper flakes for heat or bay leaves for a slightly floral note. The key is to keep the spice blend balanced so no single flavor overwhelms the others.
Required Tools and Equipment
Mason Jars and Lids
Quality glass jars with two-piece lids (a flat metal seal and a screw band) are essential for proper canning. Pint-sized jars are great for spears or slices, while quart-sized jars work well for whole cucumbers. Always inspect jars for chips or cracks before use, as imperfections can prevent a proper seal.
Canning Pot and Utensils
A large canning pot with a rack is necessary for the water bath process, which heats jars to the right temperature to kill bacteria. You’ll also need a jar lifter, a wide-mouth funnel, and a bubble remover (or a simple wooden chopstick) to ensure no air pockets remain inside.
Sanitization Essentials
Cleanliness is non-negotiable. Before starting, wash all jars, lids, and utensils in hot, soapy water, then rinse well. Jars should be sterilized in boiling water or a dishwasher’s sterilization cycle. This prevents spoilage and ensures a safe final product.
Step-by-Step Canned Dill Pickle Recipe
Step 1 – Preparing the Cucumbers
Wash cucumbers thoroughly under running water, scrubbing gently to remove dirt and surface bacteria. Trim 1/8 inch from the blossom end, as enzymes in that end can cause softening over time. Decide on your preferred cut—spears, slices, or whole. For extra crunch, soak cucumbers in ice water for at least one hour before packing.
Step 2 – Making the Brine
The brine is the soul of your canned dill pickles—it’s what transforms fresh cucumbers into tangy, flavorful snacks. To prepare it, combine equal parts vinegar and water in a large pot. For example, if you’re making 8 pints of pickles, you might use 8 cups of vinegar and 8 cups of water. Add pickling salt (about 2 tablespoons per quart of liquid) and bring the mixture to a gentle boil, stirring until the salt is completely dissolved.
Choose your vinegar wisely—white vinegar gives a clean, sharp tang, while apple cider vinegar adds a hint of sweetness. Avoid homemade vinegar or anything with less than 5% acidity, as it may not be safe for canning. If you want a slightly softer bite, you can add 1–2 tablespoons of sugar to the brine, but that’s purely optional.
Once your brine is ready, keep it hot until you’re ready to pour it over the cucumbers. A hot brine helps kick-start the canning process and ensures even flavor penetration.
Step 3 – Sterilizing the Jars
Sterilization is your insurance policy against spoilage. Place your clean jars upright in a canning pot filled with hot (not boiling) water. Bring the water to a boil and let the jars simmer for at least 10 minutes to kill any lingering bacteria. Keep them hot until you’re ready to fill them, as placing hot brine into a cold jar can cause cracking.
Your lids don’t need to be boiled anymore—modern canning lids work best when simply washed in warm, soapy water and kept at room temperature. Overheating them can damage the sealing compound. The screw bands just need a good wash; they aren’t part of the sealing process, but they keep the lid in place while canning.
Step 4 – Packing the Jars
This is where the magic begins. Start by placing a couple of garlic cloves, a sprig or two of fresh dill, and your chosen spices (like mustard seeds, peppercorns, and red pepper flakes) at the bottom of each jar. Then, pack in your cucumbers—tightly, but without crushing them. The more cucumbers you fit in, the less brine you’ll need, but you still want the liquid to flow freely between pieces.
Once packed, pour the hot brine over the cucumbers, leaving about 1/2 inch of headspace at the top of the jar. This headspace is critical for a proper seal during processing. Use a bubble remover or chopstick to release any trapped air pockets—just slide it gently down the sides of the jar.
Step 5 – Processing the Pickles
Wipe the jar rims with a clean, damp cloth to remove any brine residue—this ensures the lid seals properly. Place the flat lid on top, then screw the band on until it’s fingertip-tight (not cranked down hard).
Place jars back into the canning pot, making sure they are fully submerged in boiling water by at least 1 inch. Process pint jars for 10 minutes and quart jars for 15 minutes (adjusting for altitude if necessary). Once time is up, turn off the heat, let jars sit in the water for 5 minutes, then carefully lift them out and place on a towel.
As they cool, you should hear the satisfying pop of lids sealing. After 24 hours, check each lid by pressing the center—it should be firm and not spring back. Any unsealed jars should be refrigerated and eaten within a few weeks.
Tips for Perfect Dill Pickles Every Time
Keeping Pickles Crunchy
One of the most common complaints about canned pickles is losing that satisfying crunch. The secret lies in cucumber freshness and preparation. Always use firm, just-picked cucumbers, and trim the blossom end to prevent enzymes from softening them. Soaking cucumbers in ice water before pickling can also help maintain texture.
Some people add grape leaves, which contain tannins that help preserve crispness. Another trick is to use a product like “Pickle Crisp” (calcium chloride), which can be added directly to jars. Avoid over-processing the jars in boiling water, as prolonged heat will soften the cucumbers.
Adjusting the Flavor to Your Preference
One of the joys of homemade pickles is the freedom to customize. Love garlic? Add extra cloves. Want more heat? Increase the red pepper flakes. Prefer a sweeter profile? Add a tablespoon or two of sugar to the brine.
You can also experiment with different vinegars, spice blends, and herbs. Dill is the classic choice, but adding thyme, oregano, or even fresh basil can give your pickles a unique twist. Just remember that altering vinegar type or water ratio can affect acidity—so stick with safe canning guidelines while flavoring creatively.
Common Mistakes to Avoid
Overcooking Cucumbers
If you leave your cucumbers in boiling water too long during processing, they’ll turn mushy. Stick to the recommended processing time, and avoid using cucumbers that are overripe or too large—they tend to have softer centers.
Incorrect Brine Ratios
Getting the vinegar-to-water ratio wrong can compromise both flavor and safety. Too little vinegar reduces acidity, which can make pickles unsafe for long-term storage. Too much vinegar can make them overly sour and unbalanced. Always follow tested recipes for canning to ensure a safe pH level.
Variations of Dill Pickles
Spicy Dill Pickles
If you like a little kick with your crunch, spicy dill pickles are the way to go. Simply add sliced jalapeños, red pepper flakes, or even a few dried chili peppers to your jars before pouring in the brine. The heat level will intensify over time, so if you prefer mild spice, start small—you can always add more in your next batch.
For an extra depth of flavor, try adding smoked paprika or chipotle flakes along with your usual dill and garlic. This not only brings heat but also a smoky undertone that pairs beautifully with grilled meats and sandwiches. Keep in mind that when you spice up your pickles, the flavors will marry over weeks, meaning that what tastes mild after a day may become delightfully fiery after a month in storage.
Garlic-Lover’s Pickles
Garlic lovers, rejoice—this variation is all about bold, aromatic flavor. Instead of the standard one or two garlic cloves per jar, load up with four or more. Smash the cloves slightly before adding them to release more oils into the brine.
If you want an even stronger garlic punch, roast the cloves first to deepen the flavor, then add them to your jars. Roasted garlic dill pickles develop a slightly sweeter, nuttier flavor profile that’s addictive. Pair them with crusty bread, sharp cheese, or charcuterie for a gourmet touch.
Sweet and Sour Dill Twist
Sometimes you want the tang of a dill pickle with just a hint of sweetness to balance it out. This is where the sweet-and-sour variation comes in. Simply add sugar (about 1/4 to 1/2 cup per quart of brine) along with the vinegar and salt.
This variation is fantastic for those who find traditional dill pickles too sharp. The sugar mellows the acidity without overpowering the herbal dill and garlic notes. These pickles are great on sandwiches, chopped into potato salad, or eaten straight from the jar when you’re craving something snacky but not too tart.
Storage and Shelf Life
Best Storage Practices
Proper storage ensures your hard work pays off for months to come. Once jars are sealed and cooled, store them in a cool, dark place such as a pantry or cellar. Avoid direct sunlight, which can fade the color and affect flavor.
Temperature matters—keep jars at a steady 50–70°F for the best results. While the pickles are technically safe for up to 18 months if sealed properly, most people find they taste best within the first 12 months. Always label your jars with the date so you can track freshness.
How to Tell If Pickles Have Gone Bad
Even with careful canning, it’s important to inspect jars before eating. Signs of spoilage include bulging lids, cloudy or discolored brine (if not caused by natural spices), strange odors, or mold growth. If you ever see bubbles rising in a sealed jar without having opened it, that’s a red flag—discard it immediately.
When in doubt, follow the golden rule: If it smells off or looks suspicious, don’t eat it. Home canning is safe when done correctly, but never take chances with questionable food.
Serving Ideas for Dill Pickles
Pairing with Sandwiches and Burgers
There’s a reason dill pickles are a classic burger side—they cut through the richness of meats and cheeses with their tangy crunch. A crisp pickle spear next to a hot grilled cheese, or a few slices layered into a deli sandwich, adds the perfect pop of acidity.
For something fun, chop pickles into relish for hot dogs, or mix diced dill pickles into tuna or chicken salad for extra zing. The brine can even be used to marinate meats or flavor salad dressings.
Adding to Salads and Charcuterie Boards
Dill pickles shine on charcuterie boards, where their briny bite contrasts beautifully with cured meats, cheeses, and olives. They also add great flavor to potato salad, pasta salad, and coleslaw—just chop them finely and stir them in for a tangy twist.
If you want to get creative, use pickle slices as a garnish for Bloody Mary cocktails, or chop them into deviled egg filling for a fun, crowd-pleasing appetizer.
FAQs about Canned Dill Pickle Recipe
Do I need to refrigerate sealed jars?
No, sealed jars can be stored at room temperature until opened. Once opened, refrigerate and consume within 1–2 months.
Can I reuse canning lids?
No, lids are designed for single use to ensure a proper seal. Bands can be reused if undamaged.
Why did my brine turn cloudy?
Cloudiness can result from table salt, hard water, or natural fermentation. If accompanied by off smells or mold, discard.
Can I skip the water bath processing step?
For long-term storage, no—you must process jars in boiling water to ensure safety.
How soon can I eat my pickles?
While they’re technically ready after sealing, waiting at least 2–4 weeks allows flavors to develop fully.
Conclusion
Making canned dill pickles is more than just preserving cucumbers—it’s capturing a taste of summer that can brighten your meals year-round. With fresh ingredients, the right tools, and a little patience, you can create jars of tangy, crunchy goodness that put store-bought versions to shame. Whether you prefer classic dill, spicy heat, or a sweet-and-sour twist, the possibilities are endless once you master the basics.
So gather your cucumbers, fire up the canning pot, and get ready to enjoy the satisfaction of popping open a jar you made yourself—knowing exactly what’s in it and savoring the flavors you love most.


