Buttermilk Waffles Recipe: When it comes to breakfast comfort food, buttermilk waffles are hard to beat. They’re crisp on the outside, tender and fluffy inside, and have a subtle tanginess that sets them apart from regular waffles. Buttermilk, with its slightly acidic nature, reacts beautifully with baking soda or baking powder, creating a light, airy texture that’s downright addictive. Whether you’re preparing them for a weekend brunch, a cozy family breakfast, or even as a dessert base, buttermilk waffles have a charm that’s timeless.
Why buttermilk makes a difference: Unlike regular milk, buttermilk tenderizes the gluten in the flour, ensuring your waffles don’t turn out tough. The acidity also gives a pleasant tang that balances sweet toppings perfectly. If you’ve ever wondered why diner waffles have that melt-in-your-mouth softness, the secret is usually buttermilk.
A bit of waffle history: Waffles have been enjoyed for centuries, with roots in medieval Europe where they were cooked over open flames between patterned irons. Buttermilk waffles, however, are more of an American adaptation, gaining popularity in the early 20th century when commercial buttermilk became widely available.
If you’ve never made them before, don’t worry—this guide will walk you through each step, making sure your waffles turn out golden, crispy, and full of flavor every time.
Ingredients You’ll Need for Buttermilk Waffles
To make the perfect batch of buttermilk waffles, you’ll need a combination of pantry staples and a few flavor-enhancing extras. The good thing? Everything is easy to find, and once you’ve got the basics down, you can customize them however you like.
Dry ingredients:
- 2 cups all-purpose flour
- 2 tablespoons granulated sugar (adjust for sweetness)
- 2 teaspoons baking powder
- ½ teaspoon baking soda
- ½ teaspoon salt
Wet ingredients:
- 2 large eggs
- 2 cups buttermilk
- ½ cup unsalted butter (melted and cooled slightly)
- 1 teaspoon pure vanilla extract
Optional add-ins for flavor:
- ½ teaspoon ground cinnamon for warmth
- Mini chocolate chips for a dessert-style waffle
- Blueberries or chopped strawberries for fruity bursts
- Lemon zest for a fresh twist
Using fresh ingredients matters—a stale baking powder or old buttermilk can make your waffles flat and flavorless. If you don’t have buttermilk, you can easily make a substitute by adding 1 tablespoon of white vinegar or lemon juice to a cup of milk and letting it sit for 5–10 minutes.
Kitchen Tools & Equipment Required
Cooking waffles is easy, but having the right tools will make the process smoother and your results more consistent.
Essential tools:
- Mixing bowls: One for dry ingredients and one for wet ingredients.
- Whisk: For blending the batter without overmixing.
- Measuring cups & spoons: Accuracy is key in baking.
- Rubber spatula: For folding in ingredients gently.
Waffle maker options:
- Belgian waffle maker: Produces thick, deep-pocketed waffles that hold syrup and toppings well.
- Classic waffle maker: Makes thinner, crispier waffles.
- Flip-style waffle maker: Helps distribute batter evenly for consistent cooking.
Pro tip: Preheat your waffle maker before adding the batter—this ensures an even cook and that signature golden crust. A light coating of nonstick spray can help, but avoid too much, as it can make waffles greasy.
Step-by-Step Buttermilk Waffles Recipe
Step 1 – Preparing Your Batter:
In a large bowl, whisk together flour, sugar, baking powder, baking soda, and salt. In another bowl, beat the eggs lightly, then add buttermilk, melted butter, and vanilla extract. Pour the wet ingredients into the dry ingredients and gently fold until combined. A few lumps are okay—overmixing will make waffles tough.
Step 2 – Preheating the Waffle Iron:
While the batter rests for about 5 minutes (this helps the gluten relax), preheat your waffle maker. If yours has a temperature dial, set it to medium-high for crispy edges and a fluffy center.
Step 3 – Cooking the Waffles:
Pour batter into the center of the waffle maker, just enough to fill the grid without overflowing. Close the lid and cook according to the manufacturer’s instructions, usually 4–5 minutes, until golden brown. Remove with tongs or a fork and serve immediately, or keep warm in a low oven.
Tips for Achieving the Perfect Waffle Texture
A perfect buttermilk waffle is a balance of crispy edges and a pillowy middle. To get there, keep these tips in mind:
- Rest your batter: Letting it sit for a few minutes before cooking ensures even hydration and tenderness.
- Don’t overfill the waffle iron: This prevents messy spills and ensures even cooking.
- Avoid lifting the lid too early: Waffles need uninterrupted heat to crisp up properly.
- Serve immediately: Waffles are at their peak right off the iron; the longer they sit, the softer they get.
Mistakes to avoid include overmixing the batter (which activates too much gluten), using cold butter (it won’t blend smoothly), and not preheating your waffle iron fully.
Serving Suggestions for Buttermilk Waffles
One of the best things about buttermilk waffles is how versatile they are. They’re a blank canvas for both sweet and savory toppings, making them perfect for breakfast, brunch, or even dessert.
Classic toppings:
- Maple syrup & butter: The timeless duo that never fails. A drizzle of warm maple syrup soaking into the deep pockets of a waffle is pure comfort food.
- Fresh berries: Strawberries, blueberries, raspberries, or a mix—all add a refreshing sweetness and a pop of color.
- Whipped cream: Light, airy, and indulgent. Perfect for making your waffles feel extra special.
Creative ideas for a twist:
- Nut butter & banana slices: A creamy, protein-packed topping with natural sweetness.
- Caramelized apples & cinnamon: Warm, cozy, and perfect for autumn mornings.
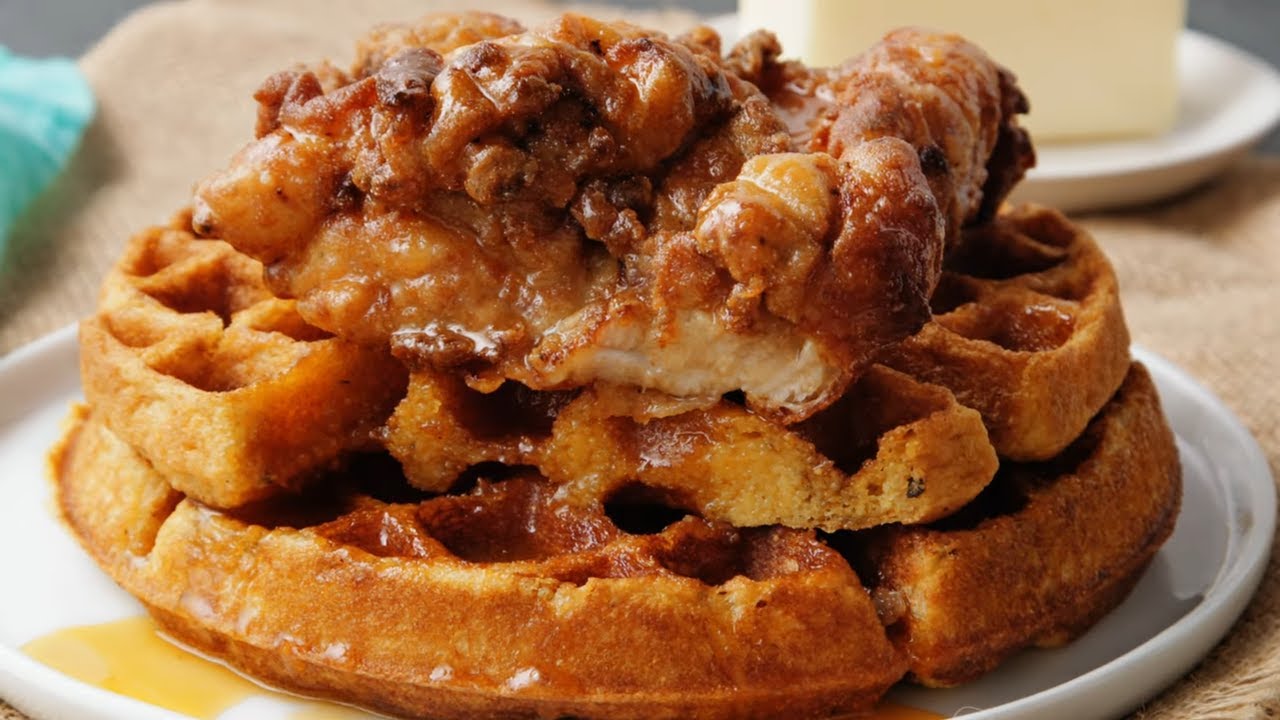
- Savory style: Top with crispy fried chicken, a drizzle of honey, and a sprinkle of hot sauce for a Southern-inspired treat.
- Chocolate lovers’ dream: Melted chocolate or Nutella with crushed nuts and sliced strawberries.
You can also serve them with ice cream for dessert or layer them with yogurt and granola for a fun breakfast parfait. The beauty of buttermilk waffles is that they pair well with just about anything you can imagine.
Storing & Reheating Buttermilk Waffles
If you’ve made more waffles than you can eat in one sitting, don’t worry—they store and reheat beautifully.
How to store:
- Room temperature: Keep in an airtight container for up to 24 hours.
- Refrigerator: Store in a sealed container for up to 3 days.
- Freezer: Allow waffles to cool completely, then place them in a single layer on a baking sheet. Freeze until solid, then transfer to a freezer bag. They’ll keep for up to 3 months.
How to reheat:
- Toaster: Pop them in for a few minutes for a crispy texture.
- Oven: Preheat to 350°F (175°C) and bake for 8–10 minutes.
- Air fryer: Reheat at 350°F for 3–4 minutes for a quick, crispy finish.
Avoid reheating in the microwave unless you’re okay with softer waffles. Microwaves tend to steam them, which takes away the crispiness.
Nutritional Value of Buttermilk Waffles
While buttermilk waffles aren’t exactly a “diet” food, they can be part of a balanced breakfast—especially if you keep an eye on portion sizes and toppings.
Typical nutrition per serving (1 waffle):
- Calories: 220–280 (depending on size and ingredients)
- Protein: 5–6g
- Carbohydrates: 28–32g
- Fat: 10–12g
- Fiber: 1–2g
- Sugar: 4–6g
Making them healthier:
- Use whole wheat flour or oat flour for extra fiber.
- Reduce sugar or use a natural sweetener like honey or maple syrup.
- Swap butter for coconut oil or a light olive oil for a healthier fat profile.
- Add ground flaxseed or chia seeds for extra nutrients.
By making a few tweaks, you can enjoy buttermilk waffles more often without feeling guilty.
Variations of Buttermilk Waffle Recipes
The base recipe is just the beginning—there are countless ways to adapt buttermilk waffles to suit dietary needs and flavor preferences.
Gluten-free buttermilk waffles:
- Replace all-purpose flour with a gluten-free flour blend.
- Make sure your baking powder and other ingredients are labeled gluten-free.
- The texture will still be light and fluffy if you follow the same mixing method.
Vegan buttermilk waffles:
- Replace buttermilk with plant-based milk (soy, almond, oat) mixed with 1 tbsp lemon juice or vinegar.
- Use flax eggs (1 tbsp ground flaxseed + 3 tbsp water per egg) instead of regular eggs.
- Substitute butter with coconut oil or vegan butter.
Fun seasonal flavors:
- Pumpkin spice waffles in autumn.
- Lemon & poppy seed waffles in spring.
- Chocolate chip peppermint waffles for winter holidays.
FAQs about Buttermilk Waffles Recipe
Q1: Can I make the batter ahead of time?
Yes, but it’s best to use it within 24 hours. Store it in the fridge and stir gently before cooking.
Q2: What if I don’t have a waffle maker?
You can use a grill pan or skillet to make waffle “pancakes,” though they won’t have the same texture.
Q3: Why are my waffles sticking to the iron?
This usually happens if the iron isn’t fully preheated or if there isn’t enough fat in the batter.
Q4: Can I make them crispy again after storing?
Yes—reheat in the toaster or oven to restore crispiness.
Q5: What’s the best way to keep waffles warm while cooking the rest?
Place cooked waffles on a wire rack in a 200°F oven to keep them warm and crisp until serving.
Conclusion
Buttermilk waffles are a true breakfast classic—crispy, fluffy, and full of flavor. With the right ingredients, tools, and a little know-how, you can make café-quality waffles right at home. Whether you go for traditional maple syrup, experiment with creative toppings, or tweak the recipe to suit your dietary needs, the possibilities are endless. Once you master the basics, you’ll find yourself reaching for this recipe time and again, not just for breakfast, but for brunches, desserts, and everything in between.