Best Gravy Recipe: There’s something magical about a warm, velvety gravy poured over a heap of mashed potatoes or a slice of roasted meat. It’s not just a condiment—it’s the soul of the dish, tying everything together with rich flavor and satisfying depth. Homemade gravy might sound intimidating if you’ve never tried it before, but let me tell you: once you master the technique, there’s no going back to the store-bought stuff.
Gravy doesn’t have to be a once-a-year Thanksgiving event. Whether you’re cooking up a roast on a Sunday, whipping up some chicken and biscuits, or simply looking to add more oomph to your meal, gravy can be your best friend. It’s quick, easy, and endlessly customizable.
Let’s take a deep dive into what makes gravy so essential, the ingredients you’ll need, and the step-by-step process to creating a silky, savory sauce that will elevate any dish it touches.
Why Homemade Gravy is Better Than Store-Bought
First off, let’s talk flavor. Store-bought gravy often contains artificial flavors, excessive sodium, and preservatives. While convenient, it lacks that deep, savory character that comes from real pan drippings or homemade stock. When you make it yourself, you’re in control of the ingredients. That means no mystery chemicals, no weird aftertaste—just pure, flavorful goodness.
Another perk of making your own gravy? Customization. You can tweak the seasoning, adjust the thickness, and choose the fat and liquid that best complements your main dish. Want a creamy white gravy for your biscuits? Done. A dark, rich beef gravy for your roast? No problem.
And let’s not forget the pride. There’s something deeply satisfying about mastering a recipe that’s often considered a “grandma-level” skill. Trust me, once you taste the difference, you’ll never go back.
Common Types of Gravy You Can Make
Gravy isn’t a one-size-fits-all kind of sauce. Depending on your base ingredients and method, there are several delicious variations to try:
- Brown Gravy: Made with meat drippings and broth, thickened with flour or cornstarch. Common with beef or turkey.
- White Gravy (Country Gravy): A creamy, milk-based gravy usually served with fried chicken or biscuits.
- Giblet Gravy: A Thanksgiving favorite made with turkey giblets, broth, and pan drippings.
- Vegetarian or Vegan Gravy: Made without meat drippings, using veggie stock and umami boosters like soy sauce, mushrooms, or nutritional yeast.
Knowing the type of gravy you want to make is the first step to gravy greatness.
Ingredients You’ll Need
The beauty of gravy lies in its simplicity. You don’t need a ton of ingredients to make a truly delicious sauce. But each component plays a crucial role in the final product.
Essential Ingredients for a Basic Gravy
Let’s break down the classic formula:
- Fat: This could be pan drippings, butter, or oil. It’s what forms the roux (the thickening base of the gravy).
- Flour: All-purpose flour is the go-to thickening agent. It combines with fat to create the roux.
- Liquid: Usually broth or stock. You can use beef, chicken, turkey, or vegetable broth, depending on your dish.
- Salt and Pepper: Don’t underestimate the power of good seasoning. Even the best gravy can fall flat without the right amount of salt.
- Optional Herbs & Spices: Think thyme, rosemary, sage, onion powder, or garlic powder for that extra depth of flavor.
That’s it for the basics. With just these five ingredients, you’re already 90% of the way to gravy perfection.
Optional Ingredients to Enhance Flavor
If you want to kick things up a notch, here are some ingredients to consider adding:
- Pan Drippings: These carry concentrated meat flavors and add incredible richness.
- Worcestershire Sauce: Just a few drops can add a wonderful savory complexity.
- Soy Sauce: Perfect for vegetarian gravies to mimic umami.
- Cream or Milk: For white gravy or a smoother finish.
- Onions or Garlic: Sautéed in butter for a sweeter, deeper flavor.
- Wine or Sherry: Adds elegance and depth to more refined gravies.
Pick and choose based on what you’re cooking. The beauty of gravy is that it’s adaptable—there’s no single right way to do it.
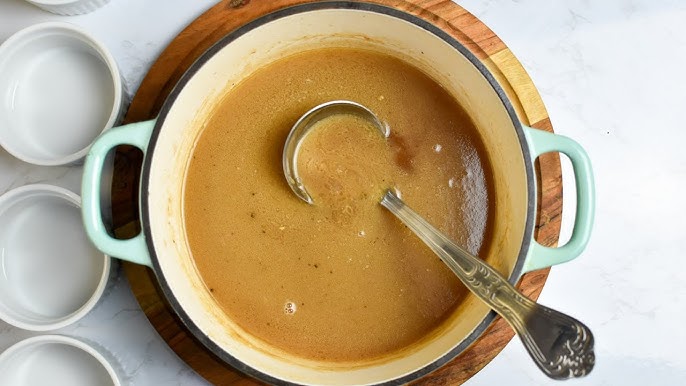
Step-by-Step Guide to Making Gravy
Let’s roll up our sleeves and make some gravy. This process is straightforward, even if you’ve never done it before. Ready? Here we go.
Step 1: Prepare the Roux
Start by heating your fat in a skillet or saucepan over medium heat. If you’re using pan drippings from a roast, pour them directly into the pan and let them heat up. If you don’t have drippings, butter or oil works just fine.
Once the fat is hot, sprinkle in the flour. Use about equal parts fat and flour—for example, ¼ cup fat to ¼ cup flour. Whisk it constantly to combine and cook for 2–3 minutes. This removes the raw flour taste and gives your gravy a golden-brown base (go a little longer for a darker gravy).
Keep whisking until the roux looks smooth and slightly bubbly. This step is the foundation of your gravy, so don’t rush it!
Step 2: Add Liquid and Whisk Thoroughly
Now comes the fun part. Gradually pour in your broth or stock while whisking constantly. This helps avoid lumps and ensures a smooth consistency.
Start with a little liquid at first to loosen up the roux, then add the rest. You’ll usually want 2 to 3 cups of liquid for every ¼ cup of fat/flour. The more liquid, the thinner the gravy—so adjust to your preference.
Keep whisking as the gravy simmers and thickens. This usually takes about 5–7 minutes. If it’s too thick, add a splash more broth. If it’s too thin, let it simmer a bit longer.
Step 3: Seasoning and Final Touches
Once your gravy is thickened to your liking, it’s time to taste and adjust. Add salt and pepper gradually, and don’t be shy with your taste testing.
This is also the point where you can add any extras—herbs, Worcestershire, cream, or even a splash of wine. Give it another few minutes to simmer and meld all those flavors together.
Then, remove from heat and serve immediately, or keep it warm on low until your meal is ready.
Tips for Perfect Gravy Every Time
Want to take your gravy from good to spectacular? Here are a few pro tips to keep in your back pocket:
Avoiding Lumps in Gravy
Lumps are the bane of gravy lovers everywhere. But they’re also completely avoidable. The key? Whisk like your life depends on it—especially when adding the liquid. Adding cold liquid to a hot roux slowly while whisking prevents clumps from forming.
If you still end up with lumps, don’t panic. Just strain your gravy through a fine mesh sieve or use an immersion blender to smooth it out.
How to Adjust the Consistency
Thicker or thinner, the choice is yours. Here’s how to tweak it:
- Too thick? Add more broth or even a splash of water.
- Too thin? Let it simmer uncovered to reduce, or mix a small slurry (1 tbsp cornstarch + 2 tbsp cold water) and whisk it in.
Remember: gravy thickens as it cools. Aim for a slightly thinner consistency in the pan so it’s just right when served.
Variations of the Classic Gravy Recipe
Let’s be honest—gravy is not a one-flavor-fits-all sauce. Depending on what you’re serving, you’ll want a variation that complements and enhances the meal. From holiday favorites to vegan-friendly options, here are some of the most popular gravy styles you can master.
Turkey Gravy
Turkey gravy is the king of Thanksgiving dinners. It’s traditionally made using the drippings from a roasted turkey, which gives it a rich, savory flavor that’s hard to beat.
Here’s how to make it:
- After roasting your turkey, remove it from the pan and pour the drippings into a bowl.
- Let the fat rise to the top and skim it off. Save about ¼ cup of the fat and return it to the pan.
- Add an equal amount of flour to the fat to form your roux.
- Slowly whisk in turkey or chicken broth, then return a spoonful of the skimmed drippings for extra flavor.
- Let it simmer until thickened. Add a splash of white wine, a pinch of sage, or a bit of cream for a gourmet twist.
The result? A golden, smooth gravy that’ll make your guests go back for seconds… and thirds.
Beef Gravy
Beef gravy is the ultimate comfort food topper—ideal for roast beef, mashed potatoes, or meatloaf. It has a bold, deep flavor and benefits from dark, rich stock.
To make it:
- Use beef roast drippings or butter for your fat.
- Whisk in flour to form the roux, then slowly add beef broth.
- Add Worcestershire sauce, black pepper, and maybe a touch of onion or garlic powder for extra depth.
- Let it simmer until velvety smooth.
Beef gravy should be robust, not too thick, and layered in flavor. It’s a game-changer for hearty dinners.
Vegetarian or Vegan Gravy
Who says you need meat to enjoy delicious gravy? With a few smart swaps, you can make a vegetarian or vegan version that’s just as satisfying.
Here’s a go-to recipe:
- Use vegan butter or olive oil as your fat.
- Form a roux with flour, then add vegetable broth.
- For umami, stir in a dash of soy sauce, nutritional yeast, or even sautéed mushrooms.
- Season with thyme, rosemary, onion powder, and a touch of garlic.
Let it thicken and serve it with mashed potatoes, roasted veggies, or vegan meatloaf. It’s earthy, savory, and 100% plant-based comfort in a bowl.
Storing and Reheating Gravy
We get it—you made a huge batch of gravy because you just couldn’t help yourself. The good news? Gravy stores well, and reheating it is a breeze with the right technique.
Best Storage Practices
Once your gravy has cooled to room temperature, here’s how to store it:
- Transfer it into an airtight container or a mason jar.
- Refrigerate for up to 4 days.
- For longer storage, freeze it. Use freezer-safe containers or silicone trays to portion it out. It’ll keep well in the freezer for up to 3 months.
If your gravy contains dairy (like cream or milk), it may separate a bit when frozen. Just whisk it well during reheating, and it should come back together.
Reheating Without Losing Texture or Flavor
Reheating gravy can be tricky if you’re not careful—it can get too thick, too thin, or lumpy. Here’s how to avoid those problems:
- Stovetop: Reheat slowly in a saucepan over medium-low heat. Stir constantly to maintain a smooth consistency. Add a bit of broth or water if it thickens too much.
- Microwave: Reheat in short bursts (30 seconds), stirring between each until it’s hot and smooth.
- Don’t boil: High heat can cause the fat to separate or make the texture grainy.
A quick whisk and a bit of patience will give you fresh-tasting, delicious gravy every time.
What to Serve Gravy With
You’ve made the gravy, now what should you pour it on? Pretty much everything, honestly. But let’s stick with the classics and a few creative surprises.
Classic Dishes That Need Gravy
Here are the go-to meals where gravy truly shines:
- Mashed Potatoes: The most iconic gravy partner. It turns fluffy potatoes into comfort food heaven.
- Roast Turkey or Chicken: Thanksgiving or not, a good poultry roast begs for gravy.
- Meatloaf: Ditch the ketchup glaze—pour rich beef gravy instead.
- Biscuits: Especially with white gravy, this Southern staple becomes a hearty breakfast.
- Stuffing/Dressing: A drizzle of gravy on top brings it all together.
- Roast Beef or Pork: The natural juices make a great base, and the flavor is unmatched.
Creative Uses for Leftover Gravy
If you’ve got leftover gravy and don’t want to waste a drop, try these ideas:
- Gravy Poutine: Pour over French fries and add cheese curds.
- Gravy Sandwich: Dip roast beef or turkey sandwiches in warm gravy—think of it like a French dip.
- Shepherd’s Pie: Use gravy instead of stock or tomato base for the filling.
- Gravy Pasta: Yep, pasta. It’s savory and unexpected, but oh-so-good.
- Gravy Stir-fry: Mix into rice with veggies and meat for a thick, saucy twist.
Don’t limit yourself—gravy is more versatile than you think.
FAQs about Gravy Recipe
1. Can I freeze homemade gravy?
Yes! Just cool it completely, portion it into airtight containers or silicone freezer trays, and freeze for up to 3 months. Reheat gently and whisk to restore smoothness.
2. How do I fix salty gravy?
Try adding a splash of cream or milk, a small potato (then remove it), or extra broth to dilute the saltiness. Acid like lemon juice can also help balance it.
3. What’s the best thickener for gluten-free gravy?
Use cornstarch, arrowroot powder, or gluten-free flour blends instead of regular flour. Mix with a little cold water first to form a slurry before adding to hot liquid.
4. Can I use milk instead of broth in gravy?
Yes, especially for white or country-style gravies. Just be sure to whisk well and simmer gently to avoid curdling.
5. How long does homemade gravy last in the fridge?
Gravy can be safely stored in the fridge for up to 4 days. Reheat thoroughly before serving, and if it smells off, toss it.
Conclusion
Gravy isn’t just an afterthought—it’s the secret ingredient that turns a good meal into an unforgettable one. With just a few basic ingredients and a little know-how, you can whip up a batch that rivals any restaurant or holiday feast. Whether you’re aiming for a silky turkey gravy, a bold beef version, or a plant-based masterpiece, the process is simple, forgiving, and oh-so-rewarding.
Now that you’ve got the steps, tips, and variations, it’s time to step into the kitchen and ladle up something special. Trust me—once you go homemade, there’s no turning back.


