Vanilla Custard Recipe: Vanilla custard is the ultimate comfort dessert—silky, creamy, rich, and infused with the subtle, aromatic flavor of real vanilla. This classic dish has roots in European culinary traditions and has been cherished for centuries in various forms, from French crème anglaise to British custard poured over puddings. At its core, custard is a mixture of milk, cream, egg yolks, sugar, and vanilla, gently cooked until it thickens into a smooth and luxurious sauce. It’s simple, but when done right, it delivers an experience that feels indulgent yet heartwarming. Whether you’re spooning it warm over a fruit crumble or chilling it as a dessert base, vanilla custard is a versatile staple in any kitchen.
Why You’ll Love This Recipe
What makes this vanilla custard recipe a favorite? First, it’s incredibly easy to follow—even for beginners. No need for fancy equipment or hard-to-find ingredients. Second, the result is consistently creamy and flavorful every time. This recipe balances richness and sweetness perfectly, avoiding the overly thick, gelatinous texture of store-bought custards. Plus, it’s customizable! Want it sweeter? Add more sugar. Prefer it lighter? Reduce the cream. It’s also a great make-ahead dessert, as it keeps well in the fridge for several days. This recipe will become your go-to for dinner parties, cozy nights in, or as a treat over your favorite cake or pastry.
Ingredients Needed for Vanilla Custard
Essential Ingredients List
To make the perfect vanilla custard, you need only a handful of everyday kitchen staples. Here’s the base list:
- 2 cups whole milk
- 1 cup heavy cream
- 5 large egg yolks
- 1/2 cup granulated sugar
- 1 vanilla bean (or 1 tbsp pure vanilla extract)
- Pinch of salt
These ingredients come together to create a silky, rich custard that’s packed with vanilla flavor. Egg yolks give the custard its signature texture, while milk and cream create that rich, creamy consistency. Sugar balances the richness, and vanilla adds the aromatic highlight. A pinch of salt may seem small, but it enhances all the other flavors beautifully.
Choosing the Best Vanilla
Vanilla is the star of this dish, so the quality you choose matters immensely. The best option? A fresh vanilla bean. Slice it open and scrape out the seeds to infuse your custard with deep, aromatic vanilla flavor. If that’s not available, opt for high-quality pure vanilla extract—no imitation stuff! You can also try vanilla paste, which offers an intense flavor and those lovely little black flecks of real vanilla. Always avoid artificial vanilla; it simply won’t give your custard the same depth or fragrance.
Tools and Equipment Required
Basic Kitchen Tools
You don’t need a professional kitchen to make delicious vanilla custard. These basic tools will do the trick:
- Medium saucepan
- Whisk
- Mixing bowls
- Fine mesh strainer or sieve
- Heatproof rubber spatula
- Measuring cups and spoons
These tools help you control temperature, mix ingredients thoroughly, and ensure the custard reaches the perfect texture without lumps or curdling.
Optional Tools for Better Results
Want to elevate your custard game? These optional tools can make the process smoother:
- Thermometer: Helps you monitor the temperature closely (ideal temp: 170–175°F).
- Double boiler: Prevents overheating and makes custard cooking more forgiving.
- Silicone spatula with a thermometer built-in: Dual function in one tool.
Though not essential, these gadgets add extra precision, which is always helpful when working with delicate mixtures like custard.
Step-by-Step Guide to Making Vanilla Custar
Step 1: Preparing the Ingredients
First things first—mise en place. That’s just a fancy French term meaning “everything in its place.” Gather all your ingredients and tools before you start cooking. Separate the egg yolks and place them in a medium mixing bowl. Measure your sugar, milk, cream, and salt. If you’re using a vanilla bean, split it lengthwise and scrape out the seeds with the back of a knife. Combine the seeds with the milk and cream for an even distribution of flavor. Taking this time up front saves you from scrambling later—and ensures your custard comes together smoothly
Step 2: Heating the Milk and Cream
In a medium saucepan over medium heat, combine the milk, cream, and vanilla (either the seeds and pod or vanilla extract). Warm the mixture just until you see small bubbles forming around the edges—not boiling. This step is crucial because gently heating the liquid helps release the vanilla flavor while prepping the milk for tempering the egg yolks. Stir occasionally to prevent a skin from forming. If you’re using a vanilla pod, let it steep for 10 minutes, then remove it before the next step. The goal is to infuse, not overcook.
Step 3: Whisking the Egg Yolks and Sugar
While your milk is heating, whisk the egg yolks, sugar, and a pinch of salt in a separate bowl. Whisk until the mixture turns pale and slightly thick—this means the sugar is dissolving and you’re adding air for a lighter texture. This step is key for a smooth, rich custard, and the color change is your cue that it’s ready for tempering. Use a large bowl to give yourself room; you’ll be adding hot milk next.
Step 4: Tempering the Egg Mixture
Tempering is where the magic—and the caution—happens. You’re about to mix hot milk into raw egg yolks, but if you rush this step, you’ll end up with scrambled eggs. So here’s the trick: slowly pour a ladle of the warm milk mixture into the egg yolks while constantly whisking. This gradually raises the temperature of the yolks, prepping them for full integration without cooking them.
Once you’ve added about half of the warm milk, slowly pour the egg mixture back into the saucepan with the remaining milk and cream, still whisking. This careful balance keeps the yolks from curdling while combining all the flavors into a smooth base. The goal is to blend, not shock, the eggs with heat.
Step 5: Cooking the Custard to Perfection
Return the combined mixture to medium-low heat and cook it slowly, stirring constantly with a heatproof spatula or wooden spoon. You’re looking for the custard to thicken slightly—enough to coat the back of your spoon. The key temperature is between 170°F and 175°F. Anything above that, and you risk curdling. No thermometer? Dip your spoon into the custard, then run your finger down the back—if it leaves a clear line, it’s ready.
Don’t rush this step. Stir gently and consistently, scraping the bottom and sides to prevent sticking. Once thickened, immediately remove it from heat and pour it through a fine mesh sieve into a clean bowl. This step removes any accidental lumps and ensures your custard is as silky as possible.
Tips and Tricks for Perfect Custard
Avoiding Lumps and Curdling
Lumps and curdling are the two biggest threats to custard. To avoid them, always temper your eggs slowly and never boil the custard. Stir constantly, and use a low heat setting. A thermometer is your best friend here, giving you precise control. If you do end up with lumps, don’t panic—strain the custard through a fine sieve to smooth things out.
Also, avoid multitasking. Custard demands your full attention during the cooking stage. Even a few seconds of overheating can ruin the batch. Stir slowly and patiently—it’s worth it.
Achieving the Perfect Texture
The ideal custard is creamy, smooth, and thick enough to coat the back of a spoon but not so thick it’s gluey. Achieving this balance comes down to three factors: the right egg-to-liquid ratio, slow heating, and constant stirring.
For a richer texture, you can increase the egg yolks by one or two. Want it a bit lighter? Use more milk and less cream. Texture is also affected by how long you cook it—stop too soon, and it’s runny; go too long, and it’s dense. Keep checking that spoon test and adjusting as needed.
Serving Suggestions
Pairing Ideas
Vanilla custard is a jack-of-all-trades when it comes to pairings. Here are some top ideas:
- Fruit: Berries, bananas, or poached pears work beautifully.
- Pastries: Pour over croissants, tarts, or Danish pastries.
- Cakes: Drizzle on sponge cake, pound cake, or bread pudding.
- Pies: Use it as a filling or topping for pies like apple or peach.
Its mellow flavor enhances almost any dessert. Warm custard can even be served alone with a dusting of nutmeg or cinnamon.
Presentation Tips
To make your custard look as good as it tastes:
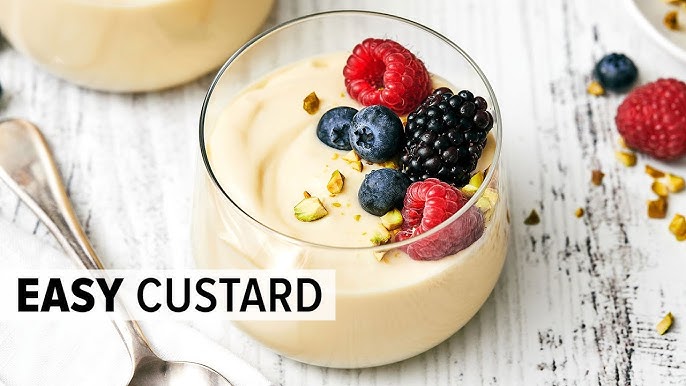
- Serve in elegant ramekins or small glass bowls.
- Garnish with fresh fruit, a mint leaf, or a sprinkle of grated chocolate.
- Layer it in trifles or parfait glasses for a visual treat.
- Chill it slightly for clean plating, especially if using it as a filling or topping.
Small touches go a long way in turning a simple dessert into a showstopper.
Storage and Shelf Life
Refrigeration Guidelines
Once your custard cools, cover it with plastic wrap, pressing the wrap directly onto the surface to prevent a skin from forming. Store it in the fridge, and it will stay fresh for up to 3 days. Use an airtight container to prevent it from absorbing other odors from the fridge.
Before serving chilled custard, give it a gentle stir to restore its creamy consistency. If it has thickened too much, whisk in a little milk to loosen it up.
Can You Freeze Custard?
Technically, yes—but it’s not ideal. Freezing can alter the texture, making it grainy or watery upon thawing. If you must freeze it, use it in baked goods where the texture won’t be as noticeable. For best results, fresh custard is the way to go. If you do freeze it, thaw it slowly in the fridge and whisk it vigorously before serving to restore some of the original texture.
Common Mistakes and How to Avoid Them
Overcooking
This is the number one custard crime. Overcooking breaks the emulsion, causing the proteins to clump and the custard to curdle. Always cook on low heat, stir constantly, and monitor the temperature. The minute it thickens, remove it from heat—don’t wait until it “feels done.”
Incorrect Tempering
Dumping hot milk into cold eggs is a recipe for scrambled eggs. Always temper gradually. Whisk constantly while adding the warm liquid, and don’t rush the process. It might take a few minutes, but it’s essential for a silky result.
Also, never skip the straining step. Even if you think your custard is perfect, this step catches any little bits and ensures it’s flawless.
FAQs about Vanilla Custard Recipe
1. Can I use whole eggs instead of just yolks?
Yes, but using whole eggs will give the custard a firmer, less silky texture. For a rich and creamy custard, stick with yolks.
2. What’s the difference between custard and pudding?
Custard is typically thickened with eggs, while pudding is often thickened with starch (like cornstarch). The texture and taste are slightly different.
3. How do I fix curdled custard?
If your custard curdles, blend it immediately in a blender or with an immersion blender to smooth it out. It may not be perfect, but it can be salvaged.
4. Can I use vanilla extract instead of a vanilla bean?
Absolutely. Use about 1 tablespoon of pure vanilla extract as a substitute. Add it after the custard has finished cooking to preserve its flavor.
5. How long does homemade custard last?
Properly stored in the fridge, homemade custard lasts up to 3 days. Be sure to cover it tightly and use clean utensils when serving.
Conclusion
Making homemade vanilla custard might sound intimidating at first, but it’s truly a rewarding kitchen project. With just a few simple ingredients and some careful attention, you can whip up a dessert that’s as elegant as it is comforting. Whether served warm over cake, chilled in a tart, or simply enjoyed on its own, vanilla custard has a timeless appeal that never goes out of style. Once you master this basic recipe, you’ll find yourself coming back to it again and again. So go ahead—grab those egg yolks and start whisking. Your next favorite dessert is just a custard away.


