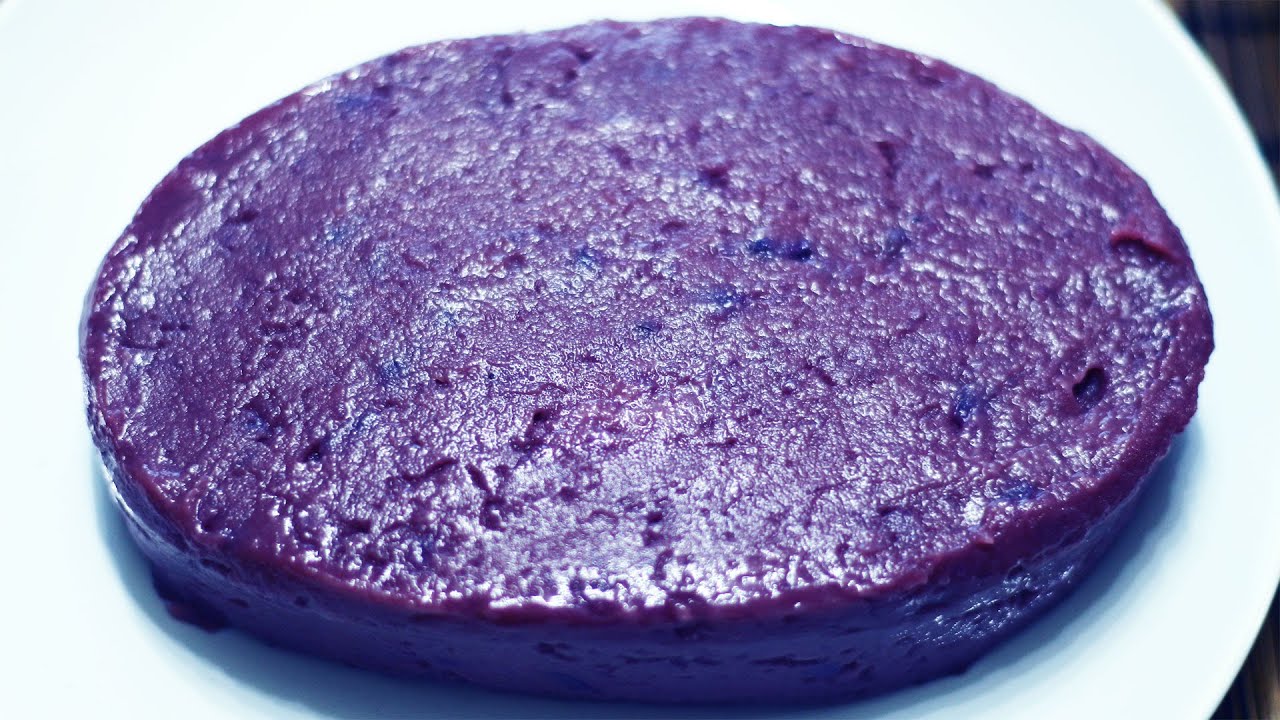
Ube Halaya Recipe: Ube Halaya, also known as ube jam, is a popular Filipino dessert made primarily from purple yam. Rich, creamy, and vibrant in color, this dessert is a beloved staple in many Filipino households. You’ll often find it served during festive occasions like Christmas, New Year, and birthday parties. The name “halaya” comes from the Spanish word “jalea,” which means jelly or jam — a fitting description for its thick, velvety texture.
This eye-catching dessert doesn’t just impress with its looks. It’s a delicious, comforting treat with a unique earthy sweetness from the ube, a starchy root vegetable native to the Philippines. Whether served as a dessert on its own or used in cakes, pastries, and ice creams, ube halaya’s signature flavor always stands out. You don’t have to be a professional chef to make it either — all you need is a little patience, the right ingredients, and this guide to walk you through every step.
Why Filipinos Love Ube Halaya
There’s something special about the bond between Filipinos and ube halaya. It’s more than just a sweet treat; it’s a nostalgic comfort food. For many, it reminds them of home, family gatherings, and their childhood. Making halaya is often a family tradition passed down through generations. The rich flavor of the ube, combined with the creaminess of condensed milk and butter, creates a dessert that warms both the belly and the heart.
Filipinos also take pride in their native ingredients, and ube is a standout. Its vibrant purple color adds a visual appeal to any dish, and its flavor is unlike anything else — mildly sweet, nutty, and incredibly satisfying. Whether it’s served on a banana leaf or spooned into jars as gifts, ube halaya is an expression of Filipino love and hospitality.
Ube Halaya in Filipino Culture
In Filipino culture, food is often at the heart of every celebration, and ube halaya plays a starring role in many of these events. From town fiestas to intimate family dinners, this dessert is a symbol of festivity and togetherness. You’ll often find it in “kakanin” spreads (Filipino rice-based desserts) alongside bibingka, sapin-sapin, and kutsinta.
Moreover, the act of preparing ube halaya is typically a communal activity. It’s not uncommon for families to gather in the kitchen, taking turns stirring the thick mixture while sharing stories and laughter. In a way, making ube halaya brings people together, which is exactly what Filipino food culture is all about.
Ingredients Needed
Main Ingredients
To make authentic, creamy, and delicious ube halaya, you’ll need a few essential ingredients. Here’s what you’ll need:
- Grated ube (purple yam) – 2 cups (can be fresh or frozen)
- Condensed milk – 1 can (approx. 14 oz)
- Evaporated milk – 1 can (approx. 12 oz)
- Coconut milk – 1 cup (optional but adds creaminess)
- Butter or margarine – 1/2 cup
- Sugar – 1/2 cup (adjust to taste)
- Ube extract (optional) – 1 tsp (for color and extra flavor)
If you’re lucky enough to get fresh ube, that’s perfect. But if not, frozen grated ube works just as well. Make sure to thaw it completely before cooking.
Optional Add-ons for Extra Flavor
Some versions of ube halaya include toppings or mix-ins to enhance the experience. Here are some optional add-ons you might want to try:
- Cheese – Grated cheddar cheese on top adds a salty contrast to the sweet jam.
- Macapuno (coconut strings) – Adds texture and more Filipino flair.
- Latik – Crispy coconut curds, a favorite topping in many Filipino desserts.
These ingredients aren’t necessary, but they elevate the dish to a whole new level.
Choosing the Best Ube
Fresh ube is the gold standard. Look for firm, smooth-skinned roots with a deep purple color. When boiled, they should be tender and easy to mash. However, fresh ube can be hard to find outside the Philippines, so most people opt for frozen grated ube available at Asian supermarkets. It’s a fantastic alternative and still delivers the flavor you’re looking for.
Make sure to avoid substitutes like purple sweet potatoes — while they look similar, they don’t offer the same earthy flavor or creamy texture that true ube provides. If using frozen, always check the label to ensure you’re getting 100% pure ube with no additives.
Kitchen Tools You’ll Need
Basic Cooking Tools
To make ube halaya without a hitch, having the right tools in your kitchen is key. While the recipe itself isn’t overly complicated, you’ll be dealing with a thick, sticky mixture that requires consistent stirring and heat management. Here are the must-have tools:
- Heavy-bottom saucepan or pot – Prevents burning by distributing heat evenly.
- Wooden spoon or silicone spatula – Ideal for continuous stirring without damaging your cookware.
- Measuring cups and spoons – Precision is important for a balanced flavor.
- Mixing bowls – For prepping and combining ingredients beforehand.
Using a thick, non-stick pan is especially helpful. Ube halaya has a tendency to stick and burn if not stirred constantly, so having a durable and heat-friendly pan is essential.
Recommended Utensils for Smooth Cooking
While the basic tools will get the job done, certain utensils can make your life even easier:
- Hand mixer or potato masher – Useful if you’re starting with fresh boiled ube that needs mashing.
- Whisk – Helps blend the milks and sugar before cooking.
- Jar funnel – If you plan to store your halaya in jars, a wide-mouth funnel prevents spills and mess.
Make sure to set up your workspace before you begin cooking. Once the cooking starts, you’ll need to stay by the stove, so prepping everything in advance will save you stress.
Step-by-Step Guide to Making Ube Halaya
Step 1 – Preparing the Ube
If you’re using fresh ube, start by scrubbing the roots clean, then boiling them in water until they’re fork-tender. This usually takes around 30 to 40 minutes. Let them cool, peel off the skin, and grate or mash them until smooth.
If you’re using frozen grated ube, allow it to thaw completely. It’s best to do this overnight in the fridge, or for a few hours at room temperature. Once thawed, give it a quick mash to break apart any lumps.
Tip: A smoother mash equals a creamier halaya. You can run the mashed ube through a food processor if you want that ultra-smooth texture.
Step 2 – Mixing and Cooking
Once your ube is ready, it’s time to combine the ingredients:
- In a large bowl, whisk together the evaporated milk, condensed milk, coconut milk, and sugar. Add a few drops of ube extract if you’re using it.
- In your heavy-bottomed pan, melt the butter over low heat.
- Add the mashed or grated ube to the butter and mix well.
- Pour in the milk mixture slowly, stirring continuously to combine everything evenly.
At this stage, the mixture will be fairly liquid, but don’t worry — it’ll thicken up as it cooks. Keep your heat low to medium to prevent scorching. Once everything is mixed, the real work begins.
Step 3 – Stirring and Achieving the Right Consistency
Now comes the labor-intensive part: stirring. As the ube halaya cooks, it will gradually thicken. This process takes about 30 to 45 minutes, depending on the amount you’re making and the consistency you want.
Key tips for this step:
- Stir constantly. Do not walk away from the stove.
- Scrape the sides and bottom of the pan frequently to avoid burning.
- Once it starts pulling away from the sides and forming a sticky mass, you’re almost there.
The texture should be thick enough that when you drag your spoon across the bottom of the pan, it leaves a clear trail.
Optional step: If you’re adding macapuno or cheese, stir them in once the halaya has thickened and cook for an additional 5–10 minutes.
Step 4 – Cooling and Storing
Once your ube halaya has reached the desired consistency, remove it from the heat and let it cool slightly. It will continue to thicken as it cools.
To serve or store:
- Spoon the warm halaya into molds or jars.
- Let it cool to room temperature before sealing.
- Refrigerate for at least 2 hours to let it set fully before serving.
Ube halaya is typically served chilled or at room temperature. You can also enjoy it warm — it’s delicious either way!
Storage tips:
- Keep in an airtight container.
- Refrigerate for up to 7 days.
- For longer storage, freeze in small portions.
Tips for the Perfect Ube Halaya
Avoiding Lumps and Burning
One of the most common issues people face when making ube halaya is ending up with a lumpy or burnt batch. But with a few simple tricks, you can easily avoid both.
Start by ensuring your ube is completely mashed or blended smooth before cooking. This might seem minor, but it makes a world of difference in the final texture. If needed, pass it through a fine strainer or give it a quick blitz in a food processor. Smooth ube equals smooth halaya — it’s that simple.
When it comes to cooking, keep your heat on low to medium at all times. High heat might speed things up, but it also increases the risk of burning. This dish requires patience. Stir constantly, especially once the mixture starts to thicken. Use a wooden spoon or heat-resistant silicone spatula to scrape the bottom and sides of the pan continuously.
Also, using a non-stick or heavy-bottomed pan can significantly reduce the chances of burning. These pans distribute heat more evenly and help keep the mixture from sticking.
Adjusting Sweetness to Taste
Taste preferences vary, and one person’s “just right” might be too sweet for another. Thankfully, ube halaya is highly customizable when it comes to sweetness.
Most recipes use condensed milk and sugar, which already pack a punch of sweetness. If you’re someone who likes it less sweet, try reducing the sugar or using only half the can of condensed milk to start. You can always add more later during the cooking process if needed.
Another great option is using coconut milk as a flavor balancer. It adds richness and creaminess while toning down the overall sweetness. Some even substitute part of the condensed milk with all-purpose cream for a more subtle, velvety finish.
If you’re adding toppings like sweet macapuno or cheese, remember that they also add their own level of sweetness (or saltiness), which affects the overall balance.
Serving Suggestions
Standalone Dessert or Add-on?
One of the things that makes ube halaya so versatile is that it can be served in many different ways. It shines on its own, scooped into small bowls or shaped into rounds using molds, topped with grated cheese for that delicious salty-sweet contrast.
But its uses don’t stop there. Ube halaya is also a star ingredient in a variety of other Filipino desserts. It’s often layered into halo-halo, a colorful shaved ice dessert packed with jellies, beans, flan, and leche. You’ll also find it piped into ube cakes, rolled into ube bread (like ensaymada), or used as filling for hopia and tarts.
Want something more adventurous? Try serving it with a scoop of vanilla ice cream or a dollop of whipped cream. Or spread it on warm toast for an indulgent breakfast.
Popular Pairings with Ube Halaya
Ube halaya pairs wonderfully with a number of Filipino favorites:
- Leche Flan – Served together as “ube-leche flan,” this duo is a holiday favorite.
- Sticky rice (puto or bibingka) – A great balance of chewy and creamy textures.
- Cassava cake – Add a layer of ube halaya for a more colorful and flavorful twist.
Even non-Filipino treats pair well with it — like waffles, pancakes, or even croissants. You’re only limited by your imagination when it comes to enjoying this iconic purple dessert.
Storing and Shelf Life
How to Store Properly
Once you’ve poured your halaya into jars or containers, make sure they cool down completely before sealing. Cover tightly with lids to prevent it from drying out or absorbing other odors from the fridge.
For best results:
- Store in glass containers to maintain freshness and flavor.
- Use airtight jars if you plan to give them as gifts or sell them.
Ube halaya tastes even better after a day or two in the fridge, as the flavors meld together. Just make sure it’s kept chilled at all times.
Shelf Life and Reheating Tips
When stored properly in the refrigerator, ube halaya can last up to 1 week. If you need to keep it longer, freezing is a good option. Divide it into smaller portions and freeze in airtight containers for up to 2 months.
To reheat:
- Thaw in the fridge overnight if frozen.
- Warm over low heat in a pan, stirring gently.
- Add a splash of evaporated milk if it becomes too thick.
Avoid microwaving directly in plastic containers — transfer to a microwave-safe dish or reheat on the stove for best texture.
FAQs about Ube Halaya Recipe
1. Can I use frozen ube?
Absolutely! Frozen grated ube is a great alternative to fresh and is widely available in Asian supermarkets. Just be sure to thaw it completely before cooking.
2. Can I make ube halaya without condensed milk?
Yes, you can substitute with evaporated milk and sugar or even use coconut cream for a different taste. However, condensed milk adds a unique richness and sweetness.
3. Why is my ube halaya not smooth?
It could be due to poorly mashed ube or lumps that weren’t broken down before cooking. Use a blender, food processor, or fine strainer to achieve a smoother texture.
4. How do I know when it’s done?
When the mixture becomes thick and pulls away from the sides of the pan, leaving a trail as you stir, it’s done. It should hold its shape when scooped or molded.
5. Can I freeze ube halaya?
Yes! Divide it into smaller portions and freeze in airtight containers. It will last up to 2 months. Thaw overnight in the fridge before serving or reheating.
Conclusion
Ube halaya is more than just a dessert — it’s a celebration of Filipino heritage, a nostalgic nod to family traditions, and a delightfully unique treat that everyone should try at least once. From its vibrant purple hue to its rich, creamy flavor, every spoonful delivers comfort and joy. While making ube halaya does take time and patience, the payoff is absolutely worth it. Whether you enjoy it on its own, paired with other desserts, or given as a heartfelt homemade gift, this iconic Filipino jam will always leave a lasting impression.
So, grab those ingredients, clear your schedule for a bit of stirring, and treat yourself to a delicious slice of Filipino culture. Your taste buds will thank you!


