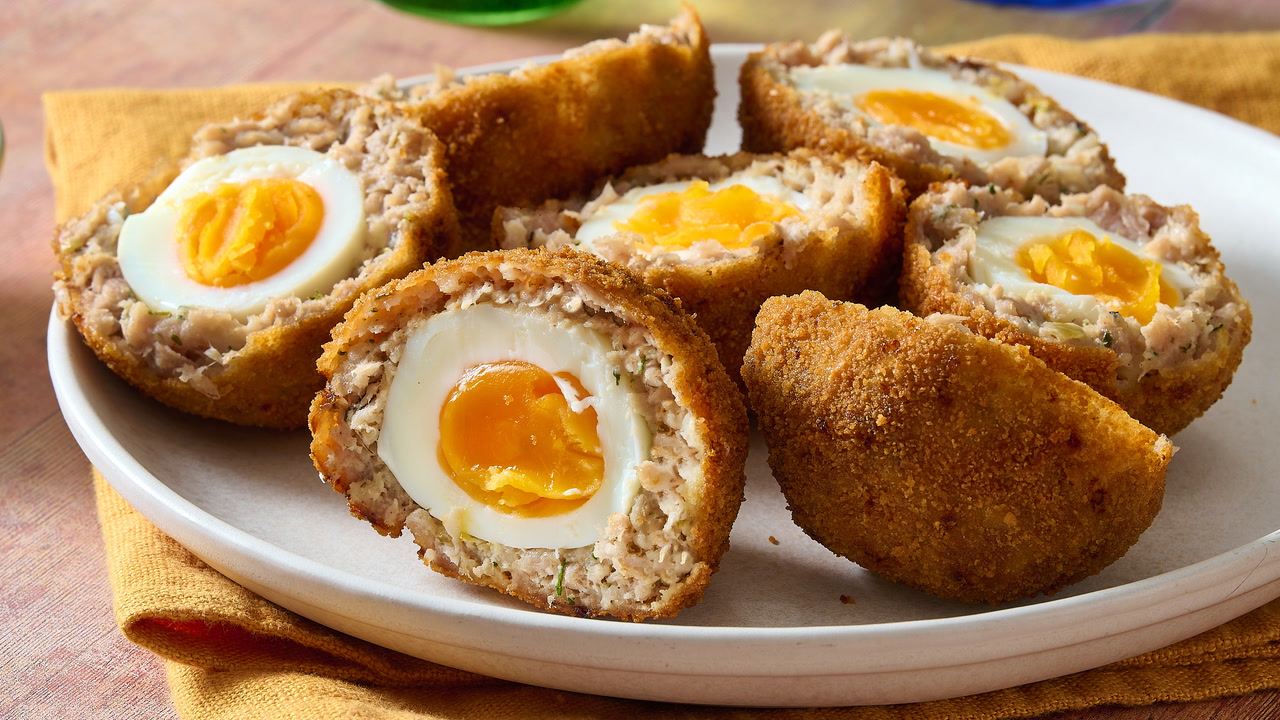
Scotch Eggs Recipe: Imagine biting into a crispy, golden shell that cracks open to reveal flavorful sausage meat wrapped around a perfectly cooked egg—this is the magic of Scotch eggs. A traditional British snack, Scotch eggs are both hearty and satisfying, making them a go-to favorite for picnics, breakfasts, and pub snacks. Though the idea is simple, getting it just right takes a bit of technique, love, and quality ingredients.
Origin and History
The origins of Scotch eggs can be traced back to 1738 when Fortnum & Mason, a luxury department store in London, first introduced this savory delicacy. Originally meant to be a portable snack for travelers, the dish has stood the test of time and evolved over the centuries. Though the name might suggest a Scottish origin, its history is deeply rooted in English culinary tradition. Today, it’s a versatile dish enjoyed in various forms across the globe.
Ingredients Needed
Main Ingredients
You don’t need a long grocery list to make Scotch eggs. Here’s a simple but complete list of the essentials:
- 6 large eggs (plus 2 for coating)
- 1 pound of sausage meat (pork is traditional)
- Salt and black pepper to taste
- 1 teaspoon mustard (optional, for added kick)
- 1 cup all-purpose flour
- 1 cup breadcrumbs (panko for extra crunch)
- Vegetable oil for deep frying
These ingredients combine to create layers of flavor and texture—crispy on the outside, juicy on the inside.
Optional Add-Ons and Variations
Want to put your own twist on it? Here are some optional add-ons:
- Chopped herbs (parsley, thyme, or chives)
- Grated cheese mixed into the sausage
- Spices like paprika or cayenne for heat
- Use ground chicken or turkey for a lighter version
You can get as creative as you want. Some modern takes even feature quail eggs or vegetarian sausage substitutes.
Tools and Equipment
Kitchen Tools Required
Before diving into the cooking, make sure you have the following tools ready:
- Saucepan for boiling eggs
- Mixing bowl
- Slotted spoon
- Rolling pin or hands for shaping
- Three bowls for flour, beaten eggs, and breadcrumbs
- Deep fryer or a heavy-bottomed pot
- Kitchen thermometer (optional but helpful)
Having the right tools streamlines the process and ensures a clean, efficient kitchen setup.
Step-by-Step Guide to Making Scotch Eggs
Step 1: Boiling the Eggs
Start by boiling your eggs. Place them in a pot of cold water, then bring it to a boil. Once it starts boiling, reduce the heat and let it simmer for 6–7 minutes for a soft yolk or 9–10 minutes for fully hard-boiled. Once done, immediately transfer them to an ice bath to stop the cooking process. Let them sit for at least 5 minutes before peeling. This trick also makes peeling easier and keeps the egg white intact.
Step 2: Preparing the Sausage Meat
Season your sausage meat with salt, pepper, mustard, or any additional spices you prefer. Divide it into equal portions—usually about 1/6th per egg. Flatten each portion into a patty using your hands or a rolling pin between two sheets of plastic wrap. This will make it easier to wrap around the egg evenly.
Step 3: Coating the Eggs
Peel the boiled eggs and pat them dry. Wrap each egg with a sausage patty, making sure there are no gaps. Seal the edges well. Now, get your coating line ready:
- First, roll the wrapped egg in flour.
- Then dip it in beaten eggs.
- Finally, coat it in breadcrumbs. Press gently so the crumbs stick well.
Repeat this process for all the eggs. If you want a super crispy crust, you can double-dip in the egg and breadcrumb stage.
Step 4: Frying or Baking the Eggs
Frying Method: Heat vegetable oil to 350°F (175°C). Carefully lower each egg into the oil and fry for about 5–6 minutes until golden brown, turning occasionally. Drain on paper towels.
Baking Method: Preheat your oven to 400°F (200°C). Place the coated eggs on a baking sheet lined with parchment paper. Spray or brush them lightly with oil and bake for 25–30 minutes or until golden and cooked through.
Both methods yield delicious results. Frying gives that classic pub-style crunch, while baking is a healthier alternative.
Tips for Perfect Scotch Eggs
Common Mistakes to Avoid
Scotch eggs might seem straightforward, but a few common missteps can turn your golden bites into soggy disasters. Here are some practical tips to ensure success every time:
- Don’t overcook the eggs: Soft-boiled eggs are key to that glorious runny center. Pull them out of the boiling water and dunk them in ice water immediately to halt cooking.
- Seal the sausage layer properly: Gaps can cause the meat to split during frying. Ensure the sausage meat is evenly distributed and sealed around the egg.
- Use cold eggs for wrapping: Warm eggs may soften the sausage meat and make wrapping difficult. A quick chill in the fridge firms them up.
- Double-dip for extra crunch: If you’re all about that crisp factor, dip the eggs twice in egg and breadcrumbs for a thicker coating.
- Don’t overcrowd the fryer: Fry in small batches so the temperature of the oil doesn’t drop too much, which can result in greasy eggs instead of crispy ones.
Take your time, follow the steps, and you’ll be rewarded with Scotch eggs that rival those from any fancy gastropub.
Serving Suggestions
Best Sides and Dips
Scotch eggs are incredibly versatile and pair well with a variety of sides and condiments. Here’s how to turn them into a full-on meal or party platter:
- Traditional Touch: Serve warm with English mustard and a simple green salad.
- Picnic Style: Pair with potato salad, pickles, or coleslaw for a hearty outdoor meal.
- Pub Vibes: Add thick-cut fries, baked beans, and a chilled beer for the ultimate comfort food combo.
- Gourmet Twist: Slice the Scotch eggs in half and serve on a bed of arugula with aioli or truffle mayo.
You can also serve mini Scotch eggs as appetizers with a variety of dipping sauces—sriracha mayo, garlic yogurt, honey mustard, or even a sweet chili glaze.
Storing and Reheating Scotch Eggs
Shelf Life and Storage Methods
Made a big batch? No worries—Scotch eggs store well and can easily be revived with the right reheating technique.
- Refrigeration: Store in an airtight container in the fridge for up to 4 days.
- Freezing: Wrap each egg tightly in plastic wrap, then store in a freezer-safe bag or container. They can last up to 1 month.
- Reheating: For best results, reheat in an oven or air fryer at 350°F (175°C) for 10-12 minutes. Microwaving is quick but can make the coating soggy.
Tip: If you’re meal-prepping, keep the components (boiled eggs and sausage) separate until ready to assemble and cook for fresher results.
Nutritional Information
Scotch eggs are a protein powerhouse but can be a bit heavy depending on how they’re prepared. Here’s a rough breakdown per serving (1 large Scotch egg):
| Nutrient | Amount (Approx.) |
|---|---|
| Calories | 300–400 kcal |
| Protein | 18–22g |
| Fat | 20–28g |
| Carbohydrates | 10–15g |
| Fiber | 1–2g |
| Sodium | 500–700mg |
To make them healthier:
- Use lean meat or plant-based sausage
- Bake instead of frying
- Swap breadcrumbs for almond flour or crushed cornflakes
FAQs about Scotch Eggs Recipe
Can I make Scotch eggs in an air fryer?
Yes! Preheat the air fryer to 375°F (190°C), spray the eggs with cooking oil, and cook for 12–15 minutes, flipping halfway through for an even golden finish.
What’s the best sausage to use?
Pork sausage is traditional, but you can experiment with chicken, turkey, or even spicy chorizo for different flavor profiles.
Can I use breadcrumbs alternatives?
Absolutely. Crushed cornflakes, almond flour, or even crushed pork rinds work great as gluten-free or low-carb options.
How do I prevent the eggs from overcooking?
Use an ice bath after boiling and time your boil carefully. Soft-boiled eggs only need 6–7 minutes to retain a runny or jammy yolk.
Are Scotch eggs gluten-free?
Not by default due to the breadcrumbs and flour, but you can easily make them gluten-free by using gluten-free flour and breadcrumbs.
Conclusion
Scotch eggs are one of those nostalgic dishes that never fail to impress. Crispy, meaty, and centered with that perfectly cooked egg, they’re a comfort food you’ll come back to time and time again. Whether you’re preparing them for a picnic, a family brunch, or just a quick protein-packed snack, the process is both fun and rewarding. Once you master the technique, the variations are endless. Add your favorite spices, switch up the meat, or try different coatings—you’ll find your own perfect version in no time.