Rolled Oats Recipe: Rolled oats, also known as old-fashioned oats, are a pantry staple in many households—and for good reason. They are whole oat groats that have been steamed, rolled flat, and then lightly toasted to create a flake-like texture. This process not only shortens the cooking time but also gives them a soft, chewy texture once prepared. Unlike instant oats, which are heavily processed and often loaded with sugar, rolled oats are minimally processed, preserving much of their natural goodness.
They are incredibly versatile. You can cook them on the stovetop, microwave them, or even prepare them overnight in the fridge. Whether you’re whipping up a hearty breakfast, using them in baking, or blending them into smoothies, rolled oats are one of those ingredients that adapt to your needs without fuss.
Why Rolled Oats Are a Healthy Choice
If you’re aiming to eat clean or fuel your body with nutritious foods, rolled oats are your best friend. They’re packed with soluble fiber, particularly beta-glucan, which helps to lower cholesterol levels and maintain heart health. That same fiber also slows down digestion, keeping you full longer and helping with blood sugar control.
Rolled oats are also a good source of protein, magnesium, iron, zinc, and B vitamins. Plus, they’re naturally gluten-free—though if you’re highly sensitive, be sure to buy certified gluten-free oats to avoid cross-contamination.
They’re affordable, accessible, and boast a neutral taste that pairs well with both sweet and savory toppings. What more could you ask for in a superfood?
Essential Ingredients for Rolled Oats
Basic Ingredients
Making a bowl of rolled oats is incredibly simple, and you only need a few ingredients to get started:
- Rolled oats – The star of the show. Make sure they’re not instant or steel-cut for this specific recipe.
- Liquid – This could be water, milk, or a non-dairy alternative like almond, oat, or soy milk. Milk makes the oats creamier.
- Pinch of salt – It might seem minor, but it really enhances the flavor.
For a standard serving:
- 1/2 cup rolled oats
- 1 cup of liquid
- Pinch of salt
This yields one hearty serving, but it’s super easy to scale up.
Optional Add-Ins for Flavor and Texture
Here’s where you can get creative! Add-ins not only boost flavor but also pack in additional nutrients. Here are some tasty suggestions:
- Sweeteners: Honey, maple syrup, brown sugar, or agave
- Spices: Cinnamon, nutmeg, or vanilla extract
- Fruits: Bananas, berries, apple slices, raisins, or dried cranberries
- Nuts & Seeds: Almonds, walnuts, chia seeds, flaxseeds, or pumpkin seeds
- Toppings: Nut butters, yogurt, granola, or dark chocolate chips
These extras transform plain oats into a gourmet-level breakfast that’s both satisfying and energizing.
Kitchen Tools You’ll Need
Basic Tools for Preparation
You don’t need a professional kitchen setup to make the perfect bowl of rolled oats. In fact, just a few basic tools will do the trick:
- Measuring cups – Precision ensures consistent results every time.
- Saucepan – Preferably non-stick, medium-sized.
- Stirring spoon – A wooden or silicone spoon is best for stirring.
- Bowl and spoon – For serving and eating, of course!
These are likely items you already have in your kitchen, making this recipe very beginner-friendly.
Optional Tools for Enhanced Experience
If you want to elevate your oatmeal game, a few extra tools can help:
- Microwave-safe container – If you’re short on time, microwave oats can be just as tasty.
- Instant pot – For batch cooking and hands-off prep.
- Food scale – For precision with add-ins like seeds or nuts.
- Blender – Great if you want to make oat smoothies or oat milk later on.
Though not required, these extras can streamline your prep and open up more ways to enjoy your oats.
Step-by-Step Guide to Making Rolled Oats
Step 1: Measure Your Ingredients
Start by measuring out your rolled oats and liquid. As mentioned earlier, the classic ratio is:
- 1/2 cup rolled oats
- 1 cup of liquid
- Pinch of salt
This gives you the perfect creamy consistency without turning mushy. If you like your oats thicker or thinner, adjust the liquid slightly.
Place everything into a saucepan and let it sit for a minute. This pre-soak allows the oats to start absorbing the liquid, giving you a smoother result.
Step 2: Combine Oats and Liquid
Place your saucepan on the stove over medium heat. Give everything a gentle stir to make sure the oats aren’t clumping together. Stirring at this point ensures even cooking and prevents burning at the bottom.
As the liquid starts to warm up, the oats will begin absorbing it and puffing up slightly. You should start to see little bubbles forming around the edges.
This step is crucial because unevenly combined oats and liquid can lead to lumpy, half-cooked results.
Step 3: Cook the Oats
Let the oats cook for about 5–7 minutes, stirring occasionally. You’ll see the oats begin to thicken as they absorb more of the liquid. Keep an eye on the texture—it should be creamy but not soupy.
At this point, you can add a dash of cinnamon, a few drops of vanilla extract, or any spices you prefer. Doing so early in the cooking process allows the flavors to infuse more deeply.
If the mixture starts sticking or becomes too thick, add a splash of water or milk to loosen it up.
Step 4: Stir and Simmer
Once your oats start to bubble, reduce the heat to low and let them simmer gently. This is where the magic happens—the oats absorb the rest of the liquid and take on that delicious creamy texture we all love.
Stir every 30 seconds or so to keep the oats from sticking to the bottom of the pan. Don’t rush this step. Giving the oats time to cook slowly ensures that they soften fully without becoming mushy. The simmering phase usually takes another 3–5 minutes, depending on your desired consistency.
At this point, your kitchen will smell incredible—especially if you’ve added cinnamon or vanilla. If you’re planning to add fresh fruits like bananas or apple slices, now is the perfect time to toss them in so they soften up a bit and meld with the oats.
Once the texture is just right, take it off the heat. Let it sit for a minute or two—this helps thicken the mixture just a touch more and cools it down slightly for a better eating experience.
Step 5: Add Toppings and Serve
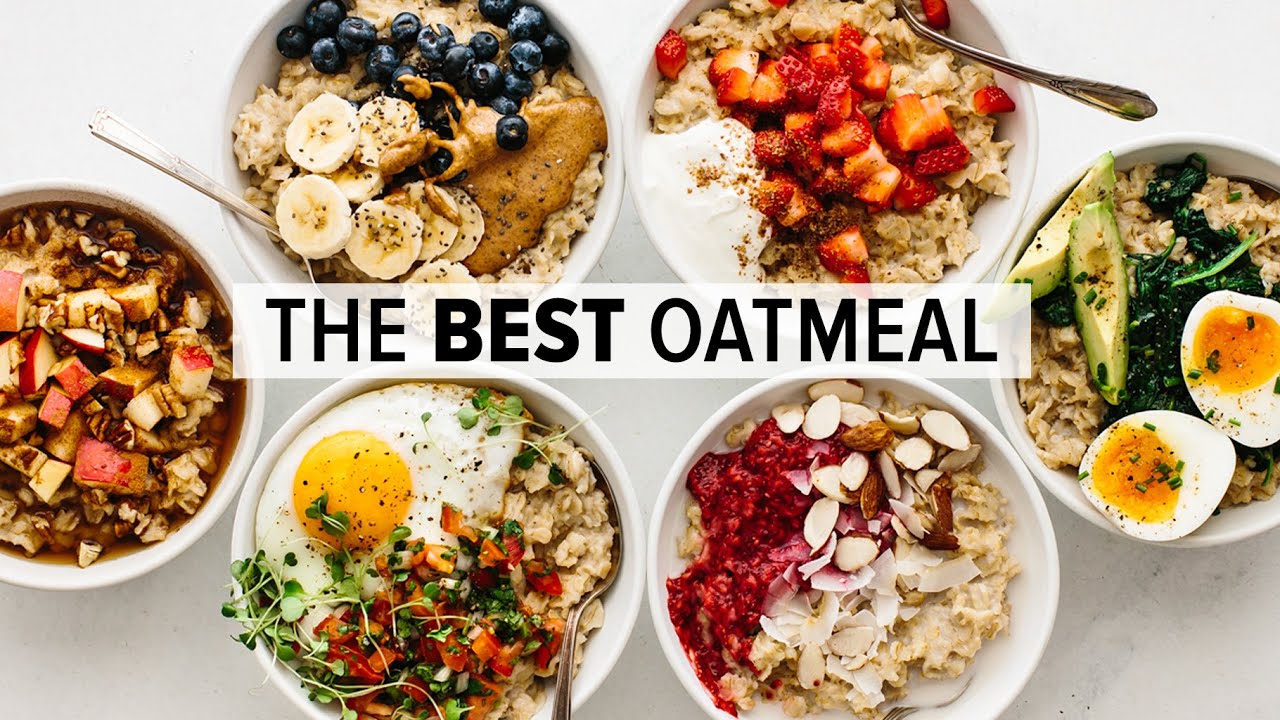
Here comes the fun part—dressing up your oatmeal! You can go the classic route with a bit of brown sugar and milk or turn it into a full-blown breakfast bowl with a mountain of healthy toppings.
Here are a few combo ideas to get you inspired:
- Banana Nut Bliss: Sliced banana, almond butter, walnuts, and a sprinkle of cinnamon
- Berry Power Bowl: Fresh blueberries, strawberries, a spoonful of Greek yogurt, and a drizzle of honey
- Tropical Treat: Mango chunks, shredded coconut, and chia seeds
- Dessert for Breakfast: Dark chocolate chips, peanut butter, and raspberries
Don’t be afraid to experiment. Mix and match based on what you have in the fridge or pantry. You can even prep several toppings ahead of time so your morning routine stays simple and quick.
Once topped, serve your oatmeal warm in a bowl. Whether you’re savoring it slowly on a Sunday or scooping it down on a busy workday, rolled oats will keep you full and fueled.
Tips for Perfect Rolled Oats Every Time
Avoid Overcooking
One of the most common mistakes when making rolled oats is overcooking them. If you cook them too long or at too high a temperature, they can become pasty and gummy instead of creamy and tender.
Stick to medium or low heat and keep an eye on the texture. Once the oats have absorbed most of the liquid and look thick but still slightly runny, take them off the heat. Remember, they’ll continue to thicken as they cool.
If you’re ever in doubt, err on the side of undercooking and let them sit for a couple of minutes. You can always pop them back on the stove with a splash of liquid if needed.
Use the Right Oats-to-Liquid Ratio
Getting the right consistency is all about using the correct oats-to-liquid ratio. The standard is:
- 1 part oats
- 2 parts liquid
But you can tweak this to your taste. Want your oats thicker? Use a little less liquid. Prefer a porridge-like consistency? Add a bit more.
It’s also worth noting that different liquids yield slightly different textures. Milk (especially dairy or oat milk) gives a creamier, more luxurious feel, while water keeps it lighter and simpler.
You can even do a 50/50 mix of water and milk for a balance between lightness and creaminess.
FAQs about Rolled Oats Recipe
1. Can I make rolled oats in the microwave?
Absolutely! Combine oats, liquid, and a pinch of salt in a microwave-safe bowl. Microwave on high for 2–3 minutes, stirring halfway through. Let it sit for a minute before adding toppings.
2. Are rolled oats gluten-free?
Naturally, yes. However, oats are often processed in facilities that also handle wheat, so if you’re gluten-sensitive, look for certified gluten-free oats to avoid cross-contamination.
3. Can I store cooked rolled oats?
Yes. Cooked oats can be stored in an airtight container in the fridge for up to 5 days. Reheat in the microwave or on the stove with a splash of water or milk to bring back the creamy texture.
4. What’s the difference between rolled oats and instant oats?
Rolled oats are less processed and have a chewier texture, while instant oats are pre-cooked and thinner, often resulting in a mushier consistency when prepared.
5. Can I eat rolled oats raw?
Yes, you can eat them raw, especially in dishes like overnight oats or smoothies. Just soak them first in a liquid like milk or yogurt to soften and aid digestion.
Conclusion
The beauty of rolled oats lies in their simplicity. You don’t need fancy equipment, chef-level skills, or expensive ingredients. From busy mornings to relaxed weekends, this recipe can adapt to your lifestyle while delivering consistent, delicious results every time.
So, next time you reach for that oatmeal box, take a few extra minutes to make it right. Add your favorite toppings, try new combinations, and don’t be afraid to experiment. The possibilities are endless, and your perfect bowl of oats is only a few steps away.