Rice Krispies Recipe: Rice Krispies treats are the ultimate nostalgic snack—a blend of crispy cereal, melted marshmallows, and butter that transforms into a chewy, sweet delight. They originated in the 1930s, created by Kellogg’s home economists, and have since become a beloved treat across generations. The beauty lies in their simplicity and versatility. You only need a few ingredients, and there’s no baking involved—just a little stovetop action and some mixing.
Perfect for quick snacks, lunchbox fillers, party trays, or even as a canvas for themed desserts, Rice Krispies treats hit the sweet spot between effort and deliciousness. Whether you’re 5 or 55, the gooey, crunchy texture is undeniably satisfying.
Why They’re So Popular
What makes them so addictive? First off, it’s the combination of textures—the snap of the cereal paired with the gooey marshmallow hold. Secondly, they’re incredibly customizable. You can toss in chocolate chips, drizzle caramel, or mix in peanut butter. They’re also affordable, kid-friendly, and don’t require special baking skills.
Plus, their no-bake nature means they can be whipped up in minutes, which is a blessing for busy parents or spontaneous cravings. With just a bit of creativity, you can even turn these treats into gourmet desserts or festive holiday snacks.
Ingredients Needed
Main Ingredients
Here’s your no-fuss ingredient list for the classic Rice Krispies treat:
- 3 tablespoons of unsalted butter – This gives the treat its rich base and keeps things smooth.
- 1 package (10 oz) of mini marshmallows – These melt easier and give that essential chewiness.
- 6 cups of Rice Krispies cereal – The star of the show, delivering that signature crunch.
You can substitute full-size marshmallows, but mini ones melt faster and more evenly. Some recipes also use marshmallow fluff, though traditionalists tend to stick with the OG setup.
Optional Add-Ins for Flavor and Texture
Want to take your treats up a notch? Here are some fun extras:
- Vanilla extract – Just 1 tsp adds a fragrant depth.
- Peanut butter – Stir in ½ cup for a nutty twist.
- Chocolate chips or chunks – Sprinkle into the mix or melt and drizzle over the top.
- M&Ms or sprinkles – Perfect for adding color and crunch.
- Sea salt – A pinch on top balances the sweetness perfectly.
Mix and match to suit your mood or occasion. Think holiday themes, birthdays, or just jazzing up your lunchbox.
Tools and Equipment Required
Basic Kitchen Tools
You don’t need a lot of fancy gear. Most kitchens already have what you need:
- Large nonstick pot – Essential for melting marshmallows and combining everything evenly.
- Spatula or wooden spoon – Preferably a heatproof one for stirring sticky marshmallow mixtures.
- 9×13-inch baking dish or pan – The standard size for pressing and shaping the treats.
- Nonstick spray or parchment paper – For lining the pan and preventing stickiness.
The goal is to keep things easy and mess-free. Cleanup is minimal if you prep the pan correctly.
Tips on Choosing the Right Pan
A glass or metal baking dish both work fine, but here’s a tip: metal pans help the treats set a bit faster. Want thicker treats? Use a smaller pan like 9×9. Prefer thinner squares? Stick with the classic 9×13.
Always grease the pan with a little butter or spray, or line it with parchment for super easy removal.
Step-by-Step Guide to Making Rice Krispies Treats
Step 1: Prepare Your Ingredients and Tools
Before turning on the stove, have everything pre-measured and ready. Once the marshmallows start melting, you’ll need to work quickly. Grease your baking dish or line it with parchment paper. Butter your spatula too—it’ll help later when pressing the sticky mixture.
Make sure your cereal is measured and in a large bowl (unless you’re confident stirring everything in the pot). This pre-prep step prevents marshmallow from setting too quickly and gives you smoother mixing.
Step 2: Melt the Butter
Place your nonstick pot over low to medium heat and melt the butter gently. Don’t rush this—high heat can brown the butter or even burn it, which will affect the flavor. Stir it slowly until completely liquid and glossy.
If you like a nutty flavor, you can let the butter brown just a little. That subtle toasted aroma adds an extra layer of richness to the treats. But for classic Rice Krispies, golden and melted is perfect.
Step 3: Add Marshmallows and Stir
Once your butter is melted, toss in the marshmallows. Stir constantly to prevent sticking or burning. This process takes about 2–3 minutes. The marshmallows will gradually melt into a silky, stretchy mixture.
Pro tip: If you’re adding vanilla extract or peanut butter, do it right after the marshmallows are fully melted. Stir it in thoroughly to blend everything smoothly.
Once the mixture is fully melted and uniform, it’s go-time.
Step 4: Fold in Rice Krispies Cereal
Now that your marshmallow mixture is perfectly gooey, it’s time to fold in the Rice Krispies cereal. Turn off the heat and add the cereal in batches rather than all at once. This makes it easier to coat each piece evenly and ensures no dry spots. Use a silicone spatula or wooden spoon and stir gently but quickly.
Here’s a tip: don’t crush the cereal while mixing. You want each piece to stay whole for that ideal crunch. If you’re working with kids, this part is fun for them to watch, and it’s where all the magic comes together.
If you’re adding any mix-ins like chocolate chips, sprinkles, or dried fruit, this is the moment to toss them in. Just be aware that if the mixture is too hot, chocolate chips might melt, so wait 30 seconds after adding the cereal before mixing them in.
Step 5: Press Mixture into a Pan
With everything evenly mixed, scoop the sticky goodness into your prepared baking pan. Now comes the slightly tricky part—pressing it down evenly. This step is key to getting perfectly shaped treats.
Here are a few tips to make it easier:
- Lightly butter your hands or the back of a spatula to prevent sticking.
- Use a piece of parchment paper on top and press down with your palms.
- For denser treats, press more firmly; for airy, chewy ones, go gently.
Make sure to spread the mixture to all corners and level it off nicely. Let it sit for at least 30 minutes to set. You’ll be tempted to dig in right away (and we don’t blame you), but cooling time is critical to get clean slices later on.
Cooling, Cutting, and Storing
Letting Them Set Properly
Patience pays off when it comes to Rice Krispies treats. Once you’ve pressed the mixture into the pan, give it time to cool and firm up. Room temperature is best—no need to refrigerate, as it could make them too hard.
Letting them set for at least 30 minutes ensures they hold their shape and don’t crumble when cut. If you’re short on time, you can pop them in the fridge for about 15 minutes, but be cautious—it can affect the texture.
Once cooled, you’ll have that perfect combo of chewy and crispy. If you’re making these for a party or event, they’re easiest to cut and serve at this point.
Cutting for Clean Squares
When it’s time to cut your treats, you want nice, clean squares, right? Here’s how to do it like a pro:
- Use a sharp knife and lightly butter the blade to prevent sticking.
- Score the top first to plan your sizes—typically, 2×2-inch squares are ideal.
- Wipe the knife clean between cuts for a polished look.
Want to get fancy? Use cookie cutters for fun shapes or cut them into bars and drizzle with chocolate for a gourmet vibe.
How to Store for Freshness
Rice Krispies treats are best enjoyed fresh, but you can store them for later too:
- Room temperature: Store in an airtight container for up to 3 days.
- Refrigeration: Not ideal unless your home is very warm, as it can harden the texture.
- Freezing: You can freeze them for up to 6 weeks. Wrap each square individually in plastic wrap, then store them in a zip-top bag or container.
To thaw, let them sit at room temp for 15-20 minutes. The flavor stays nearly as fresh, and the texture holds up surprisingly well.
Variations and Creative Twists
Chocolate-Dipped Rice Krispies Treats
Let’s be honest—everything is better with chocolate. If you’re looking to level up your classic Rice Krispies, try dipping them in melted chocolate. After cutting your treats into squares or shapes, melt semi-sweet, milk, or white chocolate in a microwave-safe bowl. Dip one end of each treat, or even drizzle the chocolate over the top for a minimalist flair.
Sprinkle with crushed nuts, sea salt, or candy bits while the chocolate is still wet. Let them set on parchment paper for about 30 minutes. These make for an irresistible dessert table hit or a quick homemade gift.
Peanut Butter and Chocolate Combo
A match made in heaven! After melting the butter and marshmallows, stir in half a cup of creamy peanut butter before adding the cereal. The peanut butter adds richness and a nutty flavor that blends beautifully with the marshmallows.
Want to go all out? Once cooled and cut, drizzle or coat with chocolate. It’s like a Reese’s meets Rice Krispies—decadent and addictive.
Holiday-Themed Rice Krispies
Rice Krispies treats are like a blank canvas for creativity. Try these festive ideas:
- Halloween: Add orange food coloring to the marshmallow mix and top with candy eyes or spooky sprinkles.
- Christmas: Mix in red and green M&Ms or use cookie cutters to shape into stars, trees, or ornaments.
- Valentine’s Day: Use pink marshmallows or a drop of red food dye, then cut into heart shapes and drizzle with white chocolate.
The options are endless, and kids especially love helping with these themed versions.
Troubleshooting Common Problems
Why Are My Rice Krispies Treats Too Hard?
The number one issue people face is ending up with treats that are too tough to chew. Here’s why it happens and how to fix it:
- Overheating the marshmallows: High heat causes the sugars to harden as they cool. Always melt on low to medium heat.
- Packing too tightly in the pan: Pressing the mixture down too hard will result in dense, rock-like squares. Be gentle for soft, chewy treats.
- Old marshmallows: Yep, marshmallows have a shelf life. Older ones don’t melt as smoothly and can cause clumpy or dry results.
Stick to fresh ingredients and go easy during mixing and pressing, and you’ll get perfect results every time.
How Do I Keep the Mixture from Sticking Everywhere?
Rice Krispies treat mix is notoriously sticky. Here’s how to tame the mess:
- Butter your hands, spatula, and even the inside of your mixing bowl.
- Line your baking pan with parchment or wax paper for easy removal.
- Use a light touch when pressing the mixture—less contact means less sticking.
Some folks even use a second sheet of parchment paper on top to press it down without touching it directly. Total game-changer!
Making Rice Krispies Treats with Kids
A Fun Family Activity
Want an activity that’s both mess-friendly and fun? Making Rice Krispies treats with kids is perfect. Since there’s no oven involved and only a bit of stovetop time, it’s one of the safest kitchen activities for little hands.
Let them:
- Stir the cereal in (once the pot is off the heat).
- Sprinkle in chocolate chips or M&Ms.
- Help press the mixture into the pan using parchment paper.
They’ll feel like mini chefs, and you get a sweet reward at the end. Just be sure to supervise closely during the melting stage.
Teaching Kids Simple Cooking Skills
This recipe also teaches kids basic kitchen skills: measuring ingredients, stirring safely, waiting for things to set, and working cleanly. It’s a hands-on intro to cooking that builds confidence and gives immediate, tasty results. Not to mention, it’s a bonding experience you’ll both remember.
Healthier Alternatives
Low-Sugar Versions
If you’re watching sugar, you can still enjoy these treats with a few tweaks:
- Use unsweetened puffed rice cereal.
- Replace regular marshmallows with sugar-free marshmallows or a mix of honey and nut butter.
- Add dried fruit, nuts, or seeds for natural sweetness and extra texture.
These won’t taste exactly like the original, but they hit the spot if you’re craving something sweet and crunchy without all the sugar.
Vegan and Dairy-Free Options
For those avoiding dairy or animal products, there are plenty of substitutions:
- Use vegan butter or coconut oil instead of regular butter.
- Choose gelatin-free vegan marshmallows (brands like Dandies work great).
- Stick with dairy-free mix-ins like dark chocolate chips or almond butter.
These treats come out just as gooey and satisfying, with no animal products involved.
Serving Ideas and Presentation Tips
Creative Serving Suggestions
Rice Krispies treats aren’t just for lunchboxes—they can shine at events, parties, and even weddings if you dress them up a bit. Here are a few ways to make them stand out:
- Treat pops: Cut the squares into smaller pieces, insert a popsicle stick, and dip in chocolate. These are perfect for birthdays or bake sales.
- Layered treats: Add a layer of peanut butter, chocolate ganache, or caramel in the middle for a more indulgent bite.
- Mini bites: Slice them into tiny 1-inch cubes and serve in cupcake liners for easy finger food at parties.
Pair with hot cocoa, coffee, or even a milkshake for a full dessert experience.
Packaging for Gifting or Sale
Rice Krispies treats are a hit for homemade gifts and bake sales. To keep them fresh and looking professional:
- Wrap each piece in plastic wrap or wax paper.
- Place in clear treat bags and tie with a ribbon.
- Add custom labels or tags if you’re gifting or selling.
For holidays, use themed ribbons or stickers. They’re cost-effective, adorable, and always appreciated.
Nutritional Information
Calories and Macronutrients
Here’s a rough breakdown for one standard Rice Krispies square (2×2 inches, classic recipe):
| Nutrient | Amount |
|---|---|
| Calories | ~90-100 kcal |
| Total Fat | ~2g |
| Carbohydrates | ~18g |
| Sugars | ~9g |
| Protein | ~1g |
This can vary based on added ingredients like chocolate, nuts, or peanut butter. Want a lower-calorie version? Cut into smaller squares or reduce the marshmallow-to-cereal ratio slightly.
Allergen Information
Classic Rice Krispies treats are gluten-free (if made with certified gluten-free cereal) and nut-free unless add-ins are used. However, marshmallows may contain gelatin, which is not suitable for vegetarians or certain religious diets. Always check ingredient labels if allergies are a concern.
FAQs about Rice Krispies Recipe
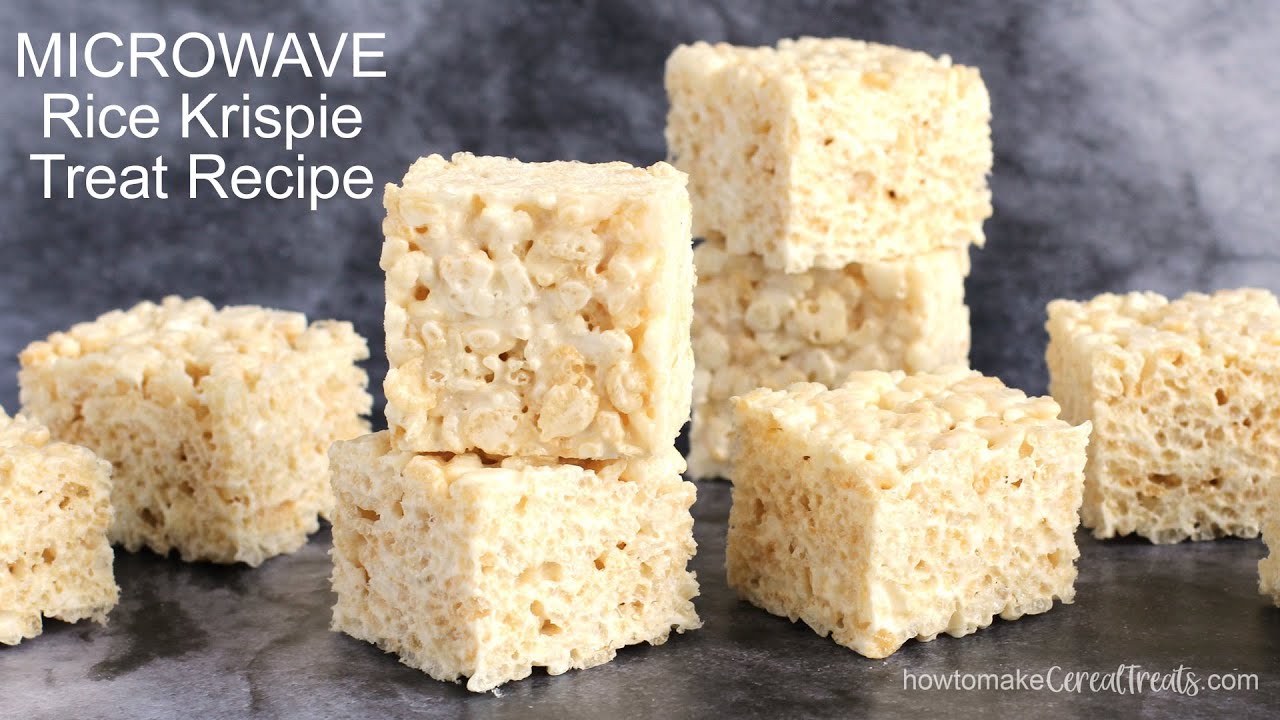
1. Can I make Rice Krispies treats in the microwave?
Yes! Melt the butter and marshmallows in a large microwave-safe bowl in 30-second intervals, stirring in between. Once smooth, stir in the cereal and press into a greased pan.
2. How long do homemade Rice Krispies treats last?
Stored in an airtight container at room temperature, they’ll stay fresh for about 3 days. For longer storage, freeze them individually.
3. Can I use flavored marshmallows?
Absolutely! Strawberry, chocolate, or other flavored marshmallows can give your treats a unique twist. Just be mindful of added sugar or color.
4. What’s the best way to clean the pot after making them?
Soak the pot in warm soapy water for 10–15 minutes. Marshmallow residue softens up quickly and washes away easily.
5. Can I make Rice Krispies treats without marshmallows?
Yes! You can use alternatives like honey and peanut butter or agave syrup with nut butters as a binding agent. The texture will be different but still tasty.
Conclusion
Rice Krispies treats are the kind of simple joy we all need more of—easy to make, endlessly customizable, and downright delicious. Whether you’re sticking to the classic version or jazzing them up with peanut butter and chocolate, there’s a version for every mood and occasion. Perfect for parties, school snacks, or just a quiet evening craving, these chewy, crunchy squares are timeless.
So grab a pot, a bag of marshmallows, and a box of cereal—you’re only 10 minutes away from happiness. Make a big batch and share the love… or keep them all for yourself (we won’t judge!).


