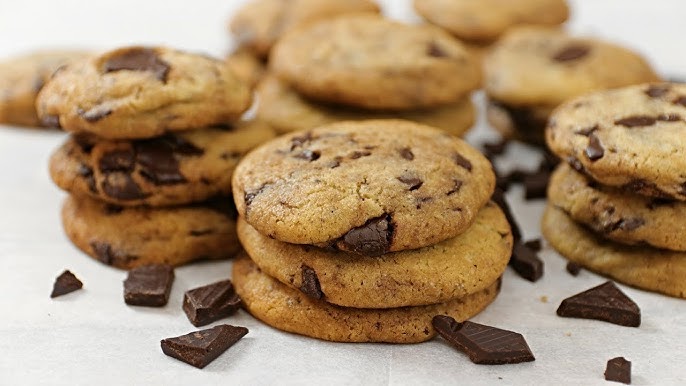
Quaker Oats Cookie Recipe: Let’s be real—cookies are always a good idea. But when you throw Quaker oats into the mix? You’re not just getting a delicious treat, you’re sneaking in a bit of health too. Quaker Oats cookies are the ultimate combo of chewy, hearty, and sweet goodness. Whether you’re baking for a family gathering, looking for a post-workout snack, or just craving something warm and comforting, these cookies hit the spot.
Why Quaker Oats?
You might be wondering—what makes Quaker oats the go-to for cookies? It’s all about texture and quality. Quaker has built a reputation for consistent, high-quality oats that give your cookies that perfect chewiness. They soak up just the right amount of moisture, blend seamlessly into your dough, and don’t turn into mush like some cheaper brands.
Plus, oats are incredibly versatile. Whether you’re going for classic oatmeal raisin or something more adventurous like coconut-chocolate-chip, oats are the blank canvas that lets your flavor dreams run wild.
Health Benefits of Oats in Cookies
Adding oats to your cookies isn’t just about taste—it’s a small nutritional upgrade. Oats are loaded with fiber, especially beta-glucan, which is great for your heart and helps maintain steady blood sugar levels. They also add a boost of plant-based protein, vitamins like B1, and minerals like magnesium, iron, and zinc.
So yeah, you’re still eating a cookie—but one that brings a little wholesome goodness with every bite.
Ingredients You’ll Need
Now that you’re pumped about these cookies, let’s dig into what you’ll need to bring them to life. The great thing about oatmeal cookies is that they use pantry staples, so chances are, you already have most of these lying around.
Core Ingredients
Here’s your base lineup:
- 1 cup (2 sticks) unsalted butter, softened
- 1 cup brown sugar, packed
- 1/2 cup granulated sugar
- 2 large eggs
- 1 tsp vanilla extract
- 1 1/2 cups all-purpose flour
- 1 tsp baking soda
- 1/2 tsp salt
- 3 cups Quaker old-fashioned oats
Each of these plays a crucial role: butter adds richness, sugars bring sweetness and help with browning, eggs bind everything together, and of course, oats add that chewy texture we all love.
Optional Add-ins for Flavor Variety
Here’s where you can get creative. Mix and match your favorites:
- 1 cup raisins or dried cranberries
- 1 cup chocolate chips or chunks
- 1/2 cup chopped nuts (walnuts, pecans, almonds)
- 1/2 cup shredded coconut
- 1/2 tsp cinnamon or nutmeg for a spiced twist
Don’t be afraid to experiment here. Want a tropical vibe? Go with coconut and white chocolate. Feeling classic? Raisins and cinnamon never fail.
Tools and Equipment Required
You don’t need to be a kitchen pro to whip up these cookies. Most of the tools you’ll need are probably already in your kitchen.
Must-Have Kitchen Tools
- Mixing bowls (one large, one medium)
- Measuring cups and spoons
- Hand mixer or stand mixer
- Silicone spatula or wooden spoon
- Baking sheets
- Parchment paper or non-stick spray
- Cookie scoop (optional but great for uniformity)
These basics help streamline your process, avoid messes, and make cleanup a breeze.
Tips for Preparation Efficiency
Here are some quick hacks to make your baking smoother:
- Pre-measure all your ingredients before starting—this keeps things flowing.
- Soften your butter ahead of time by letting it sit out for 30–45 minutes.
- Use parchment paper to prevent sticking and make cookie removal easy.
- Chill your dough for 30 minutes if you want thicker, bakery-style cookies.
These little details make a big difference in your final results.
Step-by-Step Guide to Making Quaker Oats Cookies
Now, the moment you’ve been waiting for. Let’s bake! Follow these steps to oatmeal cookie heaven.
Step 1: Prepping Your Workspace
First things first—clean your counter and gather your ingredients. Line two baking sheets with parchment paper and preheat your oven to 350°F (175°C). This ensures your oven is hot and ready when your dough is.
Then, set out your butter to soften if you haven’t already. Trust us, using softened butter makes mixing way easier and gives your cookies a better texture.
Step 2: Mixing the Wet Ingredients
In a large bowl, beat together the softened butter, brown sugar, and granulated sugar until the mixture is light and fluffy—about 2–3 minutes. Add in the eggs one at a time, beating well after each. Then stir in the vanilla extract.
You want this mixture to be smooth and creamy. If it looks curdled, keep mixing until everything is well combined.
Step 3: Combining Dry Ingredients
In a separate medium bowl, whisk together your dry ingredients: all-purpose flour, baking soda, and salt. Mixing the dry components separately helps distribute the leavening agent (baking soda) evenly throughout the dough, preventing clumps or uneven rising in the cookies.
Once mixed, slowly add the dry mixture to the wet mixture from Step 2. Do this in batches to avoid a flour explosion in your kitchen. Use a mixer on low speed or fold by hand with a spatula. Mix just until the flour disappears—don’t overmix, or your cookies might turn out tough instead of tender and chewy.
At this point, your dough should be thick and slightly sticky.
Step 4: Folding in the Oats and Add-ins
Now for the fun part! Grab those 3 cups of Quaker oats and gently fold them into your cookie dough. This step gives the cookies their hearty, chewy texture. Once the oats are evenly distributed, it’s time to throw in your favorite mix-ins—whether it’s chocolate chips, raisins, or chopped nuts.
Fold these in gently. If you’re making different variations (like some with raisins and others with chocolate chips), divide the dough into sections and mix each add-in separately.
Here’s a tip: If your dough feels too soft, pop it in the fridge for 20–30 minutes. This helps the oats absorb the moisture and makes scooping easier.
Step 5: Scooping and Baking the Cookies
Using a cookie scoop or spoon, drop dough onto your prepared baking sheets. Leave about 2 inches between each cookie—they’ll spread slightly as they bake.
Bake in your preheated 350°F oven for 10–12 minutes. Watch closely starting at 9 minutes. You want the edges to be golden brown while the centers are still slightly soft. That’s how you get that perfect chewy texture.
Remove from the oven and let the cookies rest on the baking sheet for 5 minutes before transferring them to a wire rack to cool completely.
Cooling, Serving, and Storage Tips
Freshly baked cookies smell heavenly, but cooling them properly is key to keeping their texture just right.
How to Cool for Best Texture
After those 5 minutes on the tray, transferring the cookies to a cooling rack allows air to circulate around them. This prevents sogginess on the bottom and keeps the centers soft but firm.
If you like super-soft cookies, store them slightly warm in an airtight container. Want crispier edges? Let them cool completely before storing.
Proper Storage to Maintain Freshness
Here’s how to keep your cookies fresh for days:
- Room Temperature: Store in an airtight container for up to 1 week. Add a slice of bread to the container to maintain softness.
- Freezing: Once cooled, freeze cookies in a zip-top bag for up to 3 months. For freezing dough, scoop individual portions onto a tray, freeze until solid, then store in a bag. You can bake from frozen—just add 1-2 extra minutes to the baking time.
Now you’ve got warm, homemade cookies on hand whenever cravings hit!
Common Mistakes to Avoid
Even a simple cookie recipe can go sideways if you’re not careful. Let’s troubleshoot before you bake.
Overbaking and Texture Issues
The number one mistake? Overbaking. Remember, cookies continue to bake slightly even after you remove them from the oven. Take them out when the centers still look a bit soft. That’s how you get the signature chewiness.
Also, be mindful of oven temperature. Too hot, and the cookies brown too fast outside while staying raw inside. Use an oven thermometer if possible to ensure accuracy.
Ingredient Substitutions Gone Wrong
Thinking of swapping out ingredients? Be careful. Replacing butter with margarine, for example, can make your cookies greasy or too soft. And using instant oats instead of rolled oats changes the texture completely—resulting in drier, crumbly cookies.
Always test substitutions in small batches first before committing to a full dough makeover.
Customizing Your Cookies
Want to make your cookies a little healthier, cater to dietary needs, or just switch up the flavors? Quaker oats cookies are incredibly adaptable.
Making Them Vegan or Gluten-Free
Going vegan?
No problem! Swap out the butter for plant-based alternatives like vegan margarine or coconut oil. Replace eggs with flaxseed eggs (1 tbsp ground flaxseed + 3 tbsp water = 1 egg) or use unsweetened applesauce for a moisture-rich alternative.
Need them gluten-free?
Make sure to use certified gluten-free oats (regular oats may be cross-contaminated with wheat) and substitute the all-purpose flour with a gluten-free flour blend. A 1:1 baking blend usually works best, especially ones that include xanthan gum to mimic gluten’s binding qualities.
Here’s a quick substitution table:
| Ingredient | Vegan Substitute | Gluten-Free Substitute |
|---|---|---|
| Butter | Vegan butter or coconut oil | – |
| Eggs | Flax eggs or applesauce | – |
| All-purpose flour | – | Gluten-free flour mix |
| Chocolate chips | Dairy-free chocolate | Gluten-free certified brand |
These swaps allow everyone to enjoy your cookies, no matter their dietary restrictions.
Fun Flavor Twists to Try
Why stick to the basics when you can get creative?
- Peanut Butter Chocolate Chip: Add 1/2 cup peanut butter and reduce butter slightly.
- Tropical: Add dried pineapple, shredded coconut, and macadamia nuts.
- S’mores: Toss in mini marshmallows, chocolate chunks, and crushed graham crackers.
- Carrot Cake: Add shredded carrot, cinnamon, and raisins for a dessert-meets-breakfast cookie.
Let your taste buds guide you. Oatmeal cookies are the perfect base for experimentation.
Nutritional Breakdown of Quaker Oats Cookies
Here’s a general idea of what one medium cookie (based on the classic recipe) contains:
- Calories: ~120
- Fat: 5g
- Carbohydrates: 18g
- Sugars: 9g
- Protein: 2g
- Fiber: 1.5g
Thanks to the oats, these cookies offer more fiber and slow-digesting carbs than your average chocolate chip variety. Use less sugar, add nuts, or include dried fruits for added nutrients and a touch of natural sweetness.
Keep in mind—these are still cookies. Enjoy them in moderation, and they can be a great snack or post-meal treat with a side of comfort.
FAQs about Quaker Oats Cookie Recipe
1. Can I use instant oats instead of rolled oats?
Yes, but it will change the texture. Rolled oats give that classic chew. Instant oats tend to absorb more moisture and can make cookies denser or drier.
2. How long do these cookies last?
Stored in an airtight container at room temperature, they’ll stay fresh for up to a week. You can also freeze them for 2–3 months.
3. Can I freeze the dough?
Absolutely! Scoop dough onto a tray, freeze until solid, then store in a zip-top bag. Bake directly from frozen—just add a couple of extra minutes.
4. What sugar substitutes can I use?
You can try coconut sugar, maple syrup, or a sugar substitute like stevia or erythritol. Just be sure to adjust for sweetness and moisture levels.
5. Are Quaker oats cookies good for kids?
Totally! They’re a hit with kids, and you can make them healthier by cutting sugar, adding fruits or veggies, and sneaking in some seeds or flax.
Final Thoughts
Quaker Oats cookies are the kind of feel-good treat that checks all the boxes—easy to make, versatile, wholesome, and irresistibly delicious. With just a few basic ingredients and a bit of time, you can whip up a batch of cookies that your whole family will love.
Whether you stick to the classic or explore wild new flavors, this recipe is your launchpad for cookie greatness. The chewy texture, warm flavors, and home-baked aroma will have people begging for your recipe.
And remember—nothing beats a homemade cookie made with love and a little bit of oat-powered magic.


