Pepperidge Farm Stuffing Recipe: When it comes to holiday feasts, there are a few dishes that never fail to show up on the dinner table — and stuffing is one of them. Pepperidge Farm stuffing, in particular, has earned its reputation as a classic. Why? It’s not just because it’s convenient; it’s because it nails that perfect balance between seasoned, savory bread and aromatic vegetables, creating a nostalgic, soul-warming dish that brings people together.
Whether you’re celebrating Thanksgiving, Christmas, or simply hosting a cozy family dinner, this stuffing has become synonymous with comfort food. The beauty of Pepperidge Farm stuffing is its ability to be both traditional and versatile — you can stick to the basics or jazz it up with your own twist. That familiar blue bag filled with dry, seasoned bread cubes is more than just a shortcut — it’s a gateway to homemade stuffing without the stress.
Plus, let’s be honest — everyone wants a recipe that’s easy to follow and doesn’t involve a culinary degree. With Pepperidge Farm stuffing, even kitchen novices can deliver a dish that feels gourmet. So, if you’re looking for a reliable, crowd-pleasing stuffing recipe, this one is about to become your go-to.
Quick Overview of Ingredients and Prep Time
Time is of the essence during the holidays, and this recipe respects that. From start to finish, you’re looking at about 45 minutes of prep and bake time combined — faster if you’ve got a sous-chef in the kitchen. Here’s a quick glance at what you’ll need:
- One bag of Pepperidge Farm herb seasoned stuffing
- Butter
- Onion
- Celery
- Chicken broth (or vegetable broth for vegetarians)
- Optional: sausage, cranberries, mushrooms, apples, or nuts
This recipe is scalable, customizable, and ridiculously simple — yet the results are anything but ordinary. Let’s dive into the full list of ingredients next.
Ingredients You’ll Need
Essential Ingredients for the Classic Version
The classic version of Pepperidge Farm stuffing keeps it simple yet incredibly flavorful. Here’s what you’ll need for the traditional take:
- 1 package of Pepperidge Farm Herb Seasoned Stuffing (14 oz) – This is the star of the show. Pre-seasoned, pre-dried bread cubes with a blend of herbs.
- 1 cup chopped onion – Adds depth and sweetness.
- 1 cup chopped celery – Brings in freshness and a nice crunch.
- 1/2 cup butter (1 stick) – Richness and moisture enhancer.
- 2 1/2 cups chicken broth – Helps to moisten the stuffing and add a savory base.
- Salt and pepper to taste
This ingredient list is what many families have relied on for generations. It’s got all the components of a hearty stuffing: bread, broth, butter, and aromatics. If you want to keep it old-school, this is all you’ll need to make everyone at the table happy.
Optional Add-ins for a Flavor Boost
Want to make your stuffing stand out or suit dietary preferences? Here are some delicious add-in ideas:
- Cooked sausage or bacon – Adds a rich, meaty flavor.
- Diced apples or dried cranberries – Perfect for a sweet and tart contrast.
- Chopped nuts like pecans or walnuts – Bring crunch and earthiness.
- Mushrooms – Add a deep umami flavor.
- Fresh herbs – Parsley, sage, rosemary, and thyme for a fresher, more fragrant dish.
- Eggs – Adding one or two beaten eggs gives a custardy texture, especially if baking in a casserole dish.
These optional ingredients let you make the stuffing your own. You can go traditional or craft something uniquely suited to your family’s palate. Either way, it’s going to be delicious.
Tools and Kitchen Essentials
Must-Have Equipment
You don’t need a gourmet kitchen to whip up this stuffing. Just a few basic tools will do the trick:
- Large skillet or sauté pan – For cooking the vegetables and melting the butter.
- Large mixing bowl – To combine everything easily.
- Measuring cups and spoons – Accuracy counts when dealing with broth and butter.
- Wooden spoon or silicone spatula – Great for stirring without damaging cookware.
- Baking dish (9×13 inch) – Ideal for baking your stuffing until golden on top.
- Foil – For covering the stuffing to keep it moist while baking.
Having these tools prepped and ready before you start will make the cooking process smoother and a lot more enjoyable.
Prep Tips for Efficiency
If you want to keep things stress-free in the kitchen, a little prep goes a long way. Here are a few tips:
- Chop vegetables the night before – Store them in a sealed container in the fridge.
- Pre-measure broth and butter – Saves time when you’re ready to cook.
- Use pre-cooked sausage or bacon – If adding meat, cook it ahead to reduce steps.
- Keep everything within arm’s reach – Mise en place is key for smooth execution.
Being organized will make this recipe not just easy but enjoyable. No need to fumble for tools or ingredients while the butter is sizzling!
Step-by-Step Instructions
Step 1: Preparing the Vegetables
Start by dicing your onion and celery into small, even pieces. This ensures they cook uniformly and blend nicely into the stuffing. Aim for about 1 cup each. If you’re including any extras like mushrooms or apples, go ahead and prep those now as well.
In a large skillet, melt 1/2 cup (one stick) of butter over medium heat. Once melted, toss in the chopped onion and celery. Cook for about 8–10 minutes, stirring occasionally, until the onions are translucent and the celery is tender. If you’re adding mushrooms or apples, now’s the time to add them in as well — sauté until softened.
The aroma at this stage is incredible. The combination of butter, onion, and celery is classic and sets the stage for what’s to come. Once your veggies are done, remove the pan from heat.
Step 2: Sautéing for Flavor
This is the secret behind great stuffing — that buttery, aromatic base. In the skillet with your sautéed onions and celery, the flavor is already building, but if you’re adding extras like sausage, this is where it really shines.
If you’re using sausage, crumble and brown it in the same skillet after removing the vegetables. Cook until it’s no longer pink, about 8–10 minutes, then drain any excess fat. You can either mix the veggies back in or set everything aside for the final combination step. The goal here is to lock in flavor before everything is mixed together.
Want a richer taste? Add a pinch of garlic powder, a sprinkle of sage, or a splash of white wine to the skillet while cooking. Little details like these make your stuffing taste homemade without the hassle.
When you’re done sautéing, take a moment to appreciate that warm, herby aroma filling your kitchen. That’s how you know you’re on the right track.
Step 3: Mixing with Bread Cubes
Once your vegetables (and any optional extras like sausage) are sautéed, it’s time to bring in the stuffing mix — the star of the show.
In a large mixing bowl, pour the entire bag of Pepperidge Farm stuffing. Now, carefully add your warm vegetable mixture to the bowl. The heat from the vegetables helps soften the bread cubes and start the flavor fusion.
Start folding the ingredients together using a spatula or your hands (clean, of course!). Stir gently — you want everything well-combined but not crushed. At this point, the mixture will be dry, and that’s totally okay. The next step is where it gets beautifully moist.
This step is where the magic happens — all the sautéed bits start mingling with the seasoned bread, and every bite becomes a little flavor bomb waiting to explode in the oven.
Step 4: Moistening the Mixture
Now comes the most crucial part — adding broth. The goal is a texture that’s soft but not soggy.
Warm 2½ cups of chicken or vegetable broth in a saucepan (or microwave). Gradually pour it over the stuffing mixture, one cup at a time, mixing gently after each addition. How much you need depends on how moist you want it. Some prefer a drier, crumbly stuffing, while others go for that custard-like texture.
Here’s a tip: use low-sodium broth so you can control the saltiness. Taste the mix before baking and adjust seasoning as needed. Some folks like a dash of poultry seasoning or a sprinkle of dried thyme at this stage for extra depth.
If your mixture seems too wet, let it sit for a few minutes to absorb the liquid. If too dry, add more broth, a quarter cup at a time.
The right consistency? The stuffing should stick together slightly when pressed but not be mushy. Now, you’re ready to bake.
Step 5: Baking to Perfection
Preheat your oven to 350°F (175°C). Lightly grease a 9×13-inch baking dish and spoon your stuffing into it, spreading evenly. Don’t pack it too tightly — air pockets help it cook more evenly and give it that golden, crispy top.
Cover the dish with foil and bake for 30 minutes. This allows the stuffing to steam and heat through. After that, remove the foil and bake for another 15-20 minutes until the top is golden brown and slightly crispy. That contrast between soft interior and crunchy top? That’s stuffing perfection.
Optional: For a beautiful, glossy finish, brush the top lightly with melted butter before the final bake.
And there you have it — stuffing that looks like it came out of grandma’s oven but took half the time and effort.
Customization Tips and Variations
Meat Lovers’ Version
Want to elevate your stuffing into a more filling, entrée-worthy dish? Add protein.
Start with about ½ pound of ground sausage — Italian sausage adds a nice kick, while breakfast sausage brings savory warmth. Cook it until browned and mix it in with your sautéed vegetables.
For an even heartier twist, try adding diced cooked bacon or shredded rotisserie chicken. The fat from the meat adds richness and helps bind the stuffing. Just be sure to adjust your seasoning to account for any extra saltiness from the meat.
This version pairs especially well with turkey, roast chicken, or even pork chops, and it’s sure to be a hit with any carnivore at the table.
Vegetarian and Vegan Options
Looking to serve up a plant-based version of this classic? No problem — it’s easier than you think to make Pepperidge Farm stuffing vegetarian or even vegan.
For vegetarians, simply swap the chicken broth for vegetable broth. Make sure it’s a rich, flavorful variety — homemade or store-bought works fine. Most Pepperidge Farm stuffing mixes are already vegetarian, but it’s always wise to double-check the label for hidden animal-based ingredients.
For a vegan version, make two essential swaps:
- Use vegan butter or olive oil in place of dairy butter.
- Use vegetable broth as your liquid base.
To enhance the savory flavor that meat typically provides, add in ingredients like sautéed mushrooms, caramelized onions, or a splash of soy sauce or tamari. These bring in umami and depth without compromising your dietary choices.
You can also stir in roasted nuts, cranberries, or even lentils to create texture and protein. The result? A hearty, flavorful stuffing that vegans and non-vegans alike will love.
Making It Gluten-Free
If you or someone at your table is avoiding gluten, don’t worry — you can still enjoy a delicious, homemade stuffing.
While traditional Pepperidge Farm stuffing contains wheat, there are gluten-free bread cube alternatives available in most health food sections or online. Just make sure you choose a gluten-free bread stuffing mix or use cubed and toasted gluten-free bread as your base.
Here’s how to make it work:
- Toast the gluten-free bread cubes until slightly crisp.
- Follow the same sauté and broth steps as in the original recipe.
- Mix everything together and bake as usual.
One note: gluten-free bread tends to absorb liquid differently than wheat bread, so you might need to adjust the amount of broth you use. Add it slowly and check the consistency as you go.
The finished product will have all the holiday magic without the gluten.
Serving Suggestions
Perfect Pairings for Your Stuffing
Pepperidge Farm stuffing is the ultimate sidekick to so many main dishes. It’s traditionally paired with roast turkey, but here are a few more ideas:
- Roast Chicken or Cornish hens
- Baked ham with a brown sugar glaze
- Prime rib or beef tenderloin
- Stuffed acorn squash for a vegetarian entrée
Don’t forget the sauces — a generous ladle of gravy or a spoonful of cranberry sauce complements the savory stuffing perfectly.
If you’re building a full holiday spread, serve it alongside:
- Mashed potatoes
- Green bean casserole
- Roasted Brussels sprouts
- Sweet potatoes or yams
Trust us, this stuffing isn’t just a side — it’s a centerpiece in its own right.
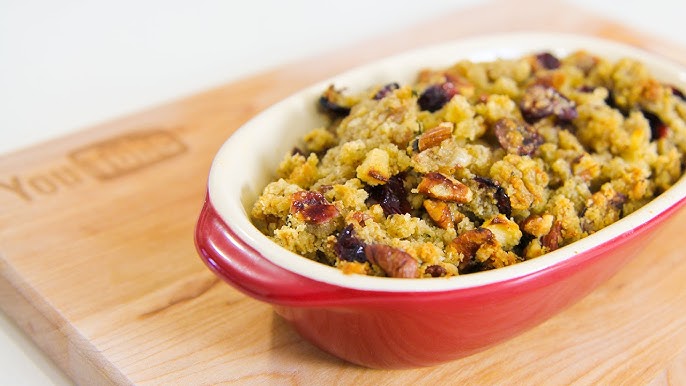
How to Serve it Beautifully
Presentation matters, especially during the holidays. Here’s how to make your stuffing look as good as it tastes:
- Bake it in a pretty ceramic dish and garnish with fresh parsley or rosemary.
- For a rustic touch, serve it in a cast-iron skillet.
- Hosting a formal dinner? Use a ring mold or ramekins for individual servings — fancy and functional.
Serve the stuffing hot, straight from the oven, and bring it to the table with a serving spoon ready. It won’t last long!
Storage and Reheating Tips
Best Practices for Leftovers
Stuffing is one of those dishes that tastes even better the next day. But storing it correctly is key to maintaining texture and flavor.
Let the stuffing cool completely, then transfer it to an airtight container. Store in the fridge for up to 3–4 days. If you’ve added meat like sausage or bacon, aim to eat it within 2–3 days for optimal freshness.
Avoid leaving stuffing out at room temperature for more than 2 hours — bacteria love to crash holiday dinners, and we don’t want that.
Freezing and Reheating Instructions
Want to make your stuffing ahead of time or save some for later? It freezes beautifully.
- To freeze: Scoop cooled stuffing into freezer-safe bags or containers, removing as much air as possible. Label with the date. It’ll keep for up to 3 months.
- To reheat: Thaw overnight in the fridge. Reheat in a covered dish in the oven at 350°F for about 20–30 minutes, adding a splash of broth if it seems dry.
You can also reheat individual servings in the microwave — just add a bit of moisture, cover loosely, and heat for 1–2 minutes.
Common Mistakes to Avoid
Dry Stuffing Woes
If your stuffing ends up too dry, it’s usually because:
- Not enough broth was added
- It was baked uncovered too long
- Bread cubes weren’t allowed to soak up the liquid before baking
Fix it by drizzling with warm broth before reheating or during the last 10 minutes of baking. You can also stir in a little melted butter for added richness.
Overly Mushy Mistakes
On the flip side, no one wants stuffing that feels like paste. This usually happens when:
- Too much broth was used
- Bread was over-mixed or crushed
- Eggs were added without enough structure
Avoid this by adding broth slowly, stirring gently, and baking until the top is crisp.
Get it right, and you’ll have stuffing that’s moist, fluffy, and perfectly balanced — every time.
FAQs about Pepperidge Farm Stuffing Recipe
1. Can I make Pepperidge Farm stuffing ahead of time?
Yes! Assemble everything and refrigerate it up to 24 hours in advance. Bake just before serving.
2. Is Pepperidge Farm stuffing gluten-free?
No, the original is not gluten-free. Use a gluten-free bread alternative to recreate the recipe safely.
3. How do I keep stuffing moist while baking?
Cover it with foil during the first half of baking and add extra broth if needed before baking.
4. Can I stuff a turkey with this recipe?
Yes, but reduce the broth slightly and ensure the internal temperature of the stuffing reaches 165°F.
5. What’s the best way to reheat leftover stuffing?
Oven reheating is best for texture. Add broth, cover with foil, and bake at 350°F for 20–30 minutes.
Conclusion
Making Pepperidge Farm stuffing is more than just following a recipe — it’s reviving a holiday tradition. Whether you keep it classic or give it your own personal twist, this dish has a way of bringing people together. Its warmth, aroma, and satisfying texture make it the heart of any festive meal.
And the best part? It’s easy enough for weeknight dinners and delicious enough for special occasions. So grab that blue bag, round up a few simple ingredients, and get ready to serve up a side dish everyone will be asking about.
Here’s to stuffing that’s always flavorful, never fussy.


