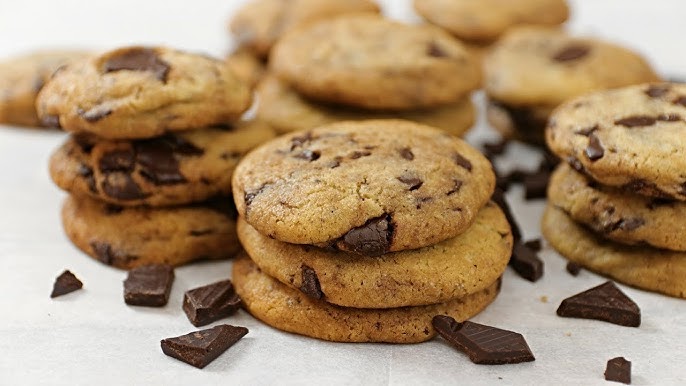
Peanut Butter Chocolate Chip Cookie Recipe: There’s something undeniably magical about the combination of peanut butter and chocolate. It’s the kind of flavor duo that sparks nostalgia, warms your heart, and satisfies that sweet-salty craving all in one bite. When you bite into a peanut butter chocolate chip cookie, you’re not just tasting a dessert—you’re experiencing a masterpiece of contrasts. The saltiness and creaminess of the peanut butter blend with the melty, sweet decadence of chocolate chips in a way that few other combinations can replicate.
But it’s not just about the flavor. It’s the texture too. Peanut butter adds a rich, chewy quality to the cookie dough, while the chocolate chips break through with melty pockets of gooey goodness. It’s soft, it’s slightly crispy at the edges, and it’s utterly irresistible.
The Appeal of Homemade Cookies
Sure, you can grab a pack of cookies from the store. But nothing—and we mean nothing—beats a warm, freshly baked cookie straight from your oven. The aroma alone can turn a dull afternoon into something extraordinary. Making cookies at home allows you to control the quality of ingredients, customize flavors, and most importantly, enjoy them fresh.
Whether you’re baking for a party, a cozy night in, or just because you need a little joy in your life, this peanut butter chocolate chip cookie recipe is your golden ticket.
Ingredients You’ll Need
Basic Pantry Ingredients
Before we dive into the step-by-step process, let’s talk ingredients. This recipe sticks to simple, pantry-friendly items that you probably already have. Here’s what you’ll need:
- 1/2 cup unsalted butter (softened)
- 1/2 cup granulated sugar
- 1/2 cup brown sugar (packed)
- 1/2 cup creamy peanut butter
- 1 large egg
- 1 teaspoon vanilla extract
- 1 1/4 cups all-purpose flour
- 1/2 teaspoon baking soda
- 1/4 teaspoon salt
- 1 cup semisweet chocolate chips
Each ingredient serves a purpose. Butter adds flavor and softness. Brown sugar adds moisture and chew. The peanut butter, of course, is the star, while the egg binds it all together. Vanilla deepens the flavor, and the flour-baking soda-salt trio builds the structure.
Choosing the Right Peanut Butter and Chocolate Chips
The type of peanut butter you use can totally change the game. Go for creamy, no-stir peanut butter for the smoothest results. Natural peanut butters with separated oils can make the dough too oily or crumbly.
When it comes to chocolate chips, you’ve got choices: semisweet for classic taste, dark for a richer flavor, or milk chocolate for sweetness overload. You can even mix a few types if you’re feeling adventurous. Want to level up? Toss in some peanut butter chips for double the nutty delight.
Kitchen Tools and Equipment
Must-Have Baking Tools
Here’s what you need to make the baking process a breeze:
- Mixing bowls (medium and large)
- Measuring cups and spoons
- Electric hand mixer or stand mixer
- Rubber spatula or wooden spoon
- Baking sheets
- Parchment paper or silicone baking mat
- Cooling rack
Each tool plays a vital role. A mixer speeds up creaming, a spatula helps fold in the chips, and parchment prevents sticking and over-browning.
Optional Tools That Make Life Easier
While not essential, these gadgets can seriously level up your cookie game:
- Cookie scoop (for evenly sized cookies)
- Kitchen scale (for precise measurements)
- Oven thermometer (to ensure accurate baking temp)
These extras make baking more fun and foolproof—especially if you’re planning to make cookies often.
Step-by-Step Guide to Making Peanut Butter Chocolate Chip Cookies
Step 1: Prepping Your Kitchen and Ingredients
Start by preheating your oven to 350°F (175°C). Line two baking sheets with parchment paper or silicone baking mats. This ensures your cookies won’t stick and helps with even baking.
Next, gather all your ingredients. Make sure your butter is softened but not melted—room temperature is perfect. Crack the egg into a small bowl to ensure no shell bits sneak in.
Measure everything ahead of time. This “mise en place” method (French for “everything in its place”) makes the process smooth and stress-free.
Step 2: Mixing the Dough to Perfection
Start with the wet ingredients. In a large mixing bowl, cream together the softened butter, granulated sugar, and brown sugar until the mixture is light and fluffy. This usually takes about 2–3 minutes with an electric mixer. The creaming process incorporates air into the dough, which helps give your cookies that lovely lift.
Once your butter and sugars are perfectly combined, add the creamy peanut butter and beat until smooth. You’ll start to see that beautiful, golden-brown mixture coming together. Then, add in the egg and vanilla extract, continuing to mix until everything is fully incorporated.
Now it’s time to add the dry ingredients. In a separate bowl, whisk together the all-purpose flour, baking soda, and salt. Slowly add this mixture to your wet ingredients, mixing on low speed or using a spatula to fold the ingredients together. Be gentle—over-mixing can make your cookies tough.
Once you’ve got a cohesive dough, pour in your chocolate chips and give everything one last mix. Make sure those chips are evenly distributed throughout the dough so every bite gets a little chocolatey surprise.
Pro tip: If your dough feels too soft or sticky, chill it in the refrigerator for 15–20 minutes. This makes it easier to handle and helps the cookies hold their shape while baking.
Step 3: Shaping and Placing the Cookies
Grab your prepared baking sheets and a cookie scoop or tablespoon. Scoop out balls of dough, about 1.5 tablespoons each, and place them on the sheet. Make sure to leave about 2 inches of space between each dough ball—these cookies will spread!
If you want those beautiful, bakery-style cookies with visible chocolate chips, press a few extra chips onto the tops of each dough ball before baking. It’s a small touch, but it makes a big visual difference.
Don’t flatten the dough balls; they’ll naturally spread into perfect cookie shapes while baking. But if you prefer thinner cookies, a light press with your fingers will do the trick.
You should end up with about 20–24 cookies, depending on the size of your scoops. At this point, if you’d like to freeze some dough for later, go ahead! Just freeze the scooped dough balls on a tray, then transfer to a freezer-safe bag once firm.
Step 4: Baking the Cookies Just Right
Pop the trays into your preheated oven and bake for 10–12 minutes. Keep an eye on them—you’re looking for edges that are golden brown but centers that still look soft and slightly underbaked. That’s the secret to chewy cookies.
Every oven is different, so your baking time might vary slightly. Start checking around the 9-minute mark if your oven runs hot.
Once baked, let the cookies rest on the tray for about 5 minutes. They’ll continue to cook slightly from the residual heat, and this helps them set without becoming overdone.
After that, transfer the cookies to a wire cooling rack to cool completely—if you can wait that long! Honestly, these cookies are heavenly while still a little warm, with gooey chocolate and melty peanut butter goodness in every bite.
Step 5: Cooling and Storing Your Cookies
Proper cooling is essential for achieving the right texture. If you move them too soon, they may break apart; leave them on the baking tray just long enough to set the base.
Once they’re completely cool, store the cookies in an airtight container at room temperature. They’ll stay fresh for about 4–5 days (though we doubt they’ll last that long). You can also freeze the baked cookies—just let them cool completely, then pop them into a zip-top freezer bag. They’ll keep for up to 2 months and taste just as amazing after a quick warm-up in the microwave.
Want to take it to the next level? Serve your cookies with a scoop of vanilla ice cream or use them to make cookie sandwiches with peanut butter or Nutella in the center.
Tips and Tricks for Cookie Perfection
Getting the Right Texture
Everyone has their preference—some like their cookies soft and chewy, while others go for crisp and crunchy. For soft and chewy, don’t overbake. Slightly underbaked centers make all the difference. If you’re after a crispier cookie, extend your baking time by 2–3 minutes.
Also, using brown sugar over white sugar gives your cookies that moist, chewy texture, thanks to the molasses content. For thicker cookies, chill your dough before baking to prevent spreading.
Avoiding Common Mistakes
Here are a few rookie errors to avoid:
- Using natural peanut butter: It often makes dough oily or crumbly.
- Overmixing the dough: This activates too much gluten, making cookies tough.
- Not measuring flour correctly: Always spoon flour into your measuring cup, then level it off—don’t scoop directly from the bag.
- Skipping the chill time: Especially important if your kitchen is warm.
These small tweaks can turn decent cookies into bakery-worthy ones.
FAQs about Peanut Butter Chocolate Chip Cookie Recipe
1. Can I use crunchy peanut butter instead of creamy?
Yes, you can! Crunchy peanut butter adds a delightful texture to the cookies with bits of peanuts throughout. Just be aware that it may alter the dough’s consistency slightly, so monitor the mixing and baking times carefully.
2. How can I make these cookies gluten-free?
Swap out the all-purpose flour for a gluten-free flour blend. Make sure the blend contains xanthan gum for the best texture. Always check that your other ingredients, like baking soda and chocolate chips, are certified gluten-free.
3. Can I freeze the cookie dough?
Absolutely. After scooping the dough into balls, place them on a tray in the freezer. Once frozen, transfer them to a zip-top freezer bag. You can bake them straight from the freezer—just add an extra 2 minutes to the baking time.
4. Why did my cookies come out flat?
Flat cookies could result from overmixing the dough, not chilling it before baking, or using overly soft butter. Make sure your butter is at room temperature—not melted—and consider chilling the dough for 15–30 minutes before baking.
5. What’s the best way to store these cookies?
Keep your cookies in an airtight container at room temperature for up to 5 days. For longer storage, freeze them in a zip-top bag. Warm them up in the microwave for 10–15 seconds to enjoy that fresh-baked taste again.
Conclusion
There you have it—a foolproof, step-by-step guide to making the most irresistible peanut butter chocolate chip cookies from scratch. These cookies are more than just a sweet treat; they’re a little piece of comfort, a homemade hug baked into every bite. Whether you’re baking for a party, sharing with loved ones, or just indulging your sweet tooth, these cookies are guaranteed to impress.
What makes this recipe so special is its simplicity and adaptability. You can easily swap in your favorite chocolate chips, add a sprinkle of sea salt for extra flair, or double the batch to store for later. The combination of creamy peanut butter and rich chocolate chips is a timeless classic—and once you master this recipe, you’ll have a go-to dessert for years to come.
Baking cookies might seem basic, but the joy it brings is anything but. So don your apron, preheat that oven, and treat yourself to the magic of freshly baked peanut butter chocolate chip cookies. You deserve it.


