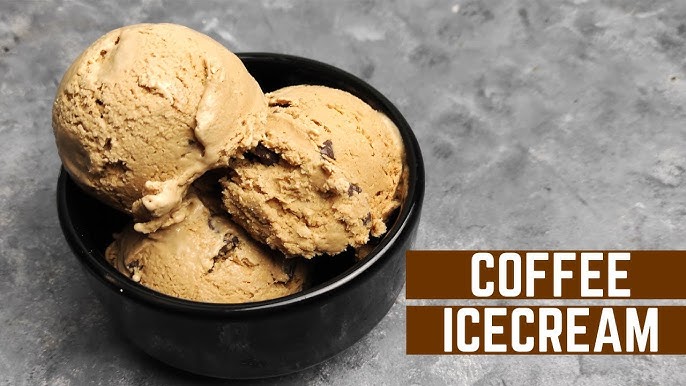
Coffee Ice Cream Recipe: Craving something sweet with a caffeine kick? Coffee ice cream hits the spot like no other! It’s rich, creamy, and packed with that bold coffee flavor we all love. And the best part? You can make it at home with just a few ingredients and a little patience. Whether you’re a seasoned home chef or a first-timer, this guide will walk you through the entire process step-by-step.
Why Coffee Ice Cream is Loved by Many
Coffee ice cream is the perfect union of dessert and caffeine. It satisfies your sweet tooth while also delivering that aromatic, roasted flavor only coffee can bring. Unlike some overly sugary ice creams, coffee ice cream offers a grown-up twist. It’s refined, indulgent, and perfect after dinner or on a hot afternoon.
This frozen treat is especially popular among coffee lovers who want a change from their regular cup of joe. Imagine your favorite latte turned into a silky, frozen delight. Plus, homemade coffee ice cream can be adjusted to your taste. Prefer espresso to drip coffee? Like it stronger or milder? It’s all in your hands.
Ingredients You’ll Need
Simple and Readily Available Ingredients
Here’s what you’ll need to whip up a classic batch of coffee ice cream:
- 2 cups heavy cream
- 1 cup whole milk
- 3/4 cup granulated sugar
- 4 large egg yolks
- 2 tablespoons instant coffee or 1/2 cup strong brewed coffee
- 1 teaspoon vanilla extract
- Pinch of salt
Each of these ingredients plays a role in flavor and texture. The heavy cream and egg yolks give it that luscious, scoopable texture. The sugar balances the bitterness of the coffee, and the vanilla rounds everything out.
Substitutions and Variations
Want to make it your own? Try these twists:
- Dairy-Free Version: Use coconut milk and almond milk instead of cream and whole milk.
- Sugar-Free Option: Replace sugar with stevia, erythritol, or monk fruit.
- Extra Kick: Add a shot of espresso or a splash of coffee liqueur for deeper flavor.
- Mix-Ins: Throw in chocolate chips, crushed cookies, or caramel swirls for fun textures.
With these ideas, you can experiment and create your signature coffee ice cream.
Equipment Required
Ice Cream Maker vs. No-Churn Method
While an ice cream maker yields the creamiest results, don’t worry if you don’t have one.
With Ice Cream Maker:
- Ensures smooth, consistent churning
- Freezes faster for creamier texture
- Requires pre-freezing the bowl (check your model)
No-Churn Method:
- Use a hand mixer or whisk
- Freeze and stir every 30 minutes for the first 3 hours
- Can be slightly icier but still delicious
Other basics you’ll need include:
- Mixing bowls
- Whisk or electric mixer
- Saucepan
- Spatula
- Fine mesh strainer (optional)
Having the right tools makes the process smoother and helps you nail that perfect batch.
Step-by-Step Instructions
Step 1 – Prepare the Coffee Base
Start by deciding how strong you want your coffee flavor. If using instant coffee, dissolve it in a few tablespoons of warm water. For a more natural taste, brew strong coffee and cool it to room temperature.
Whisk the coffee into the milk and set it aside. This forms the aromatic base of your ice cream. The trick is balancing the flavor—too much coffee can overpower the other ingredients, while too little won’t be satisfying.
Step 2 – Make the Custard
This is the heart of the recipe. A custard base gives coffee ice cream that rich and velvety texture.
- In a saucepan, heat the cream, milk, and sugar over medium heat until it starts to steam—don’t let it boil.
- In a separate bowl, whisk the egg yolks until slightly thickened.
- Slowly pour a bit of the hot milk mixture into the yolks, whisking constantly (this is called tempering).
- Gradually add the yolk mixture back into the saucepan, stirring constantly over low heat.
The custard is ready when it thickens enough to coat the back of a spoon. This step requires attention—if it gets too hot, the eggs can scramble. If you want to be extra careful, strain the mixture through a sieve to catch any lumps.
Step 3 – Mix and Chill
Once your custard base is ready and smooth, it’s time to add the coffee flavor and let it chill properly. This step ensures the final ice cream is silky, flavorful, and churns or freezes perfectly.
- Stir in the cooled brewed coffee or dissolved instant coffee and the vanilla extract into the custard.
- Mix thoroughly until everything is well combined.
- Transfer the mixture into a clean bowl. Cover it with plastic wrap, making sure the wrap touches the surface to prevent a skin from forming.
- Refrigerate the mixture for at least 4 hours—overnight is even better.
Chilling the base does two things: it helps the flavors meld beautifully, and it cools the mixture enough so it can freeze properly later. Don’t skip this step—it’s key for great texture and flavor!
Step 4 – Churn or Freeze
Now comes the exciting part—turning your mixture into actual ice cream!
Using an Ice Cream Maker:
- Pour the chilled base into your ice cream maker.
- Churn according to the manufacturer’s instructions, usually about 20-30 minutes.
- You’ll know it’s done when it resembles soft-serve ice cream.
- Transfer it to an airtight container and freeze for 2-4 hours to firm up.
No-Churn Method:
- Pour the mixture into a shallow dish.
- Place it in the freezer.
- Every 30 minutes for the first 3 hours, stir vigorously with a fork or whisk. This helps break up ice crystals.
- After 4-6 hours, you’ll have scoopable ice cream!
Both methods work beautifully, though the churned version tends to be a bit creamier. Either way, you’ll have delicious, homemade coffee ice cream ready to enjoy!
Pro Tips for Creamier Coffee Ice Cream
Want to take your coffee ice cream to the next level? These tips will help you get a gourmet-level texture and flavor every single time:
- Use Full-Fat Dairy: Skimping on fat = icier results. Heavy cream and whole milk give that dreamy creaminess.
- Chill Everything: From the base to the mixing bowl, colder is better. It speeds up freezing and improves texture.
- Don’t Overcook the Custard: Once it coats the spoon, it’s ready. Overcooking = scrambled eggs.
- Add a Touch of Alcohol: A tablespoon of vodka or coffee liqueur lowers the freezing point, resulting in smoother ice cream.
- Add Mix-ins Last: If adding chocolate chips, nuts, or cookie bits, fold them in after churning—right before final freezing.
These hacks are simple but make a big difference in how your final scoop turns out.
Serving Suggestions
Coffee ice cream is incredible on its own, but if you want to get creative, here are some delicious ways to serve it:
- Affogato Style: Pour a hot shot of espresso over a scoop of ice cream.
- With Dessert: Pair it with brownies, chocolate cake, or a warm apple tart.
- Ice Cream Sandwiches: Use chocolate cookies or shortbread for a gourmet twist.
- Drizzle Toppings: Think caramel sauce, chocolate syrup, or even a dusting of cinnamon or cocoa powder.
- Garnish Smart: A few chocolate-covered espresso beans or whipped cream can elevate the look and taste.
Whether you’re entertaining or treating yourself, these ideas make coffee ice cream even more irresistible.
Storing and Shelf Life
Storing your homemade coffee ice cream the right way is just as important as making it. Done right, it stays fresh, flavorful, and scoopable for days—maybe even weeks.
Here’s how to store it properly:
- Use an Airtight Container: Prevents freezer burn and preserves flavor. A plastic or glass container with a tight-fitting lid works best.
- Cover the Surface: Press plastic wrap directly onto the surface of the ice cream before sealing the lid. This helps avoid ice crystals.
- Freeze Immediately: Once your ice cream is churned and placed in a container, freeze it right away to maintain its texture.
- Label with Date: Homemade ice cream is best consumed within 1 to 2 weeks, so label it to keep track.
Shelf Life Tips:
- 1 week: Best texture and flavor.
- 2 weeks: Still delicious but might start to get icier.
- Beyond 2 weeks: Safe to eat but flavor and texture may degrade.
Avoid repeated thawing and refreezing—it messes with texture and can lead to grainy or icy scoops. If the ice cream looks or smells off (rare, but possible), it’s safer to toss it.
Common Mistakes to Avoid
Even experienced cooks can stumble when making ice cream at home. Let’s go over some common pitfalls—and how to dodge them:
- Skipping the Chill Step: Warm mixtures won’t churn properly. Always chill the base fully.
- Too Much Coffee: While we love a strong brew, overloading the base can make the ice cream bitter.
- Using Low-Fat Dairy: It may seem healthier, but it often results in icy, grainy texture.
- Overcooking the Custard: The biggest rookie mistake. Go low and slow—take it off the heat as soon as it coats the spoon.
- Not Stirring No-Churn Ice Cream Enough: Infrequent stirring = icy ice cream. Be diligent in those first few hours.
- Adding Flavor Too Late: Infusing the base with coffee early ensures the best flavor. Adding it after churning won’t have the same impact.
Avoiding these simple missteps can mean the difference between a rock-hard block of icy sadness and a luscious, dreamy dessert.
FAQs about Coffee Ice Cream Recipe
1. Can I use decaf coffee for this recipe?
Absolutely! If you want the flavor without the caffeine, decaf works just as well.
2. What’s the best type of coffee to use?
Dark roast or espresso gives a bolder flavor, while medium roast offers a smoother, more subtle taste. Instant espresso powder also works great.
3. How can I make it vegan?
Use full-fat coconut milk and almond milk instead of dairy, and skip the eggs. Thicken with a bit of cornstarch or use a vegan custard base.
4. Is it okay to skip the eggs?
Yes, but you’ll need a different base. Try a mix of condensed milk and whipped cream for a no-egg, no-churn version.
5. Can I add chocolate or caramel swirls?
Definitely! Fold them in after churning but before freezing. Swirls add flavor and a beautiful marbled look.
Conclusion
You get to control everything—the intensity of the coffee, the sweetness, the mix-ins, and the texture. Plus, there’s just something satisfying about digging into a frozen dessert you crafted yourself.
So whether you’re a coffee addict, an ice cream lover, or a little bit of both, this recipe is your ticket to a creamy, dreamy scoop of perfection. Fire up your ice cream maker—or grab that mixing bowl—and get ready to impress your taste buds.


