Cloud Cake Recipe: Imagine a dessert so light and fluffy that it melts on your tongue like a puff of air—that’s the magic of a cloud cake. Also known as a “Japanese Soufflé Cake” or “Angel Cake” in some circles, cloud cake is famous for its airy, delicate structure and cloud-like softness. This dessert combines the gentle sweetness of a sponge with the airy texture of meringue, making it a heavenly treat for those who crave something lighter than your typical layered cake.
So, what makes it so special? It’s all about technique. A cloud cake doesn’t rely on heavy creams or dense batters. Instead, it uses well-whipped egg whites, gentle folding, and precise baking to achieve a structure that’s firm enough to hold but soft enough to bounce back with each bite.
The name “cloud cake” doesn’t just hint at its texture—it’s a promise. One bite, and you’ll feel like you’re floating.
Ingredients You’ll Need
Crafting a cloud cake requires simple ingredients, but each one plays a crucial role in achieving that signature light and airy texture. Here’s what you’ll need:
Dry Ingredients:
- ¾ cup (95g) cake flour (or all-purpose flour sifted 2–3 times)
- ½ cup (100g) granulated sugar (divided into two parts)
- 1 tsp baking powder
- A pinch of salt
Wet Ingredients:
- 5 large eggs (separated)
- ¼ cup (60ml) whole milk
- ¼ cup (60ml) vegetable oil (neutral flavor like canola or sunflower)
- 1 tsp vanilla extract
- ¼ tsp cream of tartar or lemon juice (to stabilize egg whites)
Optional Add-Ons:
- Lemon zest for a citrusy aroma
- Cocoa powder (swap 2 tbsp of flour for cocoa if you want a chocolate version)
- Fresh berries or whipped cream for topping
Each ingredient must be measured precisely. Even a slight change in ratio can affect the final texture. This cake is all about chemistry—egg whites must be whipped correctly, and the batter must be handled gently. Don’t rush; instead, enjoy the therapeutic process of baking from scratch.
Tools and Equipment Required
Using the right tools can make the difference between a dense sponge and a cloud-soft cake. Let’s go over what you need:
Must-Have Baking Tools:
- Electric hand mixer or stand mixer (for whipping egg whites)
- Mixing bowls (glass or metal recommended)
- Sifter (for flour and dry ingredients)
- Spatula (silicone works best for folding)
- 8-inch round cake pan or springform pan
- Parchment paper
Optional Tools for Better Texture:
- Kitchen scale (for precise measurement)
- Oven thermometer (to ensure accurate baking temperature)
- Cooling rack (to prevent soggy bottoms)
- Offset spatula (for smoothing batter evenly)
Preparation is half the battle in baking. Lay out your tools and ingredients before you start. A clean, organized kitchen means a smoother baking experience. Trust me, when the egg whites are at peak stiffness, you don’t want to be fumbling around for your spatula!
Preparing the Batter
This is the most delicate and crucial step. It’s where the cloud magic begins. Here’s how to do it right.
Step 1: Separate the Eggs
Carefully separate egg whites from yolks while cold (it’s easier), then let them come to room temperature. This helps achieve a better whip for volume and stability.
Step 2: Mix the Wet Base
In a large bowl, whisk the egg yolks, sugar (half portion), milk, oil, and vanilla extract until smooth. Sift in flour, baking powder, and salt. Mix until just combined. Don’t overmix—it should be creamy but not elastic.
Step 3: Whip the Egg Whites
In a separate clean bowl, add egg whites and cream of tartar. Using your mixer, beat at medium speed until frothy. Gradually add the remaining sugar and increase speed. Beat until stiff peaks form—glossy and firm, but not dry.
Step 4: Folding Time
Take 1/3 of the whipped egg whites and gently fold them into the yolk mixture to loosen it. Then, carefully fold in the rest in two parts. Use a “J” motion with your spatula—don’t stir or press too hard. The goal is to maintain as much air as possible.
This step requires patience. Imagine folding air into batter—every move should be slow and deliberate. You’re not just mixing; you’re sculpting the cloud.
Baking the Cloud Cake
Now that your batter is ready, it’s time to bake. This is where your fluffy dream takes shape.
Step 1: Prepare the Pan
Line the bottom of your cake pan with parchment paper. Do not grease the sides—this helps the batter cling and rise properly.
Step 2: Bake Gently
Preheat your oven to 320°F (160°C). Pour the batter into the pan and tap it once on the counter to remove large bubbles. Place in the center of the oven and bake for 40–45 minutes.
Use a water bath if your oven tends to overheat or you want an ultra-moist texture. Simply place your cake pan inside a larger pan filled with 1 inch of hot water.
Step 3: Check and Cool
The cake is done when the top is golden and springs back when lightly pressed. Insert a skewer to check if it comes out clean. Once out, invert the pan immediately onto a rack to cool. This prevents deflation.
Let it cool completely before removing from the pan. Peel off the parchment and admire your fluffy masterpiece!
Cooling and Unmolding the Cake
Cooling is a step that many overlook, but it’s absolutely critical to achieving the perfect texture in a cloud cake. The structure of the cake is still delicate when it comes out of the oven. If you rush this part, the cake may collapse, become soggy, or lose its airy fluff.
Step 1: Invert the Cake Pan
Immediately after taking the cake out of the oven, turn the cake pan upside down on a wire rack. This helps prevent the cake from collapsing under its own weight. Because we didn’t grease the sides of the pan, the cake clings to the walls, maintaining its height as it cools.
Step 2: Let It Cool Completely
Allow the cake to cool upside down for at least 1 to 1.5 hours. This not only ensures structural stability but also gives it a moist, melt-in-your-mouth texture. If you rush this, the cake may shrink or become rubbery.
Step 3: Unmold with Care
Once cooled, use a thin knife or offset spatula to gently loosen the edges from the pan. Then carefully flip the cake onto a plate or cake board. Peel away the parchment paper from the base.
Voila! You should have a tall, bouncy, and cloud-soft cake ready to be dressed up however you like.
Decorating Your Cloud Cake
Cloud cake is naturally beautiful with its golden top and pillowy body, but a few decorative touches can elevate it into a showstopper. Whether you’re celebrating a birthday or just want a picture-perfect dessert, here are some easy yet elegant ideas.
Simple Powdered Sugar Dusting
A classic move. Lightly sift powdered sugar over the top of the cake for a snow-dusted effect. It’s minimal but enhances the cloud theme beautifully.
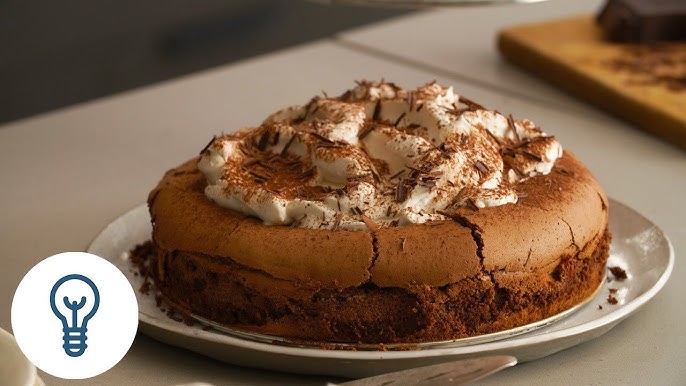
Whipped Cream Toppings
A swirl of freshly whipped cream can add richness without overwhelming the airy texture of the cake. Sweeten it lightly and pipe it around the edge or cover the entire top for a soft, creamy finish.
Fresh Fruit Arrangement
Top with strawberries, raspberries, blueberries, or kiwi slices for a colorful, refreshing look. The tartness of berries complements the sweet and subtle flavor of the cake.
Glazes and Sauces
You can drizzle a light lemon glaze or a simple vanilla syrup for added sweetness. For chocolate lovers, a dark chocolate ganache drizzle adds richness and flair.
No matter how you decorate it, remember that simplicity is key. The cake’s main charm lies in its texture, so don’t overload it with heavy toppings.
Serving Suggestions
Cloud cake is incredibly versatile when it comes to serving. Whether it’s a cozy brunch or an elegant dinner party, this dessert adapts to the mood. Here’s how to serve it right:
Pair It with Tea or Coffee
Its soft texture and gentle flavor make it a perfect companion to a warm cup of tea or a rich espresso. Try green tea for a Japanese twist or a bold Americano to contrast its lightness.
Serve Chilled for Extra Refreshment
Refrigerating the cake for an hour before serving can add a refreshing twist, especially in warmer months. It becomes slightly firmer but still retains its bounce and lightness.
Add a Scoop of Ice Cream
For an indulgent treat, serve with a scoop of vanilla or berry sorbet. The hot-cold contrast is a pleasant surprise and makes the dessert even more delightful.
Common Mistakes to Avoid
Baking a cloud cake isn’t rocket science, but it does demand attention to detail. Here are some common pitfalls to avoid:
Overmixing the Batter
This is the fastest way to deflate your batter and ruin the texture. Always fold gently and stop as soon as you no longer see streaks of egg white.
Underwhipping or Overwhipping Egg Whites
Egg whites should form stiff, glossy peaks. If underwhipped, the cake won’t rise. If overwhipped, they’ll be too dry and difficult to incorporate, leading to a grainy texture.
Baking at the Wrong Temperature
Cloud cakes need a low and steady oven temperature. Too hot, and they’ll brown too quickly and crack. Too low, and they won’t rise. Always preheat your oven and use an oven thermometer if possible.
Skipping the Cooling Process
If you don’t invert the cake while cooling, it may collapse. Cooling upside down helps it retain height and fluffiness.
Avoid these mistakes, and you’ll be well on your way to cloud cake perfection.
Storing Your Cloud Cake
One of the beautiful things about cloud cake is that it stays tender and fluffy for a day or two—if stored properly. Since it contains no heavy butter or cream inside, it actually holds up better than you’d expect. Here’s how to keep it fresh and delicious:
Room Temperature Storage (Short-Term)
If you plan to eat it within 24 hours, simply cover the cake with a cake dome or wrap it loosely in plastic wrap and store it at room temperature. Keep it in a cool, dry place—away from direct sunlight or heat.
Refrigeration (Mid-Term)
For longer storage (up to 3 days), place the cloud cake in an airtight container and refrigerate. You might notice the texture becomes slightly firmer when cold, but the flavor stays intact. Just let it sit out for 20–30 minutes before serving to return to that soft, cloud-like consistency.
Freezing (Long-Term)
You can also freeze cloud cake! Wrap individual slices in plastic wrap, then place them in a zip-lock freezer bag or airtight container. They’ll keep for up to a month. To enjoy, thaw in the fridge overnight or let them sit at room temp for about an hour.
Avoid wrapping the cake too tightly if it’s warm—it can trap steam and make the cake soggy. Always cool the cake completely before storing or wrapping.
Variations of Cloud Cake
Once you’ve mastered the basic cloud cake, the possibilities are endless. This simple recipe is incredibly flexible, allowing you to create flavors for every season and occasion.
1. Chocolate Cloud Cake
Substitute 2 tablespoons of flour with cocoa powder. The result? A rich, airy cake that satisfies your chocolate cravings without feeling heavy.
2. Matcha Cloud Cake
Add 1–2 teaspoons of high-quality matcha powder to the dry ingredients. It gives the cake a subtle green hue and an earthy depth that pairs beautifully with whipped cream and red beans.
3. Lemon Cloud Cake
Add 1 tablespoon of lemon zest to the wet ingredients and a teaspoon of lemon juice. It’s tangy, fresh, and perfect for summer picnics.
4. Coconut Cloud Cake
Fold in 1/4 cup of shredded coconut into the batter and top with toasted coconut flakes. This gives a tropical vibe and adds a light chewiness.
5. Almond Cloud Cake
Replace a portion of the flour with finely ground almonds. You’ll get a slightly denser cake with a warm, nutty aroma that’s delightful in winter months.
Each variation adds a unique personality to the base recipe while still maintaining that light, cloud-like structure.
Nutritional Information (Per Slice – Approx.)
Want to know what you’re eating? Here’s a basic breakdown based on a cake sliced into 8 servings:
| Nutrient | Amount |
|---|---|
| Calories | 160–180 kcal |
| Protein | 4g |
| Fat | 7g |
| Carbohydrates | 20g |
| Sugar | 12g |
| Fiber | <1g |
Please note that these values can vary depending on toppings or substitutions. For example, adding whipped cream or using coconut oil instead of vegetable oil may alter the fat and calorie content.
Why You’ll Love This Cake
Let’s be real—once you make cloud cake, you’ll never look at sponge cake the same way again. It’s the perfect balance of simple and elegant. Here’s why this recipe is a must-have in your baking arsenal:
- Light as air: You can literally eat two slices and not feel weighed down.
- Not too sweet: It’s perfect for people who find buttercream cakes too sugary.
- Crowd-pleaser: Whether it’s brunch with friends or a family birthday, this cake fits every occasion.
- Customizable: From matcha to lemon, you can flavor it any way you like.
- Impressive but easy: Looks and tastes fancy—but the process is straightforward.
So if you’re bored with basic desserts or intimidated by complex cakes, the cloud cake is your happy middle ground.
FAQs about Cloud Cake Recipe
1. Can I make cloud cake without cream of tartar?
Yes, you can use a few drops of lemon juice or white vinegar instead. They serve the same purpose—stabilizing the egg whites.
2. Can I make cloud cake gluten-free?
Absolutely. Use a gluten-free flour blend or substitute with almond flour. Just be aware that it may slightly change the texture.
3. Why did my cloud cake collapse after baking?
It could be from underbaking, overwhipping the egg whites, or not inverting the cake to cool. Follow the guide closely for best results.
4. How long does cloud cake last?
Stored in the fridge, it lasts up to 3 days. You can also freeze slices for up to a month.
5. Can I add fillings like jam or custard?
Yes, but be cautious. Too much moisture can affect the cake’s structure. Light fillings or thin layers work best.
Conclusion
Cloud cake is the kind of dessert that makes you feel like you’ve just pulled a piece of the sky down onto your plate. It’s tender, it’s fluffy, and it’s satisfying in the most subtle way possible. While it does require attention to technique, once you’ve nailed the process, it becomes second nature.
From getting those egg whites just right to baking at the perfect temperature and cooling upside down, each step plays a vital role in creating that signature texture. And with so many options to flavor and decorate, you can make it uniquely yours every time.
So why wait? Get those eggs out of the fridge, preheat your oven, and start baking. Trust me—your taste buds (and your Instagram feed) will thank you.