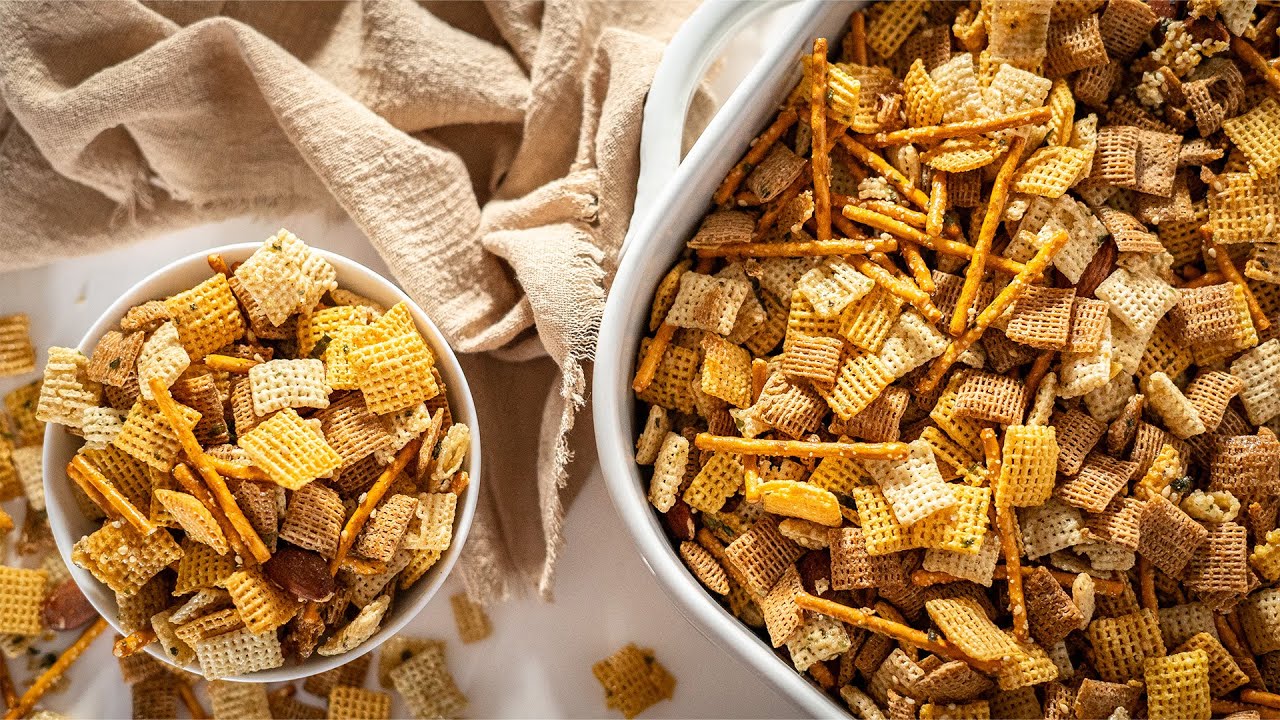
Classic Chex Mix Recipe: Chex Mix is a legendary American snack mix that brings together a perfect medley of crunchy cereal squares, salty pretzels, savory crackers, and nuts, all tossed in a buttery, seasoned blend that’s baked until crisp and golden. Originally invented by the makers of Chex cereal, it quickly became a go-to party staple, game-day snack, and all-around crowd-pleaser. It’s known for its perfect balance of salty, savory, and slightly buttery flavors that satisfy every time.
Why Classic Chex Mix is a Crowd Favorite
There’s something timeless about the original Chex Mix recipe. It’s not just the taste—though the bold, buttery seasoning is undeniably addictive—but also the texture. You’ve got crunch from cereal, a satisfying bite from pretzels, and a melt-in-your-mouth moment with seasoned nuts. It’s nostalgic, comforting, and versatile. You can make a big batch ahead of time, it stores well, and everyone—from kids to grandparents—loves it. Whether you’re bringing it to a potluck, packing it for a road trip, or munching while watching a movie, classic Chex Mix delivers every single time.
Ingredients You’ll Need
Core Ingredients
Here’s what you’ll need to create that classic, nostalgic flavor:
- 3 cups Corn Chex
- 3 cups Rice Chex
- 3 cups Wheat Chex
- 1 cup bite-sized pretzels
- 1 cup mini breadsticks or bagel chips, broken into pieces
- 1 cup mixed nuts (peanuts, cashews, etc.)
These are the foundation of the mix. The three types of Chex cereals offer a diverse crunch and mild taste that soaks up the savory seasoning like a sponge. Pretzels add salt and crunch, while the breadsticks or bagel chips contribute a toasted, garlicky flavor. The nuts bring protein, texture, and a rich, satisfying finish.
Optional Add-ins for Extra Flavor
Want to take your Chex Mix to the next level? Try some of these optional add-ins:
- Cheese crackers (like Cheez-Its)
- Parmesan crisps
- Seasoned rye chips
- Spicy wasabi peas
- Popcorn or kettle corn for a sweet-salty twist
Don’t be afraid to experiment based on your taste buds. Just remember to keep the ratios balanced so the seasoning coats everything evenly.
Kitchen Tools and Equipment
Basic Tools You’ll Need
Before you dive in, make sure your kitchen is equipped with the following:
- Large mixing bowl – For combining all your snack mix ingredients.
- Small microwave-safe bowl or saucepan – To melt the butter and blend the seasonings.
- Baking sheet – A large, rimmed one works best.
- Parchment paper – Optional, but great for easy cleanup.
- Wooden spoon or spatula – For stirring without crushing the mix.
Tips for Easy Cleanup
Line your baking sheet with parchment paper or a silicone baking mat to save time scrubbing sticky seasoning. Also, mixing everything in one big bowl keeps your counter clutter-free.
Step-by-Step Cooking Instructions
Step 1: Preheat the Oven
Start by preheating your oven to 250°F (120°C). This low, slow heat ensures the mix gets evenly baked without burning. It also gives the butter and seasoning time to infuse into every bite.
Step 2: Combine the Cereal and Snacks
In your large mixing bowl, combine:
- 3 cups Corn Chex
- 3 cups Rice Chex
- 3 cups Wheat Chex
- 1 cup pretzels
- 1 cup mini breadsticks or bagel chips
- 1 cup mixed nuts
Gently stir to mix everything evenly. Try not to break the cereal pieces—they’re fragile!
Step 3: Mix the Seasoning Sauce
In a microwave-safe bowl or small saucepan, melt together:
- 6 tablespoons unsalted butter
- 2 tablespoons Worcestershire sauce
- 1 1/2 teaspoons seasoned salt
- 1/2 teaspoon garlic powder
- 1/2 teaspoon onion powder
Microwave the butter until fully melted (about 30 seconds), then stir in the seasonings until everything is dissolved and well blended. The Worcestershire sauce is key—it adds that umami depth that makes Chex Mix taste so rich.
Step 4: Coat the Mix Evenly
Pour the seasoning sauce slowly over the dry mix, stirring constantly. You want every piece to get a light coating. Stir for 2-3 minutes, scraping the bottom of the bowl to make sure nothing gets left behind.
Step 5: Bake to Perfection
Spread the coated mix evenly on a parchment-lined baking sheet. Pop it in the oven and bake at 250°F for 1 hour, stirring every 15 minutes. This step is crucial—stirring ensures everything cooks evenly and prevents the edges from burning.
Once it’s golden brown and fragrant, pull it out and let it cool on the baking sheet for at least 15 minutes. The cooling phase is where it really crisps up!
Storing and Serving Suggestions
Best Ways to Store Chex Mix
Once cooled, transfer the mix to an airtight container. It stays fresh for up to 2 weeks at room temperature, though it rarely lasts that long!
Pro tip: Use resealable gallon-sized bags for easy storage and on-the-go snacking.
Serving Ideas for Parties or Snacks
Here are a few ways to enjoy your classic Chex Mix:
- Serve in small paper cups for individual servings at parties.
- Pack in lunchboxes for a salty treat.
- Create a snack bar with different flavors (classic, spicy, cheesy, etc.).
- Add to a charcuterie board for a crunchy surprise.
FAQs about Classic Chex Mix Recipe
Can I Make Chex Mix in the Microwave?
Yes! You can mix all your ingredients and seasoning sauce in a large microwave-safe bowl. Microwave on high for 5-6 minutes, stirring every 2 minutes. It’s faster, but you might miss out on that deep oven-baked flavor and crunch.
How Long Does Homemade Chex Mix Last?
When stored in an airtight container at room temperature, your Chex Mix will stay fresh and crunchy for about two weeks. If you refrigerate it, it can last up to a month—but it may lose a bit of its crunch.
What’s the Best Cereal Combination?
The classic trio—Corn Chex, Rice Chex, and Wheat Chex—is the gold standard for balance and texture. But if you prefer a lighter mix, skip the Wheat Chex. Want more crunch? Add extra Corn Chex. It’s all about what you enjoy.
Can I Make It Gluten-Free?
Absolutely! Just use gluten-free versions of Chex cereal (they’re labeled clearly), and swap out regular pretzels and bagel chips for gluten-free alternatives. Make sure to check your seasoning sauces and spices too—they can hide gluten.
How Do I Keep It Crunchy?
The key is baking it at a low temperature and stirring regularly. Let it cool fully before storing and always keep it in an airtight container. Avoid humid environments, as moisture is the enemy of crunch.
Conclusion and Final Tips
Making homemade Chex Mix is more than just following a recipe—it’s creating a tradition. There’s something deeply satisfying about tossing together a mix of crunchy, salty, and buttery ingredients and watching them transform into the ultimate crowd-pleaser. Whether you’re preparing it for a family movie night, a holiday party, or just to stash in the pantry for everyday snacking, Chex Mix hits the spot every single time.
One of the best things about this snack is how easy it is to customize. If you’re not into nuts, swap them for extra pretzels. Want more heat? Add a sprinkle of cayenne. Going for a kid-friendly version? Skip the bold flavors and use cheese crackers and Goldfish instead. The options are endless, and the results are always delicious.
A few final tips to make your Chex Mix truly stand out:
- Don’t rush the baking time—the low and slow method ensures everything gets crispy without burning.
- Stir consistently to avoid uneven cooking or soggy spots.
- Let it cool completely before storing to maintain that perfect crunch.
- Make a double batch—you’ll thank yourself later when the first one disappears in a day!
Chex Mix isn’t just a snack—it’s a memory-maker. So fire up the oven, gather your ingredients, and start mixing!