Chocolate Mousse Cake Recipe: Few desserts scream decadence like a chocolate mousse cake. It’s a heavenly combination of moist chocolate cake layered with light, airy mousse and topped off with a silky chocolate ganache. Whether you’re celebrating a birthday, an anniversary, or just satisfying a late-night sweet tooth, this cake hits every note. But here’s the thing—it’s not as complicated as it looks. With the right ingredients, a little patience, and our step-by-step guide, you’ll have a dessert that looks like it came from a fancy patisserie right out of your own kitchen.
What Makes Chocolate Mousse Cake So Special?
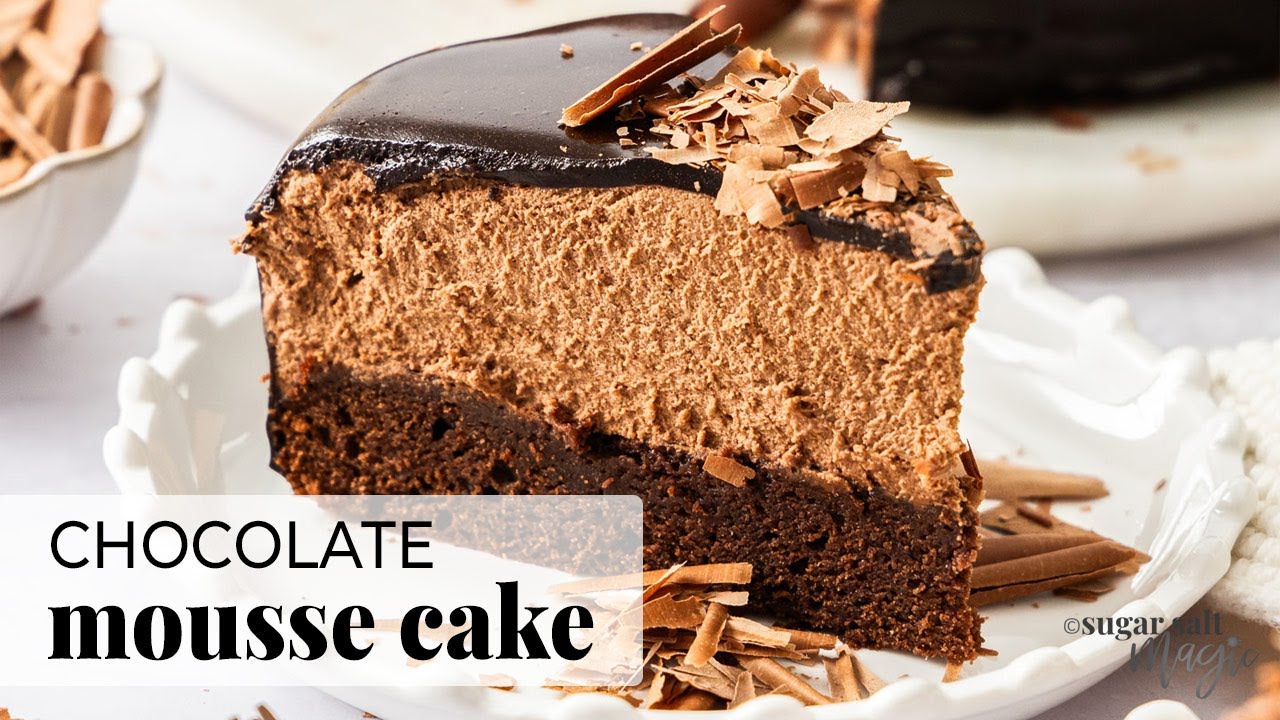
Unlike traditional cakes, a chocolate mousse cake is a layered wonder. Each bite gives you the best of both worlds: the richness of a baked chocolate sponge and the fluffiness of mousse. The texture alone is something to rave about—it melts in your mouth yet satisfies your craving for something substantial. The balance between sweet and bitter chocolate flavors makes it appealing to both chocoholics and casual dessert lovers.
Ideal Occasions for Serving
This cake isn’t your everyday dessert—it’s a showstopper. Think dinner parties, holiday feasts, romantic evenings, or birthdays where you want to go a step beyond basic. It also stores well, which makes it ideal for preparing a day ahead of your big event, giving you one less thing to worry about.
Ingredients You’ll Need
Getting the ingredients right is half the battle won. High-quality chocolate, fresh cream, and a few pantry staples will go a long way in delivering the perfect chocolate mousse cake.
Ingredients You’ll Need
- 1 cup all-purpose flour
- 1/2 cup unsweetened cocoa powder
- 1 tsp baking powder
- 1/2 tsp baking soda
- 1/4 tsp salt
- 2 large eggs
- 3/4 cup granulated sugar
- 1/2 cup buttermilk
- 1/3 cup vegetable oil
- 1 tsp vanilla extract
For the Chocolate Mousse Layer:
- 200g dark chocolate (at least 60% cocoa)
- 1/2 cup heavy cream (for melting chocolate)
- 1.5 cups heavy whipping cream (for mousse)
- 1/4 cup powdered sugar
For the Chocolate Ganache Topping:
- 1/2 cup heavy cream
- 100g semi-sweet chocolate, chopped
Tools and Equipment Required
To make your life easier, have these tools on hand:
- 9-inch springform pan
- Mixing bowls
- Electric hand mixer or stand mixer
- Spatula
- Double boiler or microwave-safe bowl for melting chocolate
- Saucepan
- Whisk
Step-by-Step Instructions
Step 1 – Preparing the Chocolate Cake Base
Start by preheating your oven to 350°F (175°C). Grease your springform pan and line the bottom with parchment paper. In a large bowl, sift together the flour, cocoa powder, baking powder, baking soda, and salt.
In a separate bowl, beat the eggs and sugar until light and fluffy. Add the buttermilk, oil, and vanilla extract, and mix until well combined. Gradually fold the dry ingredients into the wet ingredients. Be gentle here—you don’t want to overmix.
Pour the batter into your prepared pan and bake for 25–30 minutes or until a toothpick inserted in the center comes out clean. Let it cool completely before adding the mousse layer.
Step 2 – Making the Chocolate Mousse
Melt the dark chocolate with 1/2 cup of heavy cream using a double boiler or in short microwave bursts, stirring until smooth. Let it cool slightly.
In another bowl, whip the 1.5 cups of heavy cream with powdered sugar until soft peaks form. Gradually fold the whipped cream into the cooled chocolate mixture. This folding process is what gives your mousse its airy texture, so take your time and be gentle.
Step 3 – Assembling the Cake
Once the cake has cooled completely, pour the mousse over the top of the cake base while it’s still in the springform pan. Smooth the top with a spatula and tap the pan gently to remove air bubbles. Place the cake in the refrigerator for at least 4–5 hours, or overnight if possible, to set the mousse.
Step 4 – Making and Adding the Ganache
Heat the 1/2 cup of cream in a small saucepan until just simmering. Pour it over the chopped chocolate in a bowl and let it sit for 2–3 minutes. Stir until you get a smooth, glossy ganache.
Pour the ganache over the set mousse layer and use a spatula to spread it evenly. For an elegant touch, let some drip down the sides.
Step 5 – Chilling and Serving
Refrigerate the assembled cake for at least another hour so the ganache can firm up. Before serving, run a warm knife around the inside edge of the springform pan to release the cake. Slice using a sharp knife dipped in hot water (and wiped clean between cuts) for clean edges.
Pro Tips for the Perfect Mousse Cake
Creating a stunning chocolate mousse cake isn’t just about following the steps—it’s about adding those little expert touches that take it from good to unforgettable. Here’s how to master it.
- Use high-quality chocolate: This is the star of your dessert, so go for a premium brand with at least 60% cocoa. It’s richer and less sweet, giving your mousse that deep, decadent taste.
- Temperature matters: Let your melted chocolate cool slightly before folding in the whipped cream. If it’s too hot, the cream will melt, and you’ll lose the mousse’s light texture.
- Whip cream to soft peaks only: Over-whipped cream turns grainy and stiff, which doesn’t blend well into the chocolate. Soft peaks will give you that perfect, airy mousse.
- Chill between layers: Don’t rush the cooling process. Let the mousse set completely before adding the ganache, or you’ll end up with messy layers.
- Clean your tools: A spotless bowl and whisk help ensure your whipped cream fluffs up properly. Any residue can ruin the texture.
These tips might seem small, but they make a big difference in taste and presentation. A little patience and precision go a long way when it comes to chocolate mousse cake.
Variations You Can Try
Want to get creative? This recipe is incredibly flexible. Once you’ve mastered the basic chocolate mousse cake, you can mix things up with different flavors and textures.
- Raspberry twist: Add a layer of raspberry jam between the cake and mousse for a tart contrast. You can also garnish with fresh berries.
- Nutty delight: Fold in crushed hazelnuts or almonds into the mousse or sprinkle them on top of the ganache for a bit of crunch.
- Mocha mousse: Mix a teaspoon of instant espresso powder into the melted chocolate for a rich, coffee-kissed mousse layer.
- Mint chocolate: Add a few drops of peppermint extract to the mousse for a cool, refreshing version of the classic.
- White chocolate topping: Use white chocolate for the ganache to give the cake a different visual appeal and a lighter finish.
These twists keep things exciting and allow you to tailor the cake to your guests’ preferences or seasonal ingredients.
Storage and Shelf Life
Chocolate mousse cake holds up beautifully if stored properly, which is great news if you’re prepping in advance or saving leftovers.
- Refrigeration: Always store it in the fridge, covered with a cake dome or plastic wrap. It’ll stay fresh for 4–5 days.
- Freezing: You can freeze the cake without the ganache. Wrap it tightly in plastic wrap and foil, and it will keep for up to 2 months. Thaw overnight in the refrigerator before serving.
- Serving after storage: Let the cake sit at room temperature for about 15–20 minutes before serving for the best texture.
Proper storage not only maintains flavor and texture but also makes this dessert even more convenient for busy schedules or planned events.
Common Mistakes to Avoid
Even seasoned bakers can slip up when making mousse cake. Here’s what to watch out for:
- Not letting layers set properly: If you rush the chilling process, the mousse may collapse, and the ganache won’t sit right.
- Overmixing the mousse: This deflates the whipped cream, making the mousse heavy instead of airy.
- Using warm chocolate: Folding in hot chocolate into the whipped cream is a recipe for disaster. The mousse will separate and lose its texture.
- Skimping on quality: Low-quality chocolate or cream can give your cake an artificial taste. Stick to high-quality ingredients.
- Cutting the cake too soon: The mousse needs time to set fully. Cutting too early can lead to a messy, unstructured cake.
Avoiding these pitfalls ensures a cake that not only looks professional but also tastes incredible every single time.
FAQs about Chocolate Mousse Cake Recipe
Can I make this cake ahead of time?
Absolutely! It’s actually better when made a day in advance. The mousse and ganache have time to set properly, and the flavors meld together beautifully.
What kind of chocolate should I use?
Use dark chocolate with at least 60% cocoa for the mousse. For the ganache, you can go with semi-sweet or even white chocolate for a different flavor.
Is it safe for kids to eat?
Yes, this recipe is alcohol-free and kid-friendly. Just be sure to use a chocolate they enjoy—some dark chocolates can be too intense for younger palates.
Can I make it gluten-free?
Yes! Just substitute the all-purpose flour with a gluten-free blend and double-check that your other ingredients are gluten-free. The mousse and ganache are naturally gluten-free.
How long does it need to chill before serving?
At least 6 hours in total—4 for the mousse to set and 2 more after adding the ganache. Overnight chilling is even better for clean slices and full flavor.
Conclusion
There you have it—a complete, foolproof guide to making a chocolate mousse cake that’s as stunning as it is scrumptious. From selecting the right ingredients to assembling those luscious layers, every step brings you closer to dessert perfection. It’s rich, it’s elegant, and surprisingly doable right in your own kitchen. Whether you’re a baking newbie or a seasoned dessert lover, this cake will earn you rave reviews.
Ready to wow your friends, impress your family, or treat yourself? This chocolate mousse cake is your golden ticket. Don’t be surprised if it becomes your go-to showstopper for every special occasion (or just a cozy weekend treat—you deserve it!).