Chipotle Queso Recipe: There’s nothing like the creamy, spicy kick of chipotle queso to elevate any gathering. Whether you’re dipping tortilla chips, topping your nachos, or smothering your burrito bowl, this flavor-packed cheese dip always hits the spot.
Today, we’re going to walk through a step-by-step guide on how to make chipotle queso right in your own kitchen. No mystery ingredients, no store-bought shortcuts—just rich, melty goodness with bold chipotle flavor.
Ready to spice things up?
What is Chipotle Queso?
Chipotle queso is a luxurious blend of melted cheese infused with the smoky heat of chipotle peppers. It’s inspired by Tex-Mex flavors and has become a go-to topping and dip across homes and restaurants alike. Unlike traditional queso blanco, chipotle queso incorporates adobo-sauced chipotle chilies, giving it a deeper, more complex flavor and a gorgeous reddish tint.
This version is typically smoother than your average nacho cheese and packs a subtle smoky burn that tickles your tongue instead of scorching it. It’s that perfect middle ground—comfort food with a touch of adventure.
Why This Recipe is a Must-Try
This isn’t your standard cheese dip. With real ingredients and just the right amount of heat, our chipotle queso recipe delivers restaurant-quality results without the high price tag. It’s perfect for parties, cozy nights in, or as an epic snack for binge-watching your favorite show. What makes this one stand out is the balance—creamy cheese, zesty spices, and chipotle’s smoky charm come together in one magical pot.
You also have the flexibility to tailor the spice level and tweak the ingredients to fit your personal taste or dietary needs. This guide gives you the foundation, but you’re the chef—so get ready to stir up something unforgettable.
Ingredients You’ll Need
Cheese Selection
The heart and soul of queso is, of course, the cheese. For a truly decadent chipotle queso, we recommend combining cheeses for the best texture and flavor. Here’s a winning combo:
- White American Cheese: Ultra creamy and smooth when melted.
- Monterey Jack: Mild flavor with great meltability.
- Cheddar (optional): For a sharper edge and deeper color.
You want cheeses that melt beautifully without becoming stringy or oily. Pre-shredded cheese often contains anti-caking agents that mess with the texture, so go for block cheese and shred it yourself for best results.
Chipotle Peppers and Their Role
The star of this recipe? Chipotle peppers in adobo sauce. These smoky, spicy peppers add not just heat but a rich, tangy, almost BBQ-like undertone that brings the queso to life.
You’ll find them canned in the Hispanic foods section of most grocery stores. Start with one or two peppers, finely chopped, and add more depending on how fiery you like your queso. A spoonful of the adobo sauce itself also amps up the flavor and gives your queso that signature reddish color.
Additional Flavor Enhancers
Beyond cheese and chipotle, here are a few key players:
- Butter and Flour (for roux): Helps thicken the queso and prevent clumping.
- Milk or Heavy Cream: Your base liquid, adding richness.
- Onions and Garlic: Sautéed for a flavor boost.
- Cumin and Paprika: Warm, earthy spices that complement the chipotle.
- Salt and Pepper: To taste.
Optional add-ins like diced tomatoes, green chilies, or even a splash of beer can give your queso extra flair. You’re only limited by your creativity!
Tools and Equipment
Kitchen Tools You’ll Need
Before you start, make sure your kitchen is equipped with the basics. Here’s what you’ll need:
- Medium Saucepan or Pot: Non-stick is ideal for easy cleanup.
- Whisk: Essential for stirring the roux and avoiding lumps.
- Wooden Spoon or Silicone Spatula: Helps fold everything together smoothly.
- Measuring Cups and Spoons: Accuracy is key in balancing your flavors.
- Cutting Board and Knife: For prepping your peppers, garlic, and more.
- Cheese Grater: If you’re shredding cheese from a block (which we highly recommend).
Having the right tools on hand makes the cooking process a breeze—and more enjoyable!
Prep Tips Before You Start
A little prep goes a long way when making chipotle queso. Here’s how to set yourself up for queso success:
- Shred your cheeses ahead of time and keep them in separate bowls.
- Chop your chipotle peppers finely—these pack a punch, so you want them evenly distributed.
- Mince your garlic and dice your onion so they sauté quickly and evenly.
- Measure out your milk, spices, and butter before turning on the heat.
By having everything prepped and ready to go, you’ll avoid burning or overcooking anything in the process.
Step-by-Step Chipotle Queso Recipe
Step 1: Prepping the Ingredients
This stage is all about mise en place—a fancy French term for getting everything in place before cooking. Trust us, once you turn on the burner, things move fast.
Start by:
- Shredding your cheese (white American, Monterey Jack, and a touch of cheddar if you’re going bold).
- Chopping one or two chipotle peppers finely. Scoop in a spoonful of adobo sauce if you want a deeper kick.
- Mincing 2 garlic cloves and dicing half a small onion.
- Measuring 2 tablespoons each of butter and flour, 1 cup of milk (or heavy cream), and your chosen spices.
With everything laid out, you’re ready to cook with confidence and keep things moving smoothly.
Step 2: Creating the Flavor Base
Let’s kick off the cooking process by building a solid flavor base. This step is where that deep, savory aroma starts to fill your kitchen. Start by heating your medium saucepan over medium heat. Add 2 tablespoons of butter and let it melt completely. Once it begins to foam slightly, toss in the diced onions and cook them until they’re soft and translucent—this should take about 3–4 minutes.
Next, stir in the minced garlic. Garlic burns fast, so give it just 30 seconds to bloom in the butter. Now comes the magic—add your finely chopped chipotle peppers and that rich adobo sauce. Stir everything together and let the mixture cook for another minute. You want the peppers to mingle with the buttery, garlicky base and start releasing their oils.
This foundation is crucial. The butter helps carry the heat and smokiness of the chipotle evenly throughout the queso, while the onions and garlic create a savory backdrop. At this stage, you’ll already smell that smoky goodness wafting through your kitchen. Take a deep breath—it only gets better from here!
Step 3: Melting the Cheese
Once your flavor base is sizzling and aromatic, it’s time to start the cheese journey. But first, we need to create a smooth and stable sauce that your cheese can melt into.
Sprinkle 2 tablespoons of flour into your chipotle-onion mix. Stir continuously for 1–2 minutes to cook out the raw flour taste. You’re essentially making a roux, and this step will help thicken your queso and keep it velvety smooth.
Now, slowly pour in 1 cup of milk (or heavy cream for extra richness), whisking constantly. The mixture will begin to thicken slightly—this is exactly what you want. Reduce the heat to low to avoid scorching the milk.
Begin adding your shredded cheese, one handful at a time, stirring after each addition. Start with the white American cheese for that ultra-creamy base, then follow with Monterey Jack and cheddar if you’re using it. Stir gently but constantly to prevent clumping or burning. The key here is patience; rushing can cause the cheese to seize or become grainy.
Once all the cheese is in and fully melted, your sauce should be thick, smooth, and impossibly creamy.
Step 4: Mixing It All Together
Now that your cheese is melted and luscious, it’s time to marry everything together into one harmonious queso.
Add a pinch of ground cumin and smoked paprika to the pot. These spices add an earthy depth that really complements the smoky chipotle. Stir well and let the flavors meld over low heat for about 5 minutes.
This is also the perfect moment to taste your queso. Need more heat? Add another chopped chipotle or more adobo sauce. Want a bit more tang? A splash of lime juice or a pinch of salt can brighten things up. You’re in full control here, so tweak it until you hit that sweet spot of cheesy, spicy perfection.
At this stage, your queso should be thick but pourable, creamy but bold. If it feels too thick, stir in a splash of milk. Too thin? Let it simmer a little longer to reduce.
When it’s just right, turn off the heat. You’re ready to dip!
Step 5: Final Taste Test and Serving
Before you start dunking chips or drizzling this over burritos, give your queso one final stir and a taste. It should be perfectly smooth with a gentle, smoky heat that builds slowly.
If you’re feeling fancy, top your queso with chopped cilantro, diced tomatoes, or a swirl of sour cream. Want to take it up another level? Add crispy bacon bits or crumbled chorizo for a protein-packed punch.
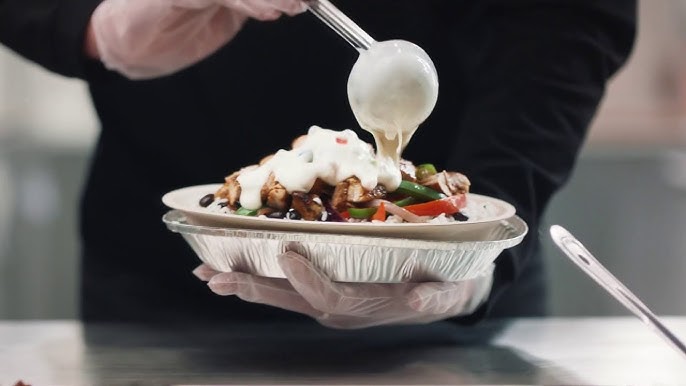
To serve, pour the chipotle queso into a warm bowl or small slow cooker to keep it hot and dippable. Serve with tortilla chips, soft pretzels, roasted veggies, or even over fries.
Hosting a party? This dish is always a hit—just be prepared for people to crowd around it like it’s the star of the show (because it is). And if you have leftovers, no worries—we’ve got creative ways to use them coming up next.
Serving Suggestions and Pairings
Best Dishes to Serve With Chipotle Queso
Chipotle queso is way more than just a dip. It’s the MVP of Tex-Mex side dishes. Sure, tortilla chips are the classic choice, but let’s not stop there. Pour it over nachos for an epic game-day snack. Drizzle it on tacos, burritos, or even scrambled eggs for a spicy wake-up call.
Hosting taco night? Set out a bowl of chipotle queso with your favorite fillings, and let guests get creative. It’s also perfect for spooning onto enchiladas or mixing into chili for an extra cheesy bite.
For something heartier, use it as a sauce base for mac and cheese with a smoky twist. Trust us, one taste of this queso, and you’ll be dreaming up new ways to use it in everything.
Creative Ways to Use Leftovers
Don’t toss that leftover queso! Here are some tasty ways to put it to work:
- Queso-Stuffed Burgers: Spoon it inside your burger patties before grilling.
- Chipotle Queso Pasta: Toss it with cooked pasta and grilled chicken for a smoky Alfredo-style dish.
- Queso Breakfast Skillet: Drizzle it over potatoes, eggs, and bacon.
- Baked Queso Dip: Pour it into a baking dish, top with more cheese and jalapeños, then bake until bubbly.
- Grilled Cheese Dip: Use it as a filling between two thick slices of bread—grill it golden for a next-level sandwich.
FAQs about Chipotle Queso Recipe
1. Can I Make Chipotle Queso Ahead of Time?
Absolutely! You can prepare the queso a day or two in advance. Let it cool completely and store it in an airtight container in the fridge. When ready to serve, reheat slowly on the stovetop or in the microwave, stirring often. Add a splash of milk to loosen it up if needed.
2. How Spicy is This Recipe?
The spice level is totally customizable. Using one chipotle pepper gives you a mild kick, while two or three bring more heat. If you’re not sure how spicy you want it, start small—you can always add more.
3. Can I Use Different Cheeses?
Definitely! While white American and Monterey Jack are classic choices, you can experiment with pepper jack, Colby, gouda, or even a bit of blue cheese for a tangy twist. Just be sure to choose cheeses that melt well.
4. Is It Freezer-Friendly?
Queso made with dairy can separate when frozen and reheated, which can affect texture. It’s best enjoyed fresh or refrigerated for short-term storage. If you do freeze it, reheat gently and stir well to recombine.
5. What’s the Best Way to Reheat Chipotle Queso?
Reheat it on low heat either in a saucepan or the microwave. Stir frequently and add a splash of milk or cream to restore its creamy consistency. Avoid high heat to prevent scorching or curdling.
Conclusion
And there you have it—the ultimate guide to making rich, creamy, and smoky chipotle queso right in your own kitchen. This isn’t just a dip; it’s a full-on flavor experience. From its bold chipotle kick to its melt-in-your-mouth texture, this queso brings restaurant-quality taste to your table with simple, everyday ingredients.
Homemade queso might sound intimidating, but as you’ve seen, it’s a breeze if you follow the steps. Plus, once you taste the difference between this fresh, homemade version and the artificial, pre-packaged stuff—you’ll never go back.
So the next time you’re craving something cheesy, smoky, and satisfying, you know what to make. Go on, grab those chips and dig in—you earned it.


