Chicken Pizza Crust Recipe: When it comes to making a healthier, protein-packed pizza, the idea of using chicken as your crust might sound a bit unconventional—but it’s actually genius! Instead of using traditional dough loaded with carbs and gluten, a chicken-based crust serves as a flavorful, low-carb alternative that’s perfect for anyone watching their intake or following diets like keto or paleo.
What makes chicken crust so great? First off, it’s a blank canvas. Just like regular dough, it absorbs seasonings well and provides a strong base for all your favorite toppings. Plus, you get a crust that’s gluten-free, grain-free, and super satisfying.
This crust is especially popular among those who want a high-protein meal without sacrificing that beloved pizza experience. And the best part? You don’t need any fancy kitchen tools or weird ingredients. If you’ve got some chicken and cheese, you’re halfway there.
Benefits of a Chicken-Based Crust
Using chicken in your crust offers numerous benefits beyond the obvious low-carb appeal:
- High in Protein: With chicken as your base, each slice is packed with muscle-building protein.
- Gluten-Free & Grain-Free: A great option for those with gluten intolerance or anyone following grain-free diets.
- Easy to Customize: You can tweak the flavor with spices or mix-ins, making it spicy, herby, or even cheesy.
- Quick and Easy: Most chicken crusts come together in under 30 minutes from prep to plate.
And don’t worry about it falling apart—when done right, the chicken crust is sturdy, holds toppings well, and offers that perfect bite you’re craving. Let’s get into the step-by-step process so you can start making your own right at home.
Ingredients You’ll Need
Main Ingredients
Creating a chicken pizza crust doesn’t require a long grocery list. Most of what you need might already be sitting in your fridge:
- 1½ cups cooked, shredded chicken (fresh or canned)
- 1 large egg
- ½ cup shredded mozzarella cheese
- 1 tsp garlic powder
- 1 tsp Italian seasoning
- Salt and pepper to taste
You can adjust the seasonings to your liking. Some people throw in a pinch of red pepper flakes or even a touch of parmesan cheese for extra flavor.
Optional Toppings and Add-ons
Once your crust is baked, it’s time to get creative with toppings. Here are some crowd-pleasing ideas:
- Pizza sauce or marinara
- More mozzarella or a mix of cheeses
- Pepperoni, cooked sausage, or bacon
- Sliced bell peppers, onions, mushrooms, olives
- Fresh basil, arugula, or spinach
- Crushed red pepper or chili oil for spice lovers
Remember, the toppings go on after the crust is baked once. That’s the key to keeping your crust firm and not soggy.
Preparing the Chicken Mixture
Cooking and Shredding Chicken
If you’re starting with raw chicken, you can either boil or bake it until fully cooked. Boiling typically takes 15-20 minutes, while baking might take a bit longer. After cooking, let the chicken cool slightly, then shred it using two forks or a food processor.
Short on time? Canned chicken or rotisserie chicken works just as well. Just be sure to drain and dry canned chicken thoroughly to avoid excess moisture in your crust. A paper towel pat-down can do wonders here.
Mixing with Binders and Seasonings
Once your chicken is shredded and moisture-free, combine it in a large bowl with your egg and mozzarella. Add garlic powder, Italian seasoning, salt, and pepper. This mixture is your crust “dough.”
You’ll notice it doesn’t look like typical dough—it’s more like a thick meat paste. That’s totally normal. The egg and cheese act as binders to hold everything together when it bakes. If the mixture seems too wet, add a tablespoon of grated parmesan or almond flour to help absorb excess moisture.
Forming and Baking the Crust
Shaping Your Crust
Preheat your oven to 400°F (200°C) and line a baking sheet with parchment paper. Spread the chicken mixture onto the parchment in a circular or rectangular shape, depending on your preference. Aim for about ¼ inch thickness.
Use your hands or a spatula to smooth it out evenly. This step is key to making sure it bakes uniformly and holds up under toppings. Press it down gently to compress the mixture and avoid air pockets.
Baking Time and Temperature
Slide your crust into the oven and bake for 20 minutes, or until it’s golden brown around the edges and firm to the touch. You want the crust to be mostly cooked through before adding any toppings. If it looks a little pale, give it a few extra minutes.
Once it’s out of the oven, let it cool slightly before topping—this helps it stay crisp and hold its shape.
Adding the Toppings
Choosing the Right Sauce and Cheese
Now that your crust is golden and sturdy, it’s time to layer on the goodness! Your first choice: sauce. While classic marinara or pizza sauce is a go-to, feel free to branch out. Love spice? Try a spicy arrabbiata. Prefer white sauce? A simple mix of garlic, olive oil, and parmesan works wonders. Even pesto or buffalo sauce can transform your pizza into something truly next level.
As for cheese, mozzarella is the default for a reason—melty, gooey, and mild enough to complement any topping. But don’t stop there. Mixing cheeses adds depth. Try sprinkling on some sharp cheddar, creamy gouda, or salty feta. Just remember not to overload it—you want to melt, not drown your crust.
Popular Topping Ideas
Here’s where you can get creative. Think of your favorite pizza joint and borrow inspiration. Here are some topping combos that shine on a chicken crust:
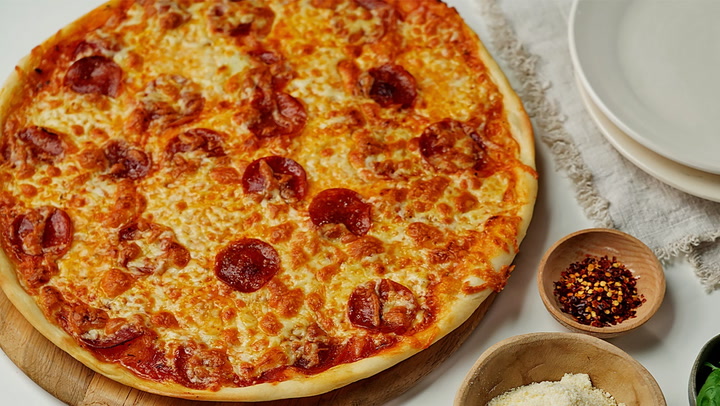
- Classic Pepperoni: Marinara + mozzarella + pepperoni
- Meat Lovers: Red sauce + sausage + bacon + ground beef + mozzarella
- Veggie Supreme: Tomato sauce + onions + mushrooms + bell peppers + olives + mozzarella
- BBQ Chicken: BBQ sauce + chicken pieces + red onion + mozzarella + cilantro
- Margherita: Tomato slices + mozzarella + fresh basil + olive oil drizzle
Layer your toppings evenly, but avoid piling them too high. A thick load can weigh down the crust and make it soggy. Aim for balance—enough to satisfy, but not so much that it compromises texture.
Final Bake and Serving Tips
Achieving the Perfect Finish
Once your pizza is topped, slide it back into the oven for another 10 minutes at 400°F. This final bake melts the cheese, blends the flavors, and crisps up the edges just right.
Want a bubbly, browned top? Turn on the broiler for the last 1-2 minutes. Keep a close eye though—cheese can go from golden to burnt in a flash!
When done, let your pizza sit for 3-5 minutes before slicing. This short resting time lets everything firm up slightly, making your slices easier to lift and enjoy.
Cutting and Serving Suggestions
Use a sharp pizza cutter or chef’s knife to slice through the crust. Unlike doughy bases, a chicken crust has a denser texture, so a firm press is needed.
Serve your slices with a side salad for a light meal, or pair with roasted veggies or garlic knots if you want something a bit heartier. Hosting friends? Turn your chicken crust into personal-sized pizzas so everyone can customize their own.
And don’t forget dips—ranch, garlic butter, or even sriracha mayo go perfectly with this protein-packed pie.
Nutritional Benefits of Chicken Pizza Crust
Low Carb, High Protein Advantages
If you’re counting macros or just trying to eat cleaner, chicken pizza crust is a game-changer. Traditional pizza crusts can rack up 30-50 grams of carbs per slice. With chicken crust, you’re cutting that down to nearly zero while boosting your protein intake.
That means better blood sugar control, sustained energy, and a meal that keeps you full for longer. It’s a win for athletes, dieters, or anyone trying to eat more intentionally.
Suitable Diets and Health Benefits
Here’s a quick list of diets this recipe supports:
- Keto: Nearly zero carbs and high in fat and protein
- Paleo: Just make sure your toppings are paleo-approved
- Gluten-Free: No grains, no gluten
- Whole30: Skip the cheese and use Whole30-friendly sauce and toppings
Beyond that, you’re getting essential nutrients like B-vitamins, iron, and selenium from the chicken, and if you add veggies on top, even more fiber and antioxidants. Healthy never tasted so indulgent!
Variations of the Chicken Pizza Crust
Keto-Friendly Version
Already low in carbs, this crust is naturally keto-friendly. But if you want to amp up the fats for a better keto ratio, try adding:
- 1 tablespoon of olive oil or avocado oil to the mix
- Extra shredded cheddar or parmesan cheese
- A drizzle of garlic butter post-bake
These tweaks don’t just help with macros—they boost flavor, too.
Spicy or Herb-Infused Options
Want to kick it up a notch? Try these spicy variations:
- Add crushed red pepper flakes or cayenne pepper to the crust mixture
- Mix in chopped jalapeños or green chilies
- Use buffalo sauce instead of marinara
For an herby twist, incorporate:
- Chopped fresh basil or oregano into the chicken mix
- A sprinkle of rosemary or thyme before baking
- A brush of herb-infused olive oil over the finished crust
Each variation brings something new to the table, so don’t be afraid to experiment and make it your own!
Common Mistakes to Avoid
Overcooking the Crust
It might be tempting to bake your crust until it’s super brown, thinking it’ll get extra crispy. But there’s a fine line between golden and dry. Overcooked chicken crusts tend to become tough and rubbery, making them difficult to cut and chew.
To avoid this, always pre-bake the crust just until it sets and edges start to turn golden—usually 20 minutes at 400°F. Remember, it’ll bake again with toppings, so you don’t need it fully crisp in the first round.
Pro Tip: If you like an extra-crispy base, use a pizza stone or bake directly on the oven rack (with parchment) during the final bake. That helps with airflow and keeps the bottom firm without drying out the crust.
Choosing the Wrong Chicken Type
Not all chicken is created equal when it comes to making crust. Using overly wet chicken (like some canned varieties) can lead to a soggy, unstable crust. Always drain and pat dry if using canned chicken. For best results, stick to:
- Rotisserie chicken (well-shredded)
- Freshly cooked and shredded chicken breast or thigh
- Pre-cooked ground chicken (if you’re blending it with binders)
Avoid fatty or heavily seasoned pre-cooked chicken, which can clash with your added seasonings or interfere with binding.
If you’re trying this recipe for the first time, aim for consistency—finely shredded chicken blends best and gives you a crust that holds together with a satisfying chew.
Storage and Reheating Tips
Storing Leftovers
Got extra slices? Awesome—this crust stores surprisingly well. Let your pizza cool completely, then place slices in an airtight container or wrap them in foil. Store in the fridge for up to 4 days.
For longer storage, you can freeze chicken crust pizza (before or after baking with toppings). Just layer parchment between slices and use a freezer-safe bag or container. It’ll keep well for up to 2 months.
Want to prep ahead? Make and bake the crust alone, then freeze it plain. When ready, add toppings and bake fresh.
Best Ways to Reheat
The key to reheating is avoiding sogginess. Skip the microwave—it’ll make your crust chewy and limp. Instead:
- Oven Method: Reheat at 375°F for 8-10 minutes until warm and crispy.
- Air Fryer: Set to 350°F and reheat for 4-5 minutes for a quick and crispy result.
- Stovetop Skillet: Warm slices in a covered skillet over medium heat for a few minutes. This method keeps the bottom crisp and melts the cheese evenly.
Reheated chicken crust pizza holds up well, so don’t hesitate to make a big batch!
FAQs about Chicken Pizza Crust Recipe
1. Can I use canned chicken?
Yes! Just be sure to drain it very well and pat it dry with paper towels. Too much moisture will make the crust soggy.
2. How do I make it crispier?
Use a pizza stone or bake directly on the oven rack for the second bake. A quick broil at the end also helps with crisping.
3. Is it freezer-friendly?
Absolutely! You can freeze the crust either baked or unbaked, with or without toppings. Just wrap it tightly and it’ll last up to 2 months.
4. Can I use ground chicken instead?
Yes, ground chicken works great! Mix it with the egg, cheese, and seasonings the same way. It binds well and gives a smooth texture.
5. How long does it last in the fridge?
Stored properly in an airtight container, it stays fresh for up to 4 days in the refrigerator.
Conclusion
Chicken pizza crust is the perfect blend of innovation and indulgence. It offers all the pizza satisfaction without the carb overload—plus, it’s gluten-free, packed with protein, and endlessly customizable. Whether you’re keto, paleo, or just trying to eat cleaner, this crust fits the bill without sacrificing flavor or texture.
With a little prep and a few simple ingredients, you can whip up a pizza that’s hearty, healthy, and delicious. From family dinners to quick solo meals, it’s a game-changer you’ll come back to again and again.
So ditch the dough, grab some chicken, and let your pizza cravings run wild—without guilt.