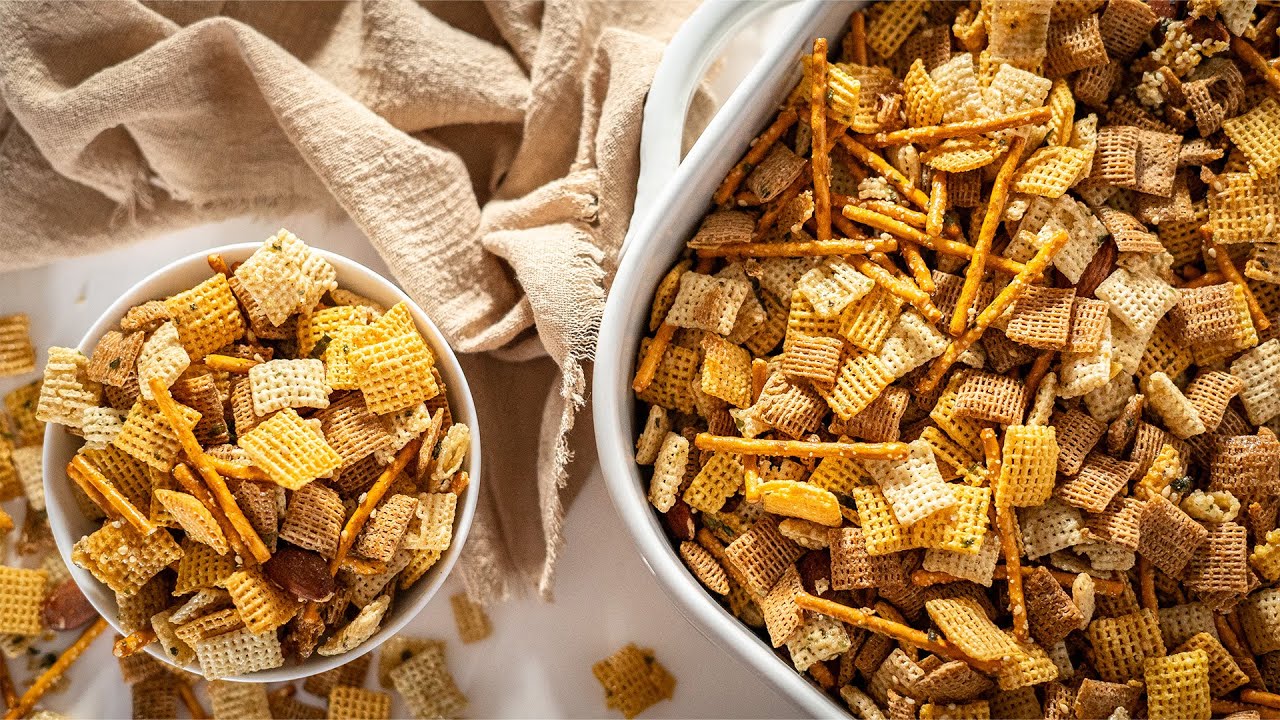
Chex Party Mix Recipe: There’s something about a big bowl of crunchy, savory Chex Party Mix that instantly puts you in the mood for fun. Whether it’s game night, a holiday gathering, or just a chill day with your favorite people, this iconic snack mix never fails to impress. It’s simple to make, endlessly customizable, and hits all the right notes – salty, buttery, crispy, and completely addictive. Ready to make your own batch? Let’s dive in!
What Is Chex Party Mix?
Chex Party Mix is a homemade snack that combines different types of Chex cereal—corn, rice, and wheat—with a flavorful seasoning blend, often including butter, Worcestershire sauce, garlic, and onion powder. The whole thing gets baked until it reaches a perfectly crispy, golden state. What sets this mix apart is the balance of textures and the intense savory flavor, thanks to its rich coating.
It’s been around for decades, with the original recipe dating back to the 1950s. Since then, it’s become a staple in American households, especially around the holidays. And while you can buy premade Chex Mix at the store, there’s nothing quite like the fresh, homemade version straight out of your oven.
Why It’s a Go-To Snack for Any Occasion
Let’s be real: you don’t need an excuse to whip up a batch of Chex Mix. It’s the kind of snack that works for pretty much any occasion—parties, road trips, lunchbox fillers, or just binge-watching your favorite shows. It’s budget-friendly, easy to make in large quantities, and customizable to any taste preference. Want it spicy? Add some cayenne. Need it sweet? Toss in a few chocolate chips post-bake. It’s all up to you.
Plus, it travels well and stores beautifully. Make a big batch, and you’ve got snacks for the week (or for the next 24 hours, depending on how fast your crew devours it!).
Ingredients You’ll Need
Classic Ingredients Breakdown
Here’s what you’ll need for a traditional Chex Party Mix:
- 3 cups Corn Chex
- 3 cups Rice Chex
- 3 cups Wheat Chex
- 1 cup mini pretzels
- 1 cup cheese crackers or bagel chips (cut into bite-sized pieces)
- 1 cup mixed nuts (optional)
For the sauce:
- 6 tablespoons unsalted butter (melted)
- 2 tablespoons Worcestershire sauce
- 1 ½ teaspoons seasoned salt
- 1 teaspoon garlic powder
- ½ teaspoon onion powder
These are the basics, and they work beautifully together. The butter mixture coats the cereal and other mix-ins, and when baked, it creates a perfectly crispy, flavor-packed result.
Optional Add-ins for Extra Flavor
Here’s where the fun begins. You can tweak this recipe to match your cravings or the crowd you’re feeding:
- For spice lovers: Add a pinch of cayenne pepper or a few dashes of hot sauce to the sauce mix.
- For a cheesy version: Toss in some Parmesan cheese after baking.
- For a smoky twist: A little smoked paprika can give a BBQ-like flavor.
- For sweet and salty: Add chocolate chips, M&Ms, or dried cranberries after the mix has cooled.
- For nut-free options: Skip the nuts and double up on pretzels or cheese crackers.
The possibilities are truly endless. The key is to maintain a balance of textures—crunchy, crispy, and just a hint of chewiness if you’re adding dried fruit.
Equipment and Prep
Kitchen Tools Required
Before you dive into mixing and baking, it’s a good idea to gather all your tools. You don’t need anything fancy, but having the right kitchen equipment ready will streamline the whole process. Here’s what you’ll need:
- Large mixing bowl – You’ll need a very spacious one to mix everything without spilling.
- Measuring cups and spoons – Accuracy matters, especially when blending spices and sauce.
- Microwave-safe bowl or saucepan – For melting the butter and mixing in your seasonings.
- Wooden spoon or spatula – To stir the mix gently so the cereal doesn’t break.
- Baking sheet (preferably with sides) – A rimmed sheet pan ensures the mix doesn’t slide off while baking.
- Parchment paper or foil (optional) – For easier cleanup and to prevent sticking.
Prepping Your Ingredients Before Mixing
Mise en place—a French term meaning “everything in its place”—is the key to a smooth cooking process. Before you even turn on the oven, go ahead and:
- Measure out all dry ingredients. Place your Chex cereals, pretzels, crackers, and nuts into one large bowl. This helps you see the volume and balance everything.
- Chop any large ingredients. If you’re using bagel chips or large crackers, cut them into bite-sized pieces so they bake evenly.
- Melt the butter. Whether you do it in the microwave or on the stovetop, make sure it’s completely melted.
- Mix the seasoning. Stir Worcestershire sauce, garlic powder, onion powder, and seasoned salt into the melted butter until it’s fully combined.
Having everything prepped and within reach makes the next few steps fast and fuss-free. Plus, it keeps the cleanup to a minimum—a win for everyone.
Step-by-Step Instructions
Step 1: Preheat the Oven
Start by preheating your oven to 250°F (120°C). This low and slow heat is what ensures the mix bakes evenly and crisps up without burning. Unlike roasting vegetables or baking cookies, you don’t want high heat here. The goal is to dry out the cereal mix just enough to give it that satisfying crunch.
While the oven is heating, you can move on to mixing everything together. Timing is everything, so don’t let the oven sit idle too long.
Step 2: Mix the Dry Ingredients
Take your large bowl filled with the Chex cereal, pretzels, cheese crackers, and nuts, and give everything a light toss. Use your hands or a large spoon to ensure all the textures are well-distributed. You don’t want to end up with one half full of pretzels and the other with all the cereal.
This is also the point to eyeball your proportions. If something looks off—too many nuts or not enough crunch—now’s the time to adjust before the wet mixture goes in.
Step 3: Make the Savory Sauce
Now it’s time for the flavor bomb: the buttery sauce. In a separate bowl or saucepan, melt your butter completely. Once melted, stir in the Worcestershire sauce, garlic powder, onion powder, and seasoned salt.
Pro tip: Taste a tiny bit of the sauce before pouring it over the mix. If you love garlic, add a bit more. Prefer a smokier flavor? Try a pinch of paprika. Just don’t over-salt—it’s easy to go overboard.
Pour the sauce evenly over the dry mix. Don’t dump it all in one spot—drizzle it slowly while stirring gently to coat every piece.
Step 4: Combine and Toss
Once the sauce is poured in, gently toss everything using a spatula or your hands (if you’re cool with getting a little messy). Be careful here—Chex cereal is delicate, and rough mixing will turn your crunchy squares into crumbs.
You want each piece to be lightly but thoroughly coated in the buttery mixture. That’s what gives every bite a consistent flavor.
Once you’re confident that everything is well-coated, spread the mix in a single layer on your baking sheet. Overcrowding the pan leads to uneven baking, so if necessary, divide the batch across two sheets.
Step 5: Bake to Crispy Perfection
Now for the fun part—baking! Place your baking sheet into the preheated oven and set a timer for 1 hour. Yes, it seems like a long time, but low and slow is key to getting that signature Chex Mix crunch without burning it.
Here’s what to do during that hour:
- Every 15 minutes, take the baking sheet out and gently stir the mix. This ensures even browning and helps all sides of the mix get crispy. Be gentle while stirring—don’t crush your mix.
- Use a spatula or wide spoon to lift and turn the mix, especially from the edges where it tends to cook faster.
After an hour, the mix should be lightly golden and smell absolutely irresistible. If it still feels a little soft, don’t worry—it will continue to crisp up as it cools.
Step 6: Cool and Store Properly
When the baking time is up, remove the sheet from the oven and let the mix cool completely on the pan. This step is crucial. If you store it while it’s still warm, condensation can make it soggy, ruining that perfect crunch.
Once fully cooled, transfer the mix to airtight containers or zip-top bags. It’ll stay fresh for up to 2 weeks—if it lasts that long, of course!
Here are a few storage tips:
- Use glass jars or tins to keep it extra crisp.
- Add a food-safe silica packet (like the kind that comes in seaweed snacks) to keep moisture out.
- Avoid storing near the stove or in humid areas of your kitchen.
Homemade Chex Mix also makes a great gift—just portion it into cellophane bags, tie with a ribbon, and boom—instant homemade snack love!
Tips and Variations
Making It Spicy, Sweet, or Nutty
This is where you can unleash your inner snack scientist and make a Chex Mix that’s truly your own. The base recipe is great, but it’s also super flexible.
Want it spicy?
- Add cayenne pepper, chili flakes, or even a dash of hot sauce to the sauce mixture.
- Swap regular nuts for spicy peanuts or sriracha almonds.
Craving something sweet?
- After baking, toss in chocolate chips, mini marshmallows, or dried cranberries.
- Replace the savory sauce with a sweet one: melted butter + brown sugar + vanilla + cinnamon. Bake the same way for a sweet crunch.
Love extra nuts?
- Go for cashews, pecans, or almonds.
- Toast the nuts before adding for a deeper flavor.
You can also switch up the cereals—try Crispix or Cheerios for a change of pace.
Gluten-Free and Vegan Options
The traditional recipe isn’t gluten-free or vegan by default, but with a few smart swaps, it absolutely can be!
For gluten-free Chex Mix:
- Use gluten-free varieties of Chex (corn and rice Chex are typically GF).
- Choose gluten-free pretzels and skip bagel chips unless labeled gluten-free.
- Make sure your Worcestershire sauce is GF (some brands contain malt vinegar).
For a vegan version:
- Swap out butter for vegan butter or refined coconut oil.
- Use a vegan Worcestershire sauce—yes, it exists! Annie’s and Wizard’s are great options.
- Avoid cheese crackers or use vegan cheese snacks instead.
The result? A fully plant-based, crowd-pleasing snack that everyone can enjoy.
FAQs about Chex Party Mix Recipe
How long does Chex Party Mix stay fresh?
Homemade Chex Mix stays fresh for up to 2 weeks when stored in an airtight container at room temperature. Just make sure it’s completely cooled before storing to keep that crunch.
Can I microwave the Chex Mix instead of baking?
Yes! You can microwave it in a large microwave-safe bowl on high for 5–6 minutes, stirring every 2 minutes. It’s quicker but may not be quite as evenly crispy as the oven-baked version.
Is this snack kid-friendly?
Absolutely! Kids love the mix of crunchy textures and mild flavors. Just be cautious with spicy additions or nuts if there are allergies or picky eaters involved.
Can I make it in bulk for parties?
Definitely. Just double or triple the recipe and spread it across multiple baking sheets. Rotate the sheets halfway through baking for even crisping.
What drinks go well with Chex Party Mix?
Cold soda, iced tea, or even a light beer go great with Chex Mix. For a cozy option, try apple cider or hot chocolate alongside a sweeter variation of the mix.
Conclusion
There you have it—your ultimate, step-by-step guide to making the best Chex Party Mix at home. It’s crunchy, savory, and completely addictive. Plus, you can make it ahead of time, store it easily, and personalize it to match your flavor cravings.
Whether you’re hosting a party, prepping for movie night, or just want a homemade snack that beats anything from a bag, Chex Mix is the answer. Serve it in big bowls, stash it in snack bags for lunchboxes, or wrap it up as a thoughtful gift.
So grab that mixing bowl and make your own signature batch—you’ll never go back to store-bought again.